
The Bottom Line
Introduction, Specifications, and Pricing
When it comes to cases, Cougar is not a brand that normally pops into our minds as a first instinct. This does not mean there is anything inherently wrong with them. Cougar is a company that has not gained the foothold some of the incumbents in the industry have gained.
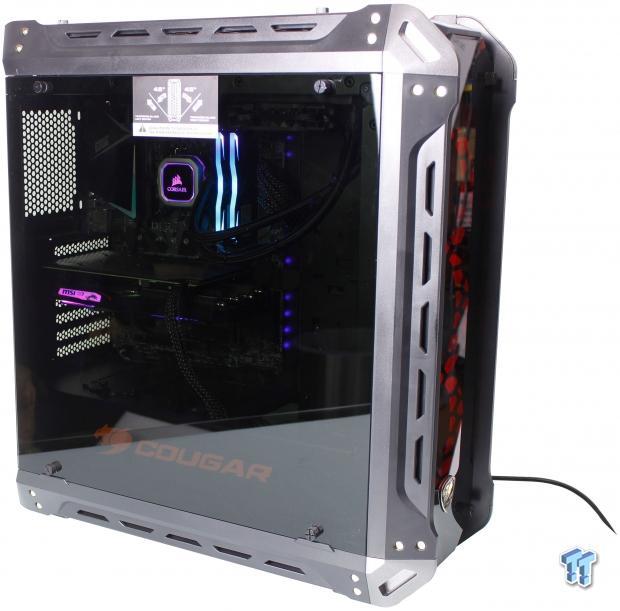
The last Cougar case we looked at was 6+ years ago in 2012 with the Cougar Evolution Galaxy case, which was not bad for the time but was reminiscent of a HAF-X model chassis. With that being said, the Panzer G which we are looking at today shows some refinement and current trends with Tempered Glass and LED fans coming preinstalled. But I cannot shake the feeling that it has some definite similarities to others on the market once again in the HAF replacement the H500P. you can see the H500P review and make your own judgement. As you can see, the Panzer G shares a similar shape, surround tempered glass and even industrial styling as the H500P offers.
The Panzer G is made for those seeking a tempered glass chassis with plenty of cooling options and the ability to stuff it full of fans. With the primary fan mounting locations shrouded in tempered glass though, you do have to question if there will be any ill effects with airflow due to the inability of glass to allow air to pass through.
This means that the vents located around the tempered panels will be where the air must enter or exit, and for those who love fluid dynamics in the crowd, you know all too well what making a gas (air) turn up to 90 degrees can do for your airflow.
Some of the exciting things about the panzer G starts, of course with its surround of tempered glass. The Panzer G is visually closed off by tempered glass on both side panels along with top and front glass panes as well. Behind the front tempered glass panel, you can catch a glimpse of the three preinstalled 120mm next-generation Vortex LED fans.
These are airflow focused 120mm fans with an LED light ring circling the perimeter. The tempered glass is smoked, which makes it harder to see through and I assume many will celebrate as that will help hide the cable management side which we will look at later.
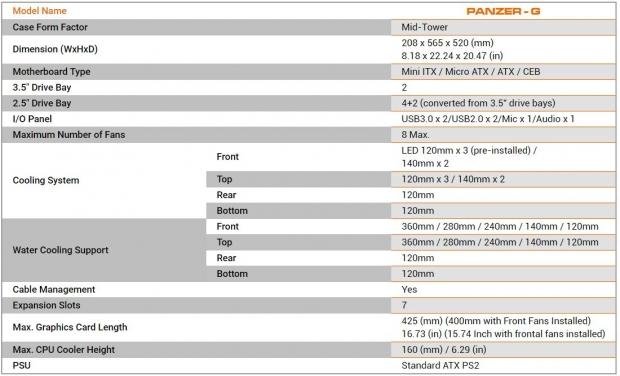
As you can see the Panzer G, as listed on the Cougar website's spec list, shows it to be a mid-tower chassis which I will accept although it has become common knowledge that 560mm height typically is full-tower range. The Panzer G is 565mm high, which means it comes in just as a full-tower if we follow the commonly understood sizing.
The Panzer G is 520mm deep and 208mm wide, so it's not nearly as thick as some chassis we have seen before which means liquid cooling fitment may be impacted. Usually thinner chassis will not fit radiators very well as memory and motherboard heat sinks can be found to be directly adjacent of where you would want to mount the radiator. We will be checking that out as we get to that section to install our AIO.
The Panzer G can fit everything from mITX, mATX, and ATX along with extended support for CEB, which is slightly wider than standard ATX. This is an interesting addition for motherboard fitment as CEB boards are for workstations or servers which generally we do not see in the consumer or gamer space.
The total drive options are up to 6 storage devices with two 3.5" mounts which also support 2.5" drives and four total 2.5" dedicated mounts. The PSU does not have a listed spec as far as maximum length, so we will dig into its mounting and any relevant space constraints as we get deeper into this new case.
Cooling fitment is abundant with eight total fan and radiator locations. If you opt for 140mm that number is reduced to 4 locations with two of the spots (rear and bottom) being 120mm only. CPU cooler height is limited to 160mm, which is relatively standard, and you should be able to fit most coolers on the market should you opt for an air cooler.
It is something to note though, as some of the more extreme coolers can enter the 160mm+ range which would not allow you to install your panel with the cooler in place. The Panzer G comes with 3x next-generation Vortex LED 120mm fans cascading the front of the chassis with no other installed fans listed.
The only fitment issues I could think of right out of the gate may come from the slimmer width of the chassis and installing radiators which have the potential to interfere with motherboard heat sinks or even taller memory.
We found the Panzer G presently available directly from Amazon for $94.58 and being Tariffs are active as of the time of writing, I am not sure if this chassis price has been impacted by it or if it may go up slightly in the future.
This is a good spot for the Panzer G, but we will have to wait and see if it has the feature set, appearance, and performance to match the other well-equipped cases that are on the market in the same $90 - $100 price range.
Shannon's Chassis Test System Specifications
- Motherboard: MSI MPG Z390 Gaming Edge AC Z390 (buy from Amazon)
- CPU: Intel Core i7 8700K (buy from Amazon)
- Cooler: Corsair H100i Pro RGB (buy from Amazon)
- Memory: GeIL Super Luce RGB GLS416GB3600C16ADC
- Video Card: MSI GeForce RTX 2060 Gaming Z (buy from Amazon)
- Storage: SanDisk M.2 256GB
- Power Supply: Enermax Platimax DF 1050W (buy from Amazon)
- OS: Microsoft Windows 10 Home 64-bit (buy from Amazon)
Packaging
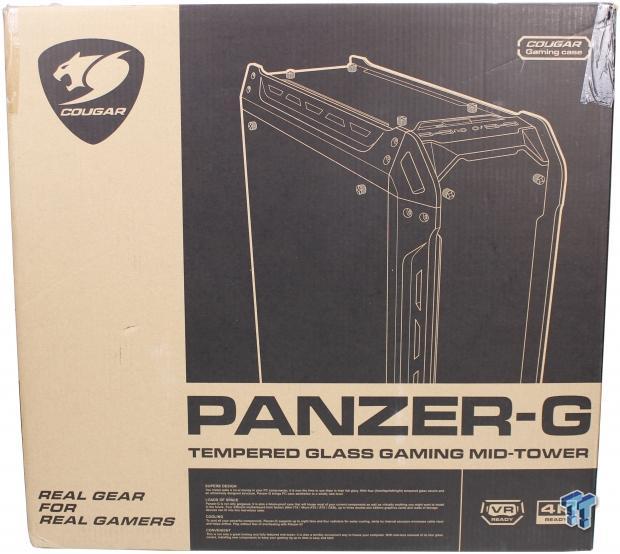
Cougar does not waste money on a color box that will find its way to the bin once your build is finished. It is a standard brown box that survived the rigors of shipping quite well with only minor accordion effect on the edges and a few small cuts likely from rough travel with other packages. The front of the box offers an opaque view of how you can expect the Panzer G to look like.
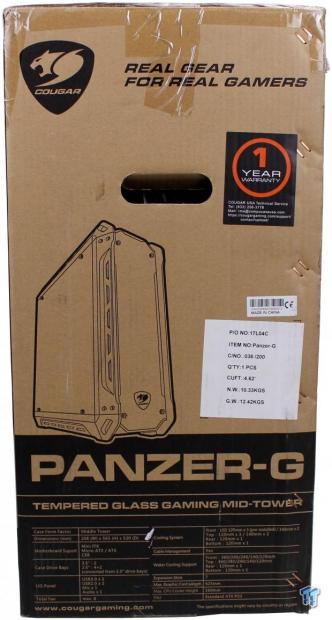
Moving to the first of the thinner sides of the packaging, we see an inverse or line drawing of the chassis similar to what we saw on the primary side. This side, however, carries a one-year warranty sticker which is relevant to note. A one-year warranty is not something to shout from the hilltops about as it's about standard for many CE products and many brands for chassis offer two years or even higher warranty.
Below all of this we have a stuck on decal listing product name, and some weight and other carton details. Moving to the lower section, we have the name immediately followed by a basic spec table similar as we had in the article previously.
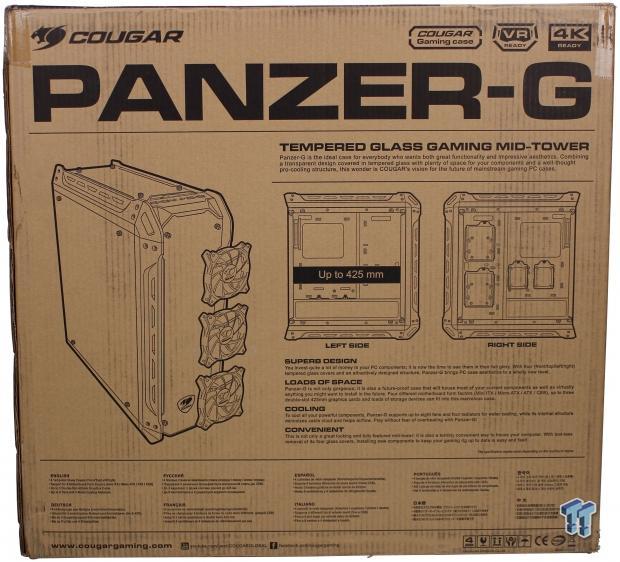
The rear or other large side of the box we have a semi-exploded and detailed view of the Panzer G case. Here we see the three fans pulled in front of the glass panel, and I am guessing to illustrate that the three included fans are indeed preinstalled in the front.
Also, we get line drawings of the main chamber and rear cable management sections to give us a pretty accurate description of the layout. Lastly would be a multi-language description of a few key marketing points such as the four sides tempered glass, triple GPU fitment and eight fan mounts along with radiator support.
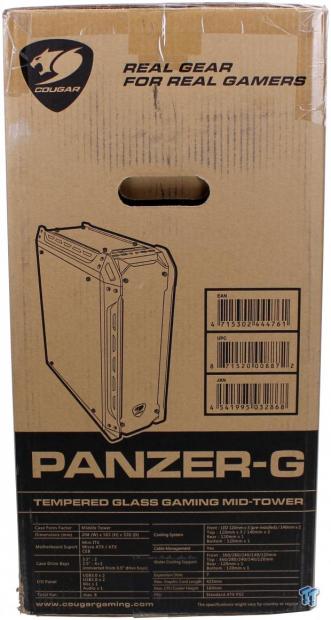
The final side of the rectangular box is, of course, another thin side. This one once again mirrors the opposing side except for the white label which that location now houses three bar codes for UPC, EAN, and JAN. for those unaware, the UPS is a universal standard for product number symbology while EAN is the European standard and JAN is the Japanese version. To most this doesn't matter but I figure since I mentioned it, I may as well answer the question instead of any of you having to Google it.
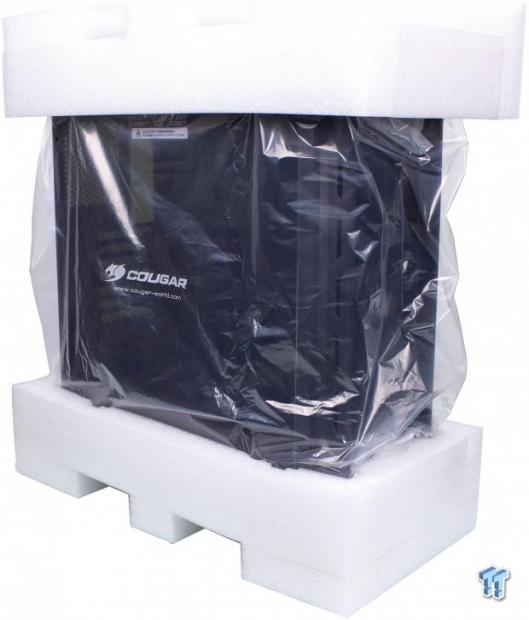
When removing the Panzer G from the packaging, we were greeted by one of the better foam solutions for securing a chassis. This is a squishier closed cell foam similar to something like a polyethylene vs. the harder polystyrene. You will know the difference as polystyrene tends to break if force is applied whereas the polyethylene will be far more malleable which I have had more luck with less abrasion from package vibration in transit.
Once again, probably not necessary to explain that but if you see something like this, you know the company had some care in material selection and not merely BOM reduction to save every penny. This gets some points from me as this is far less likely to leave any run abrasions or marring on your PC should you need to repack it to move it somewhere. Beyond the foam, there is also the plastic bag the chassis is wrapped in which adds another sacrificial layer should your case have a rough time in transit to you. Then on top of all of that, every tempered glass panel is wrapped in plastic.
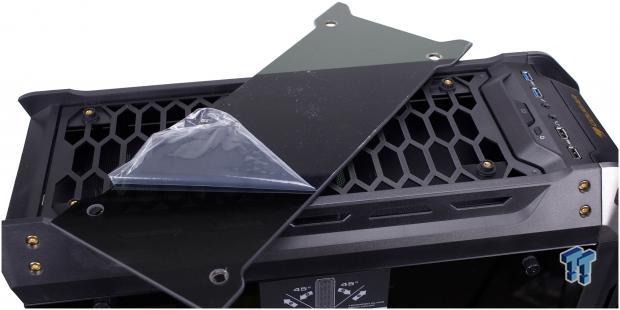
Speaking of the plastic sheeting on the tempered glass panels. Here you can see it on the tempered glass, which I think is excellent for the exterior. However, Cougar made probably one of my pet peeve lists, and that's having plastic on the inside and outside of the glass. This means if you want optimal clarity on your case you have to remove the top and front panels to peel both sides, which is not a huge deal more just annoying since the panels do not need to be removed for installation of components.
To many, this will likely be a non-issue, but I feel it would be very advantageous to users to not have to pull these panels as you can risk stripping the knurled nuts form the plastic panels when reinstalling the screws as they are not always the smoothest fit. The last point of the film is the internals of the chassis which the side panels are film covered on both sides which means even if the accessory box or cabling gets loose its less likely to scratch the panel.
Cougar Panzer G Mid-Tower Chassis
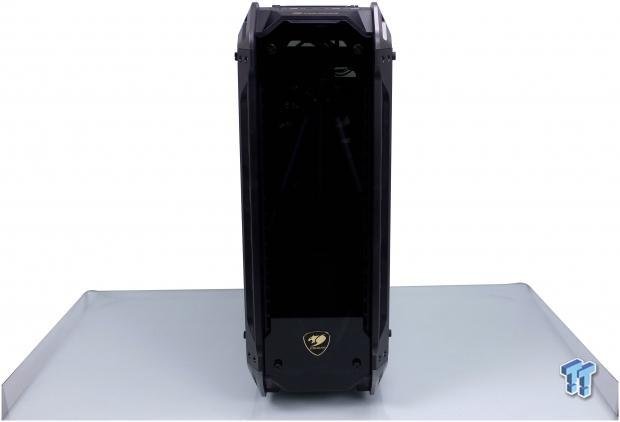
The front of the Panzer G is dim and subdued with the smoked panels once all of the film is removed. Without any lights illuminating the internals or fans, you almost cannot even tell there are fans behind the glass.
Here you can also make out that the 90-degree corners of plastic for some reason are a lighter gray or silver hue which is an interesting contrast compared to the straight panel plastic edges which are much more dark gray. The gold color of the Cougar badge jumps out at you and while I understand that seems to be Cougars brand ID the inclusion of a Gold glossy badge and decorative allen head fasteners it just feels a bit garish.
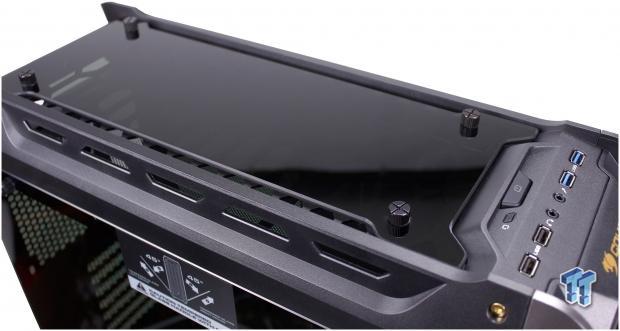
Here we have the top of the chassis where you can see it's married again to a tempered glass panel. Here you can also see the elongated hexagonal plastic mesh which allows optimal airflow and is backed by a finer mesh to avoid larger debris from getting into your PC.
Also note the side facing vents as this may be an essential point once we get to testing since the front of the chassis employs these but by and large the pass-through of airflow is majorly limited, of course, we will test to see to what extent this impacts performance.
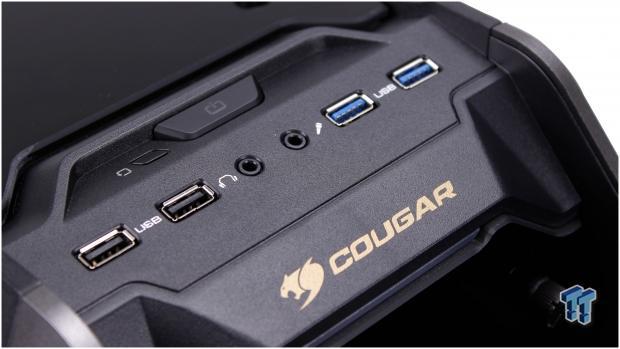
The front I/O is in a reasonably standard location on the top of the front panel. Keep that in mind if you are building in the Panzer G as you will need to hang the front panel carefully to the side unless you want to pull all of the internal wiring out to remove it entirely.
The front I/O retain a reasonably standard yet stout layout with dual USB 2.0 ports, adjacent to microphone and headphone 3.5mm ports and leading to the far edge with dual USB 3.0 (or USB 3.1 Gen 1; or USB 3.2 Gen 1) depending on which new standard you decide to follow.
Let's say it supports up to 5Gb/s. Above these or more appropriately toward the rear of the chassis you have a large main button for power, and it is illuminated white when the system is powered. To the left of the main power button is a flush mounted reset button to help avoid mistaken actuations.
Lastly, of course, we were wondering where the HDD led was located and it was located directly below the cougar logo and name at the far edge angling toward the front panel. The entire little light bar flickers white when HDD activity is detected.
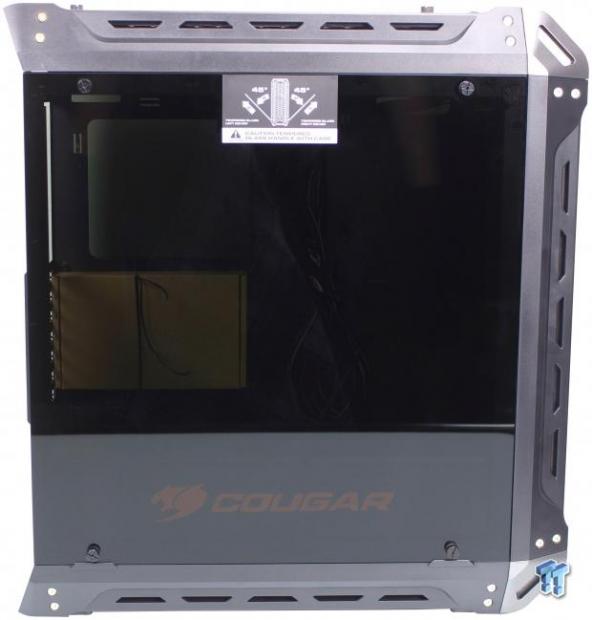
The main side or left side depending on how you look at it is where we will be installing our components for our test system. This side is concealed by yet another smoked tempered glass panel which as you can see does an excellent job of making a clean look as you cannot get a clear view of components without some inner light. You can see the panel itself is held on by four fasteners which are designed to be toolless and do a rather good job of affixing the panel with just hand tightening.
QC could be better in this area as the fasteners do not always want to thread in cleanly, leaving you to choose to wrench on it harder than the other three or to leave it with a 1-2mm gap between the panel on that one mounting point.
Now to the elephant in the room, the decal at the top center of both sides panels. This is the instruction to make sure you lean the panel far enough to remove it as there are lips to avoid the panel just falling downward. This is good to know, especially during reinstallation otherwise you can break the panel glass at the thinner part surrounding the fastener hole.
The last thing to note on this one, I promise. The plastic that makes up the bottom, front, and top panels you can see here and will notice it is quite symmetrical. It has the pass-through ventilation style slots in it even on the edges.
And of course, the gold aesthetic allen headed screws which serve no purpose beyond appearance. I do feel like a matte or glossy silver would have been a better choice to pull this aesthetic together but let's face it aesthetics are always a matter of preference and opinion.
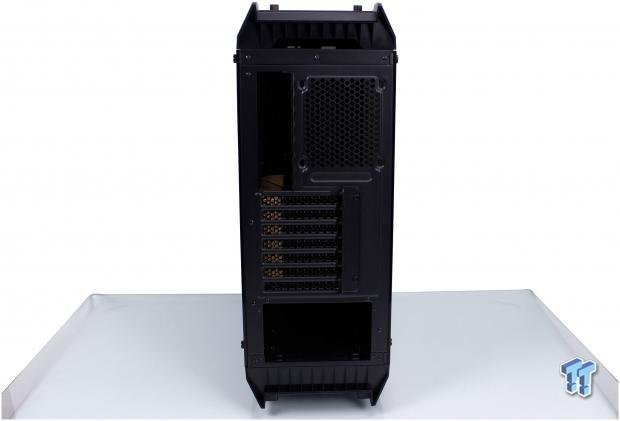
The rear or I/O side of the chassis is pretty standard fare. Starting at the top, you can see an opening area where we can grasp the top panel to release it as its plastic clips are quite stiff. It requires a significant amount of force to remove below that we have the rear fan opening which is unoccupied as the Panzer G only has three 120mm fans at the front of the chassis.
The seven expansion slot covers are fairly standard quantity for most mid and full-tower sized cases. The exterior access is used to give you a little more interior room by allowing the motherboard to rest closer to the far rear of the chassis.
This exterior access can be a significant hindrance as some cases use the dust cover to hold the slot covers, which means you need some severe hand yoga to get them all back into place and closed.
Luckily Cougar still uses individual screws per slot to ensure optimal fastening force for the slot covers independently but also for installed components. The PSU installation is left wide open for a PSU to slide in which I appreciate vs. some solutions where you have to try to slide it in from the side. The bracket is included for the PSU and is in the accessory box which we will see soon.
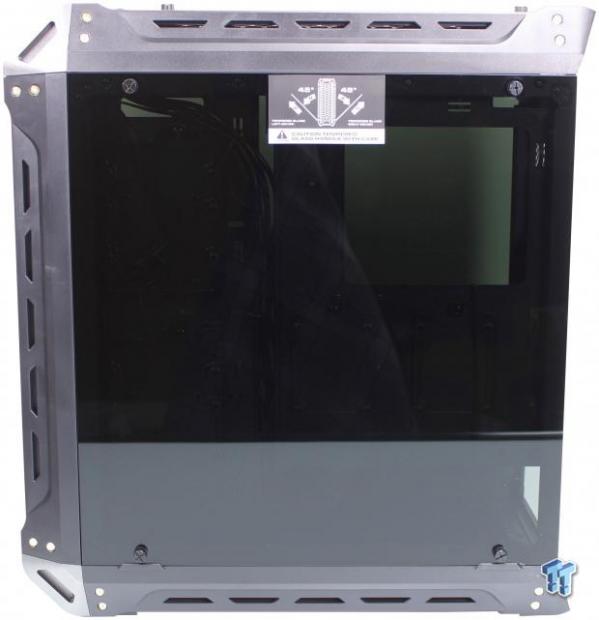
Here we see the cable management side, which once again is smoked tempered glass. This side carried the same film covering and also the same panel sticker warning of the need to angle the panel. There is nothing else to say here that has not already been said on the other side.
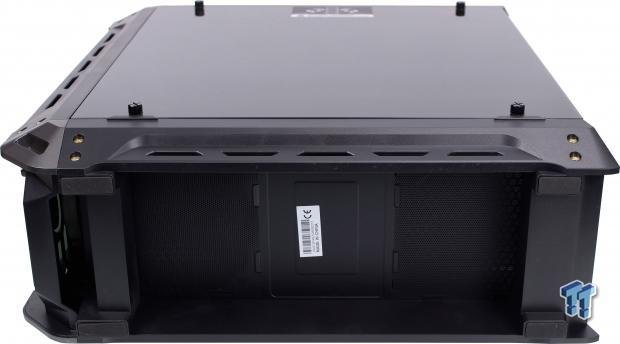
The bottom of the chassis we see the bottom plastic framework which raises the case well above the floor or surface it will sit on. You will see it has four rubber feet which should help it from sliding on the surface, but the adhesive on these feet are not excellent as they can peel up with some movement of a full system on a flat surface.
This is more common than most people know which is why you do not want to slide your system around but rather pick it up to move it even if just a few inches. Better adhesive will promote better adhesion and less likely to tear away, but something like this is not a deal breaker, in my opinion.
The lower dust filters are removable but not like some we have seen which are simple and slide out without moving the chassis around. This style of dust filter while useful are one of my least favorite as it requires bending the medium to remove it from the metal tabs of the chassis. Also, the ID sticker for the chassis is found here where it's less likely to be damaged or removed as it not within sight unless you decide your PC should lay on its side for some reason.
Inside the Panzer G
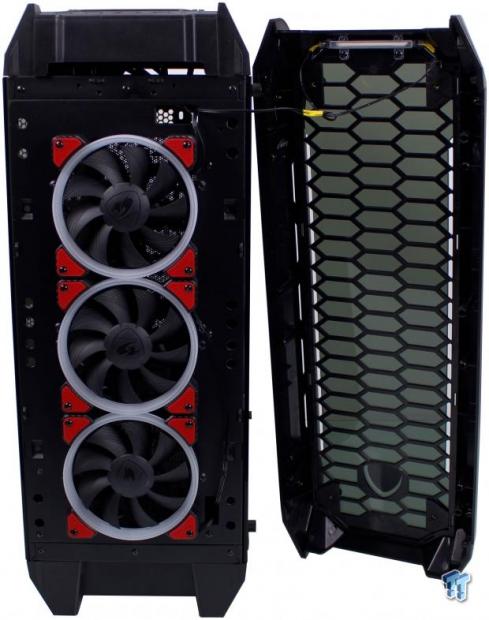
The front panel comes off with a solid tug and cannot travel too far as it has two leads coming from the panel to the inside of the chassis HDD LED header. There are six total plastic press pins which retain the front panel via pressure fit.
This should be no issue unless you plan to remove your front panel every day for years. The area leading into the fans is unfiltered which I thought was odd until I noticed there is a filter within the case body itself after the fans so this means that your fans can accumulate dust and will need to be cleaned as the screen is after the fans in the airflow path.
Here you can also see the rear side of the front panel which has the elongated hexagonal pattern. The last thing worth mentioning is the triple 120mm fans covering the front of the Panzer G with their red rubber anti-vibration mounts and opaque white rings which are undoubtedly LED lit.
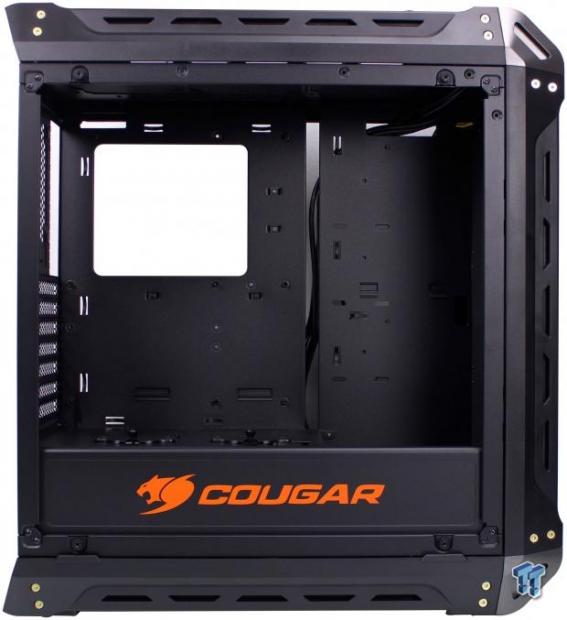
Removing the panel from the main chamber, we see that the opening is quite expansive. The CPU cooler backplate cutout is quite massive and should service any cooler I can remember seeing in my history of PC work. There are no HDD cages or 5.25" cages to contend with which makes this a relatively blank slate to do a more involved build within.
The PSU uses a PSU cover to ensure a nice clean aesthetic, but then Cougar slapped a large applique with a bright orange cougar logo on it to ensure you know who's case you are using. I'm not against branding, but I prefer something a bit more tasteful and not as much in your face. The only drive mounting we can see in sight would be the dual 2.5" mounts affixed to the PSU cover.
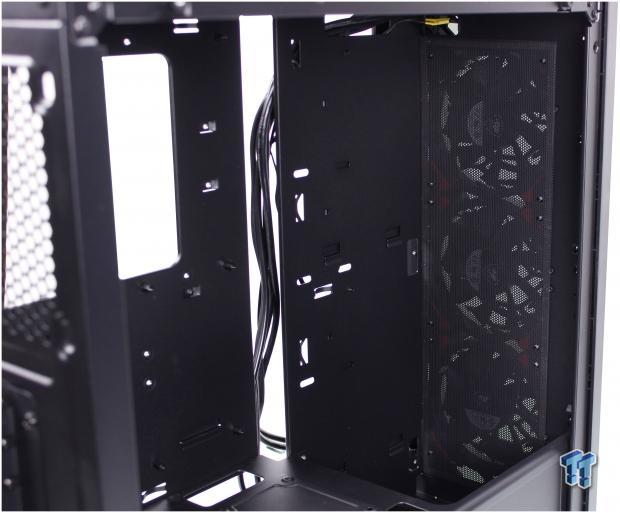
Moving to the front panel, we now see the rear of the area we just looked at before. Here we see the front triple 120mm fan setup flanked by the integrated fan filter. It's nice to see that with this filter they employed a magnetic perimeter.
One area Cougar took extra care was to even punch out holes for the fan screws which I thought was pretty cool so that it doesn't push the filter away from the chassis. I'm not quite sure yet if this will impact its ability to filter the air but if it did the spacing to the metal of the enclosure means it would be minimal.
Moving left toward the area where we would typically see HDD cages instead we have a mostly blank panel with some cutouts for the rear mounted drive sleds along with some other slotted holes. The slotted holes are an excellent addition as those could potentially be used for things such as cylindrical reservoir/pump mounting.
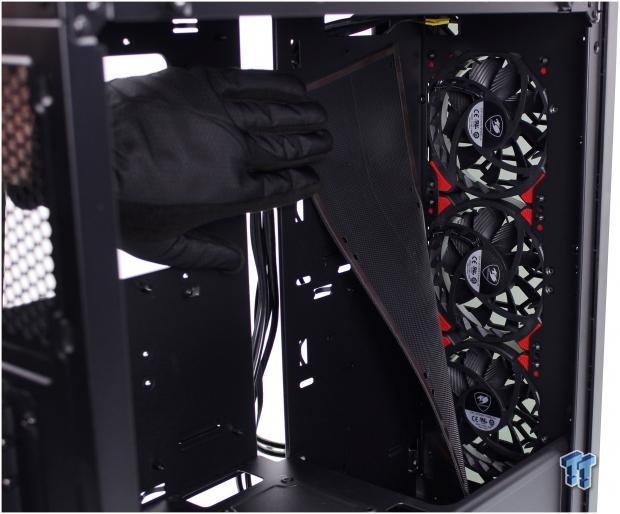
Here we pulled back the magnetic filter to show it's mounting and pass through holes for the fasteners. To answer the question, no, I am not a hand model, which is why I wear gloves. That and I don't want fingerprints on the case when you see it.
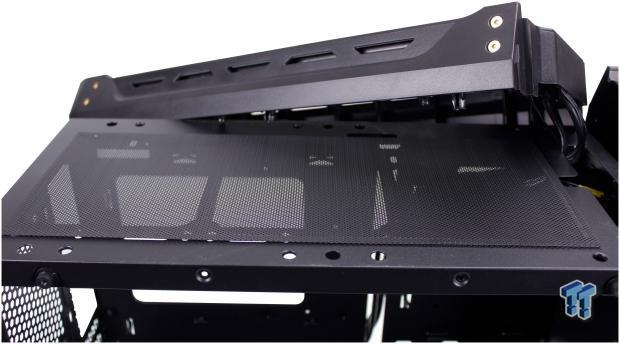
The top of the chassis offers once again a magnetic fan filter similar to the front. It has fitment for up to triple 120mm mounting or dual 140mm. The 120mm and 140mm mounts are slotted to allow adjustment away from or towards the motherboard.
This is usually a nice thing to see but with the chassis not being super wide means even at its furthest setting you can run into issues where the liquid cooling components or AIO may interfere with VRM heat sinks or memory. We will look at this a bit more in the building part of the review.
The top panel is affixed with six plastic pressure retention pins the same as the front panel we saw previously. Once again this is not a bad thing but does make for a very tight fitting panel, so you have to do a quite uncomfortable amount of tugging to get the panel off.
Inside the Panzer G Continued
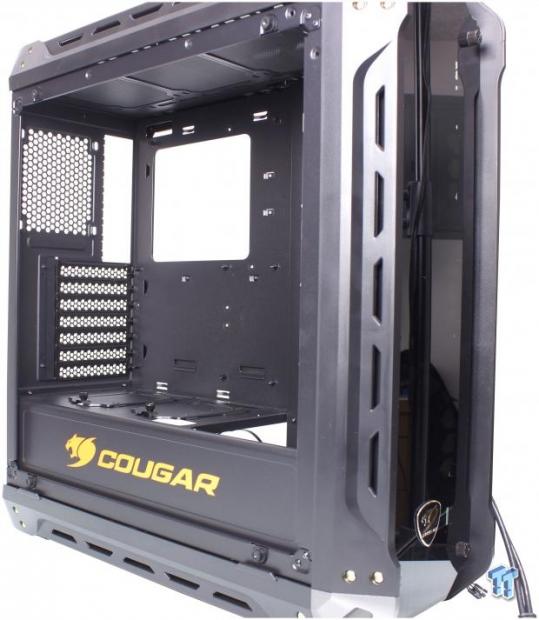
Here we see where most of your component will be mounted. The motherboard tray is big enough to fit everything from a diminutive mITX to mATX, ATX, and even CEB. Not sure why CEB but being its very close to ATX, I will let that one pass, I don't see many consumers using CEB in a gamer style system.
The standoffs for ATX are preinstalled but removable should you not need them. Instead of grommeted holes for cables to pass through, the Panzer G has an offset of depth between the HDD mounting vertical plate and the motherboard tray.
This does mean that any cables passing around this area needs to be extra tidy as there's no pass-through grommet to hide them. We can see seven total cable tie points on the main motherboard tray while the HDD mounting place has another four tie points.
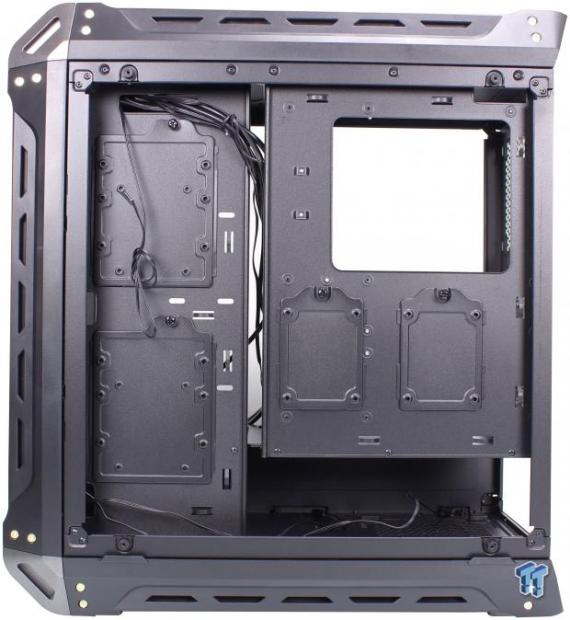
Here we have the rear of the component area. This is where all the cable management magic happens and where the components go that you do not necessarily want to see. Here we have four drive mounts two of which being 3.5" which can also support 2.5" drives along the left.
Dedicated 2.5" drive trays are found on the rear of the motherboard tray directly beneath the CPU cooler backplate cutout. All of the trays require removal from the chassis to fasten the drives as it is not toolless and screws are used to affix drives to the sleds.
Here we can also see the previously mentioned tie-down points which are plentiful and should be more than enough to tie down the cables used for even a more extreme system build.
Here you can see the offset split between the left side plate and the motherboard tray I mentioned which unfortunately will show any cables coming across. This does mean you will have to be meticulous about your cable routing and tie down accuracy to ensure a nice clean build.
Also worth noting is the PSU area where you can see the motherboard tray ends. As you can see, there is not any way to squeeze a PSU in from the side with the shroud in place which is why Cougar made the Panzer G with the idea of sliding the unit in from the rear of the chassis. The section of the chassis has rubber feet below the PSU to support it and omit some vibration should there be any.
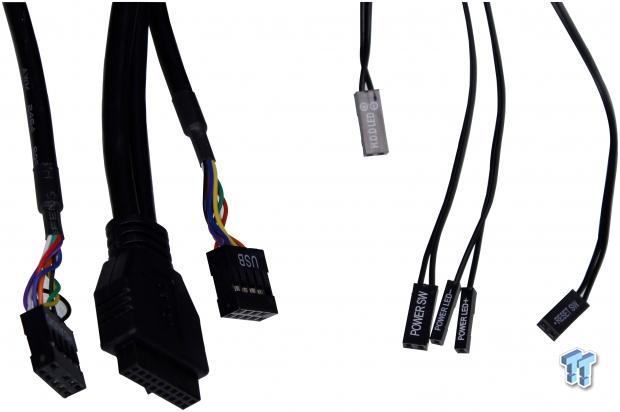
Here we have the Panzer G's front panel cables. It is a reasonably standard lot with HD Audio, 20 pin USB 3.0 (3.1 Gen 1, 3.2 Gen 1), USB 2.0, HDD LED, Power LED, Power Switch and Reset Switch. The switch and LED headers are all black, which, is a welcome sight.
The USB 2.0 and HD audio has the multi-color wires although I do wish they could do them all black, so they better disappear in a build. There is no special sleeving, and this overall is pretty standard fare for the level of chassis.
Hardware & Documentation
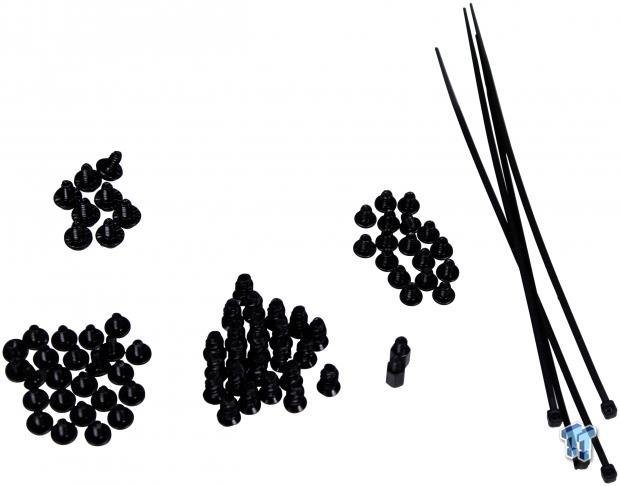
The accessory bag comes with a mix of fasteners to assist with the completion of your build. Eight screws are included for the PSU mounting as the PSU itself uses four to fasten to the bracket, and the bracket itself uses four fasteners to mount to the case body.
There are seventeen total screws for HDD and motherboard mounting. Twenty-four coarse fan screws are included for mounting fans directly to the case. Lastly, there are twenty-four SSD mounting screws as well. Along with those fasteners, there are two extra standoffs included and four zip ties. The four zip ties are likely not enough for a complete build, but it's a start.
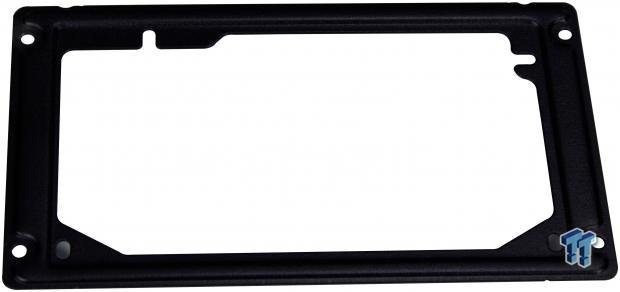
Another included but very necessary part of the accessories is the PSU bracket. It is designed to have the fan pointed down as you can see the notches on the top edge which lines up with rivets in the Panzer G rear mounting section.
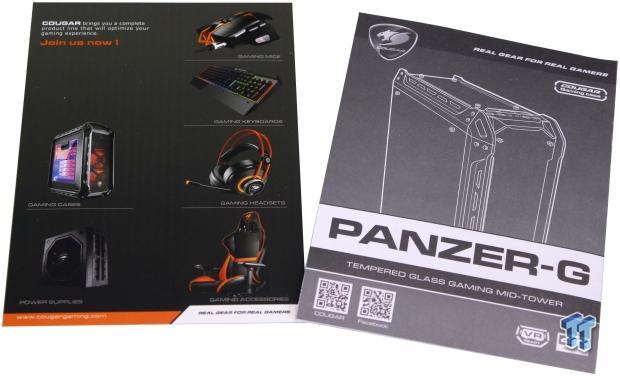
The manual is rather standard; it is a multi-fold booklet that ends up in eight panels. It is dual sided, and a majority of the information is in English. Luckily the infographics are of good enough quality that we can tell what Cougar is trying to represent.
There is also a hard card stock pamphlet included with marketing from Cougar showing what other parts they offer in hopes they can get you on board with some other purchased accessories or peripherals.
Case Build & Finished Product
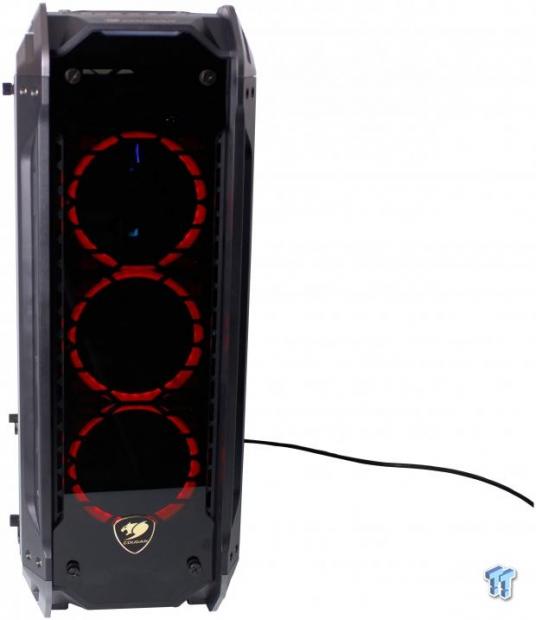
Here we see the front of the Cougar Panzer G built and running. I was going to show it off, but it would look the same as we looked at earlier since there is not a visual change when built.
Here you can see the lighted fan rings which are red or orange depending on how you look at it; I shall call it reddish-orange because to me that's how it looks. The top of the front panel we see the LED light bar which flickers with drive activity and since we have an M.2 drive its almost impossible to catch it lit with the camera, but it's a white light when illuminated.
I think the style while being more of a gamer feel with the rings of the fans glaring back at you, I feel like in the right setting the Panzer G could fit into many gaming setups rather easily.
However, using it for something such as an office or home, their system may not fit in too well unless you happen to be working in a Silicon Valley incubator wearing a hoodie to work. I've got nothing against that honestly, just more of a reference to the fact that a system in the panzer G would not blend well in a serious drab office environment.
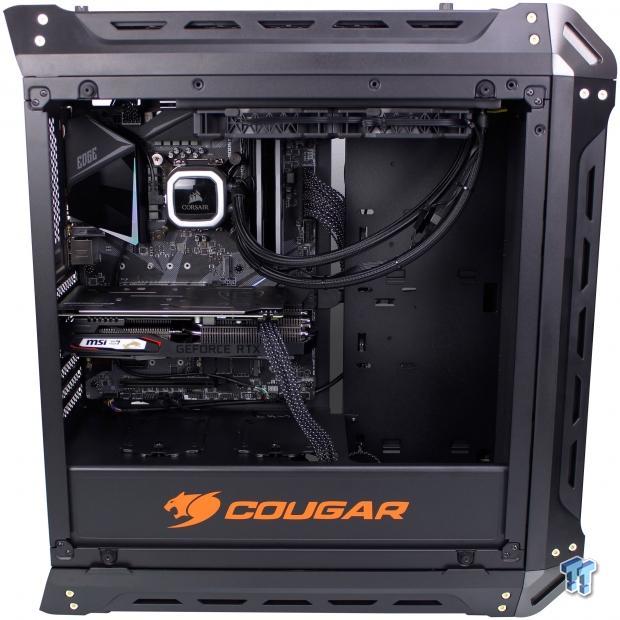
The Panzer G was rather easy to build in with even the CPU EPS connector being easy enough to connect, which in some tighter mid towers can be a real chore. The one major standout to me was the Corsair H100i Pro RGB used in the build had to be moved forward in the chassis to avoid contacting the CPU VRM cooler you can see with the word EDGE on it.
Even with the outwardly slotted holes, it would not fit without putting pressure on the heat sink, which is an abort situation in my book. This, to me, means you have to be very aware of your motherboard heat sink design to ensure it will not interfere with your intended cooling.
The GPU went in without an issue, and since each slot uses its own dedicated fastener, we did not need to worry about a cascade of falling slot covers. The RTX 2060 looks downright minuscule as we could easily fit any card length I know of at this time in the space allotted by the Panzer G. One last note; is that while I had to relocate the AIO it still operated as expected when moved one fan space toward the front, so if you are using a dual 120 cooler it should be no issue.
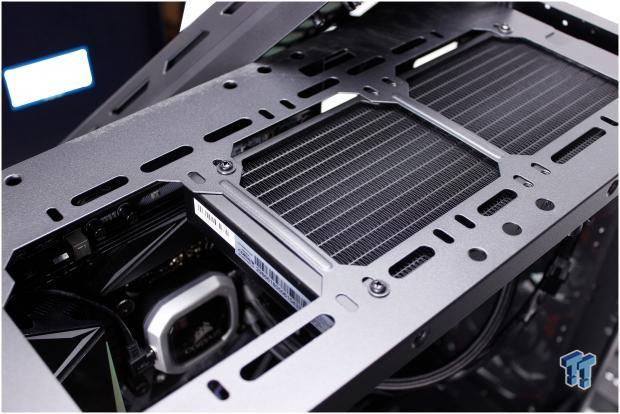
Here we see the Corsair H100i installed in the more forward facing fan mount locations. It fits with a few mm to spare here, which I had to show as Cougar states that 280mm radiators are supported in the top which takes the radiator 20mm closer to the motherboard which in my opinion is not possible unless you have a board with open VRMs or an extremely low profile cooler and DIMMs.
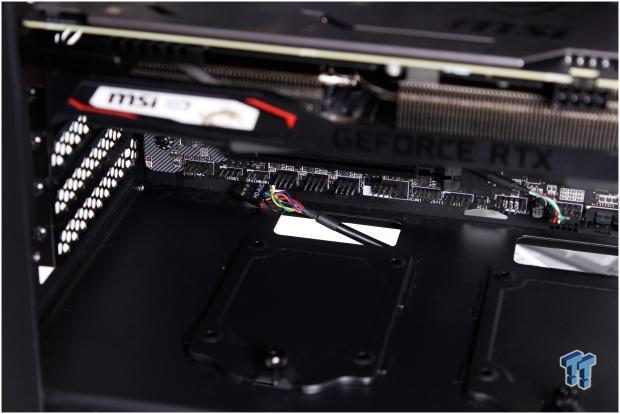
Another point of concern is the internal I/O wiring. All of the cables were able to be routed efficiently, out of sight, but, when routing the same way as the front panel cables, the HD audio was about 2cm too short. This means the only option to effectively reach the header was to run it under the lower edge of the motherboard and have the cable bridge the split between the vertical HDD tray and motherboard tray.
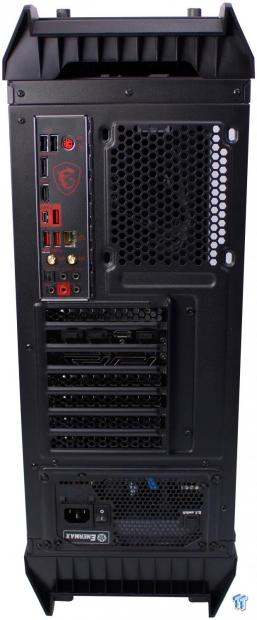
The rear of the chassis looks about the same as the out of the box appearance with just the opening being filled by the internal components I/O. There was no real issue installing anything, even sliding the PSU in was painless. The rear fan opening being empty feels wrong, but it would feel even worse pulling one of the front fans to the rear as the front rings make a good look and having a gap there would look odd. If any of you plan to buy this chassis plan at least one good fan into your budget to add into this location to give yourself a good exhaust push.
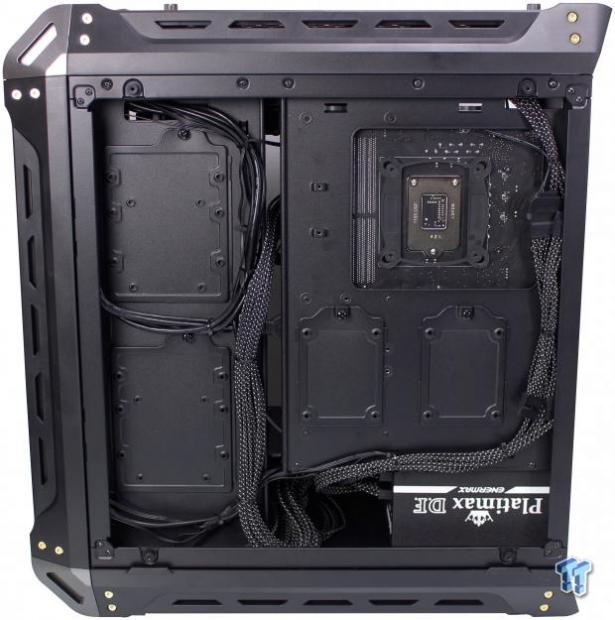
Here we have the rear cable management area, which is the part I hate the most. I don't like having to manage cables as it gets cumbersome very quickly. Much to my surprise, the area given worked well as I used the separation between the vertical HSDD tray and the motherboard tray as guidelines to run the cables.
Overall the cable tie down points are in good locations to get your cables well managed, and it even dealt with our custom sleeved Enermax cable bundles with ease. Due to the location of the USB 3.0 20 pin header, there was excess length which we looped in between the 3.5" bays which worked well and left them in a good state.
Even with a 1050W PSU the Panzer G had plenty of room in front of it to store excess cabling to keep it from becoming a mess back here. Addition of an array of storage drives in the rear would mean a few more cables, but overall it came out relatively clean without a considerable time investment.
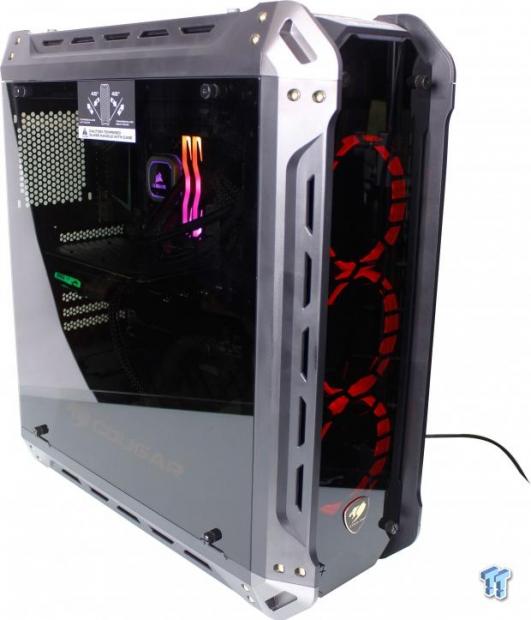
Here we have the system assembled and ready to run. The smoked panels mean you need some light to get a good view of components. I imagine with some adequately placed LED strips the system chamber could pop, but with the lighting from the installed components, you can see that it can shine through it's just much darker which can be an excellent thing to hide less than stellar cable management. With the system off its all dark and you could think the case was empty until you go to pick it up and realize it's a bit heftier than it was at the onset.
Final Thoughts
When I first started with the Panzer G, we were admittedly unsure as Cougar is not a name we see regularly. We walked away a bit surprised as at the $100 price point it had some tricks up its sleeve to allow for a quite competent gaming rig.

In our testing, it kept all of the components within reasonable temps and only was loud when pushed for a very long period under the most extreme stress test load we could apply. We are also happy to report that removing the front panel to test airflow impedance we observed a mere 2C improvement in delta over ambient on the CPU and 3C on the GPU. This tells us that while I thought it might be a significant choke point, it was minor and not a huge area of concern.
The Panzer G did some things right. First, the Panzer G has triple ring lit fans in the front that do a decent job of feeding cooling air to the system and adds a pleasant aesthetic to the front of the build. The tempered glass plastic film is a blessing and a curse as it protects the finish but is a pain to disassemble everything to remove. The Panzer G has plenty of room to be creative with a liquid cooling build or even as a modding palette.
With most cases, we can find some grievances, and the Panzer G does not get away unscathed here. Firstly the gold is a bit off-putting at least as a personal feeling. Gold is a rare thing in the case world and even more rarely done well. The mix of brighter silver with darker gray plastics is an odd addition when the entire plastic surround being either the brighter or darker option would likely flow much better.
The slimness of the case limits cooling compatibility as we experienced with our 240mm AIO installation and therefore I would strongly recommend 140mm based AIO or custom liquid cooling in the Panzer G. One QC point would be the threading for the fastening of the tempered glass panels, it is merely rough and not a smooth experience.
This leads to the choice of risking damaging the plastic the knurled nut is seated into or just leaving one of the mounting points loose. Lastly, we would like to see better fan filter options for the bottom as it looks to be a real chore for anyone who builds in the Panzer G and will likely result in them just never being removed or cleaned.
The Panzer G comes to market at $94.58 at the time of writing, and as said before this is a rough price point to find yourself in as there are many excellent case options at this level.
The difference with the Panzer G is that it comes in at a full-tower size and many popular options such as PSU shrouds, the LED ring included fans and a swath of tempered glass. With all of this and the issues previously mentioned, I would feel comfortable recommending the Cougar Panzer G for someone looking for a competent case that they were not looking to build immense liquid cooling into, and preferably a build more like the one we assembled today.
The Panzer G is a solid case but take the marketing points for what they are, marketing. Liquid cooling will not be a dream in the Panzer G; it will merely be passable.
Shannon's Chassis Test System Specifications
- Motherboard: MSI MPG Z390 Gaming Edge AC Z390 (buy from Amazon)
- CPU: Intel Core i7 8700K (buy from Amazon)
- Cooler: Corsair H100i Pro RGB (buy from Amazon)
- Memory: GeIL Super Luce RGB GLS416GB3600C16ADC
- Video Card: MSI GeForce RTX 2060 Gaming Z (buy from Amazon)
- Storage: SanDisk M.2 256GB
- Power Supply: Enermax Platimax DF 1050W (buy from Amazon)
- OS: Microsoft Windows 10 Home 64-bit (buy from Amazon)
Performance |
85% |
Quality |
80% |
Features |
85% |
Value |
85% |
Overall |
84% |
The Panzer G does a reasonable job with its feature set and ability to balance aesthetics and performance.

Similar Content
Related Tags

