


Our Verdict
Introduction, Specifications, and Pricing
When it comes to cases, EVGA is not usually one of the first companies that come up in conversation. From what we have seen in the past from EVGA, we think they should. We are nearly sure the first chassis we saw from them was the Hardon Air which was stylistically a trendsetter, packing a ton of options in a tiny chassis. We then looked at the DG-87 chassis, and it was a beast of a case. Not only was it feature-rich, but the styling was also something we had never seen and is a case that would compete with many of the best full-tower cases offered even today.
Falling in the middle of both cases, EVGA has made a move into mid-tower cases as well. The solution we have is something we have just seen on the inside, but the outside is sleek and clean, with minor traits of the DG-8 Series cases. Following the same idea of the DG-8 Series, the chassis we are about to see is one of four in the lineup. All of them come with various options, and at varying levels of cost, but at the heart of them all are mostly the same chassis.
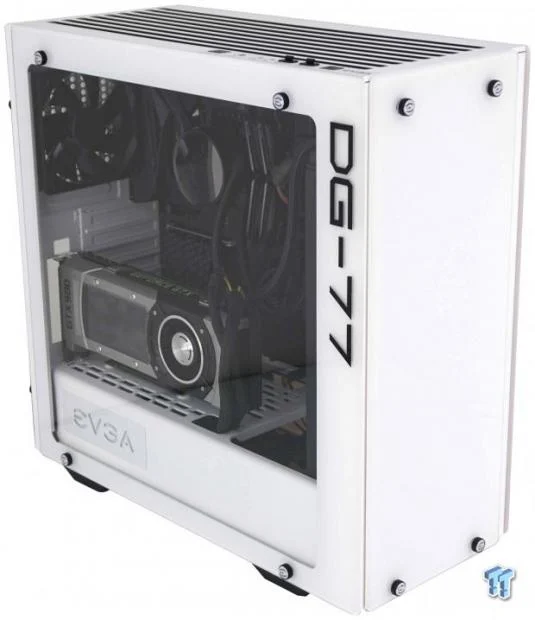
We are looking at the top tier offering of the DG-7 Series, the DG-77, which comes with all the bells and whistles. In this model, you get K-boost, three tempered glass panels, software support an RGB LED controller, four fans, a vertical GPU kit, and an I/O cover. The DG-76 lacks the K-Boost, only has two glass panels, comes with three fans, and the GPU kit is optional. The DG-75 lacks what the DG-76 does, but comes with two fans, and no I/O cover. The DG-73 has the least and offers no glass at all. So, while you see everything included with the DG-77 chassis we are about to show you, make sure you reference what comes in each version before making your final buying decision.
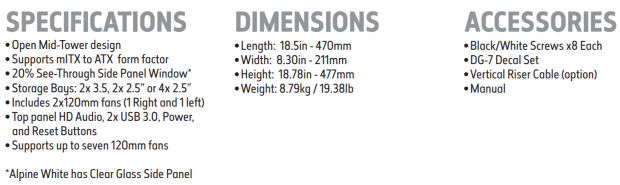
The DG-77 is made of steel, which in this instance is white, but almost all versions can be had in black as well. The front of the chassis and the right side of the chassis have tempered glass panels, of which, the inside is fully painted white and blocks any view through them. The left side panel is only painted around the edges, which allows a clear view into the chassis. Utilizing an open mid-tower configuration, the chassis will support a mini-ITX, Micro-ATX, or an ATX motherboard. On the inside are two 3.5" drive trays as well as a pair specifically for 2.5" drives, but all four trays can be populated with 2.5" drives. The front I/O panel offers all of the usual things found there but also includes dust covers for the USB 3.0 ports. The last thing mentioned in the first section is that this Alpine White DG-77 supports up to seven fans, but only two are included.
Dimensionally, the case is 470mm long, it is 211mm wide, and the chassis is 477mm tall. All told, the DG-77 weighs in at 8.79 kilograms, but nearly half of that weight is contained in the three glass panels. Along with the chassis, EVGA sends screw cover stickers, and since the ones on the chassis are white, we get a spare set of black covers to replace them. If the black DG-77 on the side of the case is not to your liking, extra model number stickers are included, so that you can change it to match the motherboard or video cards inside of it. With the top tier offering, there is also a vertical riser cable sent, which connect the video card to the motherboard, and a manual for basic information.
Cooling is only handled with a pair of fans out of the box, but there are many options left. The front of the case will allow three 120mm fans or a pair of 140mm fans. The top of the chassis is identical in capabilities, but the back of the case will only hold a single 120mm fan. This all means that you can house a 360mm or 280mm radiator in the front of the case, but we suggest only fans at the top to ensure there are no parts conflicts. A single 120mm radiator can be hung in the back, which means AIOs can be used on both the motherboard and the video card.
When it comes to pricing, we may as well cover all of the cases. The DG-73 has an MSRP of $89.99 and is only available in black. The DG-75 is shown to be $109.99, the DG-76 at $139.99, and the DG-77 we have for you now is listed at $159.99. The latter three cases are the ones which can be had in both black and white. With that information in hand, we do not feel that with what is supplied in the top of the line DG-77, that you will not get your money's worth, at least on paper. However, we still want to get a good look at the DG-77, and save our opinion for later.
Our Latest Mid-Tower Cases Review Coverage
Chad's Chassis Test System Specifications
- Motherboard: ASUS Maximus IX Code Z270 (buy from Amazon)
- CPU: Intel Core i7 7700K (buy from Amazon)
- Cooler: NZXT Kraken X62 (buy from Amazon)
- Memory: Team T-Force Night Hawk RGB TF1D48G3000HC16CBK
- Video Card: NVIDIA GeForce GTX 980 (buy from Amazon)
- Storage: Samsung XP941 256GB (buy from Amazon)
- Power Supply: SilverStone SST-ST85F-G (buy from Amazon)
- OS: Microsoft Windows 10 Home 64-bit (buy from Amazon)
Packaging
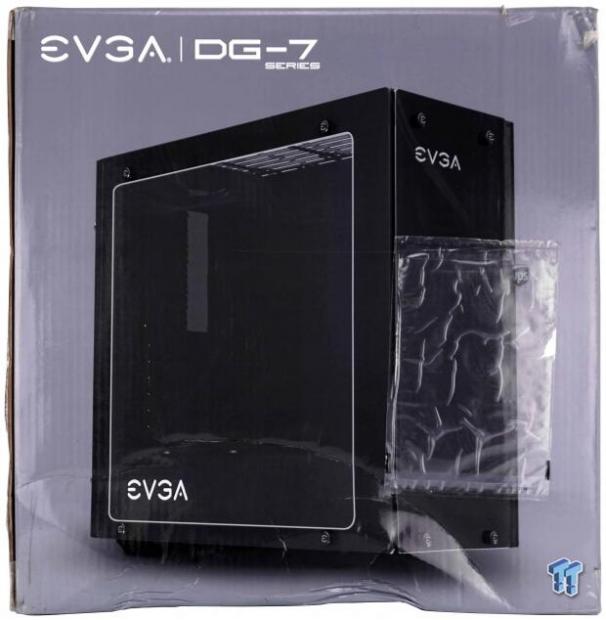
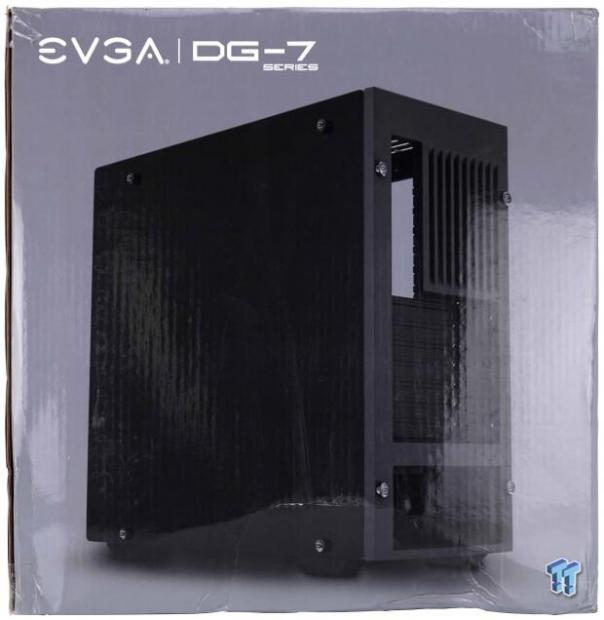
EVGA opted to put this chassis inside of a shiny gray cardboard box. At the top of the front panel, we find the EVGA name along with the DG-7 Series name of the chassis. The majority of the panel is used to show an angle of the chassis, where the front and left side can be seen.
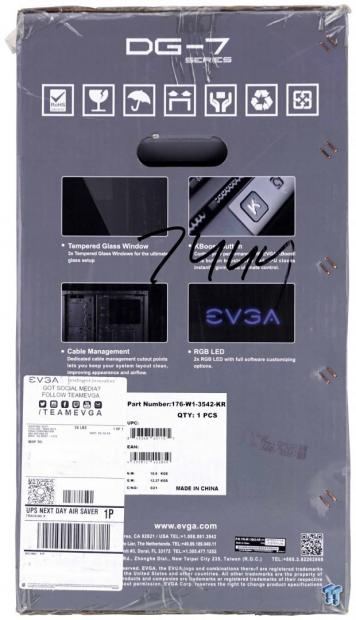
Iconography follows the Series of a case this is, and under the handle are four images showing off features found in most of the lineup. Keep in mind, tempered glass and K-Boost are not things found in all four versions.
At first glance, the back of the box looks much like the front. However, even though the text at the top is the same, the view of the chassis is now showing the back and left side.
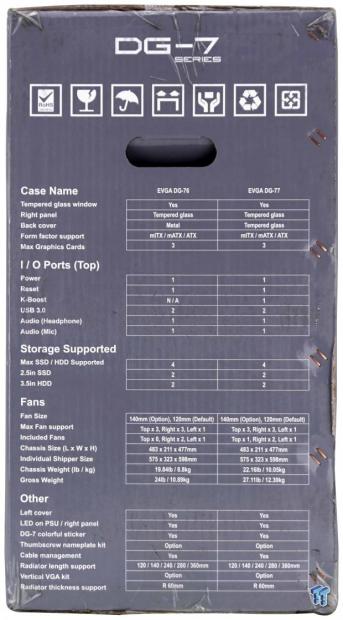
Our final look at the external packaging has us now looking at the specifications for the DG-76 and DG-77 models. There are a few changes that happen further down the line, so please do not expect what you see in the DG-77 specs to be what it has in the lowest numbered model.
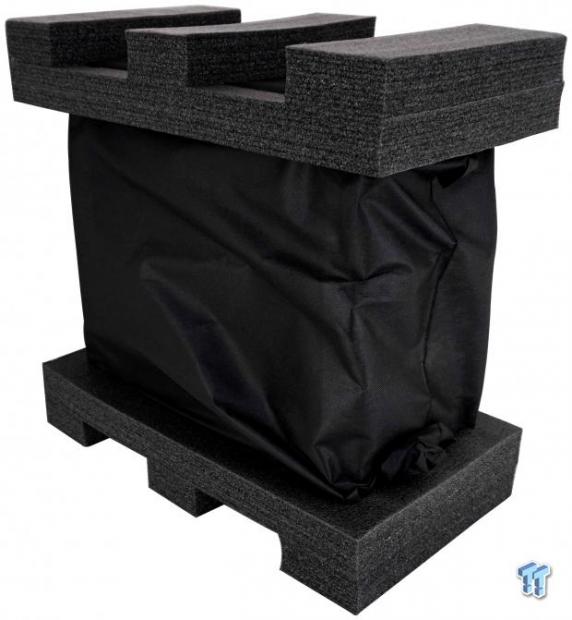
The glass of the chassis has plastic applied to both sides, ensuring that the glass and the paint on those panels are not scratched. Rather than plastic, EVGA ships the chassis in a cloth bag, which can also be used later as a dust cover or travel bag. While many use dense foam on the top and bottom of the chassis, only a select few care to make the color match the rest of the internal protective measures. All of the parts played their role, and with damage to the box, our chassis came through without a scratch.
EVGA DG-77 Mid-Tower Chassis
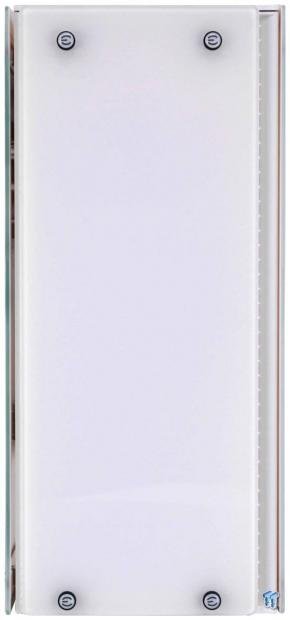
The front of the DG-77 is a view of a large class cover panel, which is screwed into a plastic frame. The glass panel is slightly offset from center, which allows the right side of the glass to be used as an air duct to supply the chassis with air.

On top of the chassis, running along the left side, we have the front I/O panel. From left to right, we have the K-Boost button, a reset buttons, HD Audio jacks, two USB 3.0 ports with dust covers, the power button, and EVGA's name.
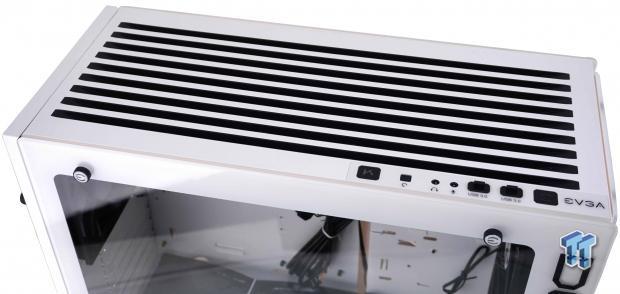
Moving back a bit to get a better view of the rest of the top panel, we find slots which are painted black, which resembles features found on the DG-8 Series cases. The top is removable and makes access to mounting fans under it possible.
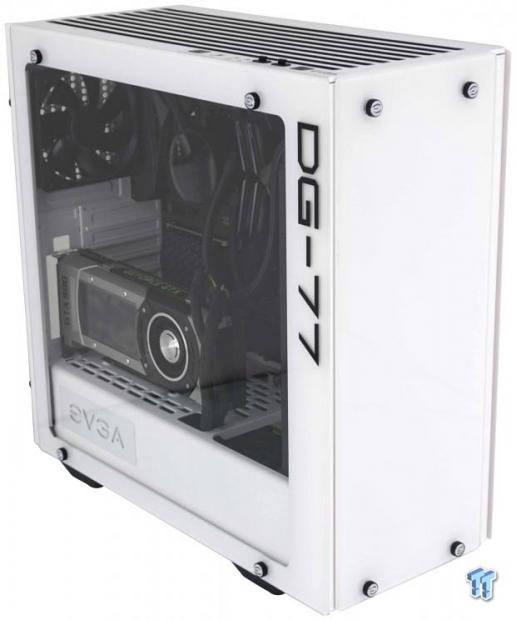
Much like the front, all you see on the side is an expanse of glass. The edges of it are painted to keep the view of the frame blacked, and there is no tint to the glass to block the view inside. The DG-77 found in the top-right corner is only one choice, and it can be removed and replaced with stickers which EVGA has provided.
The back of the chassis has a clean and professional looking appearance. It is because EVGA adds a plastic cover panel over the steel. We also see it reads Designed by EVGA near the bottom.
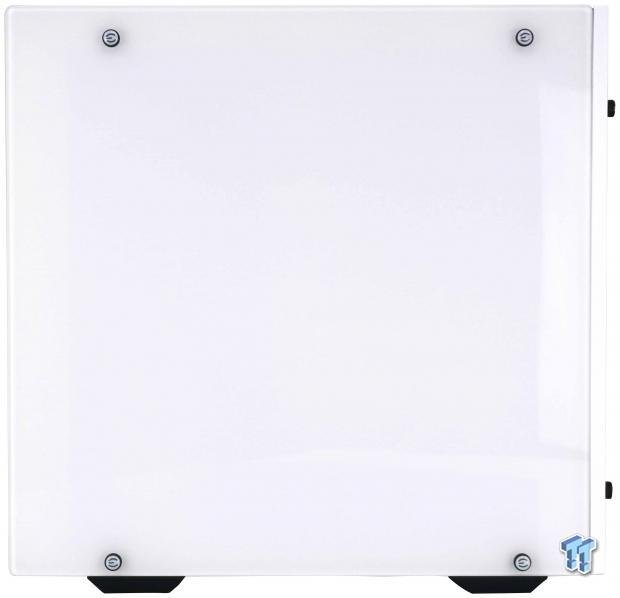
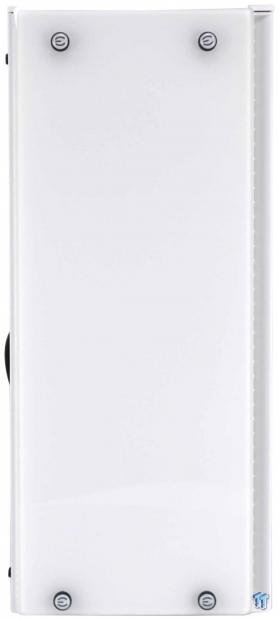
The right side of the DG-77 also offers a panel made of tempered glass, but this time the entire panel is painted on the inside to keep any mess behind it hidden. Since we have seen sixteen of them so far, we like the added touch of the "E" applied to the tips of all of the thumbscrews.
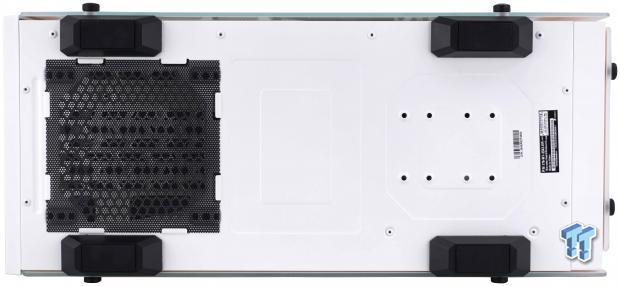
Under the chassis, we see chunky plastic feet with rubber pads on them. There is a removable dust filter under the PSU, but it is not easily accessed. Between the front feet, we see holes which allow a 3.5" or 3.5" drive to mount to the floor, and the sticker is important, you will need the serial number for registration.
Inside the DG-77
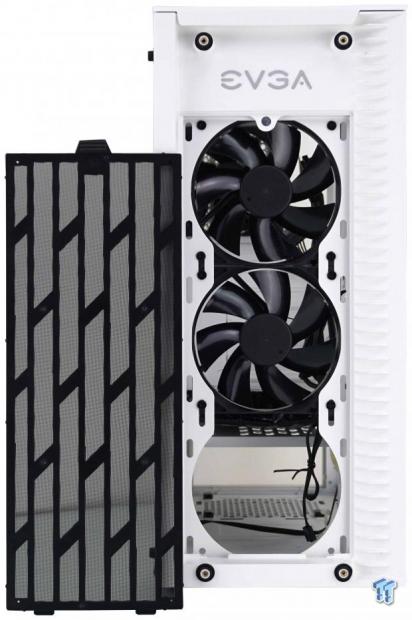
We took the glass panel off and set it aside, which exposed access to the black dust filter. Hanging inside of the case is a pair of 120mm fans, and there are slots for 140mm fans too. EVGA also places their name at the top of the front bezel, and while it is not able to be seen through the glass, we can only assume this comes into play with the lower-end models.
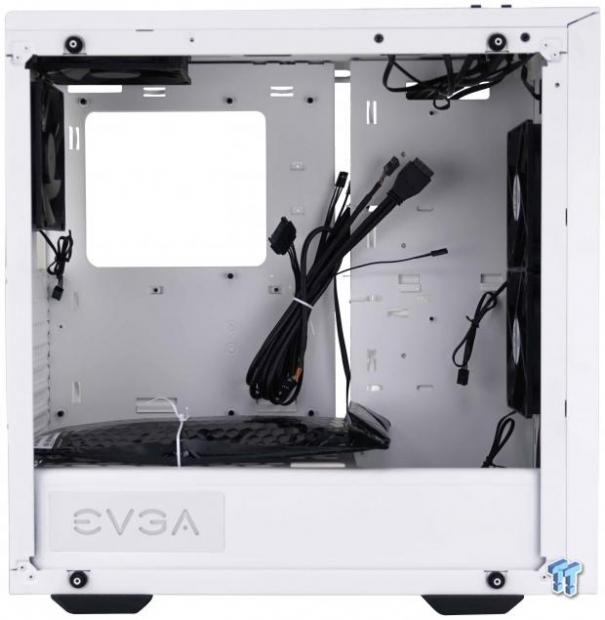
Inside of the chassis, we notice immediately that this looks just like the CMT510 interior, but with a different PSU cover. Everything being white, black cables will stick out like a sore thumb, and to keep things looking great, you will need to take some time with wire management.
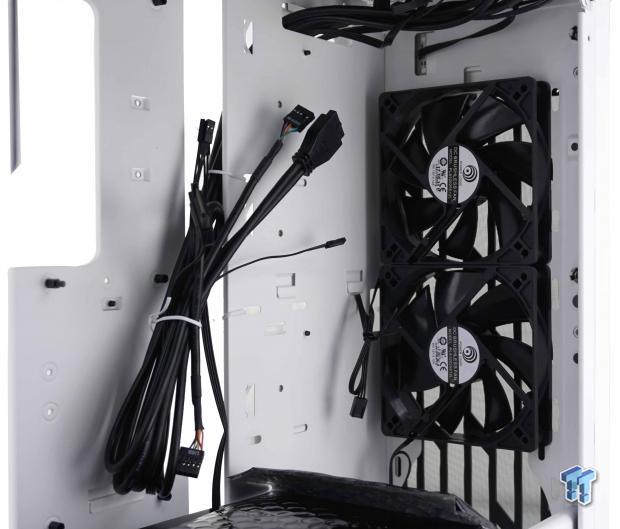
EVGA installed a pair of Power Logic PLA12025S12L fans, which are powered with 3-pin connectors. Fans are far enough from the I/O wires not to be an issue, and while we can add a third 120mm fan to the stack, the PSU cover is notched to allow fat radiators in there as well.
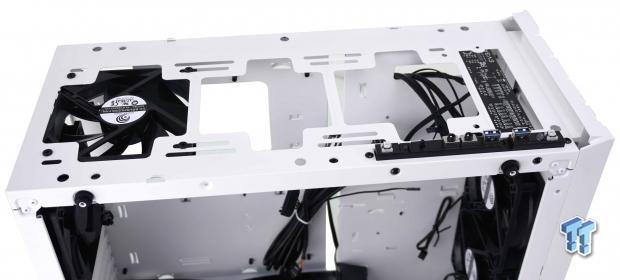
The top cover pulls from the case, and under it, we see a few things worth mentioning. There is a fan installed near the back of the chassis, and the fan layout matches that found in the front of the case. The last thing we noticed is that the front I/O stays with the case.
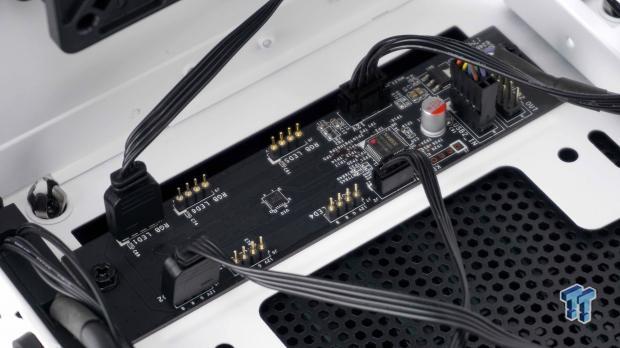
Flipping the chassis onto its roof, and looking up by the I/O panel, we see a bonus addition to the DG-77. This is an RGB control center for the chassis. It allows any RGB device to be added into the loop, and with K-Boost software, they are all controlled at once.
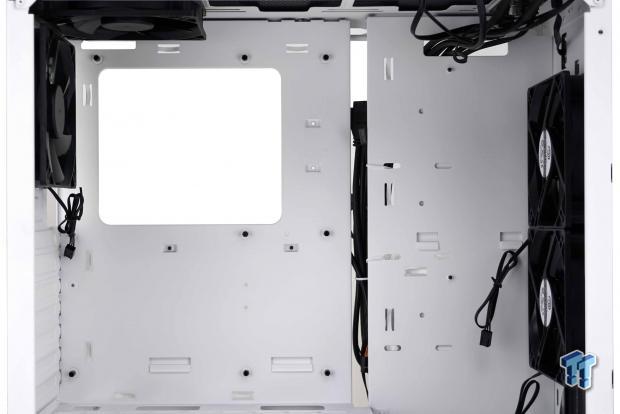
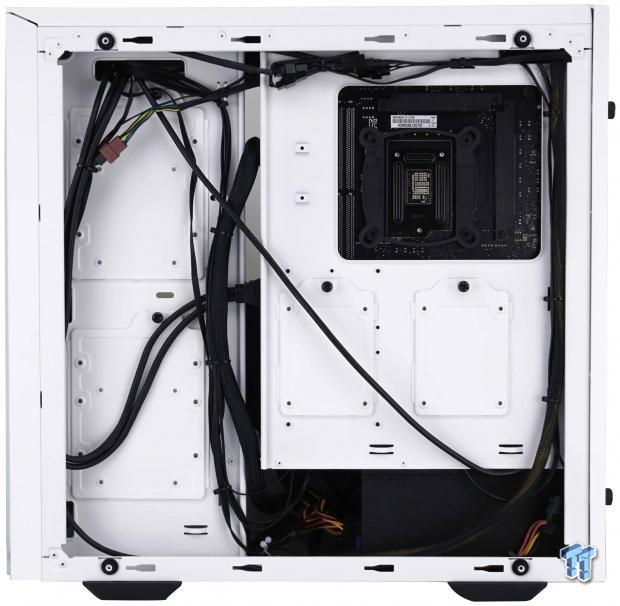
The motherboard tray is broken up into two sections, with a thin gap between them to pass wires through it. The left side has one hole at the top for wires, a much larger hole to access back plates, and there are seven wire tie points. The right side has a hole at the top, three conventional tie points, and both panels have tabs poking through them to support storage devices.
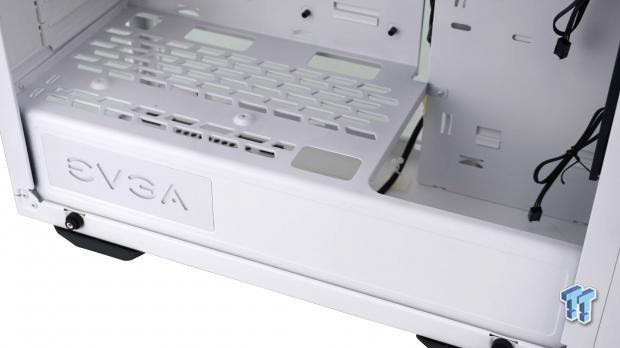
The PSU cover is opened wide at the front of the chassis, but the entire side of the cover is solid, blocking all behind it from view. The top also has an unusual mesh design added to it, there are four holes to put wires through, and the side of the PSU cover has an RGB LED EVGA built into it.
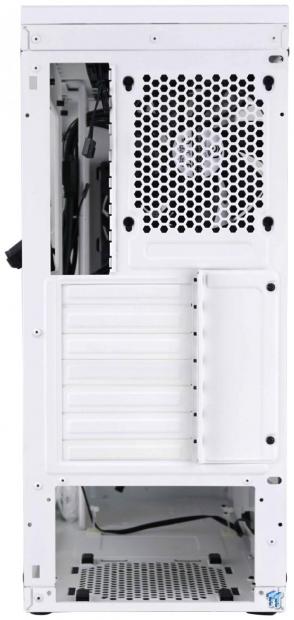
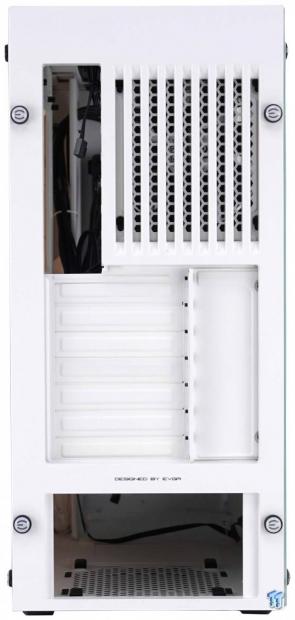
The back of the case, we are showing it from the outside, because we have removed the plastic cover this time. The fan hanging at the top is the same as the other three, and the expansion slots are accessed externally. Again, without the cover, it is identical to the CMT510 at this time.

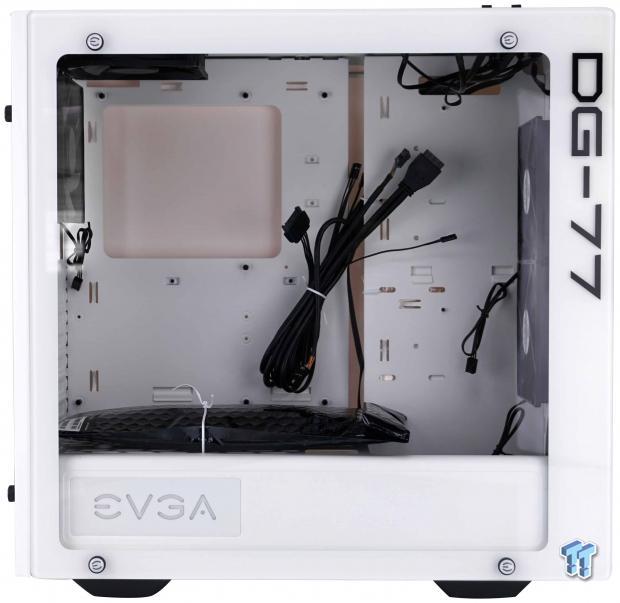
Behind the motherboard, we found the hardware, which is taped to the panel. There are two larger trays on the left for 3.5" or 2/6" drives, but the pair to the right are for 2.5" drives only.
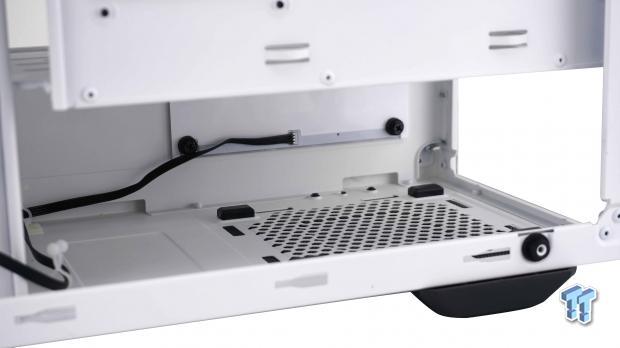
The PSU will slide in from the back, so be careful not to catch the wire connected to the back of the EVGA name which lights up. The PSU will rest upon four rubber pads and can draw air through the floor, or from above.
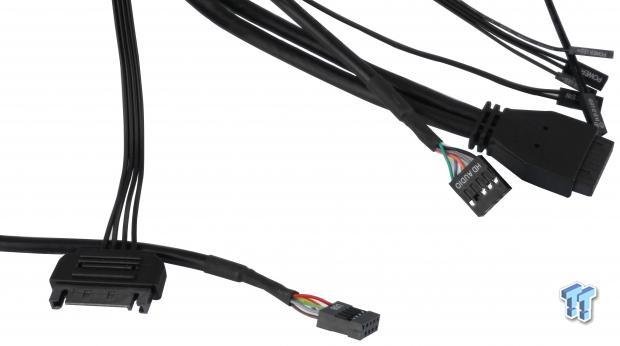
To power the RGB LED control panel, EVGA uses a SATA power connector for that, and the USB 2.0 cable is used to control it. In the other section, which comes from the front I/O panel, we have the HD Audio, native USB 3.0, and the switch and LED leads.
Hardware & Documentation
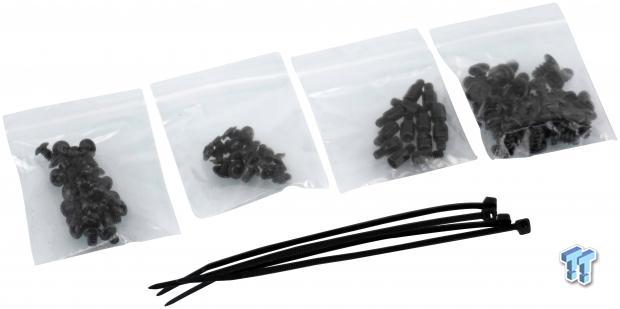
EVGA is not afraid to share when it comes to the amount of hardware they provide in the DG-77. The bag on the left has a handful of 6/32 screws for HDD installation. For 2.5" drives and the motherboard installation, which used M3 screws, grab for the second bag seen here. The chassis comes with standoffs already installed, but here, have a lot more. The last bag contains fan screws, and with a few locations left to fill, that bag will cover you for this case and maybe two others. However, when it came to wire management help, we got only four zip-ties.
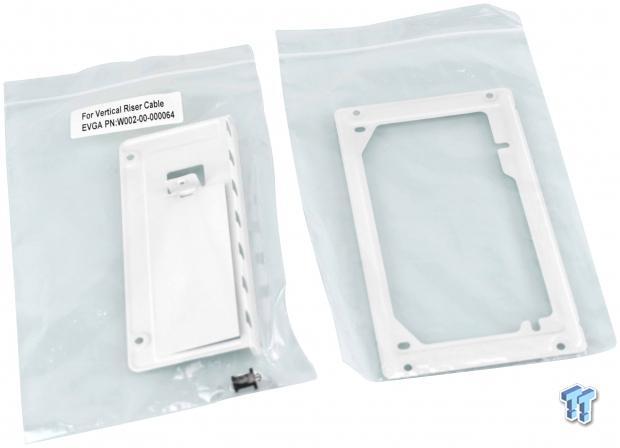
The PSU mounting plate was expected, as we found it with the FPS chassis as well. What we did not expect was the additional expansion slot cover plate. The plate offers a removable section, which allows for vertical installation of a video card. There is also a small plastic spacer, which clips the card into the new expansion slot.
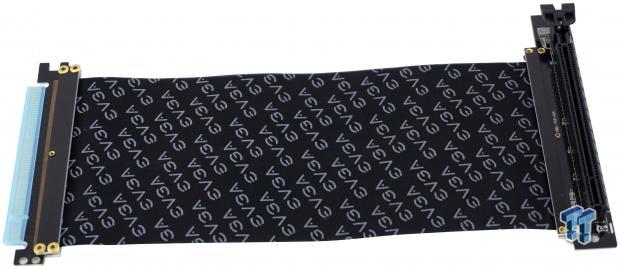
One of maybe three cases we have seen to date, which offer vertical GPU mounting, and include the riser card to allow it to happen. The left end connects to the motherboard, the middle is all fancy with the EVGA name all over it, and the right end screws to the PSU cover and is where the card is connected.
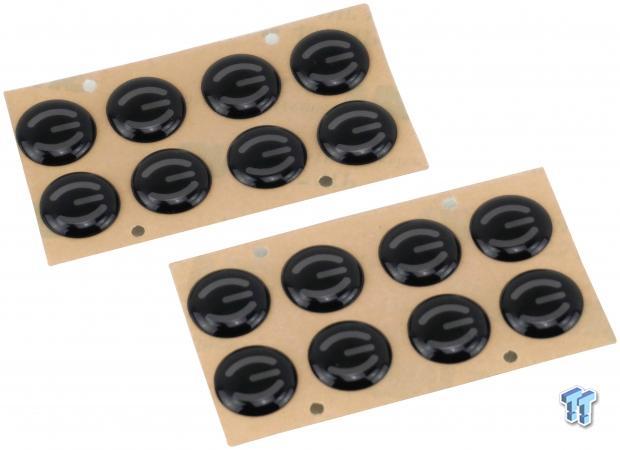
The tops of every thumbscrew on the chassis has a white plastic sticker with a black "E" in the center. If you would like the contrast of black on the screws instead, EVGA ships a set of sixteen covers, to swap them out.
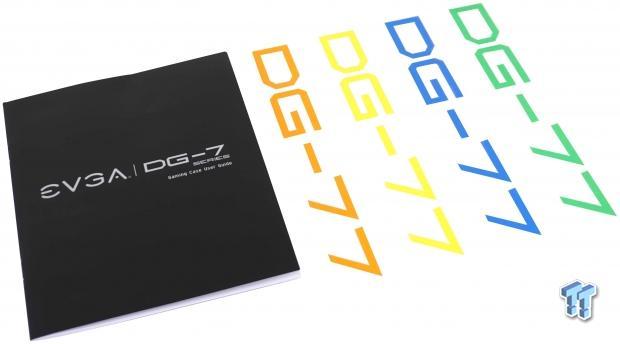
The manual shows us what the parts are all for, and there is the standard build guide. However, there is not a single scrap of information on the optional GPU mounting, which is needed. We did notice that while looking at the DG-77 online, EVGA shows more color options, but in our box, we got orange, yellow, blue, and green DG-77 stickers to replace the one on the left side panel. Although they don't have to go on the case, you can put them anywhere.
Case Build & Finished Product
Since there are no concessions for external drive bays, the front of the chassis does not change from beginning to end. The solid look of the glass is sleek and elegant, but we do wish there was a clear area at the top to allow the LED EVGA name behind it to be seen in the DG-77.
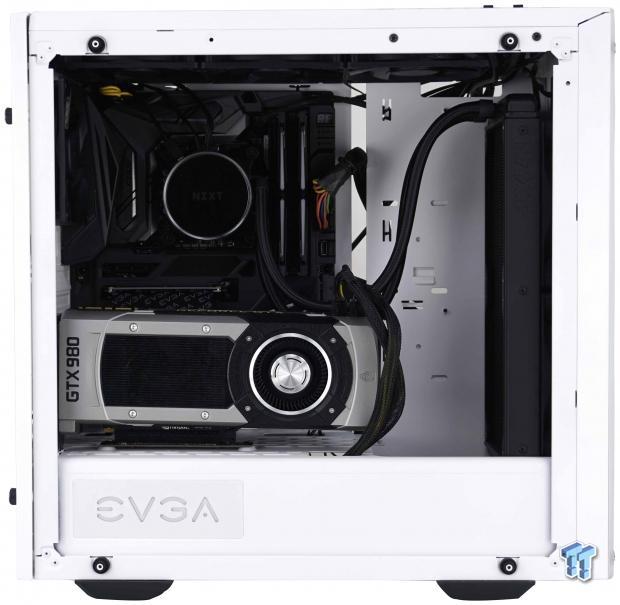
The AIO gave us no issues when installing it, and the motherboard slid right into position as well. Connecting the wires is all fine and dandy, but the GPU mounting in the vertical orientation left the video card leaning and had no support.
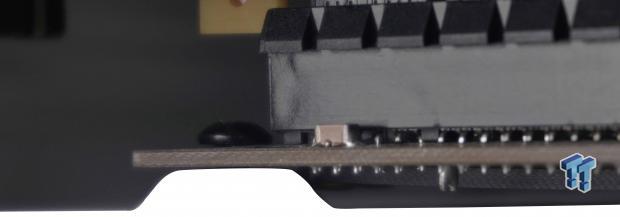
The first, and biggest issue is that when using the mounting locations, they are angled as they rise to meet the PCB. Look under it though. You can see how badly the bottom PCB is flexing to allow the riser card to be screwed in.
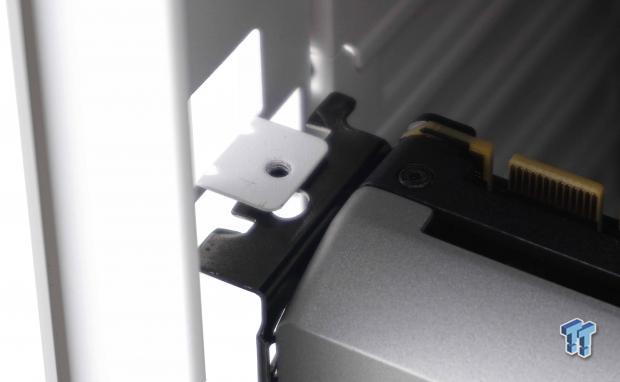
Due to the bad arrangement with mounting the riser below, the screw holes are not even close to being right. It appears that the card must be screwed to the plate outside of the case, and then slid in through the back, because putting a screw and the adapter in is not easy to do, nor does it align.

The dust shield went in as expected, and the PSU installation was a breeze too. The video card though, it is inset into the case and is in no way flush with the back of the chassis, and due to our issues, we can see it just leaning over and putting pressure on the slot and the tab of the video card.
Much of the wiring is easy to maintain and keep out of view. However, there is the HD Audio cable running diagonally across the back, complicating the use of one of the drive trays. We feel more length to this cable is the simple solution, because as it is, it barely reaches, and nearly had us running it in front of the motherboard.
Once shop is closed up, after battling the installation and issues we saw there, we are pleased with the look of the chassis. While it may not have been the easiest chassis to work with, the principle of it all is on point, and does look pretty darn good.
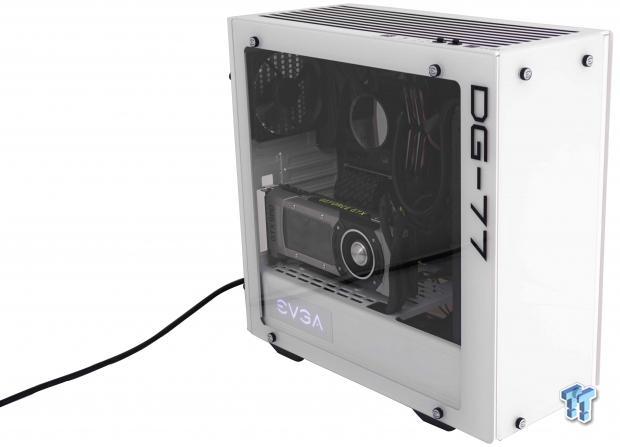
Once powered, the power switch glows the same color as the EVGA on the PSU cover, and we can see all of the components. What we do not see is the EVGA on the front of the case, which is glowing behind the glass. There is software for control of the lighting and other K-Boost features, and when the button is pressed, it is also backlit to show the mode is enabled.
EVGA DG Tuner Software
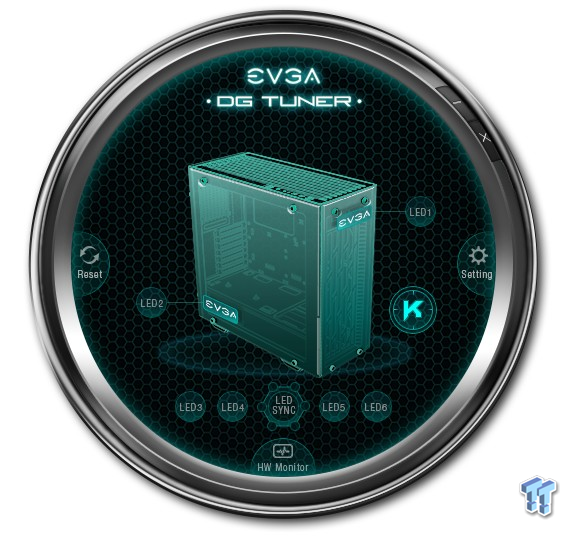
After much hassle, you are granted the privilege of using the DG Tuner software. Once obtained and installed, it gives you control of the lighting, access to a hardware monitor, and most importantly, allows you to click on the "K" to enable K-Boost. This is something with EVGA where they tell the PC to keep the CPU and GPU at full speed, for gaming of course. One thing they do not mention though is that it also maxes out every fan in the chassis too.
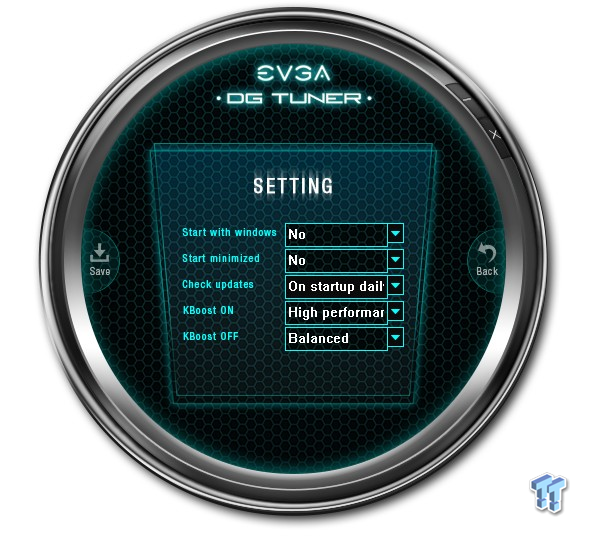
By clicking on the settings tab on the right side of the circle, it offers choices on how the software will run. There are options to start with windows, start minimized, how to update the software, what K-Boost will do when enables, and what happens when the PC is not under K-Boost control.
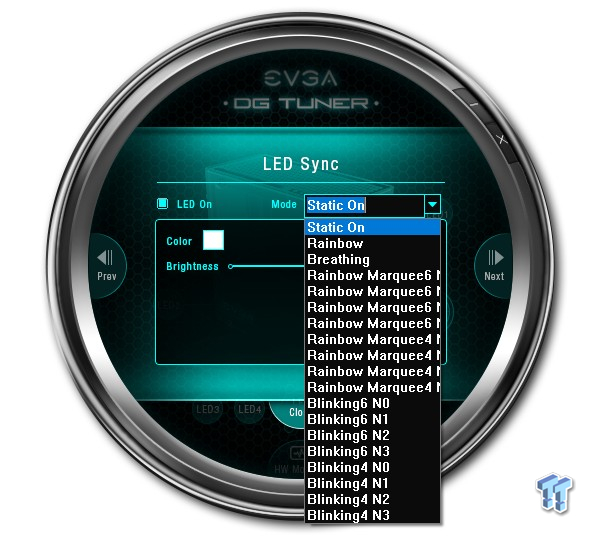
Near the bottom of the first image, there is a small tab for LED sync, and in it, this is what you find. You can turn the LEDs on or off, you can see what the current color is, and even a slider to adjust the intensity. The modes are what will keep you busy for a while, as there are nineteen modes to look through and see which you like best.

If you are concerned with temperatures in the PC, the DG Tuner software will sow you most things all-in-one easy to see chart. With nine major and minor bits of information to be seen all at once, and the ability to pick a spot on the graph for information at a specific time, we really couldn't ask for more out of it.
Final Thoughts
There is a lot to like when it comes to the DG-77. The look is high-end, and there are traces of its DNA from the earlier DG-8 Series. While on the inside, it does share its internal layout and bulk of features that the CMT510 has, but EVGA tried to take every panel and rethink on all of it, and have in some way figured out how to one-up nearly every mid-tower chassis with glass panels. Room for seven fans, room for water cooling gear, and air flow into the chassis which is not hindered as it has been with others. EVGA makes certainty to give you all of the tools for vertical GPU mounting success, but we would strongly urge them to do a video or offer some form of detailed instructions as to how it is supposed to be done properly. The chassis offers K-Boost, with software control, and while not quantified as such, the DG-77 is also an RGB mid-tower offering. One thing is for sure, with the DG-77, EVGA makes sure to turn every stone, and look under every rock when designing the DG-77, as it is unique from any angle, and with the push of a button, you can go from sitting idle to full blast in the blink of an eye.
With everything we liked, we do feel the need to bring up a few things we saw along the way. The HD Audio cable is in our opinion too short. It can reach the bottom left corner, but it is tight and crosses paths with space which can already be occupied. While it is entirely possible that we went about the GPU mounting all wrong, we went with common sense. We tried things a few ways, but with the riser not aligned flat, if mounted to the expansion slot, it would not sit all the way into the slot. We tried various things, and in the end, had a GPU which was flopping around.
There is the fact that we just saw this chassis in a simpler form, but how hard EVGA pummeled that design, we feel that speaks for itself. K-Boost has issues as well. Not the software and what it does, but the way it has to be obtained. To access the download, we had to register an account with EVGA. Once that was complete, we were then pointed towards product registration. Not a huge issue, but remember, we now have the system running, we are in windows, and we are asked for the number, on a sicker, which is now under the case. Once you have sorted all of that, you may now download the software, and set it up to do whatever you feel is best.
On paper, the asking price is not out of line. However, since there are lights you will never see, cable length issues, lack of hassle-free software obtainability, and a GPU orientation that does not want to play well, these all take away from the value. EVGA did make every change possible to the standard version of this chassis, things like cover panels, a good airflow design, adding fine touches, even if they are just stickers, it is apparent that EVGA was trying hard to make the DG-77 stand out in the crowd.
We feel with just a tiny bit more effort and some detailed instructions, the DG-77 would have been a complete success with our full recommendation. As it sits, we can see where EVGA was going and had they got there; they would have had the crème of the crap. However, it is the fine details that make all the difference in the world, and with what we saw from EVGA in the past, we thought for sure we were in for something amazing. In the end, it sort of fell flat, but it was still a very interesting journey to see how this tempered glass and RGB craze is evolving.
Chad's Chassis Test System Specifications
- Motherboard: ASUS Maximus IX Code Z270 (buy from Amazon)
- CPU: Intel Core i7 7700K (buy from Amazon)
- Cooler: NZXT Kraken X62 (buy from Amazon)
- Memory: Team T-Force Night Hawk RGB TF1D48G3000HC16CBK
- Video Card: NVIDIA GeForce GTX 980 (buy from Amazon)
- Storage: Samsung XP941 256GB (buy from Amazon)
- Power Supply: SilverStone SST-ST85F-G (buy from Amazon)
- OS: Microsoft Windows 10 Home 64-bit (buy from Amazon)
 Lian Li B4-mATX Review: a compact mATX SFF case with excellent airflow and premium features
 Ocypus Sigma F36 BK ARGB Cooling Fan Review: high airflow and unified design in one frame
 PCCooler CPS RZ820 Display Review: a flagship-level CPU air cooler with an LCD screen
 MOAIPLAY ORA PRO G1 850W ATX 3.1 PSU Review: high efficiency and 10-year warranty for $119.99
 NZXT H6 RGB+ Compact Dual-Chamber Chassis Review
 Assassin's Creed Hexe to be revealed 'relatively soon' according to insider
 LG claims that you can improve your aim by up to 38% by playing on a 480Hz OLED monitor
 Sony's $500 million lawsuit heats up after choice to end PlayStation disc production
 Spacecraft confirmed to be approaching one of Earth's seven mysterious 'quasi-moons'
 AI models could soon get cheaper as OpenAI, Meta, and xAI enter a new price war
 SAP escapes EU penalty by easing customer lock-in concerns
 Cursor builds AI agent 'Sand' to rival Anthropic's Claude Cowork
 PocketMage is a distraction-free pocket computer with a wizard-themed operating system
 Samsung is holding your health data hostage to train its AI
 MOZA FMP18 Panel Bundle Review: authentic F/A-18 Hornet cockpit controls for flight sims
 Micron 6600 ION 245.76TB Enterprise SSD Review - Best in Class Programming Speeds
 MOZA MA3F EFCM Flight Control Module Review: authentic Airbus A320 autopilot panel for simulators
 Turtle Beach Stealth Pro II Wireless Gaming Headset Review - Premium Sound, Fantastic Features
 MOZA MGX1000 Instrument Panel Review: a realistic Garmin G1000 replica for immersive flight sims
 Simagic Zeus Formula Steering Wheel Review: premium build and advanced inputs for F1 racing
 GIGABYTE X870E Aero X3D Dark Wood Review - A woody goody
 The Super Mario Galaxy Movie (2026) 4K Ultra HD Blu-ray Review
 KTC H49S66 5K2K (5120x1440) 49-inch 180Hz Gaming Monitor Review
 HighPoint Rocket 1604L Gen5 x16 NVMe Software RAID AIC Review: half the price with full 59 GB/s speed
 I stopped digging through Windows menus after I set up this one folder
 Don't sell your Windows laptop until you do these things
 6 PC cleaning mistakes to avoid for safer hardware maintenance
 Phison and Intel Take Aim at Local AI's Memory Wall with aiDAPTIV
 How to Remap Keyboard Keys in Windows using Microsoft PowerToys
 7 tips to organize your Windows files for faster, easier access
 Intel Arc G3 Extreme first impressions with MSI's Claw 8 EX AI+ - Incredible power for an extreme price
 How to fix Wi-Fi Adapter Not Working on Windows laptops: troubleshooting tips
 Hisense U7SG 4K TV: Modern Entertainment for the New Age
 6 underrated Microsoft Word features worth using to boost your productivity