


Our Verdict
Introduction, Specifications, and Pricing
With a company such as FSP, we are still building an opinion on them and their entry to the case market. With only one chassis to base an opinion on, the CMT210, we feel that there is not enough information on hand to make an educated guess on what they are all about, or what the exact market share is that they are trying to accommodate. If we had to conclude from what we have seen already, we feel that with the chassis we looked at, FSP was a bit behind the times, since the CMT210 is an old school looking design, and did not offer the things which many buyers demand of their cases these days.
Although, there is always room to grow and try different ideas when you are just entering a segment of the market. While the CMT210 was a sufficient design for the average user, there were things missing which would have let FSP stand tall in the mid-tower market. In fact, this is the approach which has been taken this time, where modularity, hidden bays, a PSU cover, and lots of tempered glass is used. These features are what customers are looking for in a chassis, and it appears that FSP was not lost on this fact. So, already, FSP is swaying our opinion on what they offer in cases, and have done something which will make many people stand up and take notice.
The chassis we are going to be looking at is the CMT510 RGB from FSP, and it appears to hit all of the checkboxes. There is plenty of room for storage drives, most of the mess is hidden from view, and there are even accommodations for water cooling. While the CMT510 RGB delivers all of those things, there is also a fan and RGB lighting hub included, along with four RGB fans, which helps to take the chassis up a peg compared to the many other cases very similar to it. We are pleased to say, that at least FSP did not go to the same OEM everyone else did with the eight or so cases like this which were nearly identical in all respects. At least FSP is entering the market standing on their own two feet, rather than riding on the coattails of others successes.
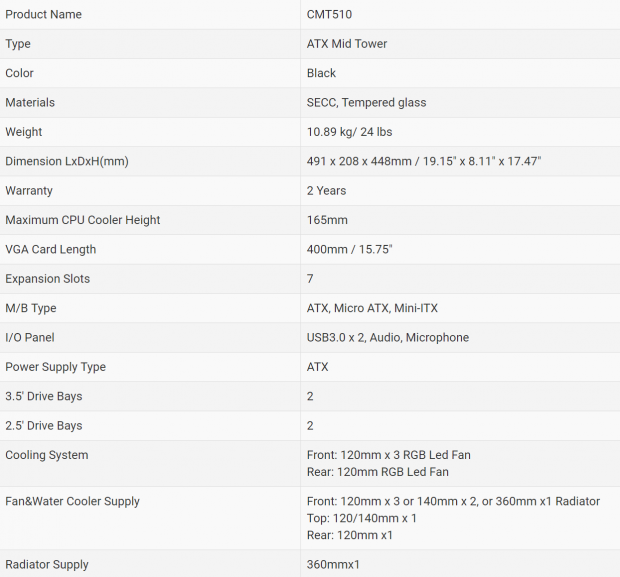
The CMT510 RGB is made of mostly steel, which has been painted black, and all of the surfaces are textured. On three sides of the SECC steel chassis, one can find 4.0mm thick chemically tempered glass panels. Both sides of the chassis, as well as the front panel, are glass, with a high degree of tint to black-out the view on the front and the right side. The CMT510 is 491mm tall, it is 208mm wide allowing for 165mm tower coolers, and is 448mm from front to back. All told, the chassis weighs in at 24 pounds empty, and the bulk of that weight is due to the glass. Video cards can be 400mm in length, dependent on the cooling options, and if there is an issue with the CMT510, FSP covers the chassis with a two-year warranty.
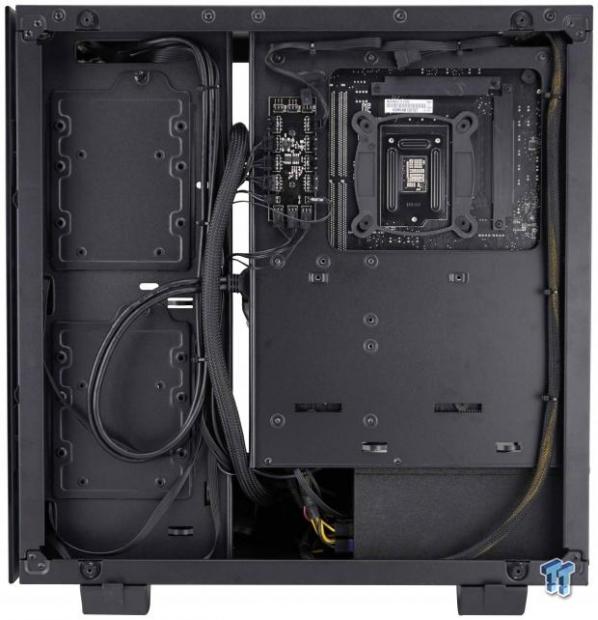
The CMT510 will house an ATX, Micro-ATX, or a Mini-ITX motherboard, and offers seven slots at the back to fill with networking, video, and audio cards. Within the front, I/O panel, a pair of USB 3.0 ports, a pair of 3.5mm audio jacks, and the power and RGB buttons along with the activity LEDs, are all offered. The power supply needs to be ATX form factor to mount correctly, but this is true of nearly all mid-tower cases. The chart shows that there are two locations for 3.5" drives, both of which are mounted on the right side of the chassis interior. However, it explains that there are two locations to mount 2.5" drives, but it only partly true. Both of the HDD trays will also accept 2.5" drives, so it possible to use four of them in the CMT510.
Cooling is handled, right out of the box, with the use of four fans. In the front of the chassis, there are three 120mm RGB FSP fans, and the fourth is the exhaust fan hanging at the back. It is not until you look at the next section that we see mentions of larger fans used. The front of the chassis can take on a 360mm or 280mm radiator, which also means it will allow for a pair of 140mm fans there instead of the trio supplied. The top of the chassis does not have a fan, but near the back of the chassis, you could add a 120mm or 140mm fan. The back of the chassis is restricted to 120mm only, but a radiator can and will hang there too.
We assumed, as long as this chassis has been on the market, that it would be widely available. Sadly, this is not what we are finding on this side of the pond. The chassis was slated to cost just $90, and at that price, the value is high. However, when we looked to get one of the CMT510 RGB cases stateside, we find random sellers as the only source, and they are asking astronomical prices, somewhere near $140 at that. We realize that sometimes products do much better in select markets around the globe, and is it likely that other countries have much better access. While we will be basing our opinion on the $90 price point, as that is what FSP set as the MSRP, we do still have to keep in mind the market here in the US as well.
Our Latest Mid-Tower Cases Review Coverage
Chad's Chassis Test System Specifications
- Motherboard: ASUS Maximus IX Code Z270 (buy from Amazon)
- CPU: Intel Core i7 7700K (buy from Amazon)
- Cooler: NZXT Kraken X62 (buy from Amazon)
- Memory: Team T-Force Night Hawk RGB TF1D48G3000HC16CBK
- Video Card: NVIDIA GeForce GTX 980 (buy from Amazon)
- Storage: Samsung XP941 256GB (buy from Amazon)
- Power Supply: SilverStone SST-ST85F-G (buy from Amazon)
- OS: Microsoft Windows 10 Home 64-bit (buy from Amazon)
Packaging
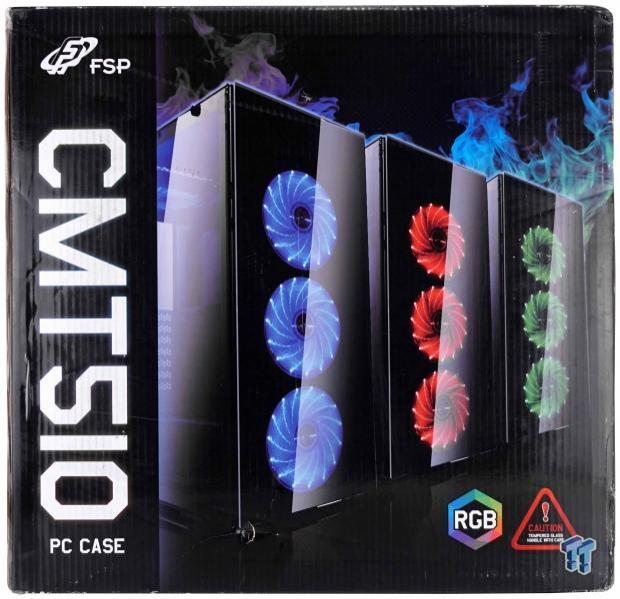
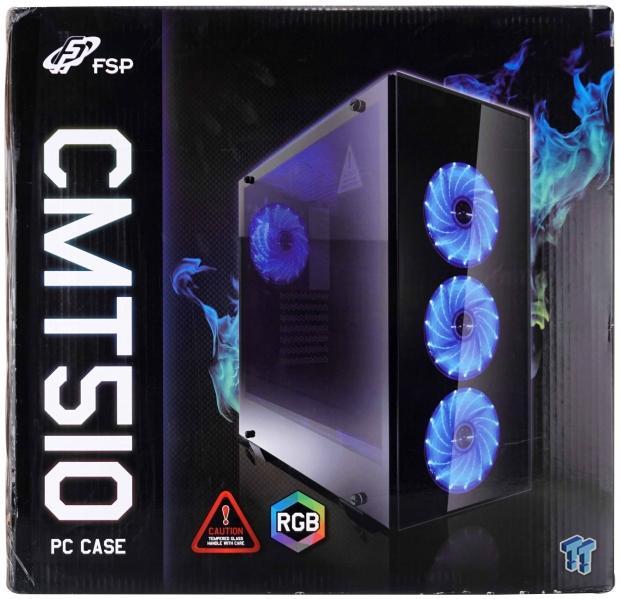
The packaging is fancy, using shiny cardboard and high-end graphics. We see that the left of the front panel is used to display the FSP name and logo, with CMT510 PC Case shown below. The bulk of the panel is used to display the front of the chassis in three different colors, and along with blue flames behind the cases, we see that the CMT510 is RGB capable and that one should be careful handling the box.
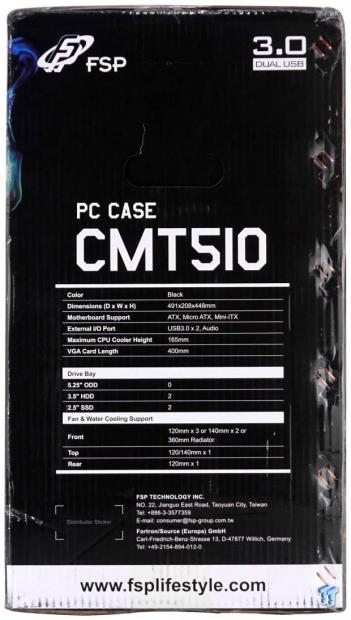
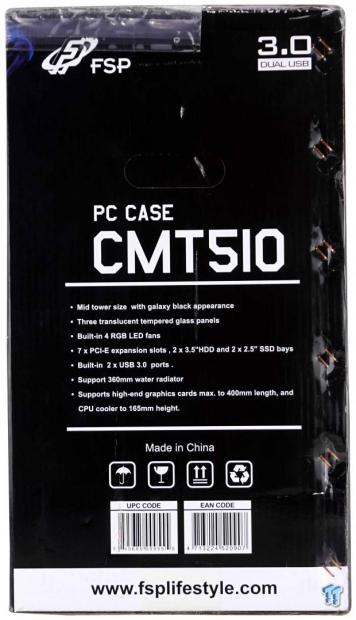
The right side offers the FSP name and logo at the top, next to a mention of the dual USB 3.0 ports. Lower, under the handle, is a specifications chart, while at the bottom, we find the addresses for FSP along with the site address.
Of course, this may be the front of the box, but it was hard to tell, and we are calling this the back panel. Nearly everything found on the opposing panel is seen here, but we do get the chassis in full view this time, lit up with blue lighting to match the flames.
Much of what is found on the side panels is repeated too, but this time instead of specifications we find the list of features. Also rather than addresses, we see icons and barcodes.
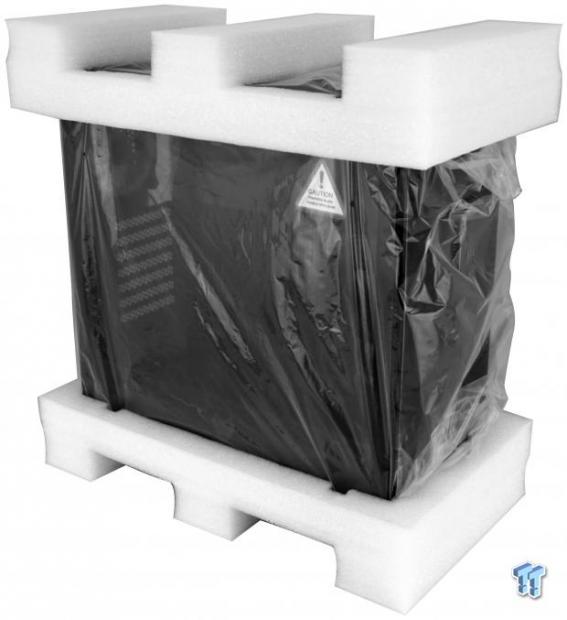
With plastic on the pout side of all of the glass panels, it is FSP's first line of defense. The chassis is wrapped in a bag to keep the paint from getting scuffed, and for the times when your shipment is not appropriately handled, FSP uses dense foam caps on the top and bottom. All of the parts together worked perfectly. The box may look a bit beat, but the chassis is in beautiful condition under all of this.
FSP CMT510 RGB Mid-Tower Chassis
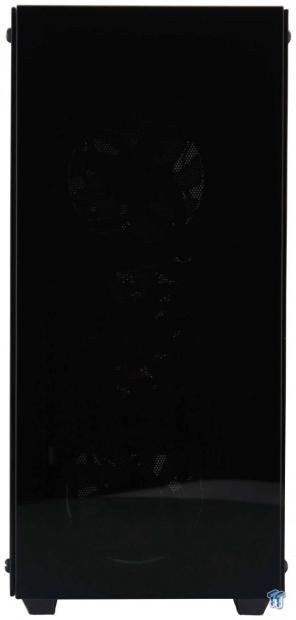
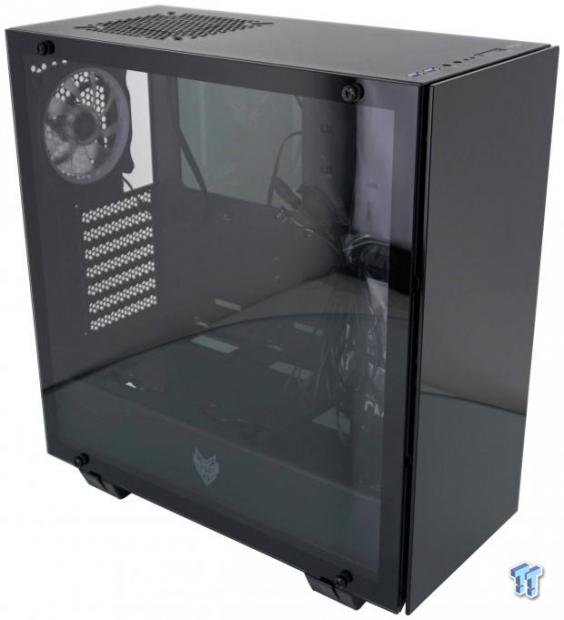
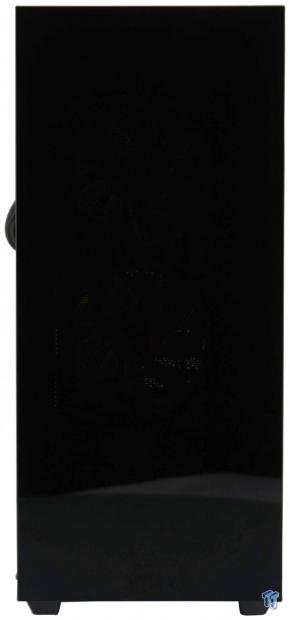
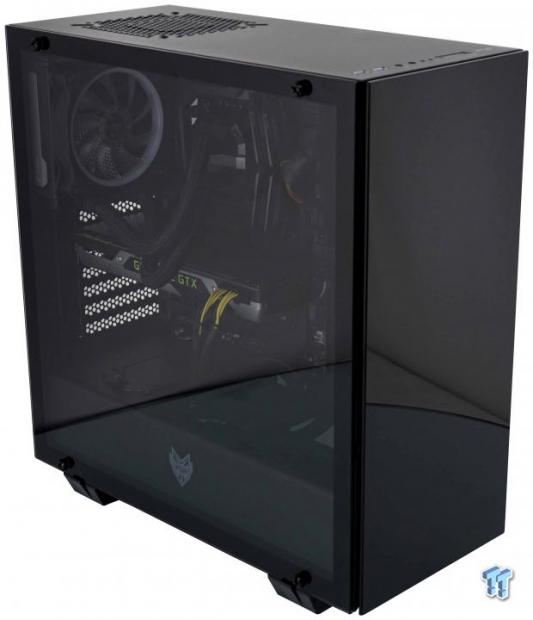
Looking at the front of the CMT510, all we see is the panel of dark tinted glass. There is no visible frame around it, it breathes from all sides of the glass, and the only thing breaking up the sleek tower appeal, is seeing the thumbscrews on the side panels.
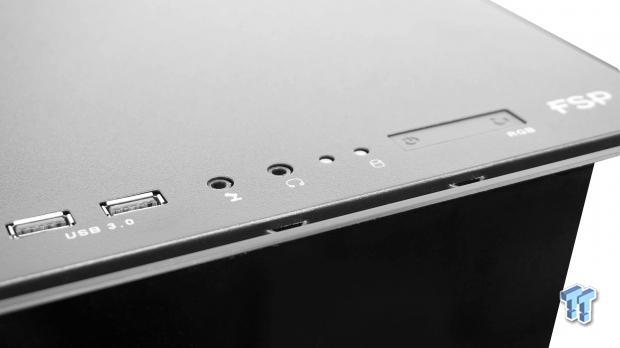
Just behind the glass, we locate the front I/O panel. In it, there is a pair of USB 3.0 ports on the left, followed by a pair of HD Audio jacks. We then run into a pair of LEDs, and a section housing both the power button, as well as the RGB, LED button.

The top of the chassis is steel and offers a single fan location near the back of the chassis. From this angle, we can also gain perspective on the gap between the front glass. While not that wide, it can draw from all sides at once, which is less restrictive than slots down the sides in a framed bezel design.
The left side of the CMT510, is all glass, and the feet help to hold the panel in place, but the thumbscrews lock it into place. The edges of the glass are painted to eliminate view of the frame, while still offering an unimpeded view inside of the case.
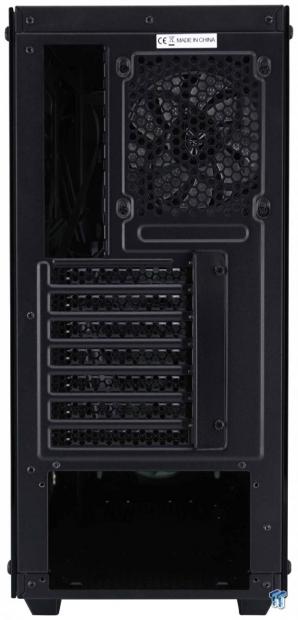
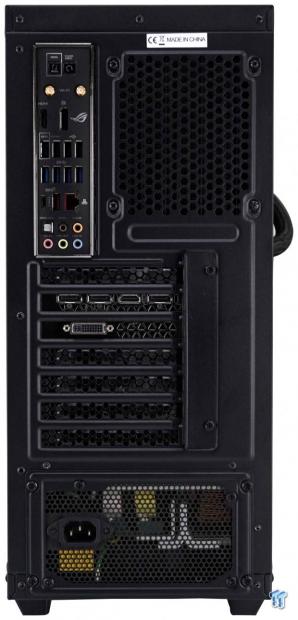
Around the back of the CMT510, the rear I/O area and exhaust fan are placed near the top. The expansion slots use ventilated covers, are accessed externally, and rather than more ventilation, the cover panel is solid steel. The bottom is where the PSU slides into the chassis, and the mounting plate is in with the hardware.
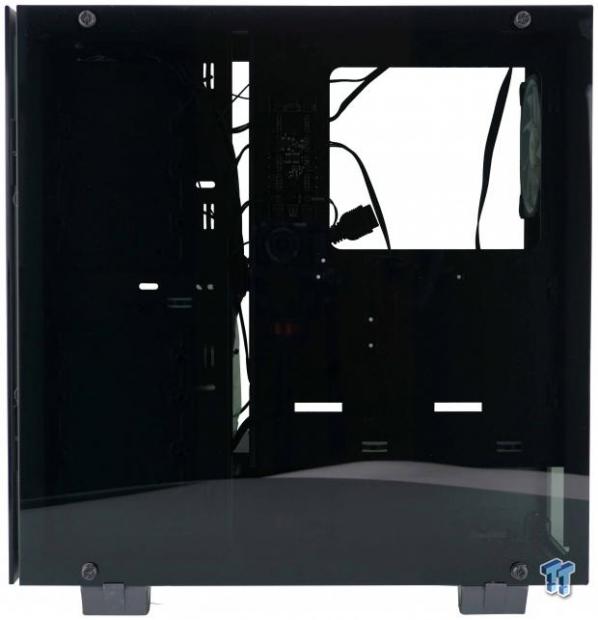
Looking into the right side of the chassis, we see slightly less, as this panel does offer some level of tint. We can still see through it, which means you may want to work a bit harder on wire management.
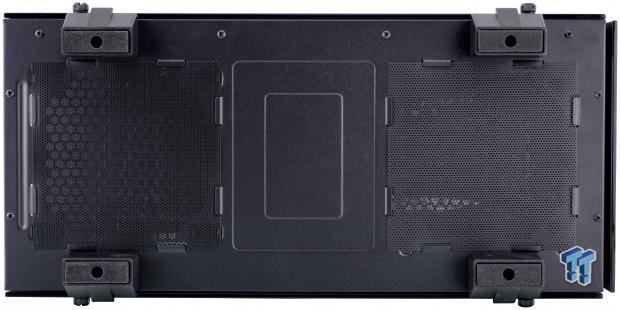
The feet which support the CMT510 are as far to the sides as they can be, and all have rubber pads on them. There is a dust filter under the PSU at the back, as well as one near the front for some passive ventilation offered there.
Inside the CMT510 RGB
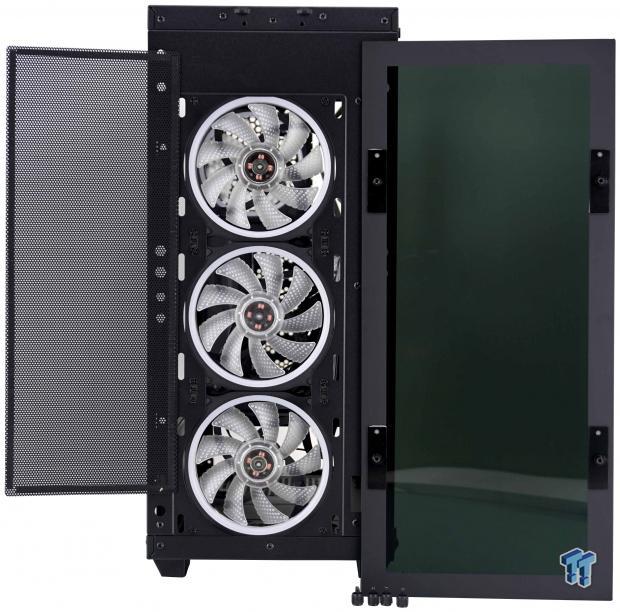
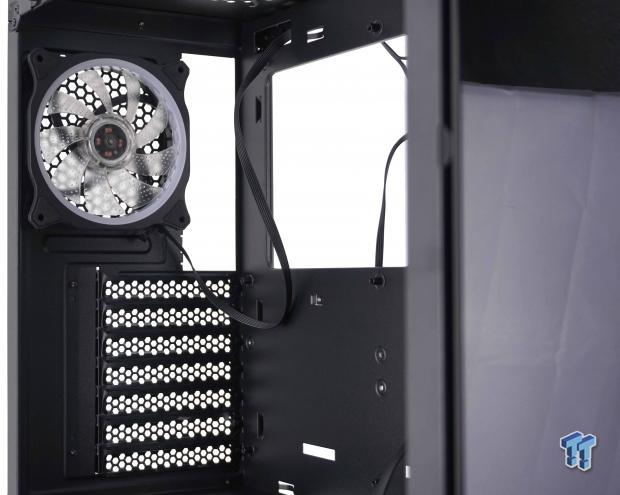
Removing the front glass is a bit of a chore, as you have to reach inside the case and remove four thumbscrews, which is not all that easy to do, especially when PSU wires are involved later in life. However, removing it exposes the magnetic dust filter, and while we can see three fans installed, we can also see holes for 140mm fans.
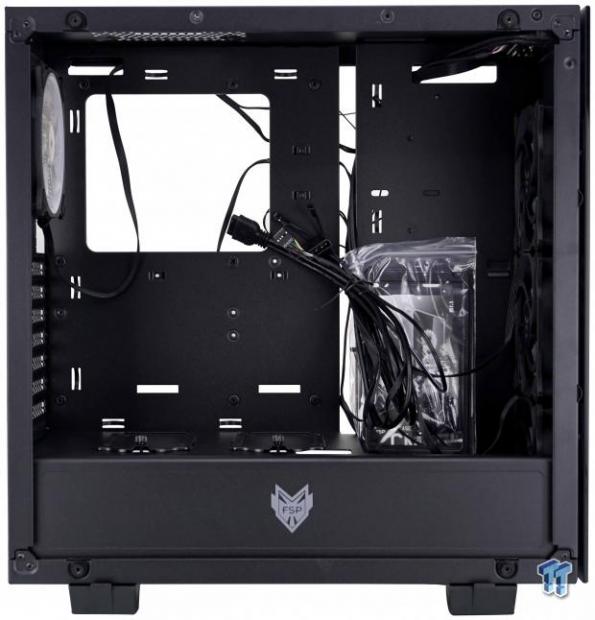
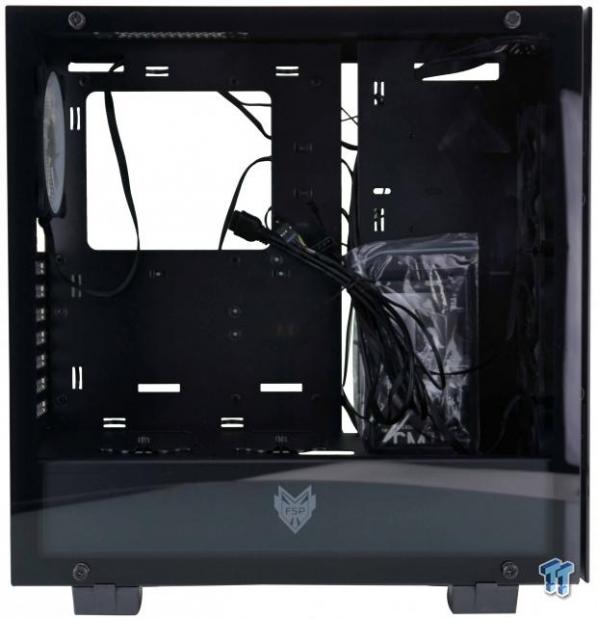
Getting rid of the side panel is easy, as once the screws are out, the feet still hold the glass there until you tilt it outward and lift it off. Once gone, we see all of the room inside of the case. We also see that the wires are tied to the motherboard tray, and is also where the hardware is found as well.

Hanging on the front of the chassis are the three pre-wired RGB fans, which takes care of fan speed and lighting. Just to the right of the fans are the thumbscrews for the glass panel, and while these may be easy to get, imagine the ones on the other side of the case.
The motherboard tray comes to an end, with a gap for wires, and then another section of steel blocks the view past. Besides the cooler access hole, there are two more holes for wires to pass through, and eleven locations to strap wires to.
The fan in the back of the chassis is also pre-wired, with excess, so it should not interfere with motherboard installation. Since the cards are externally secured, all we see here is the threads from the screws which mount the cover plate.
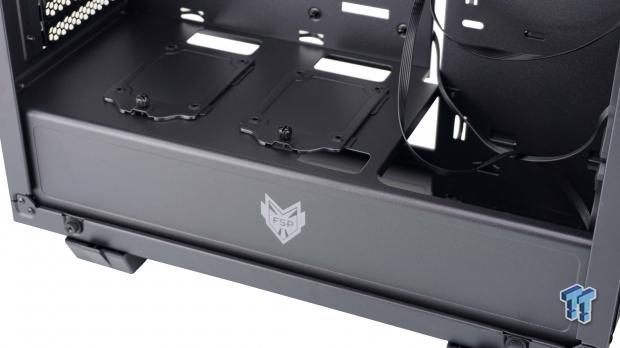
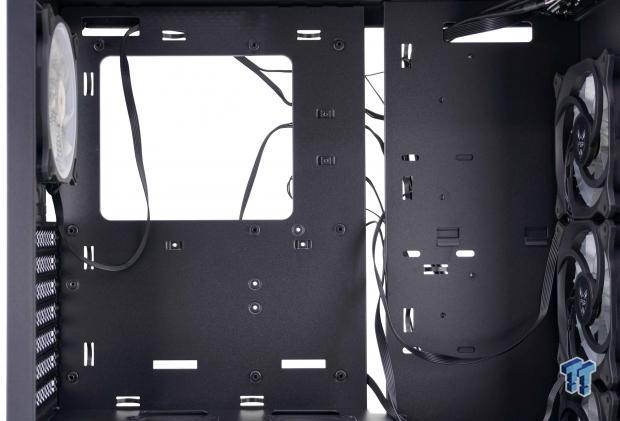
The PSU cover has a large gap at the front of the case, which allows for fans and radiators to be placed there, without conflict. The side of the cover has the FSP name painted on it, while the top offers three holes to pass wires through, and a pair of trays to mount 2.5" drives to them.
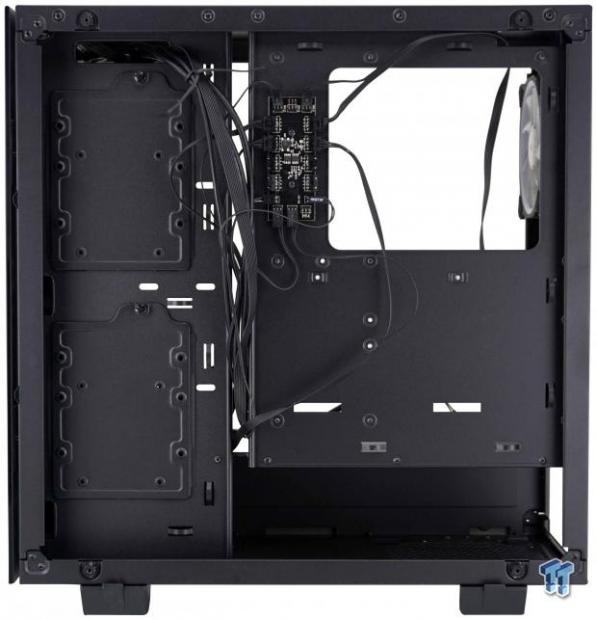
Behind the motherboard tray, we find a hub near the top, which controls the RGB lighting, but is also a power source for the fans too. The steel panel to the left is where you can hang 3.5" or 2.5" drives, and at most, there is 17mm of room between the steel and the glass panel.
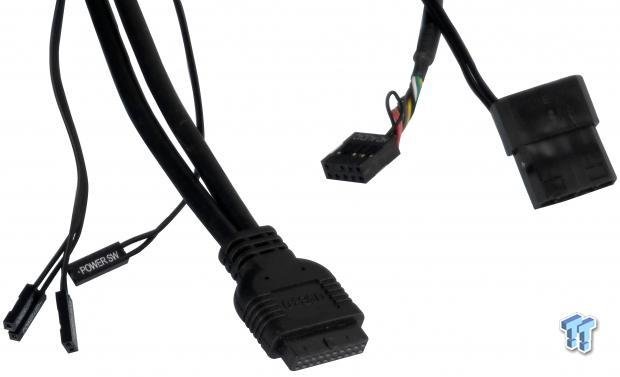
The chassis wires cover everything found on the front I/O panel, plus the 4-pin Molex connection which powers the hub. On the left, we have the switch and LED wires, then the native USB 3.0 cable, and another cable for HD Audio connectivity.
Hardware & Documentation
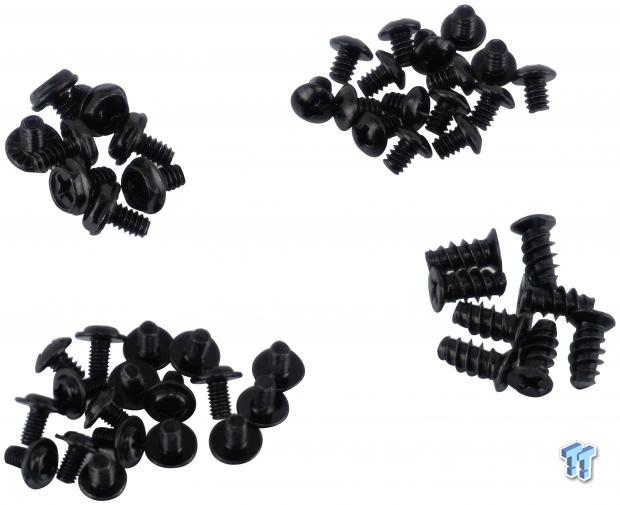
In the bag of hardware, we found all the screws seen. At the top, to the left, we find eight hex-head screws which are used to mount the PSU and the PSU plate, and next to it are the HDD screws. At the bottom, we find the 2.5" drive and motherboard mounting screws, and FSP also sends eight fan screws in case you want to change the cooling layout.
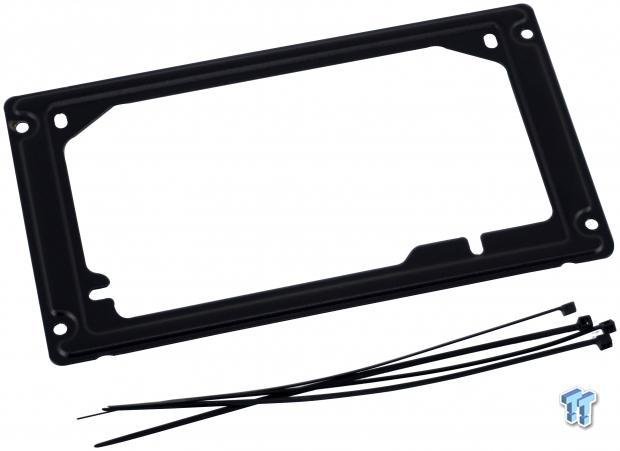
We finally get to the PSU mounting plate we have mentioned a few times now. It is made of steel, painted black, and installed with the raised support sections facing out. For the wire management, FSP does offer four zip-ties, but more will be needed to keep everything clean behind the motherboard tray.
The manual starts out with a parts list, describing what we explained when we showed you all of the screws. It carries on with a basic installation guide, which is there to sort out any questions the first time builder may have. To be blunt, if you have ever built a PC before using this chassis, everything is self-explanatory, and referring to the manual at all is highly unlikely.
Case Build & Finished Product
From beginning to end, the front of the chassis does not change one bit. If you opt to change the cooling, the view to come once powered will look different, but as of now, it is just a reflection of whatever is in front of all that black glass.
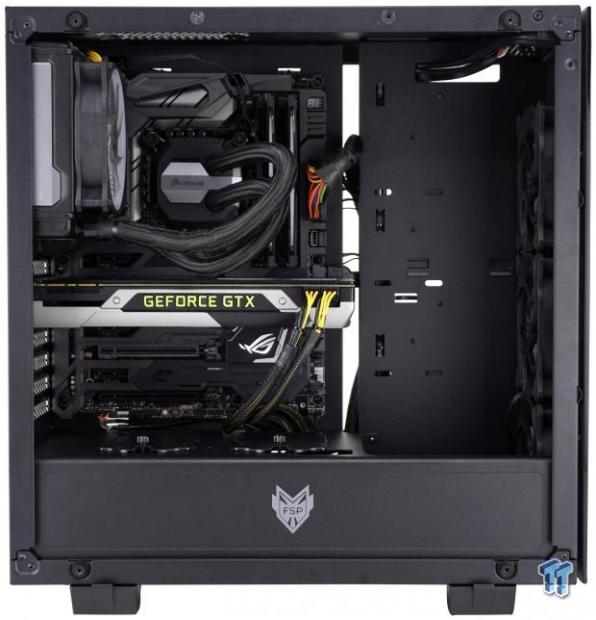
With some effort, the build inside of the chassis can look clean as a whistle. The motherboard fits, with room for only a fan at the top. The video card is level, and we were also able to install an AIO at the back while keeping the aesthetic appeal the 120mm fan in the front is there to offer.
The dust shield gave us no issue, but when installing a GPU, the opening to the right of the slots is not as wide as it could be. This makes it, so you have to weasel the card in with force, and we don't care to force a card in and have something go gong with the slot alignment. As to the PSU, loosely mount the plate to it, slide it into the chassis, the mount the plate and tighten the PSU screws.
The fan wires are what will give the most trouble, figuring out how to route them cleanly, and still connecting them to the hub, was what took the most time. The PSU wires fall into place well, and we found enough tie points not to have a rats nest viewed through the glass.
All back together, the CMT510 RGB is still as sleek and simplistic looking as it was earlier, just that now we can see some hardware filling up the empty void inside. While the front glass screws are tough to get to, we do like the lack of thumbscrews on the front.
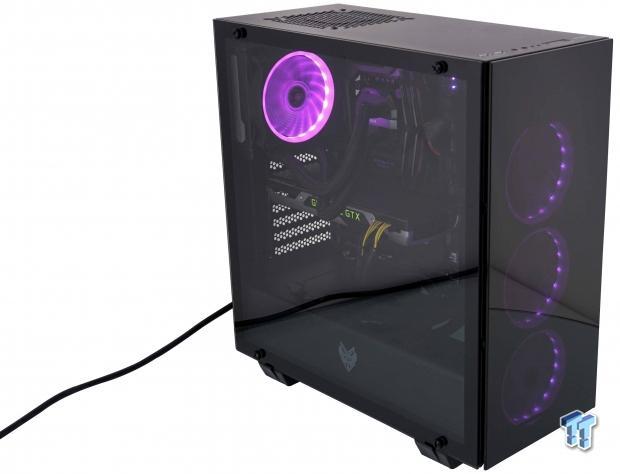
Once power is added to the PC, the chassis comes to life in a glow of a select few colors. We saw green, red, blue, white, yellow, and then there is the purple color we see in this image. Noise is kept low too, as noise climbs to only 33 dB a foot away from the chassis.
Final Thoughts
We are glad that FPS took the time to offer something original while following many other companies into this section of the case market. They could have been the ninth or tenth manufacturer to send us the same old chassis, but they took their own path, and we applaud them for it. The fact that they offered a frameless bezel on the front, and the screws are hidden; it raises the bar for what to expect in a chassis wrapped in tempered glass. Speaking of that, we also love the way the feet are designed to hold the side panels in place.
There is no fear of removing the screws and the panel falling off of the chassis here. Internally the CMT510 RGB is like many others, but we feel the lack of an HDD cage is also a plus. FSP finds a way to allow for four storage drives, and two can be 3.5" capacity monsters if need be too. On top of that, there is a hub to control lighting and does limit the ability to control the fan speed, but with the silence offered out of the box, the cooling is sufficient enough not to need to adjust it.
There are some things we wish were a bit different though. The top of the chassis could offer more cooling options, and there is a sticking point between us and the front thumbscrews. If there is a drive installed in the trays near the front of the case, they need to be removed to access the screws. This means any time you want to change fans or clean the intake filter; you do need to contemplate removing components to do so. We do wish the chassis was slightly taller, as then more water cooling options become available that can be found in other mid-towers, and we wish the GPU were easier to install. However, everything about the chassis works as intended, but looks may have superseded function a bit in this design.
In the end, the one other thing that will take the wind out of the sales of anyone on this side of the pond, it's the lack of availability and the price you have to shell out if you can find it. The CMT510 RGB was slated to cost only $90, and at that price, we feel it is a fair trade. The CMT510 RGB lived up to what we expected of it, and we can easily see paying near that price for one. However, the reality is we found two places we are not sure we would even give our credit card number to, and at nearer $140 than $100, the pricing is way out of line.
This is the reality for those in the US sadly, and had we been able to grab it at Newegg or Amazon at a respectable price, we would have gone ahead and recommended it. For those of you with access, by all means, give this FSP CMT510 RGB at try. As for those on the North American continent, wait it out and see what happens, as now is not the right time to strike.
Chad's Chassis Test System Specifications
- Motherboard: ASUS Maximus IX Code Z270 (buy from Amazon)
- CPU: Intel Core i7 7700K (buy from Amazon)
- Cooler: NZXT Kraken X62 (buy from Amazon)
- Memory: Team T-Force Night Hawk RGB TF1D48G3000HC16CBK
- Video Card: NVIDIA GeForce GTX 980 (buy from Amazon)
- Storage: Samsung XP941 256GB (buy from Amazon)
- Power Supply: SilverStone SST-ST85F-G (buy from Amazon)
- OS: Microsoft Windows 10 Home 64-bit (buy from Amazon)
 MOAIPLAY ORA PRO G1 850W ATX 3.1 PSU Review: high efficiency and 10-year warranty for $119.99
 NZXT H6 RGB+ Compact Dual-Chamber Chassis Review
 Lian Li HYDROSHIFT II 360P OLED Curved Liquid CPU Cooler Review
 ID-Cooling FROZN A620 SLK CPU Cooler Review
 GAMDIAS Atlas P6 CG Dual Chamber Mid-Tower Chassis Review
 HDMI 2.2 products are coming in 2027 as chip makers begin sampling FRL2 silicon this year
 Solo dev tries to make his own GTA 6 with AI, as he got tired of waiting for Rockstar
 Repair channel buys ASUS RTX 4090 for $222 and finds plastic die with fake NVIDIA markings
 Epic's gen AI use deters partners, Vampire Survivors x Fortnite might get cancelled
 Sony seems to confirm singleplayer first-party PlayStation games will remain console exclusive
 NVIDIA GeForce GTX 1650 modded with 8GB of GDDR6 memory doubles performance in God of War and Unigine Superposition
 Apple will be working with Intel to design and build its chips in the USA, confirms President Donald Trump
 GTA 6 pre-order date revealed by Rockstar
 Anthropic's CEO confirms he can be fired as CEO through the company's own authority
 Speed Racer (2008) 4K Ultra HD Blu-ray Review: a stunning remaster of the cult classic
 Navman MiVue Smart True 4K Surround Dashcam Review - Seeing In All Directions At Once
 IQUNIX Magi96 Pro Aluminum Low Profile Mechanical Keyboard Review - Premium Build, Satisfying Sound
 Asetek Forte S-Series Racing Simulator Bundle Review
 Razer Pro Type Ergo Wireless Split Ergonomic Keyboard Review - Built for Comfort and Support
 ASUS ROG Strix Morph 96 Wireless Gaming Keyboard Review - Great Performance, More Affordable
 SAPPHIRE Radeon RX 9070 GRE PULSE OC Review - A New 1440p Challenger Has Arrived
 I read the Windows Backup app screen carefully, and it does not back up what most people think
 Low Sound Volume on Windows 11? How to fix audio issues and restore normal volume
 8 Critical Warning Signs You Should Never Ignore in Windows 11
 This Windows security feature protects Documents from ransomware, but it is off by default
 Windows 11 already has a voice typing tool, and it is the one most people are not using
 Quick Assist is the only remote-support tool I open when a relative calls about their PC
 The PowerToys utilities I keep enabled on every Windows 11 PC, and the ones I turned off within a week
 TweakTown's Best of Computex 2026 Awards - The Best Hardware, Gaming Gear, and AI
 Phison E37T SSD Controller Exclusive Preview - The Fastest DRAMless SSD Platform Yet