
The Bottom Line
Introduction, Specifications, and Pricing
Fresh from the floor at CES, Corsair has sent over another chassis for us to have a look at. Straight off the product page, we are told that this a clean and minimalist design, but to be fair, we have seen many similar cases as of late, and this is what Corsair came up with to address that part of the market.
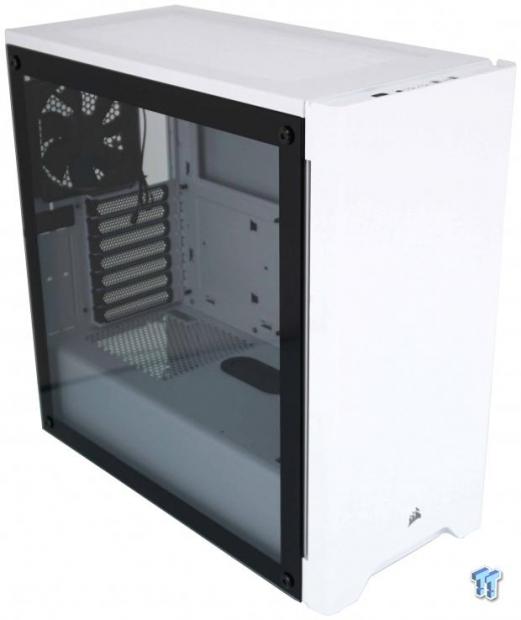
It is not all that rare that we see a chassis with tempered glass, an open internal layout with hidden storage drives, or that come with solid bezels which draw air in from the sides. To be blunt, there is only one new addition to the world of cases that Corsair has opted to employ in this chassis, but we will save that tasty bit for later.
In no way do we blame Corsair for jumping on the wagon here. Many people are brand loyal, and up until this point, Corsair offered nothing precisely like this chassis. We also know, since we see about every trend to hit cases, what is offered in their latest chassis is what the buyers have been gravitation to.
It only makes sense to ensure that no matter what side of the coin you are coming from, that there is an option to get the same thing from them, and of course, making money where they otherwise would not have. It is standard business practices, but is Corsair too late to the game to get a foot in the door, with so many others like this already widely available.
We have been addressing things found within the newest Corsair chassis, the Carbide 275R Mid-Tower Chassis. With a chassis that offers up all of the standard options the market expects to see in a chassis, color options of black or white, use of tempered glass on the left side, all while ignoring the RGB fad which has some up in arms with no vision of usefulness to the feature.
That is not to say it cannot be added for those who like it, but as shipped, the chassis delivers only a small LED worth of light under the front bezel. Even though the layout is nothing new, we do still have much to cover as we show off the latest Corsair Carbide 275R Mid-Tower Gaming Chassis from Corsair.
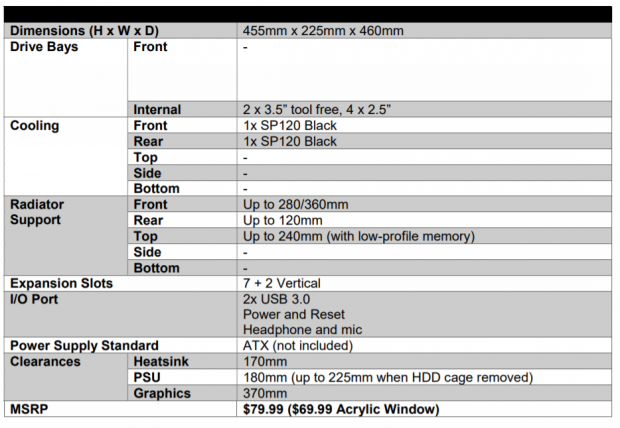
The chart we are looking at is from the press kit, and we would assume once released, a more thorough list of the specifications can be had on site. What we are shown is the dimensions first of all. The 275R stands 460mm tall, it is 455mm from front to back, and is 225mm in width. There are no accommodations for external bays of any kind, but there are six locations for storage drives inside of the chassis. Four drives have to be 2.5" as the tray hanging on the back of the motherboard tray will not house larger drives.
For 3.5" drives, there are two bays, inside of a cage, which uses plastic trays to mount the drives to. In the back of the chassis, there are seven standard expansion slots, but Corsair also adds two more slots vertically so that a GPU can be mounted there. You will, however, need to purchase the riser as one is not shipped with the chassis. At the top of the chassis, within the I/O panel, there is a pair of USB 3.0 ports, a power and reset button, along with a pair of 3.5mm jacks for audio.
Cooling of the case is accomplished with a pair of fans out of the box. Both fans are black, both fans require a 3-pin connection to power them, and both are SP120 fans from Corsair. One fan is found in the front of the chassis, while the other is in the back exhausting hot air. As for what can fit, the front of the chassis will house three 120mm fans or a pair of 140mm fans.
The rear of the case is built for 120mm fans only, and the top of the chassis will accept a pair of 120mm fans, with no option for 140mm fans there. Radiator space is the same as the fan support. You can put a 280mm or 360mm radiator in the front, and possibly one in the top as well. The issue here is that you need low profile RAM, and quite possibly, motherboard heat sinks could play a factor on fitment as well.
Clearances inside of the chassis are quite good, and will accommodate many standard size products. If you are looking to use an air cooler on the CPU, you have 170mm of space inside to fit it. The PSU is somewhat limited to 180mm of room, but the HDD cage is removable, which opens things up to 225mm of room for the PSU and wires. Video cards can be up to 370mm in length, but this can be reduced by the size of the radiator used in the front of the chassis.
While at first, we assumed that color was the only option when buying the 275R, but this chart delivers pricing for both the tempered glass version, as well as a more affordable acrylic option. The MSRP for the tempered glass option, in black or white, should be found near the $79.99 mark. The acrylic versions should be ten dollars cheaper when they arrive at Newegg and Amazon that is. As of this moment, there are no listings to go by for reference, so we can only assume release pricing will be fair, and close to the cost that Corsair feels it is worth.
Chad's Chassis Test System Specifications
- Motherboard: ASUS Maximus IX Code Z270 (buy from Amazon)
- CPU: Intel Core i7 7700K (buy from Amazon)
- Cooler: NZXT Kraken X62 (buy from Amazon)
- Memory: Team T-Force Night Hawk RGB TF1D48G3000HC16CBK
- Video Card: NVIDIA GeForce GTX 980 (buy from Amazon)
- Storage: Samsung XP941 256GB (buy from Amazon)
- Power Supply: SilverStone SST-ST85F-G (buy from Amazon)
- OS: Microsoft Windows 10 Home 64-bit (buy from Amazon)
Packaging

Using plain cardboard with black print on top of it undoubtedly saves cost, and allows Corsair to put the money into the chassis. In the center of this panel, we find the Corsair logo with a rendering of the chassis in front of it. At the bottom, we see the full name of the chassis, and that it is a mid-tower gaming chassis.

Moving to the next side of the box, we run into a fragile sticker and another denoting which of the optional cases are inside. Below the handle is a list of specifications in three languages, with a pair of view of the chassis rendered below that.

If the shipping label were not blocking the view, what you would see is an exploded diagram of the Carbide 275R on the back panel. Features are marked A through G, and near the bottom, there are text descriptions of what each of them is.
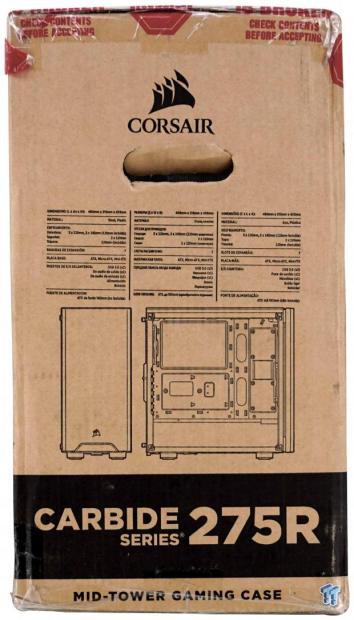
As we look at the last panel of the packaging, we see the company name and logo at the top, and off-kilter list of specifications, the same renderings from the opposing panel, and the name and type of chassis it is at the bottom.

Corsair took much effort to protect the Carbide 275R. The glass has plastic applied to both sides before it is mounted to the chassis, and then the entire chassis is wrapped in a plastic bag. So far we are protecting the paint and finishes. Then Corsair uses tick dense foam end caps to ensure the bumps and bruises to the box do not make it to the chassis. We also see that they added foam to cover the glass side panel as well, all working together to deliver this chassis in superb condition.
Corsair Carbide 275R Mid-Tower Gaming Chassis

The front of our 275R is white, rounded on both sides, and has a hairline texture to look like brushed metal. Near the bottom, we see the Corsair logo and a place for air intake as well as a grab location to remove there bezel. It is also where an LED is positioned to offer a glowing effect to the front of the chassis, on whatever it sits on.

At the top of the chassis, contained in the front bezels, we locate the front I/O panel. From left to right, there is a backlit power button, a much smaller reset button, a pair of 3.5mm jacks marked for audio, and a pair of USB 3.0 ports.
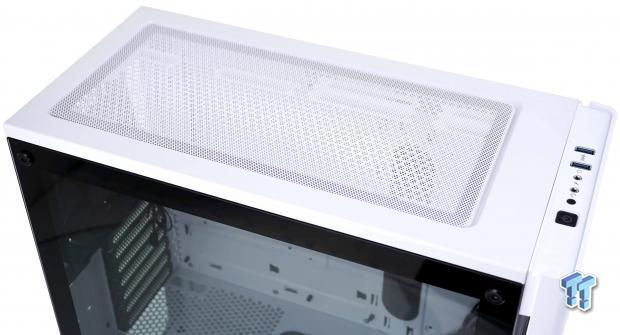
The top of the chassis is made of steel, with a lower center section used to help ventilate the case. Covering the area is a plastic cover, which magnetically attaches to the chassis, to block the view of the larger honeycomb shaped holes under it.
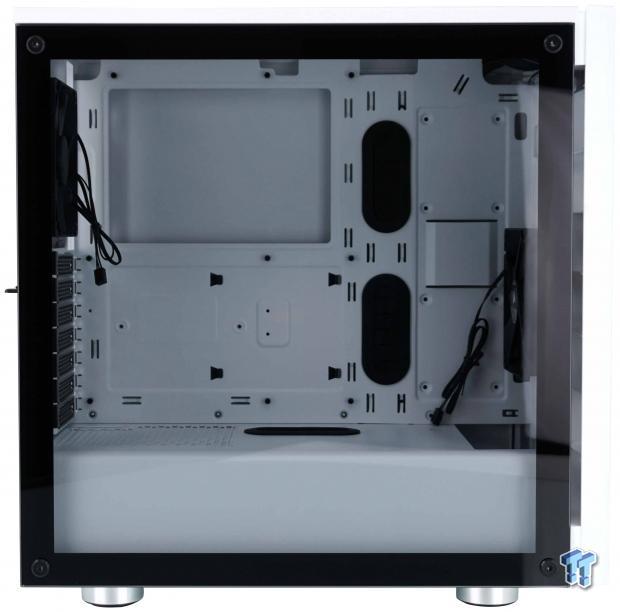
The entire left side of the 275R has tempered glass covering everything. The edge is painted black to contrast all of the white but also blocks the view of the frame. We also see screw heads this time, rather than bulky thumbscrews usually used to keep the glass in place.

The back of the chassis offers the rear I/O and an adjustable fan location at the top. In the middle are the standard seven expansion slots, but if you gain access to a PCIe riser cable, you can also mount the GPU vertically. At the bottom is where the PSU gets mounted, and we can see the dust filter below comes out the back.

The right side of the chassis is a solid steel panel, and at the back, we find a hand grip as well as thumbscrews to lock it in. Also, if you look at the bottom, there are the fat exposed metal looking feet to help dress things up.
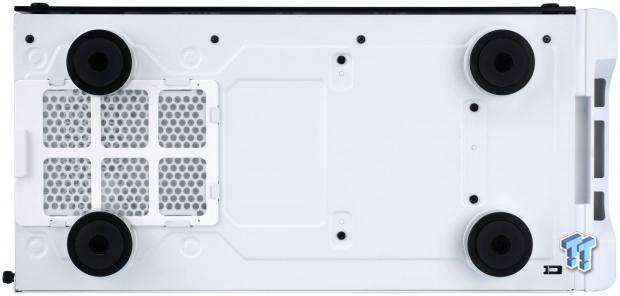
Under the chassis, we are drawn to the feet first. Each of them is placed for stability, and use a rubber pad to give it grip. We see the dust filter for the PSU at the back, and the four screws in the middle and between the front feet allow the HDD cage to be removed.
Inside the Carbide 275R
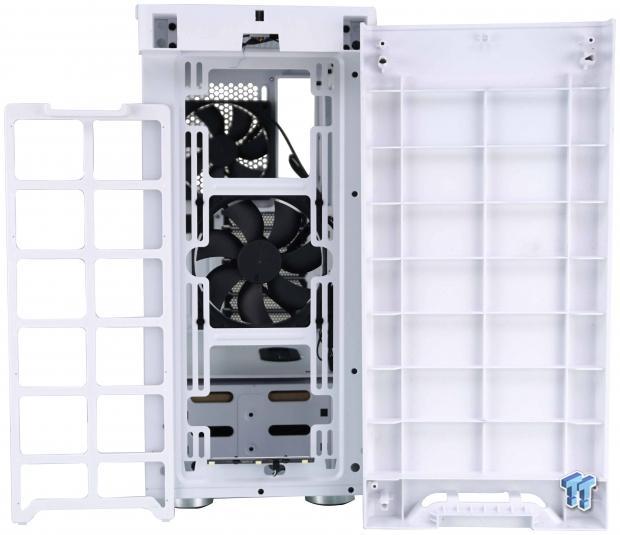
The front bezel will pull away from the chassis, which gives access to the dust filter for cleaning. You also need to do this if you plan to change the cooling configuration. Notice though, there are no wires to deal with, which is a plus to any chassis.

Inside of the box, there is an Allen key in a bag floating around, and as seen in this image, it is used to remove the tempered glass side panel. Keep in mind that the screws are aluminum, and the chassis is steel, as it will come up later in our review.
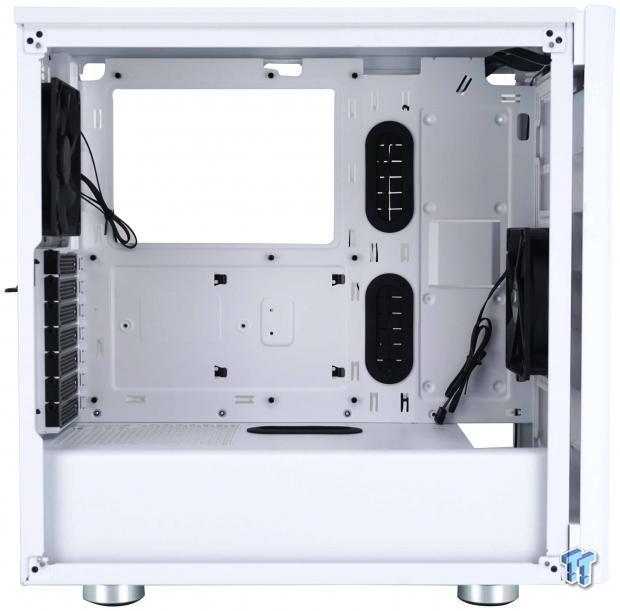
With the glass gone, the view inside does not change much. We still see the large chamber for all of the major components, while the lower section is blocked from view by the PSU cover.

Inside the front of the 275R, we see a single SP120mm fan there needing a 3-pin fan connection to be powered. There is room for more fans or 140mm fans, and with the notch cut out in the PSU cover, longer radiators have room to be fitted.
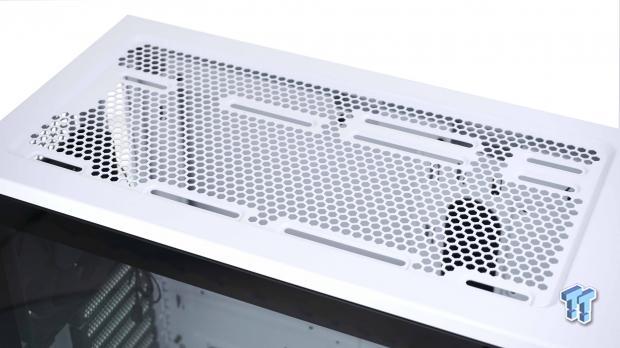
While there was no mention of it in the chart, we can see that the top of the chassis offers room for a pair of 120mm fans as well as a single 140mm fan. The fans will blow through the honeycomb mesh and can be hidden from view with the cover, once everything is installed.
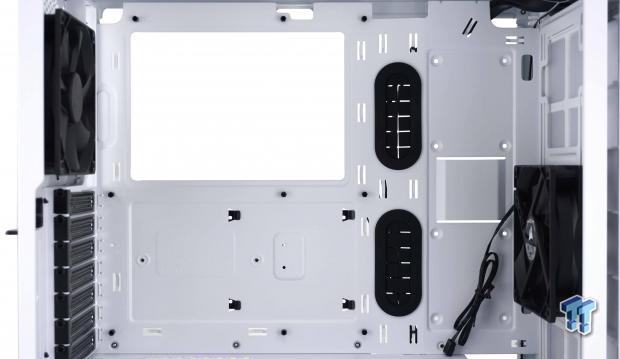
The motherboard tray has a wide opening to access CPU cooler backplates, and two of the six openings have grommets in them. The standoffs are pre-installed, with a helper stud in the middle, and at last count, there are eighteen places to tie wires to.
Inside the Carbide 275R Continued

The PSU cover is notched at the front as we addressed earlier, but there is also another grommet for connecting the motherboard and powering the GPU. There is an odd screw hole, we assume for a GPU support of some sort, and there is mesh over the PSU so that the PSU can be oriented either way.

The back houses the second SP120 fan, but we can also see that the seven expansion slots are accessed internally. The +2 slots use a cover plate, where the screw is on the outside, and there are extra screws in the hardware to use there.
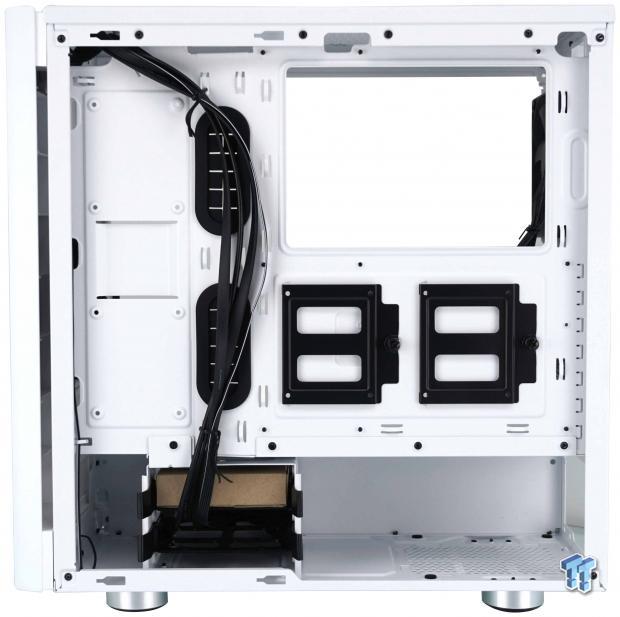
Corsair straps the wires to the motherboard tray, as it divides four locations for 2.5"drives. Two need to be mounted to the motherboard tray, while the other two can fit in the black trays. With 25mm of room overall, we see no issues forthcoming.

Those of you still spinning discs, Corsair provides this removable cage with two bays. These trays can also be used for 2.5" drives and screws, or use the pins on 3.5" drives.

Without removing the HDD cage, there is limited room for a decent sized PSU along with the wires. Since the PSU has to go in first, modular connectivity can be tough, but it is doable.

The cables are long enough to get where they need to be, without a bunch of excess that needs to be tended to. All of the wires are black, and from left to right, we see the native USB 3.0 connection, the power LED, power switch and reset connections, and for audio pass-through to the bezel, there is the HD Audio connection too.
Hardware & Documentation
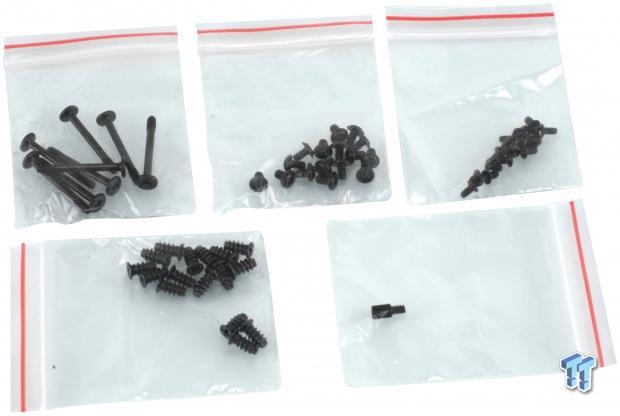
Found inside of a box which is shipped in the HDD cage, we pulled out five bags of hardware. There is a bag with eight long fan screws, followed by a bag with the motherboard, PSU and GPU screws, and another with M3 screws for 2.5" drives. In the bottom row, we are looking at eight standard fan screws, and the last bag has a standoff if you do not like using the helper stud already installed.

Corsair wants to help with wire management, and doing so has provided us with six zip strips. While this may not cover all of your wire tending needs, it does provide enough to get the chassis wiring strapped down. We also added in the Allen key. It is used only for door removal and replacement, but is something you will want to keep close to the chassis and handy for later.

The manual on the left covers what you should find inside of the box, and a chart showing what the hardware is intended to be used with. It continues with a basic build assembly instruction which will get most users by without much to question. All Carbide cases offer a two-year warranty, but there is a special set of rules for Australian customers.
Case Build & Finished Product

Just like when we started. The front of the chassis does not change a single thing from when we first saw it, to the point of being ready to power it on. We like the monolith design and just the simplest addition of a log at the bottom.
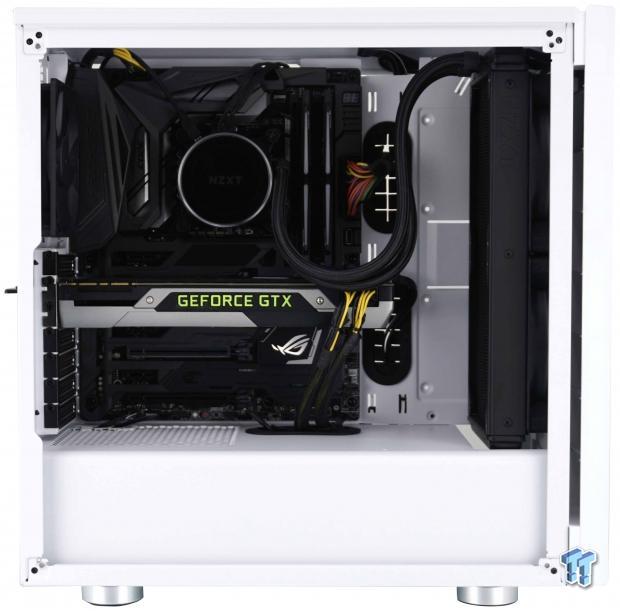
We had no issues installing all of our testing gear. The 280mm radiator fits in the front, and there is still room to go before we hit the video card. The motherboard installs square with the world, leaving the video card level as can be. We also like what we can't see, which delivers an immaculate end product with this chassis.
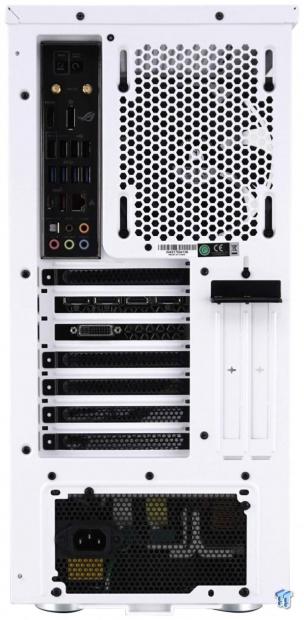
Since no raiser was supplied with the case, we were left to use the horizontal slots for the video card. Above it, the dust shield gave us no problems getting it installed, nor did the PSU at the bottom.
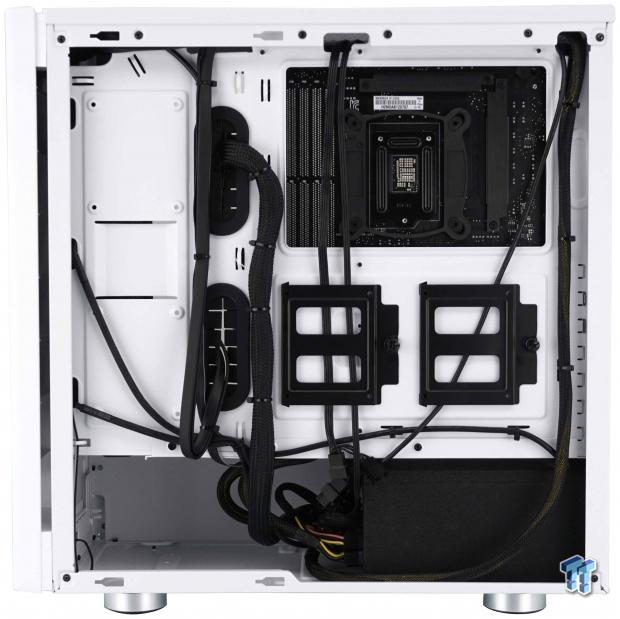
Due to the length of some wires, we did have to come up with creative ways to accomplish clean wire maintenance. However, there are plenty of tie points to keep groups separate, and easy to access down the line. We also removed the HDD cage so that the PSU had more room, which also made connectivity on that end much easier on us.
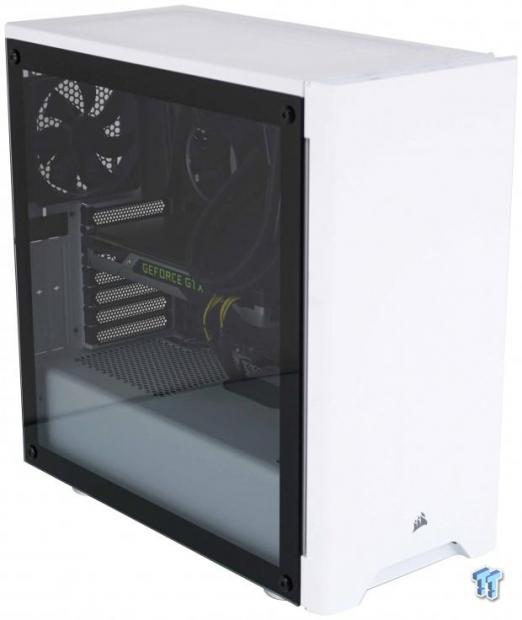
Even without power to the 275R, we do like the way it looks. Yes, it has been done before, but there is something about this chassis that has that it factor. Plusses to this effect are the wider and flatter screws in the glass and the fact that the glass is not tinted beyond view behind it.
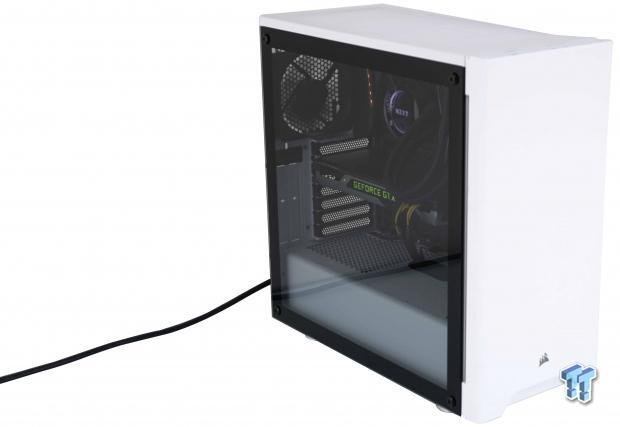
With the system now under power, we are hearing the fans at 34 dB right now. Even without interior lighting, we can see all of the components and their RGB LEDs lit right through the glass. Speaking of lights, also look just below the front of the chassis, where you can see the white LED that illuminates the area in from of the 275R.
Final Thoughts
At first, we were not so sure about the 275R, and it is because we have seen many very similar to it. However, Corsair has done a lot of things right with this chassis. We like the aesthetics of a solid front panel, all one color cases, which do their best not to impede on the view inside. Corsair offers the large area inside we all expect, they delivered on a PSU cover and grommets to keep everything clean and tidy, and is a chassis that does not short anyone on places to tie wires to.

There is plenty of room behind the motherboard tray for wires and 2.5" drives without panel fitment issues, and it comes with easy to access and remove dust filters in the front of the chassis and under the PSU. While not the fanciest of cases to ever leave Corsair, the Carbide 275R is precisely what the market is gravitating to the most.
With the good, there does come a little bit of bad news too. We are of the camp that if you are offerACing a vertical GPU mounting location, said chassis should come with all of the parts needed to make that happen, namely a PCIe riser of some form. Corsair does not offer one inside of the box, and it is likely you will have to go to eBay or some other location to find something affordable. The other thing we noticed, is that with all that noise coming from this chassis, the amount of airflow is not all that great.
It will keep you from frying components inside of it, but with the limitations of the intake behind thin slits and a dust filter, those who like to push boundaries will want to ponder changing the cooling. The last bit is partially our fault, but we do wish the screws holding the glass in, were better. By removing the glass once for images, replacing it for later images, removing it to pull out the hardware when we were done, by the time we went to box it up we noticed a screw was stripped. Pay special attention to this when it comes to the door panel because it is something that could happen easy enough to you too.

We do not feel that the MSRP is out of line. At a $79.99 MSRP set for the chassis we just looked at, there is quite a bit of bang for the buck here. The 275R hits all of the boxes as to what is hot in today's market, and they have done it with elegance, a clear view of the interior, and with an aesthetic which fits into any environment. The Carbide 275R Gaming Mid-Tower Chassis is a great starting point, as it is a case that can grow as your needs increase, offers some modularity to accommodate those who want to use bigger PSU's, and in the end, the build looks fantastic. If it were our money and were in the market for a mid-tower chassis, the 275R falls in our top ten right now, maybe even our top five.
Chad's Chassis Test System Specifications
- Motherboard: ASUS Maximus IX Code Z270 (buy from Amazon)
- CPU: Intel Core i7 7700K (buy from Amazon)
- Cooler: NZXT Kraken X62 (buy from Amazon)
- Memory: Team T-Force Night Hawk RGB TF1D48G3000HC16CBK
- Video Card: NVIDIA GeForce GTX 980 (buy from Amazon)
- Storage: Samsung XP941 256GB (buy from Amazon)
- Power Supply: SilverStone SST-ST85F-G (buy from Amazon)
- OS: Microsoft Windows 10 Home 64-bit (buy from Amazon)

| Performance | 90% |
| Quality | 91% |
| Features | 93% |
| Value | 94% |
| Overall | 92% |
The Bottom Line: Affordable, stylish, open, and delivered with a terrific view, the Carbide 275R hits what users are looking for right on the mark! Corsair may have been a little late releasing it, but to some, the wait was surely worth it.
PRICING: You can find products similar to this one for sale below.
 United
States: Find other tech and computer products like this
over at Amazon.com
 United
Kingdom: Find other tech and computer products like this
over at Amazon.co.uk
 Australia:
Find other tech and computer products like this over at Amazon.com.au
 Canada:
Find other tech and computer products like this over at Amazon.ca
 Deutschland:
Finde andere Technik- und Computerprodukte wie dieses auf Amazon.de
What's in Chad's PC?
- CPU: Intel Core i7 13700K
- MOTHERBOARD: ASUS ROG Maximus Z690 Hero Eva
- RAM: TEAM DDR5-7200 32GB
- GPU: ASUS GeForce RTX 3090 Eva
- SSD: addlink m.2 2TB
- OS: Windows 11 Pro
- COOLER: Fractal Lumen S36
- PSU: be quiet! Dark Power Pro 1500W
- KEYBOARD: ASUS ROG Strix Scope TKL Electro Punk
- MOUSE: ASUS ROG Strix Impact Electro Punk
- MONITOR: ASUS ROG Swift OLED PG42UQ
Similar Content
Related Tags

