


Our Verdict
Introduction, Specifications, and Pricing
As we all know, the basic premise of Rosewill as a company is to find products that sell very well for other manufacturers and to develop similar products from them. In doing so, the master plan is to add something the others have not, possibly reduce the price in the process, or products can sometimes be identical, with just a minor aesthetic change or two. The reason we bring this up is that to date if our memory is serving us adequately, today will be the fifth time we have seen this chassis design in some form or fashion.
One look at the interior of Rosewill's latest submission and our mind immediately experienced déjà vu. Going back through the masses of reviews we have done in the past, we find that the concept is taken from cases like the Aerocool P7-C0, the Raidmax Alpha and Sigma cases, and we even found this interior in Rosewill's Gram. On the exterior, all of these cases are drastically different aesthetically, they range in price from $60 to $97, and a couple of them offer tempered glass, while the other two have standard plastic windows in the steel panel. We know that Rosewill can quickly change the exterior look of the chassis, and they could add tempered glass, which they have, but the competition here is stiff.
All of this brings us to the Rosewill Meteor XR and Meteor XR Plus cases. Attempting to improve on the Gram, and at the same time trying to offer more bang for the buck than any of the other three versions, Rosewill is giving it a go again. Many of the things which you are about to see are the same as we have seen many times before, but there is one addition which Rosewill thinks will take this chassis into the latest generation of features, but is it worth the hassle? Stick with us as we rehash much of what you are about to see, and find out if the additions and changes made to the Meteor XR cases are enough to detract you from buying any of the aforementioned cases, which are nearly identical in almost every way.
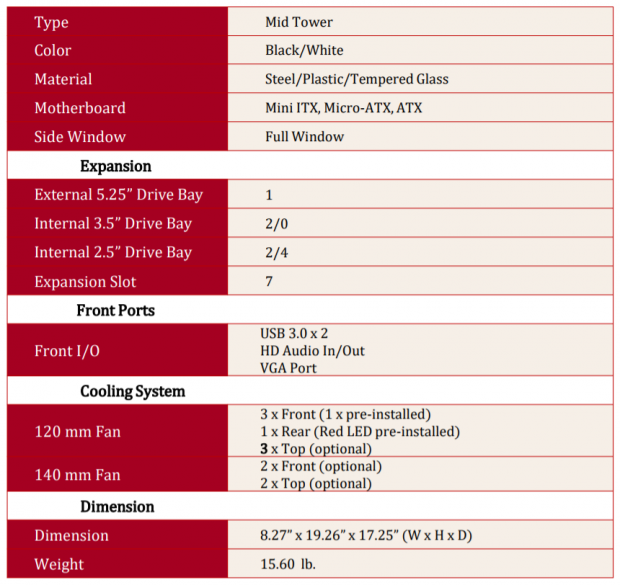
In the chart supplied to us by Rosewill, we see the specifications chart for the Meteor XR Plus, but there is only one change made between the chassis we are looking at, and what we find in this chart. The Meteor XR is a mid-tower chassis which is black on black, while the Meteor XR Plus is black on the outside and some of the inside. However, the motherboard tray and PSU cover are both white in the Meteor XR Plus. The frame and most of the components are made of steel, ABS plastic is used for the bezel, the feet, and HDD trays, and we find chemically tempered glass on the left side of the chassis, which is 3mm in thickness. Both of the Meteor XR cases are 8.27" wide, they are 19.26" tall, they are 17.25" deep, and weigh in at 15.6 pounds empty.
The bezel has a removable cover to accommodate the single 5.25" bay on the inside, and this drive is removable by removing four screws. Under the PSU cover are a pair of 3.5" drive trays which are contained in a removable metal cage. This is also why the chart shows zero as a possibility. As for 2.5" drive locations, the HDD bays can be used, and behind the motherboard tray are a pair of trays to use too. These trays can also be moved from behind the motherboard to the top of the PSU cover. In the back of the chassis, there are seven expansion slots, but the covers are break-out style. In the I/O panel, we are given a pair of USB 3.0 ports, a pair of HD Audio jacks, and what is noted as a VGA port is an HDMI port to support VR users.
Where cooling is concerned, the Meteor XR has quite a few options. While a single 120mm fan is installed in the front, and a 120mm red LED fan is found in the back of the chassis, there are options to fill from there. The front of the chassis will take on three 120mm fans or a pair of 140mm fans. The top of the chassis is the same, and like the front can also be used to support AIOs and custom loop components, as long as they are thin. At the back of the chassis, you could use this area for water cooling support, but there is not an option to step up to 140mm here.
Already refreshing out memory on the prices of all other cases we have seen with similar setups, we have a ballpark of where the Meteor XR should come into the mix. The Meteor XR is not the most affordable of the group, nor is it the most expensive. With the MSRP for both the Meteor XR and Meteor XR Plus priced identically at $79.99, this chassis falls right smack in the middle of the pack, and we get an HDMI port on the front of the chassis. We feel that on paper, the price is right where it should be, considering the features and specifications it offers, but let's find out how it all works in real life scenarios, and see if the Meteor XR is the leader of the pack of five.
Our Latest Mid-Tower Cases Review Coverage
Chad's Chassis Test System Specifications
- Motherboard: ASUS Maximus IX Code Z270 (buy from Amazon)
- CPU: Intel Core i7 7700K (buy from Amazon)
- Cooler: NZXT Kraken X62 (buy from Amazon)
- Memory: Team T-Force Night Hawk RGB TF1D48G3000HC16CBK
- Video Card: NVIDIA GeForce GTX 980 (buy from Amazon)
- Storage: Samsung XP941 256GB (buy from Amazon)
- Power Supply: SilverStone SST-ST85F-G (buy from Amazon)
- OS: Microsoft Windows 10 Home 64-bit (buy from Amazon)
Packaging
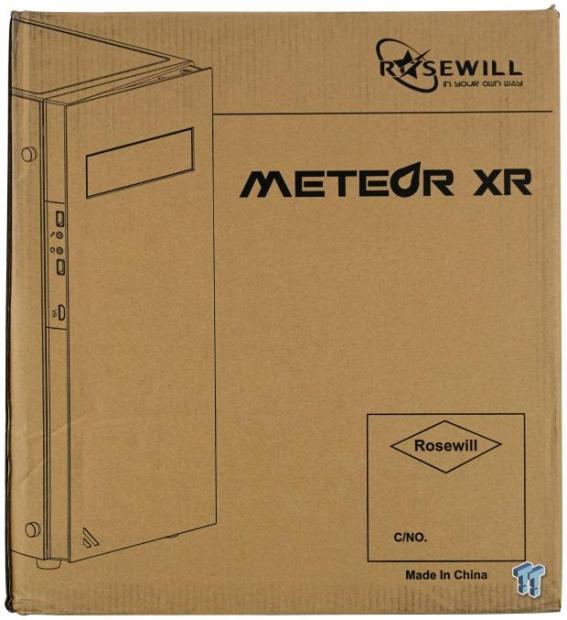
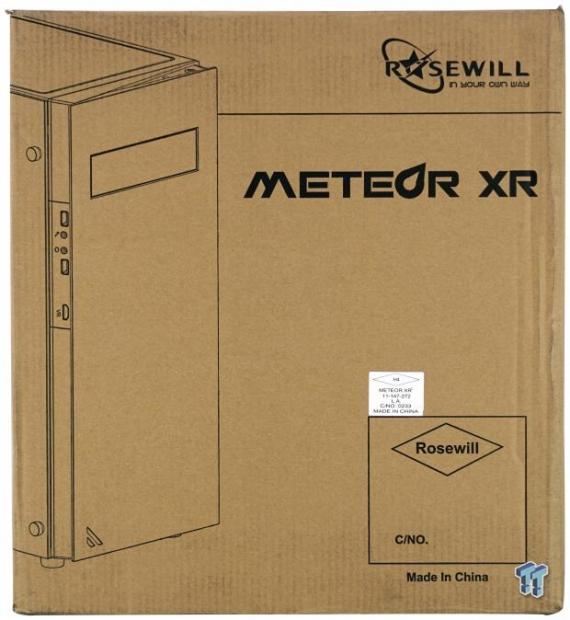
The packaging for the Meteor XR is nothing all that special. Plain cardboard and black screen printing are used to drive home the information provided. To the left is a rendering of the front bezel of the Rosewill Meteor XR, and the last thing to mention is that the case is made in China.
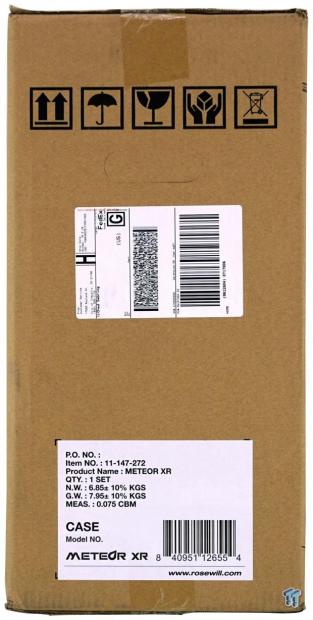
The next panel starts with icons at the top on how to handle and treat the package at the top. Moving past the shipping sticker, we can see a sticker applied by Rosewill. In it, there is information as to the product, quantity, size, and weight of the box.
Aside from the tiny white sticker near the center of the panel, the back of the box is identical, in what is displayed on this panel, as to what we saw on the front.
The side panels are also the same just that this time the shipping label is not present. Limiting the money put into packaging is great, as it allows Rosewill to put the money elsewhere, in things we can use, not throw away shortly after the build process.
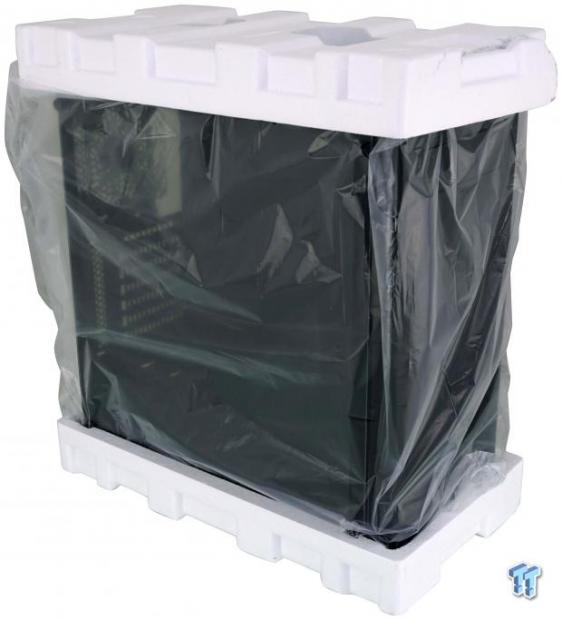
Inside of the box, we did find plastic stuck to both sides of the tempered glass panel before the chassis is bagged. Once that is done, the chassis is set into thin Styrofoam end caps, and we can see that the top one got broken in transit. The packaging may have broken, but it did not fail, which allowed the Meteor XR inside to arrive without a mark on it.
Rosewill Meteor XR Mid-Tower Chassis
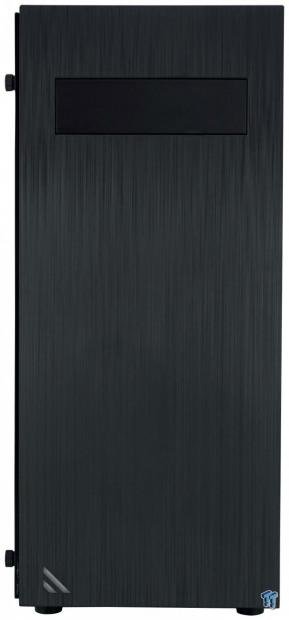
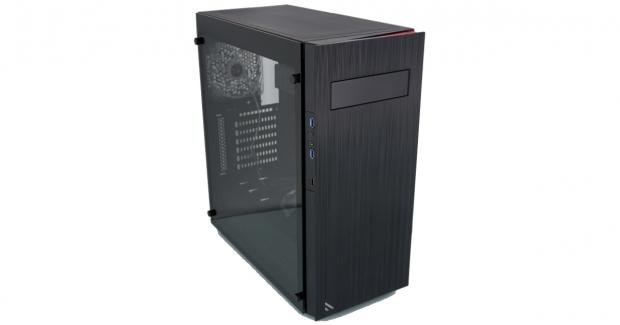
The front of the Meteor XR is squared off at the corners, and we can see the removable drive bay cover and the slashes in the bottom left corner, the red HDD Activity LED, are what breaks up the bezel. To add a bit of class to the look, Rosewill opts to use a brushed metal finish in the black plastic surface.
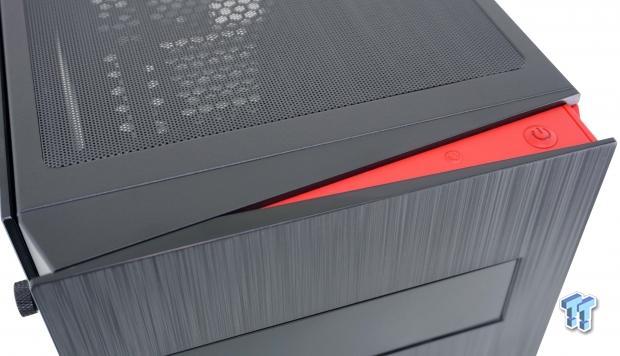
At the top of the chassis, just behind the front of the case, on the right side, is a bright red plastic insert to add contrast to all that black. This is also where we find the power and reset button, and the power button at the right is backlit blue when the chassis is powered.
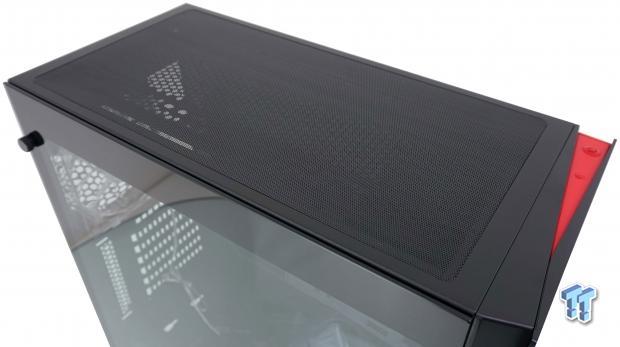
The top of the chassis is made of steel, with the thinnest bits of panel left to support the panel. Inside of the ring of steel is the plastic, magnetically attached, dust filter, which covers the large area of honeycomb mesh below it.
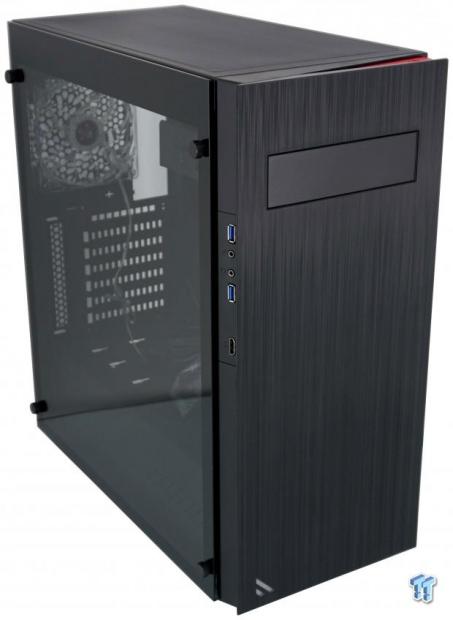
On the left side of the chassis, we find a chemically tempered glass panel covering the entire frame of the chassis. The inside edge is painted black to block the view of the steel frame behind it and is held in place with four thumbscrews. We do also see more of the I/O panel on the side of the front bezel.
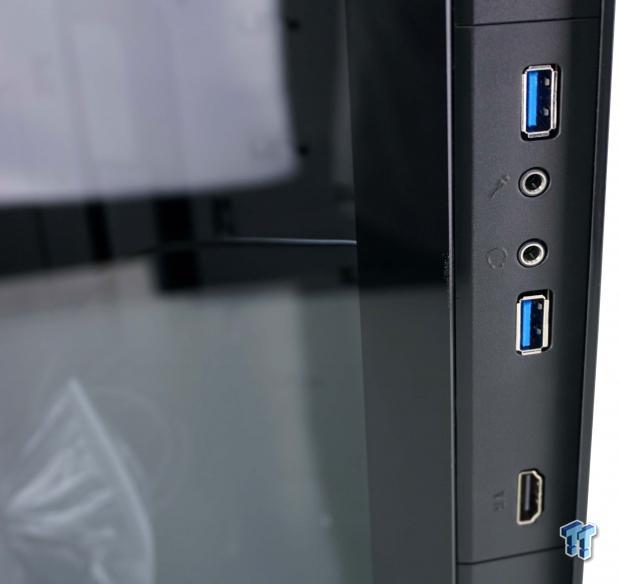
From top to bottom, we find a USB 3.0 port, a pair of HD Audio jacks for the headphones and microphone, with another USB 3.0 port below them. At the bottom is the VR port, which is an HDMI port, so that connecting headset is made much easier on the user.
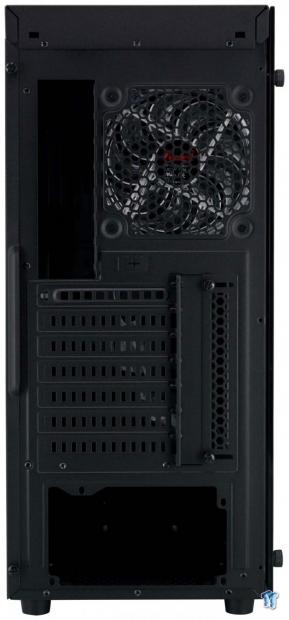
At the back of the bus, we see that the top of the chassis is offset well from the rear I/O and exhaust fan, to add room for water cooling support. The seven break-out expansion slot covers have passive ventilation to the right of them, and cards are secured externally and have a slide cover to fill the gap. That leaves us at the bottom of the Meteor XR, where the PSU is to be installed.
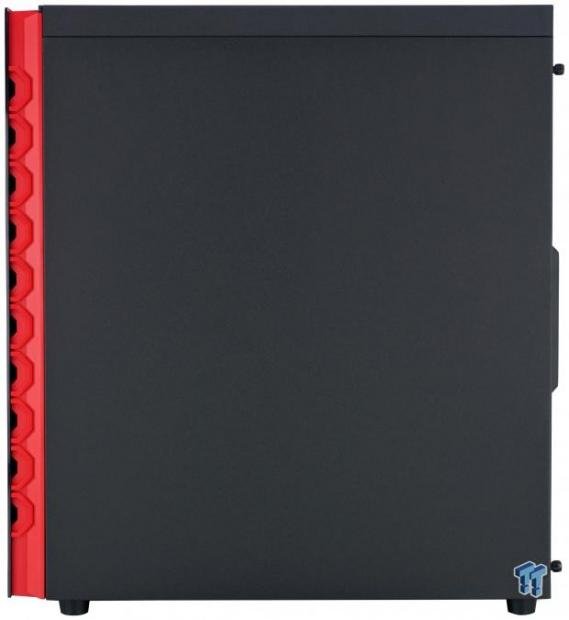
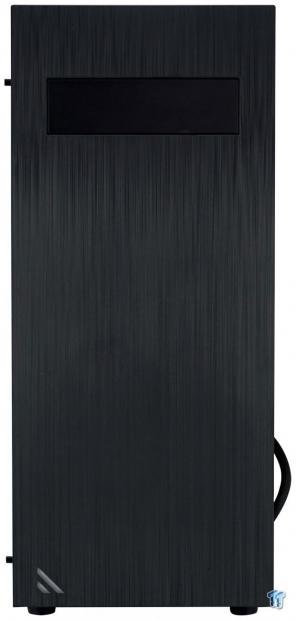
The right side of the chassis shows us three things. The first is that the view is blocked by a solid steel panel, which is painted to match the rest of the chassis. The second is that the bright red accent continues from the top and runs down this side. The third, and most important, is that the ten tiny holes in the red stripe, this is how the chassis gets its airflow.
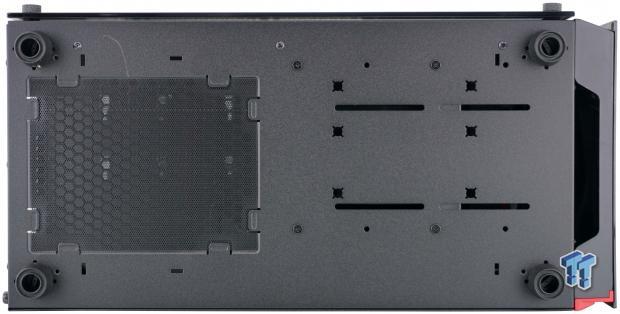
Under the Meteor XR, we find round hard rubber feet used to support the chassis. These do offer a sturdy footing but are easy to slide on hard surfaces. There is a dust filter under the PSU, but it is not the easiest to remove to clean, nor is it easy to replace without tipping the case over to do so. We imagine the holes and slots at the front could be used for pumps and reservoirs, but it is easy to see it has nothing to do with the HDD cage mounting, and the four screws show it can only be installed in one location.
Inside the Meteor XR
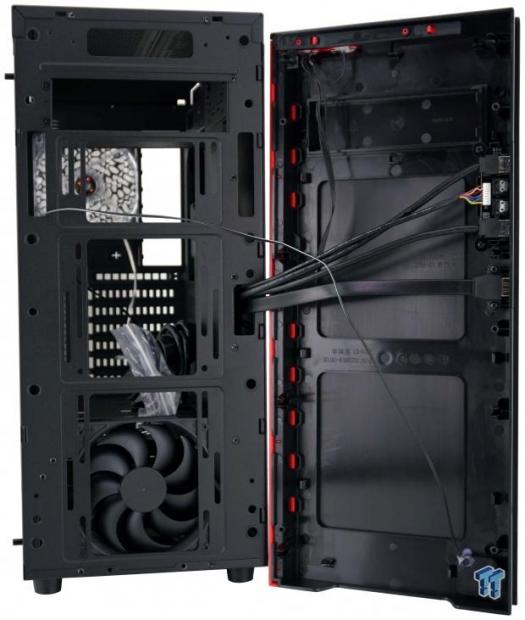
We pulled the front bezel off to find a few disturbing things. Not only are the wires attached to the bezel, but they run across it, breaking up airflow and possibly getting into the fan blades. We also find it strange that there is so much compatibility for cooling, yet only ten super thin holes to allow air into the chassis, and from just the one side too.
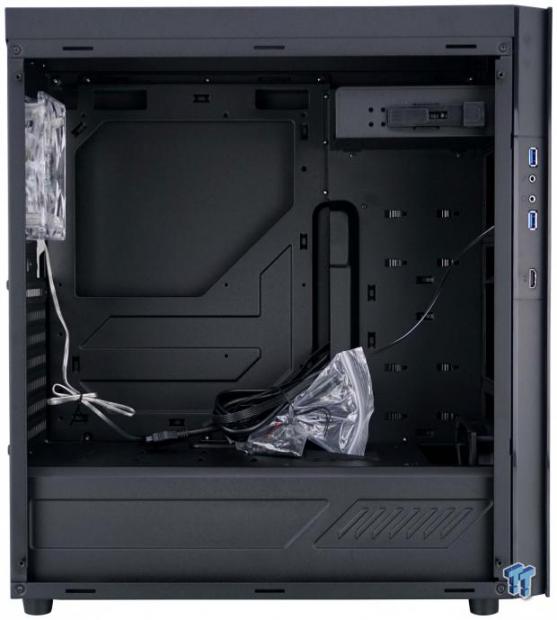
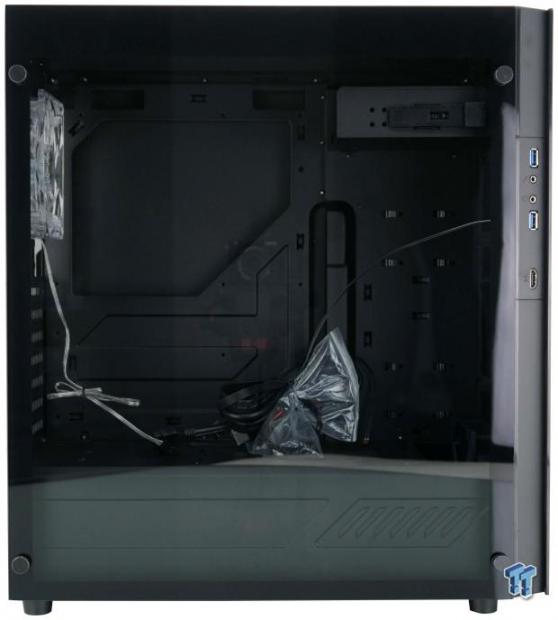
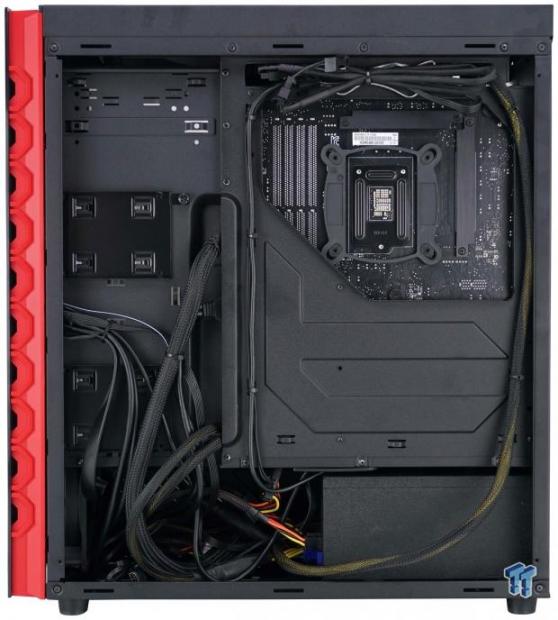
This we have seen many times before. The interior is wide open from front to back, leaving room for all of the main components as well as some addition things too. The wires and hardware are tied together and lying on the PSU cover, which is used to block the view of the PSU, HDDs, and any wire messes you might have.
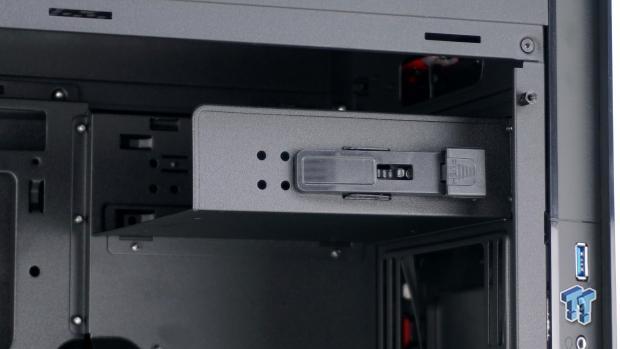
At the top of the chassis, there is a single 5.25" drive bay. If you wish to leave it in, it can also be used for a pair of 2.5" drives, as there are holes in the bottom of the bay for precisely that. If you do not wish to use it, removing four screws allows the tool-free bay to come out.
Behind the front bezel, there is not a dust filter of any kind, and the one fan that Rosewill has provided is delivering air to the HDDs and PSU, not the main chamber of the case. You can move the fan, but we will be testing the chassis as it was sent to us for our thermal evaluation.
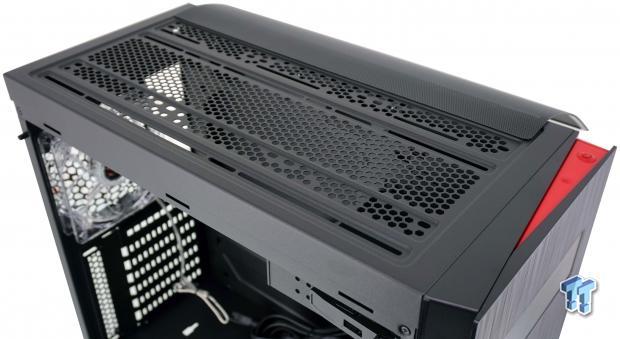
The top of the chassis is pressed into shape to add more support to the steel panel so that all of the honeycomb mesh can be removed. There are slots for 120mm fans as well as ones for 140mm fans, and is where we will be installing or CPU cooling.
Inside the Meteor XR Continued
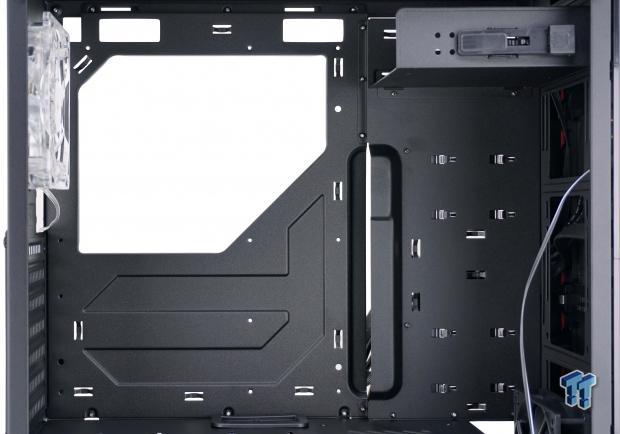
The motherboard tray offers four places to pass wires; there is a larger opening for CPU cooler backplates so that M-ITX motherboard have wire management too, and there are twelve tie points. We are sure if you follow our reviews that this looks familiar though.
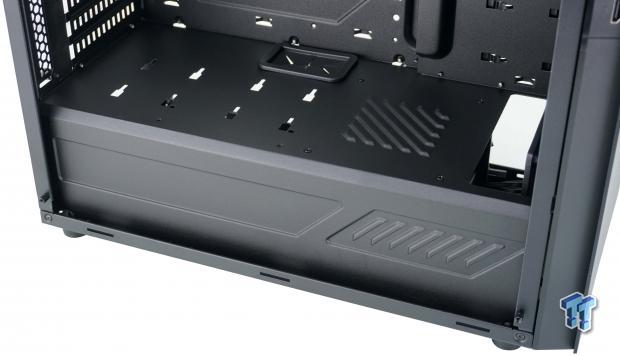
The PSU cover is the same as the other cases too. There is a gap at the front to allow for a thin radiator to fit, some louvered fins, a hole with a grommet for wires to pass through, and on this stylized cover, there are optional locations for the SSD trays.
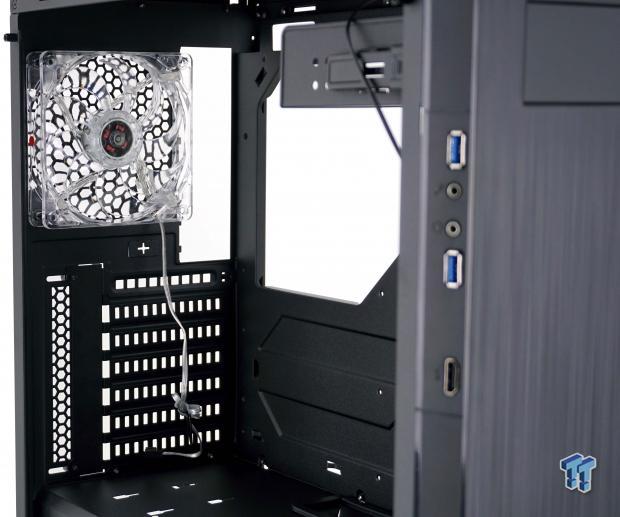
We find the clear fan hanging in the back, which is red LED lit when powered via a 3-pin fan connection. There is a knockout just below it for the HDMI cable to pass through, and we recommend breaking out the expansion slot covers you need as soon as possible, as they may not be able to be later, due to motherboard thickness.
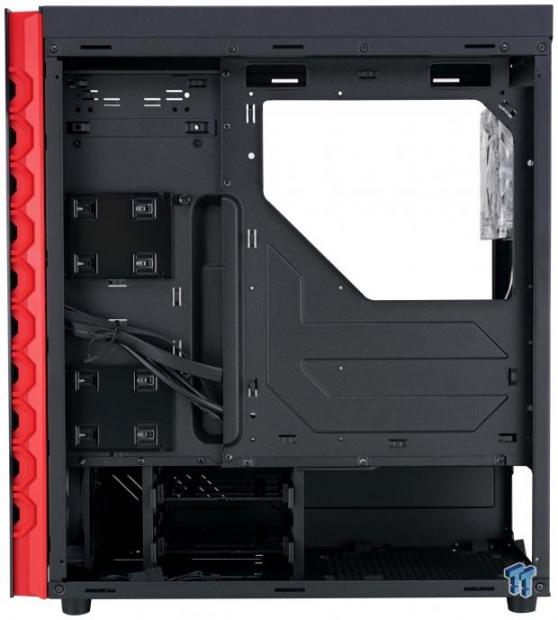
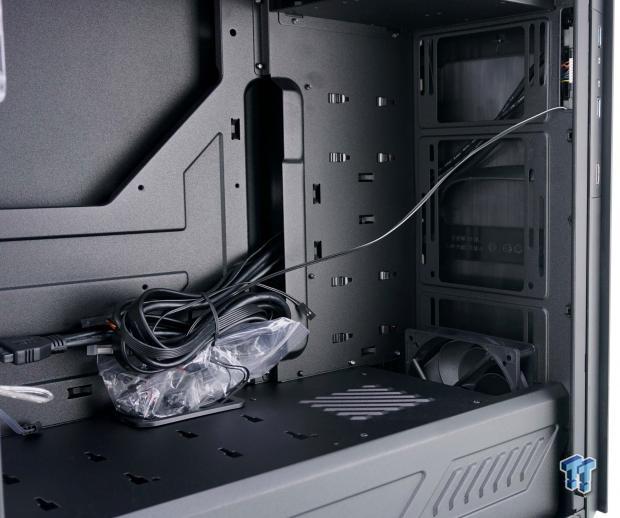
Behind the motherboard tray, there is 20mm of clearance for wires and such, but the left side is a fair bit deeper. On the left, we get 30mm of room and is where the pair of 2.5" drive trays are placed. At the bottom, we find the HDD cage with two trays in it, and to the right, the PSU will slide in and rest on thick foam pads.
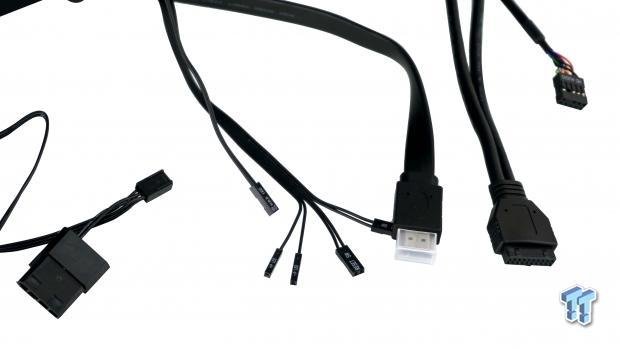
The front fan can be powered by the motherboard or fan controller or can be connected to the PSU via the 4-pin Molex plug. The front panel wires are all here; there is an HDMI cable with a cover protecting the connection, a native USB 3.0 cable, and an HD Audio lead. All of the wires are black to blend in and are long enough to get anywhere you need.
Hardware & Documentation
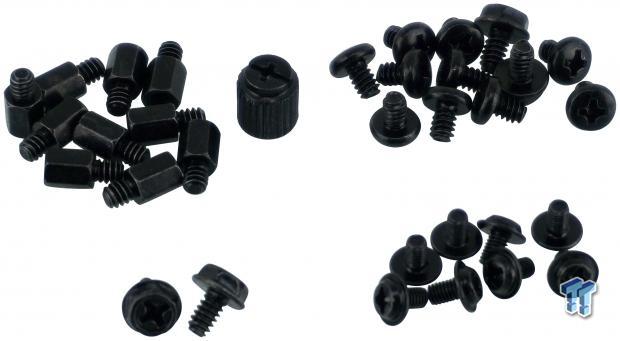
Tied to the chassis wires, there is a small bag of hardware. In that bag is what we see here. There are ten standoffs supplied, along with the socket to drive them into the motherboard tray. To the right are ten motherboard screws, and somehow a pair of the PSU screws ended up in this pile, and are not with the other two at the bottom-left. The last group of screws is for securing 2.5" drives into the trays or the ODD bay.
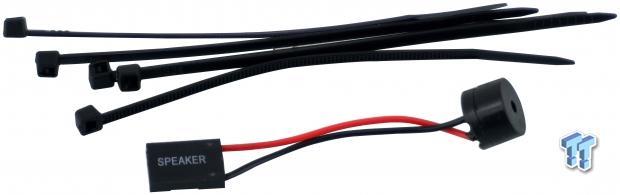
Along with the basic stuff every case needs, Rosewill includes five zip-ties to help manage wires inside of the chassis. They also send along the motherboard POST speaker, which is rare these days, but is there in the bag if you like to use them.
The manual is found inside of the clear plastic bag which envelops the chassis, floating freely. The user guide explains all of the parts you should have to get started, where all of the major components go, and even some renderings of options the chassis offers. While this guide is enough to get by with for the novice builder, it is slim on information, but the renderings do a fair job at explaining what each step is about.
Case Build & Finished Product
With the components we use, and the lack of using an optical bay device, we would like the chassis not to have the cover breaking up the faux look if the brushed metal cover. However, it is what it is, and we are left with something that looks exactly as it did fresh out of the box.
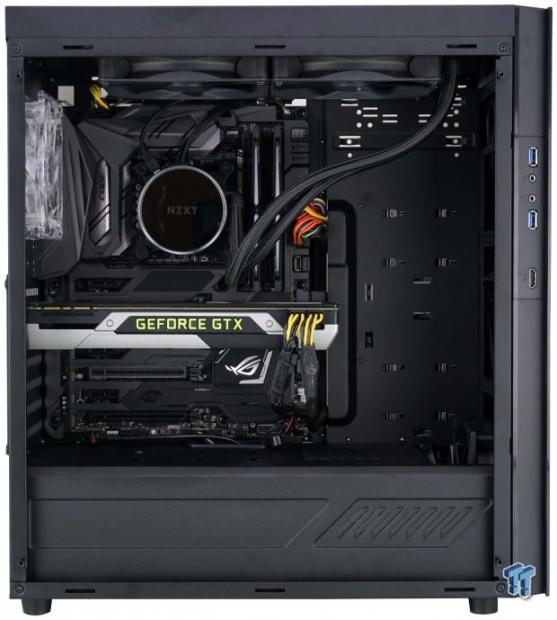
We opted to use the top of the chassis to support our AIO, and we are well clear of the motherboard and RAM sticks. The motherboard fits well, but the limited room of the gap to the right of the board does make wiring a challenge. The video card is nearly level, and we see nothing of the PSU or the mess we have hidden behind the PSU cover.
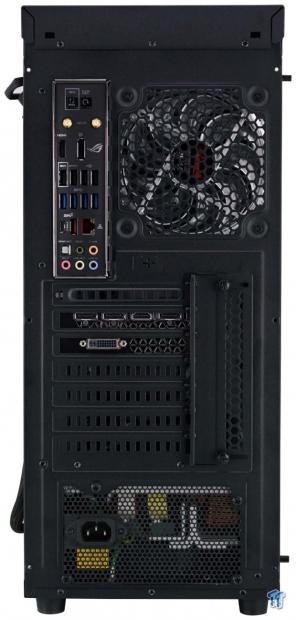
We have no complaints with the back of the chassis. The dust cover snaps into place, the video card aligns well and is easily screwed securely into the chassis, and the same is said for the PSU installation. We do wish, however, that the dust filter was removable from here, rather than having to tip the chassis to access it.
The left side of the chassis houses much of the wires coming from the front I/O as well as from the PSU. We did remove the HDD cage for clearance as well as room to hide all of the long cables. To the right, things are tidier, as we can secure the Kraken wires and the 8-pin to the motherboard tray.
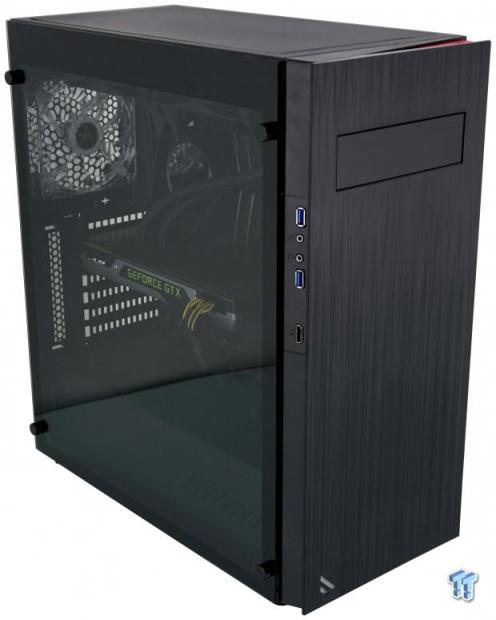
While the front of the chassis, being plastic, loses a point or two, the left side panel and the lack of tint means that the interior of the chassis is always visible to show off. The lines are good, and the panels match with tight precision, just that we do not feel that from this angle, the chassis is all that great looking.
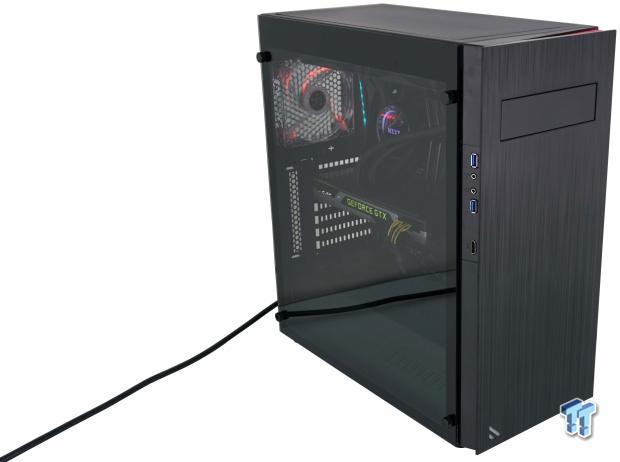
When powered, there is a blue glow to the power button at the top, and the bottom-left corner of the chassis will flicker red as the storage is accessed. The fan at the back of the Meteor XR also glows with red LEDs but does not do much to flood the chassis with light.
Final Thoughts
On the lighter side of the Meteor XR, we do like the attempt to class it up a notch by molding the plastic front bezel with a brushed metal finish for starters. It is by no means a metal replacement, but it's better than an expanse of slightly textured plastic like we see on everything else. The tempered glass panel, while thin and only chemically tempered, lacks tint to block our view, and is painted around the edge to block our view of the metal components. On top of that fact, the grommets used on the glass panel wrap around both sides of the glass rather than staying with the standoff. They hold the glass in place, without screws, much more securely than any other glass side panel using this sort of mounting. The chassis is near silent, it is built well, it has a customizable interior, and for some, the addition of an HDMI port into the front I/O panel is an important point too.
With the good, does come the bad with the Meteor XR cases. For starters, we feel the accent is wasted, as most users would have the innards in view to them, and would likely see none of the accents in daily use. Secondly, in this stripe, we find the intake to be sad. The holes are tiny, very little air flows through them, and when the Meteor XR is powered, you can even hear the wind whine as it tries to squeeze into the front of the case. With the intake done in the manner it is, we were in no immediate danger of throttling anything in the chassis, but thermal results were significantly higher than in most other mid-tower cases. What got us the most though, is the VR HDMI cable setup. It is great that the front I/O panel include this feature, but after it was installed in the panel, nobody at Rosewill seemed to care what happened. To wire this connection, you have to run the cable across the motherboard, through the knockout just above the GPU, and see is in plain view. Would have a hole in the back of the chassis, behind the motherboard tray, not have been a much more elegant solution if you are asking us to power things externally? At this point, the design is getting long in the tooth, and for the fifth version of a chassis, we feel we shouldn't be running into such issues.
Some may fall in love with this chassis at first site, and getting past the plastic front made to look like something it obviously is not, we knew the internal layout, and the feature set should carry the Meteor XR through to the end, and still get our recommendation. However, the Meteor XR costs $79.99, which is not the best price for this chassis type, and at the same time, Rosewill has limited the airflow so much, they may as well have just cut it off altogether. While we understand that sometimes you have to do the bare minimum to get by with adding a feature such as a VR port, but we feel with one more hole in the chassis, it could have been so much better. In the end, $80 is not that much to pay for a customizable mid-tower chassis with tempered glass. In this instance, we do not feel that the last of a long line of similar cases is even close to the best solution, and unless you plan to modify the front of the chassis for better airflow, you better have the AC jacked, or the heat turned low. The Meteor XR might just be aptly named, as a meteor is a hot burning mass, and the inside of this chassis is hot, not yet on fire, but it is likely you may not want to deal with either of them in real life.
Chad's Chassis Test System Specifications
- Motherboard: ASUS Maximus IX Code Z270 (buy from Amazon)
- CPU: Intel Core i7 7700K (buy from Amazon)
- Cooler: NZXT Kraken X62 (buy from Amazon)
- Memory: Team T-Force Night Hawk RGB TF1D48G3000HC16CBK
- Video Card: NVIDIA GeForce GTX 980 (buy from Amazon)
- Storage: Samsung XP941 256GB (buy from Amazon)
- Power Supply: SilverStone SST-ST85F-G (buy from Amazon)
- OS: Microsoft Windows 10 Home 64-bit (buy from Amazon)
 Lian Li B4-mATX Review: a compact mATX SFF case with excellent airflow and premium features
 Ocypus Sigma F36 BK ARGB Cooling Fan Review: high airflow and unified design in one frame
 PCCooler CPS RZ820 Display Review: a flagship-level CPU air cooler with an LCD screen
 MOAIPLAY ORA PRO G1 850W ATX 3.1 PSU Review: high efficiency and 10-year warranty for $119.99
 NZXT H6 RGB+ Compact Dual-Chamber Chassis Review
 Assassin's Creed Hexe to be revealed 'relatively soon' according to insider
 LG claims that you can improve your aim by up to 38% by playing on a 480Hz OLED monitor
 Sony's $500 million lawsuit heats up after choice to end PlayStation disc production
 Spacecraft confirmed to be approaching one of Earth's seven mysterious 'quasi-moons'
 AI models could soon get cheaper as OpenAI, Meta, and xAI enter a new price war
 SAP escapes EU penalty by easing customer lock-in concerns
 Cursor builds AI agent 'Sand' to rival Anthropic's Claude Cowork
 PocketMage is a distraction-free pocket computer with a wizard-themed operating system
 Samsung is holding your health data hostage to train its AI
 MOZA FMP18 Panel Bundle Review: authentic F/A-18 Hornet cockpit controls for flight sims
 Micron 6600 ION 245.76TB Enterprise SSD Review - Best in Class Programming Speeds
 MOZA MA3F EFCM Flight Control Module Review: authentic Airbus A320 autopilot panel for simulators
 Turtle Beach Stealth Pro II Wireless Gaming Headset Review - Premium Sound, Fantastic Features
 MOZA MGX1000 Instrument Panel Review: a realistic Garmin G1000 replica for immersive flight sims
 Simagic Zeus Formula Steering Wheel Review: premium build and advanced inputs for F1 racing
 GIGABYTE X870E Aero X3D Dark Wood Review - A woody goody
 The Super Mario Galaxy Movie (2026) 4K Ultra HD Blu-ray Review
 KTC H49S66 5K2K (5120x1440) 49-inch 180Hz Gaming Monitor Review
 HighPoint Rocket 1604L Gen5 x16 NVMe Software RAID AIC Review: half the price with full 59 GB/s speed
 I stopped digging through Windows menus after I set up this one folder
 Don't sell your Windows laptop until you do these things
 6 PC cleaning mistakes to avoid for safer hardware maintenance
 Phison and Intel Take Aim at Local AI's Memory Wall with aiDAPTIV
 How to Remap Keyboard Keys in Windows using Microsoft PowerToys
 7 tips to organize your Windows files for faster, easier access
 Intel Arc G3 Extreme first impressions with MSI's Claw 8 EX AI+ - Incredible power for an extreme price
 How to fix Wi-Fi Adapter Not Working on Windows laptops: troubleshooting tips
 Hisense U7SG 4K TV: Modern Entertainment for the New Age
 6 underrated Microsoft Word features worth using to boost your productivity