
The Bottom Line
Introduction, Specifications, and Pricing
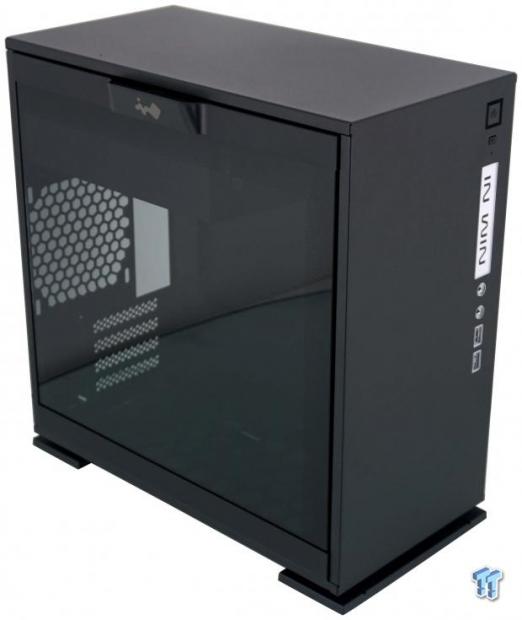
Once In Win got past some of the more mundane and near childish case designs that they released in the past, the ball was set rolling ever since. Their whole approach now is to be "contemporary and innovative" and at the same time mixing art and technology to deliver some of the most unique cases we have ever seen. Even though the chassis we are going to provide an in-depth look at today is not something out of the box like the Tou 2.0, the D-Frame 2.0 or the X-Frame 2.0. That does not mean that In Win is not trying to innovate, even if confined within the cubic style chassis which they are helping us present.
Classified by In Win as a Mini-Tower chassis, the latest case to hit the labs takes a square design to the extreme. The most important aspect of this case is that it is compact, and while one might assume that also means you lack modularity and room, this is not the truth at all. In Win has chosen to use thicker steel to build the chassis making it nearly strong enough to stand on, and is the first chassis we have seen with a tempered glass side panel which requires no screws or grommets. To be blunt, no matter where you glance at this new chassis, you are going to see something that In Win has either been the first to show, or is something done in a way which eases the build and usage of this case over the long haul.
The chassis we are on about is the In Win 301 Mini-Tower chassis. At first, one may think; great, another boxy case for smaller systems. In reality, all you need to do is look at the 301 to realize there is more afoot than one would expect. There is much to discuss and cover with the In Win 301, so even though it is compact in nature; there are surprises at every turn. The 301 is taking In Win into a new realm of chassis design, and raises the bar as to what to expect from them in the future. At this time, however, we feel that the In Win 302 Mini-Tower chassis is not only a top contender for smaller system builds, but it is a chassis in which many will build a new system, just to have the pleasure of using this case.
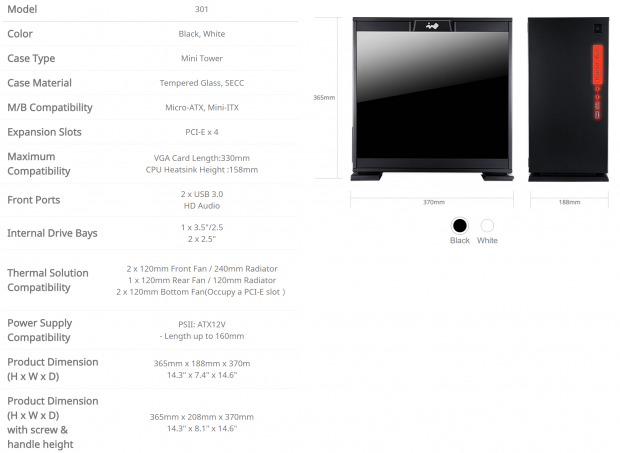
The In Win 301 comes in two color choices. The first is to get the chassis painted black and to accompany it, the entire front I/O panel is illuminated with red LEDs. The other option is to get a version which is painted white, and the I/O panel has blue LEDs to illuminate it. This chassis is a Mini-Tower capable of housing a Micro-ATX or Mini-ITX motherboard, made from SECC steel and tempered glass. The glass on the chassis is found on the left side, it is tinted, and has a dot matrix painted on a couple of edges to block out the view of the frame. The frame of the chassis is made of steel, which is painted inside and out, but it is also 1.2mm in thickness to give the 301 a very robust feel and heft to this chassis.
At the back of the chassis there are four expansion slots, and on the inside, there is room for 330mm worth of video cards, and also 158mm or clearance for CPU air coolers. The front I/O panel consists of a nameplate, a pair of USB 3.0 ports, HD Audio jacks, with the power and reset button above all of that. Storage in this chassis is limited. There is a single drive tray which can house either a 3.5" or 2.5" drive, and built onto that cage is an additional location to hang a 2.5" drive off the bottom of it. The power supply is mounted at the top of this chassis and does have restrictions to where it can only be 160mm in length. All told, all of this can be found inside of a chassis that is 365mm tall, 188mm wide, and 370mm deep.
Cooling is not as robust as one may expect, but the offerings here are sufficient. The front of the 301 has a removable plate which will allow for a pair of 120mm fans to be attached, and can also be a location used for liquid cooling. The rear of the case has a single fan location for a 120mm fan and can again be used to support water cooling. The bottom of the chassis will take on another pair of 120mm fans, but doing so will limit the number of cards to be placed inside. As for liquid cooling support, it is possible, but it will eliminate any ability to use a video card.
With such a sturdy design and the implementation of a new way of attaching a tempered glass side panel, we would expect the price of the 301 to be high. However, looking online for pricing, we are shocked to see the pricing we did. While Amazon does not show any stock of either version of the 301, Newegg is on point and offers both the black and the white cases. It is there that we see that this In Win 301 is listed for only $69.99. While the white one does mention that this is a sale price, the black version sells all day long at this price.
For what you get, not only in style and layout, the sturdiness of this chassis is a leap above many on the market, and if you have plans for a Mini-ITX or Micro-ATX build in your future, the In Win 301 is worth serious consideration to house your goods inside of it.
Chad's Chassis Test System Specifications
- Motherboard: GIGABYTE GA-Z68X-UD4-B3
- CPU: Intel Core i7 2600K (buy from Amazon)
- Cooler: Corsair H80i GT (buy from Amazon)
- Memory: G.Skill Ripjaws F3-12800CL6D-4GBXH
- Video Card: ZOTAC GeForce GTX 970 AMP. Extreme Edition (buy from Amazon)
- Storage: SuperSpeed 128GB SSD
- Power Supply: SilverStone SST-ST85F-G (buy from Amazon)
- OS: Microsoft Windows 7 Ultimate 64-bit (buy from Amazon)
Packaging

Packaging for the In Win 301 is kept as basic as possible, helping to keep that price down. The box is made of plain brown cardboards, and with a mix of red and black printing, we are given the In Win name and logo at the top and 301 in large numbers across the middle.

The right side of the box starts off denoting the color of the case inside, and ours is marked as black. Below the color options is a specifications chart which covers everything we just discussed, and even shows seven features at the bottom.

The back of the box is identical to what we found on the front of the box. Sadly, with all the room available, DHL still managed to cover the chassis name with a shipping label.

The last side of the box has the name and logo at the top along with the company tagline and site address. The sticker is for internal tracking at the company, but near the bottom we also find five features written out.
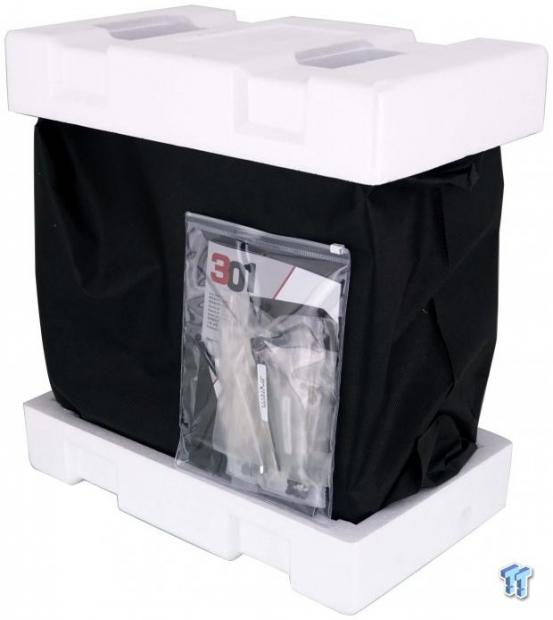
Inside of the box, you will find the 301 wrapped inside of a cloth bag, and further protected with thick Styrofoam caps at the top and bottom. The glass panel is also protected with layers of plastic inside of the cloth, and all of this works together to deliver us a chassis in immaculate condition. In Win also ships the paperwork and hardware on the outside of the chassis, making it easier to figure out how to open the chassis too.
In Win 301 Mini-Tower Chassis

The front of the In Win 301 is an expanse of black steel in this instance, only broken up with the front I/O panel off to the right side of it. Another thing to note about the front of the 301 is that this bezel is fixed to the chassis and not removable.

The front I/O panel runs vertically down the chassis, and at the top are a power button and a tiny reset button, with an even smaller hole for the HDD activity LED. Next, we see the In Win nameplate above the HD Audio jacks and the pair of USB 3.0 ports, and all of the white trim seen here will glow with red LEDs when powered.

The top of the 301 is much like the front, where there is a solid expanse of black steel with no ventilation options. That being what it is, we would like to point you to the large button on the left side of the top panel, which with a press, allows the side panel to be opened like an oven door via a latch system inside of the chassis.
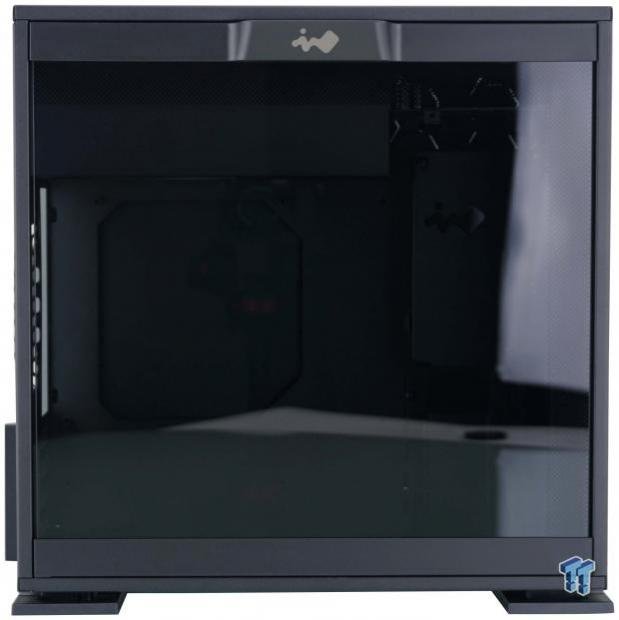
The left side of the case has a thin steel edge around all side of the tempered glass panel, which has thicker trim at the top and bottom of it. The glass is tinted, but it also has a microdot pattern along the top and front edges to block out the view of the frame sections behind it.
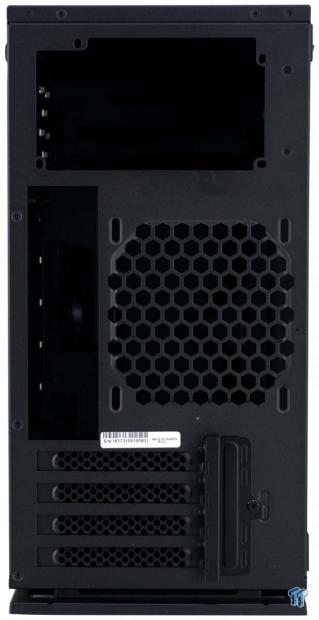
On the back of the 301, we find that the PSU is at the top of the chassis. Below it, we find the rear I/O and room for a 120mm fan that is adjustable in height. That then leaves us with the four expansion slots at the bottom, which are accessed externally.

The right side of the chassis mimics the left side in the way that the panel is opened. A pair of captured screws is at the top, which allows the top to release and open, with the bottom having tabs to help lock the panel into place. Since the front is closed off, the honeycomb openings near the front are used as the intake for the 301.

Under the 301 we find large "shock-proof" feet for the chassis to stand on, with tiny rubber pads to give it some grip. Across the middle is a section of plastic mesh used as a dust filter, and we can also see some of the fan mounting holes offered on the floor of the 301.
Inside the In Win 301
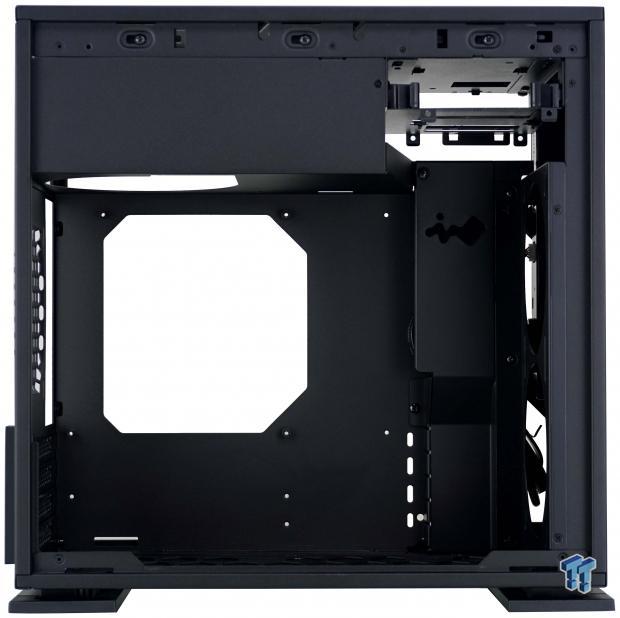
The first glance inside of the 301 is one of openness and cleanliness. The top has a PSU cover and is also where the storage bays are located. The lower section is open from front to back, and there is a cover to keep wiring out of site as much as possible on the right side.

The drive bays are what we are looking at in this images, and they can be removed. While more obviously, there is a plastic tray to house a 3.2" or 2.5" drive inside of the cage, the tabs below the cage allow for a second drive, a 2.5" drive, to be installed as well.
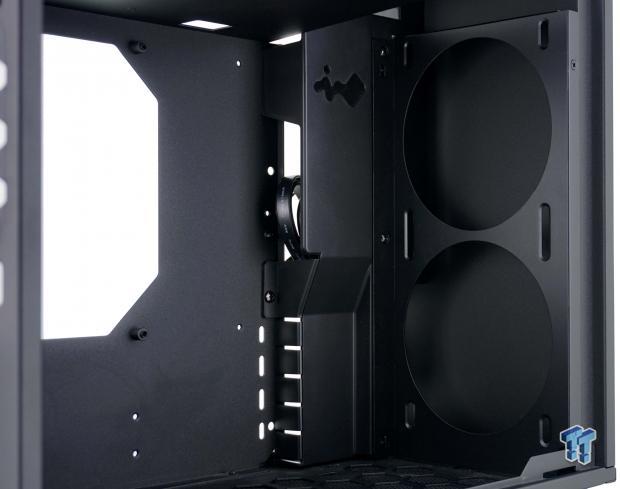
Inside of the front of the 301 we see locations for a pair of 120mm fans to take cool air into the chassis. This panel is removable, but to do so; you also need to remove the plastic wire cover, which has break-away tabs at the bottom of it, so that openings are kept to only what is needed to get the front I/O wiring and GPU wires out into the main chamber.

The motherboard tray has a large opening for CPU cooler backplate access, and around the hole are four helper standoffs already installed. For Mini-ITX systems, you are good to go as-is, but for a Micro-ATX system, you will need to install the other four standoffs found in the hardware bags.

The floor of the 301 is opened up by using honeycomb shapes like what was found on the right side panel, allowing air to pass unimpeded. The dust filter has tabs bent into the bottom of the chassis, but since the fan mounting holes are already accessible, the filter does not need to come off for the build process, only for cleaning.

The back of the chassis also sports a honeycomb pattern where the rear 120mm fan is to be placed, allowing as much airflow as possible without restrictions. We can also see that the expansion slots are flush with the back wall of the 301, and is why they are externally accessed.
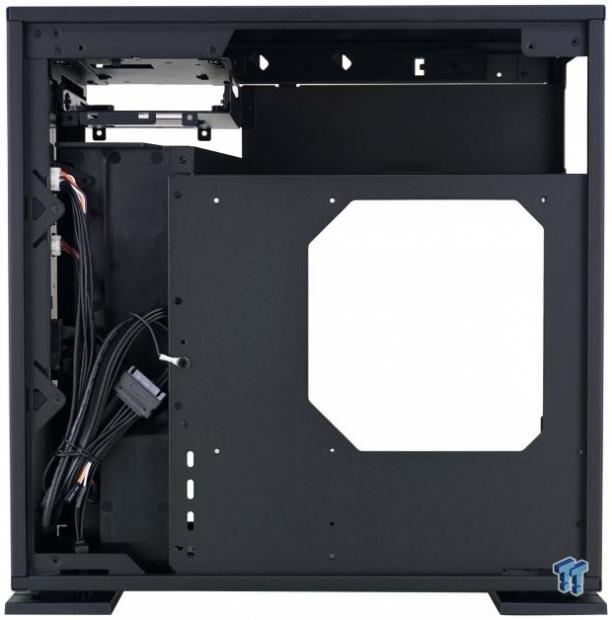
Behind the motherboard tray, there is not much room, but then again, there does not need to be either. The bulk of the wires can be contained at the top where the PSU is installed, or in the deep cavity on the left, below the drive bays.
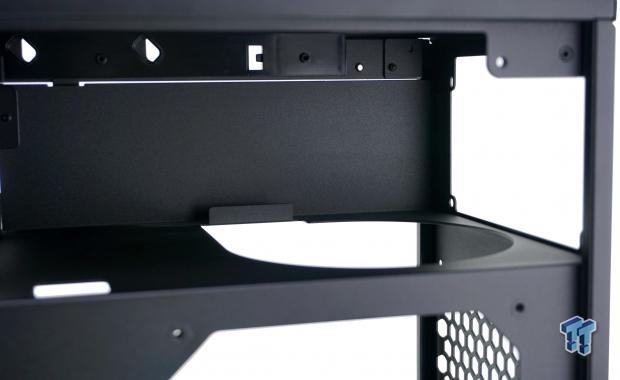
At the top, if the chassis, from the back, a PSU can be slid into place. The 160mm is a hard measurement, as the tab on the frame seen in the upper-right corner, and another tab on the HDD bays are the pinch points to that measurement. Once installed, the PSU draws air through it via the large hole in the floor of the PSU cover.

Wires are kept to a minimum in the 301. There is a long lead which is for the HD Audio connector, a shorter SATA power plug for the front panel LEDs. The USB 3.0 cable is longer again, like the HD Audio cable, and the power switch, reset switch, and HDD LED wires are all sleeved as one cable.
Hardware & Documentation

The first bits of hardware we are showing consists of the hex head screws at the left, which are used to mount the PSU and the expansion cards. On the right, we have both the socket to drive them, and the other four standoffs used for Micro-ATX motherboard installations.

In the group we see this time, we have pan head M3 screws for mounting the motherboard, and below them are eight washers for those opting for liquid cooling. In Win also supplies fifteen fan screws, and also a set of countersunk M3 screws to mount 2.5" drives into the drive bays.

In Win also sends the 301 with five wire ties to help to contain the wires so that the back panel will go back onto the chassis without conflict. The bent steel and pair of screws are a GPU support bracket, which we have seen in Other In Win cases, and is something we like.

Then, of course, there is the user manual. The manual covers many languages, as well as showing everything from how to open the chassis, through installing all components, and even shows the cooling capabilities inside of the 301. Even if this were the first chassis you ever touched, the manual would get you through the customization and installation process.
Case Build & Finished Product

Once we placed all of our gear inside of the case, it was time to take another spin around it to see how it all plays out. As for the front of the 301, not a single thing has changed, but there is one to be had once we power this system.
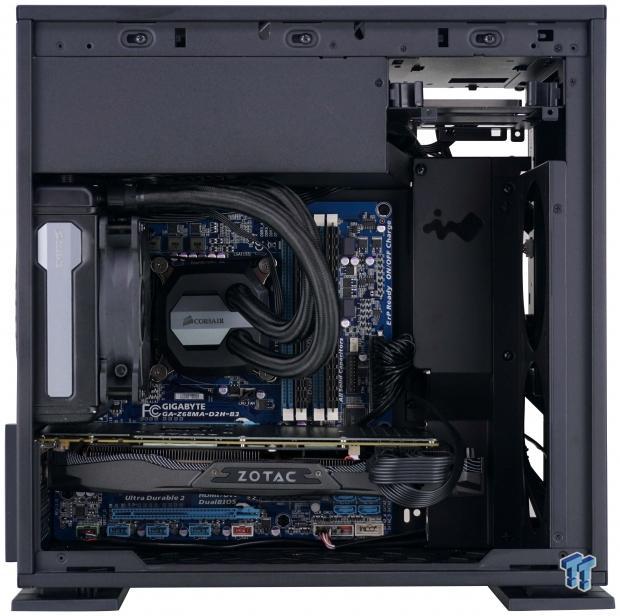
All of the system we installed found its place, and even filling it as best as we could, there is still room to be had. When it comes to mounting all of the parts, we had no0 issues, but we did find the GPU support bracket cause our third fan to rub funny in the cooler, so we opted to leave it out.

We did have to dig out a smaller PSU to fit in the top of the chassis, but it mounts simply. We also tested a dust shield for the rear I/O and found no issues with fitment there. When it came to the video card, we found that the screws line up perfectly, and that is a great thing, as trying to flex this 1.2mm thick steel of the chassis is near impossible to do.
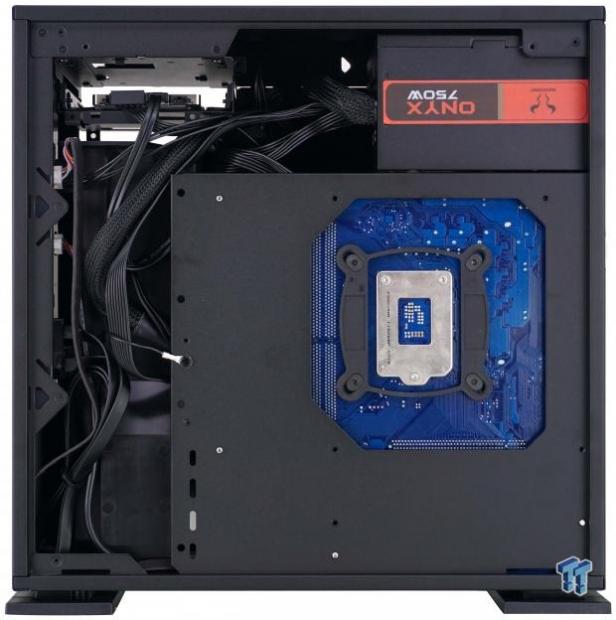
Using the smaller PSU, you are left with room at the top to tuck in the excess PSU wires, while the bulk of the chassis and PSU wires can be routed and contained down the left side. It also helps to explain why there is little room behind the motherboard tray because, with this layout, it is not needed in the slightest.
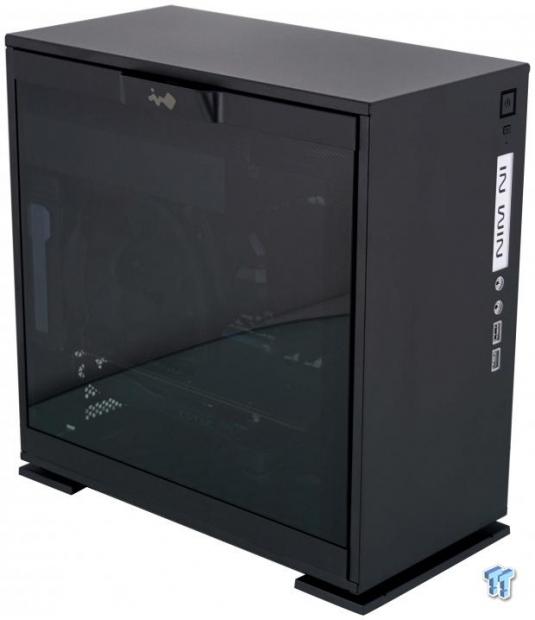
After reattaching the right side panel, and tilting the tempered glass panel into position, pressing the frame of the glass until the latch clicks, we were ready to have one of our final looks at the clean and sophisticated appearance of the In Win 301.
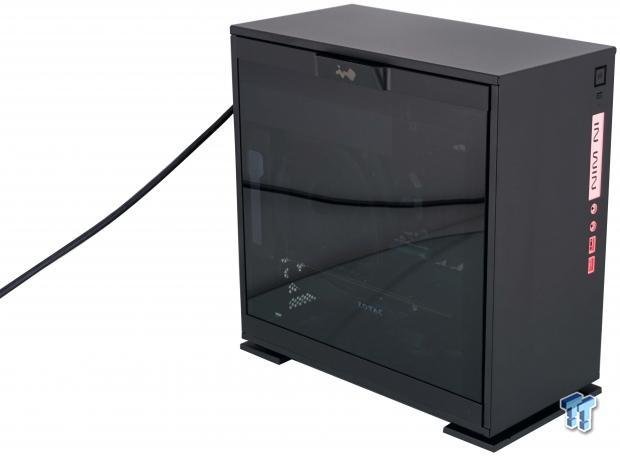
Once we powered the system up, the glow of red LEDs on the front panel is hard to miss. We can also see the LEDs from inside of the chassis through the tinted glass, and all in all, we have nothing to complain about with the way this looks.
As for noise levels, there are none by default. In Win does not supply a fan inside of this case, so the amount of noise the 301 makes for you, is solely based on the fans chosen to cool it.
Final Thoughts
Within the confines of a cubic chassis design, In Win still finds a way to impress us. Opting to use thicker materials for the construction takes an ordinary chassis into something more akin to a bomb shelter. Adding lights to the front in a new way is also a great addition in our minds, and is something many will appreciate when it comes to the aesthetic appeal if the 301. On top of all of that, we love the oven door style side panels, which disconnect at the top first, and sit in grooves at the bottom, making opening and getting inside much easier on the user. The icing on the cake is that while using tinted tempered glass on the left side of the case, there are no screws or grommets to break up the smooth look that glass should bring to a chassis. Inside or out, we found a well thought out design, which while slightly limiting to what can be installed into it, has a solution for all needs, done in a manner that other companies are not even pondering yet.
Most potential customers would like to have a fan or two in the chassis, but we realize that in many instances the pre-installed fans get stripped from the case for AIO coolers, or for fans that will match a theme or produce minimal noise. We appreciate that In Win leaves that decision up to the user so that the amount of noise and airflow inside of the 301 is all up to you. Things like water cooling support in the fro0nt and at the back is a huger plus to the case, and is something many will appreciate as well when it comes to picking out parts to fit inside of the chassis. The only thing that caused us any grief at all is the limiting factor of the PSU length, so we could not install out standard PSU. Keep this in mind when it comes to picking parts, as this, and the CPU air cooler height will restrict choices, but there are options available that will work.
For such a beefy, thoroughly thought out design, we still feel that the price we are seeing is a tad low. We realize that anyone looking to buy the 301 is loving the $69.99 pricing, we feel that In Win could have charged more for this case, and is not. Kudos to In Win for not price gauging. Even though we tend to gravitate to curved or add shaped cases, as the cube is getting quite old now, In Win has brought us back to appreciate what this shape of a case can deliver.
If we were pondering a Mini-ITX or Micro-ATX build and were not looking for the smallest chassis possible, the In Win 301 Mini-Tower Chassis would be at the top of our list. You may find many similar offerings, and they may even come close, in price, but we are certain you will not find one built like a tank, with the level of fit and finish that In Win has presented here today.
Chad's Chassis Test System Specifications
- Motherboard: GIGABYTE GA-Z68X-UD4-B3
- CPU: Intel Core i7 2600K (buy from Amazon)
- Cooler: Corsair H80i GT (buy from Amazon)
- Memory: G.Skill Ripjaws F3-12800CL6D-4GBXH
- Video Card: ZOTAC GeForce GTX 970 AMP. Extreme Edition (buy from Amazon)
- Storage: SuperSpeed 128GB SSD
- Power Supply: SilverStone SST-ST85F-G (buy from Amazon)
- OS: Microsoft Windows 7 Ultimate 64-bit (buy from Amazon)

| Performance | 95% |
| Quality | 100% |
| Features | 90% |
| Value | 100% |
| Overall | 96% |
The Bottom Line: In Win's 301 Mini-Tower is a huge success! It is as strong as an ox, the fit and finish is top-notch, and we dig the way In Win innovates. There is not one reason why the In Win 301 should be passed by for smaller motherboard based builds.
PRICING: You can find products similar to this one for sale below.
 United
States: Find other tech and computer products like this
over at Amazon.com
 United
Kingdom: Find other tech and computer products like this
over at Amazon.co.uk
 Australia:
Find other tech and computer products like this over at Amazon.com.au
 Canada:
Find other tech and computer products like this over at Amazon.ca
 Deutschland:
Finde andere Technik- und Computerprodukte wie dieses auf Amazon.de
What's in Chad's PC?
- CPU: Intel Core i7 13700K
- MOTHERBOARD: ASUS ROG Maximus Z690 Hero Eva
- RAM: TEAM DDR5-7200 32GB
- GPU: ASUS GeForce RTX 3090 Eva
- SSD: addlink m.2 2TB
- OS: Windows 11 Pro
- COOLER: Fractal Lumen S36
- PSU: be quiet! Dark Power Pro 1500W
- KEYBOARD: ASUS ROG Strix Scope TKL Electro Punk
- MOUSE: ASUS ROG Strix Impact Electro Punk
- MONITOR: ASUS ROG Swift OLED PG42UQ
Related Tags

