
The Bottom Line
Introduction, Specifications, and Pricing
The maker movement is here to stay, and for some companies, they took this concept to heart. The one that stands out above all others, with now many contributions in allowing customers to customize components, has to be Cooler Master. They offer peripherals, cases, and coolers with the maker movement in mind when the designs were first drawn up, and it seems there is no end to their support of this. Cooler Master has developed CPU coolers that can be run in multiple aesthetic appearances, delivered keyboards with all the bells and whistles that coders and tinkerers love to play around with, and have had much success in their newer lineup of MasterCase and MasterBox cases.
We have seen both the MasterCase 5 and the MasterBox 5, and it is easy to say that we were and still are impressed with what they put forward with designs such as these. However, there is always a large segment of the market that has no desire for a full-tower chassis; they prefer to have smaller cases to house their smaller form factor systems in. Cooler Master, not wanting to isolate these customers, has pushed their boundaries, and have released something a fair bit more compact that the previous two offerings. On top of a size reduction, none of the "Make It Yours" mentality has been lost in this design. The sheer number of features offered in their latest Micro-ATX tower chassis is impressive, to say the least.
Of course, this new MasterCase Pro 3 which Cooler Master has released does keep some of the heritage of the chassis line, with a very familiar outside style and appearance. While maintaining a familiar look, Cooler Master has made changes inside and out, all for your benefit. While modularity is key, the amount of options that the MasterCase Pro 3 presents is even better than what was found in its larger brothers. For those of you who want everything that the chassis market can offer in features, and tend to gravitate to Micro-ATX or Mini-ITX motherboards, Cooler Master is now offering a case worthy of anyone's attention, and shares the spirit of the maker movement to the best of their ability.
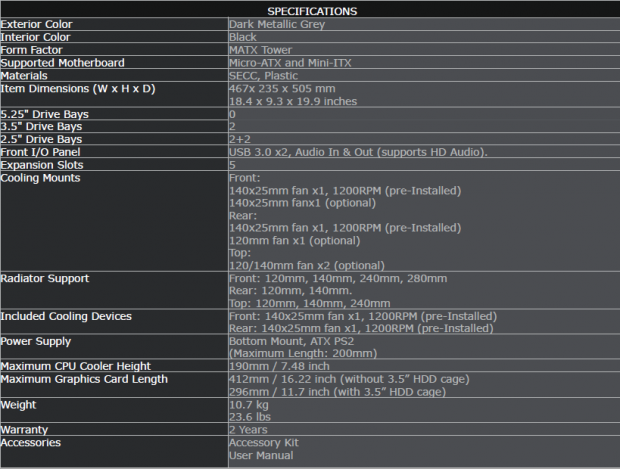
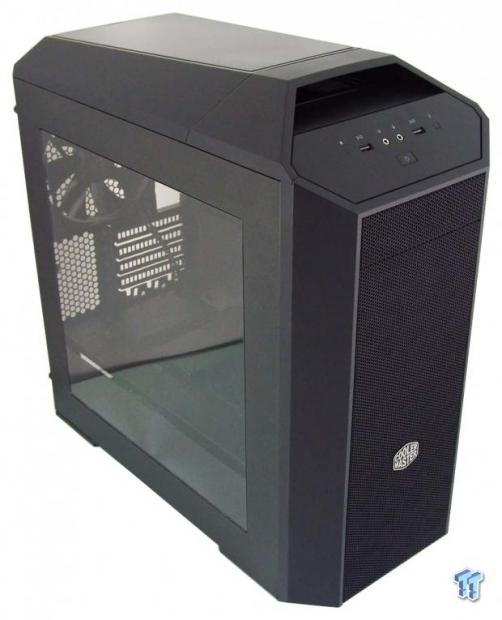
The MasterCase Pro 3 is defined as a Micro-ATX tower chassis and is only offered in dark metallic gray at this time. It stands 505mm tall, 467mm from front to back, and 235mm wide, and it weighs in at 10.7kg. This SECC steel and ABS plastic design is made to support Micro-ATX and Mini-ITX motherboards and sports a two-year warranty. The MasterCase Pro 3 keeps the large mesh panel on the front which runs from top to bottom, and also keeps the angled back front I/O panel, and the gentle angle of the top as it slowly drops away toward the back. The sides are both flat, with no random shapes presenting themselves in extended sections of steel. But on the left side panel, there is a full sized window that leaves just enough steel around it to be structurally sound.
Inside of the chassis, there are no conventional 5.25" bays on the inside, but there is a removable bay cover in the front bezel. While a cage is not installed by Cooler Master in this location, they do supply a pair of drive bay brackets so that you may install a fan controller in this location. There are only two locations at the bottom of the chassis for 3.5" drives, and this cage is removable as well. As for the 2.5" drives, there is a two plus two configuration, but only three trays are sent inside of the chassis.
There is the wiring from the front I/O panel with has plenty of length and is all black, so it easily blends in with the interior's black paint job. They do not mention this in the chart, but as you make your way from the front of the chassis to the back, there is a floor which separates the PSU and storage from the rest of the PC. The reason we are bringing this up now is that this section is also completely removable. Getting to the back of the chassis, we find the MasterCase Pro 3 offers up five expansion slots, four of them for video cards, and the lowest slot comes with a cord-tending bracket.
Cooling is well thought out in this design, too. The front of the chassis offers a removable bracket, into which you can install either two 120mm fans or a pair of 140mm fans. In combination with this front fan bracket and the space afforded on the inside, a 120mm, 140mm, 240mm, or a 280mm radiator can be installed here as well. From Cooler Master, the front comes shipped with a single 1200 RPM 140mm fan. The rear of the MasterCase Pro 3 can house either a 120mm or 140mm fan, but Cooler Master installed another 140mm fan at this location. This area can also be used to mount a 120mm or 140mm radiator. On to the top, we see that it houses the same fan options as the front of the chassis delivered, but when it comes to liquid cooling, we do lose support for a 280mm radiator, but there is room for a 240mm radiator.
At this time, as we are writing this just ahead of the MasterCase Pro 3 release, we are not finding anything concrete for pricing on the internet. We have been told that this chassis will release to the public on the 30th of August, and we should start to see stock on shelves as soon as September 6th. With this bit of information, Cooler Master also provided us with the MSRP, and the MasterCase Pro 3 is set to cost you just $99.99. With everything you are about to see, along with many options for additional purchases of components soon to be available from the Cooler Master store, the initial investment is worthy of every penny as it sits. If you do find yourself needing extra bits, or want to make the case work better for you, the parts will be there for the picking, but of course, with an additional investment required. The reality is, though, a few of the optional bits "could" be used, but the MasterCase Pro 3 stands on its own as shipped and leaves us wanting very little else.
Chad's Chassis Test System Specifications
- Motherboard: GIGABYTE GA-Z68X-UD4-B3
- CPU: Intel Core i7 2600K (buy from Amazon)
- Cooler: Corsair H80i GT (buy from Amazon)
- Memory: G.Skill Ripjaws F3-12800CL6D-4GBXH
- Video Card: ZOTAC GeForce GTX 970 AMP. Extreme Edition (buy from Amazon)
- Storage: SuperSpeed 128GB SSD
- Power Supply: SilverStone SST-ST85F-G (buy from Amazon)
- OS: Microsoft Windows 7 Ultimate 64-bit (buy from Amazon)
Packaging

The packaging is gray and matches the external color of the chassis. The company name and logo is at the top, above a pair of chassis images, and it has the MasterCase Pro 3 name laid over it. There is also a notation of the FreeForm Modular System, which allows you to customize, adjust, and upgrade the chassis as needed.
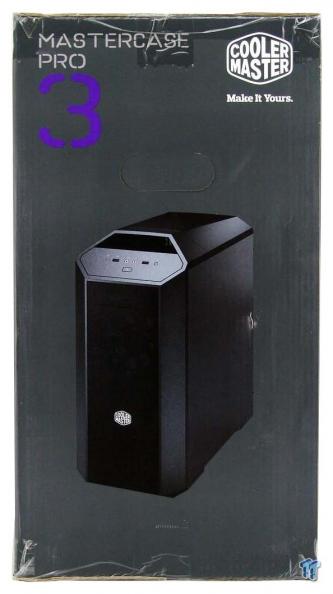
The chassis and company naming are found at the top of this thin panel. Below the carrying handle, the bulk of this panel is used to present the image of the chassis showing the front, top, and right side of it.
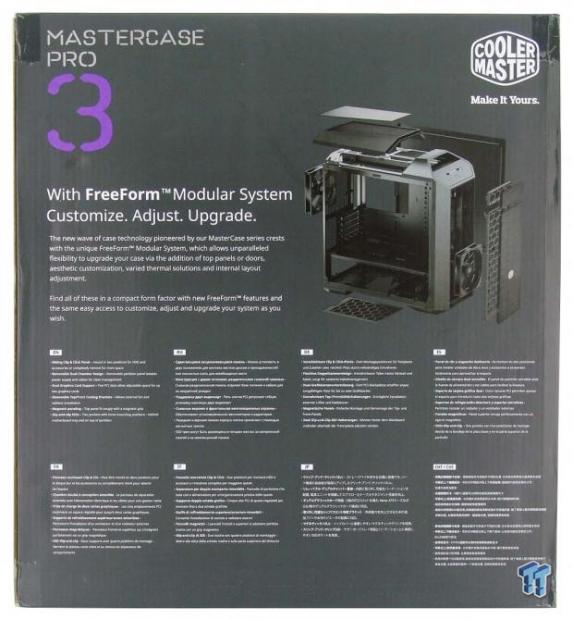
Naming again flanks the top of the back of the box, but this time, the image below helps to explain the FreeForm Modular System, as it displays a lot of the removable sections and components. The lower section is used to list the chassis features, and this is repeated a total of eight times in various languages.
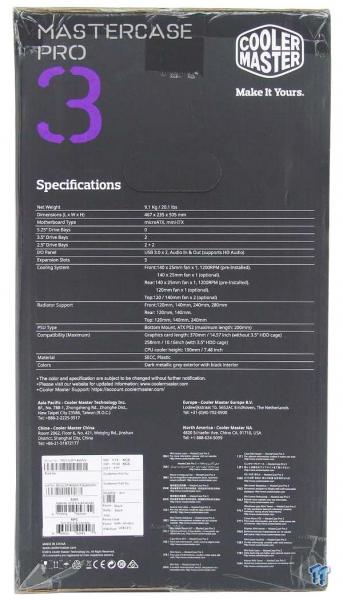
The last panel offers the technical specifications of the MasterCase Pro 3, and this chart is identical to the one we just went over on the last page. There is some fine print at the bottom which delivers company information, and the notation of this being a PC chassis named the MasterCase Pro 3.
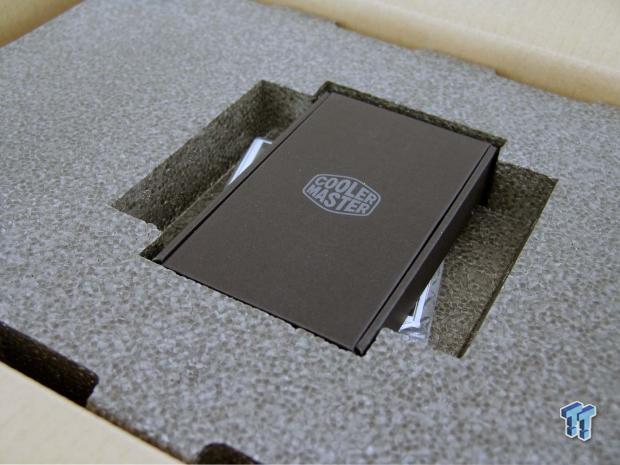
When we opened the top of the box, we were a bit surprised to see gray Styrofoam used to protect the chassis, but we also found the hardware and literature set into a cutout. This way you can check all the hardware against the manual, and gauge if everything is there before you even get to the chassis.
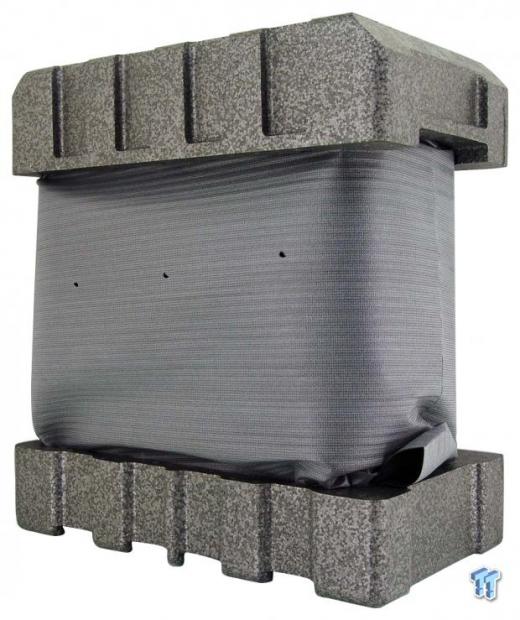
Removing the chassis and its inner packaging, we see a lot of gray. The huge Styrofoam end caps will have no issues protecting the chassis inside of it. Taking things a step further, rather than a plain plastic liner, Cooler Master opts for a thing foam inner layer to protect the paint finish, as well as the large side window from damage. This chassis took a very long voyage to get to us, and the packaging worked so well that we found not one scratch or imperfection in it.
Cooler Master MasterCase Pro 3 Micro-ATX Tower Chassis
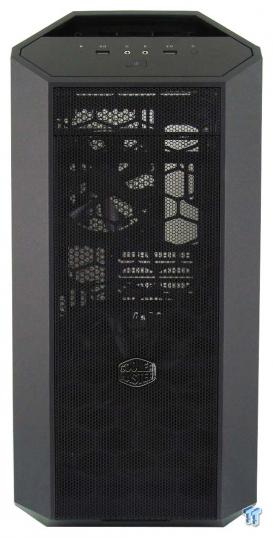
The MasterCase Pro 3 looks much like the earlier cases in this series. The swept back sides on the front bezel on either side of the steel mesh, even the laid back top to offer a handle as well as a location for the front I/O panel.
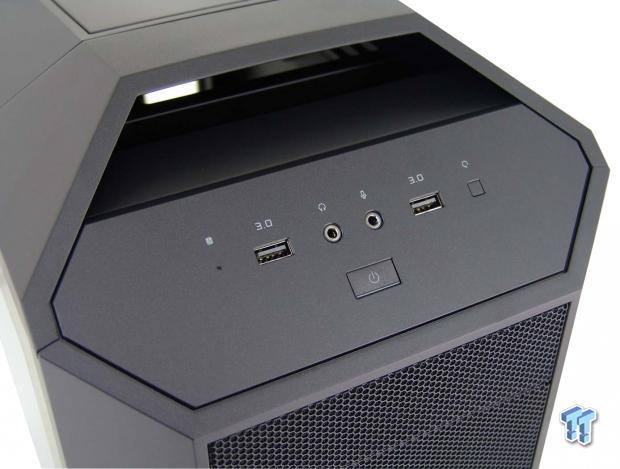
The front I/O panel offers less than we see on most, but sometimes less is more. This is an instance where offering the HDD LED, a USB 3.0 port, the HD Audio jacks above the power button, another USB 3.0 port, and a tiny reset button helps keep a smooth and simpler look.
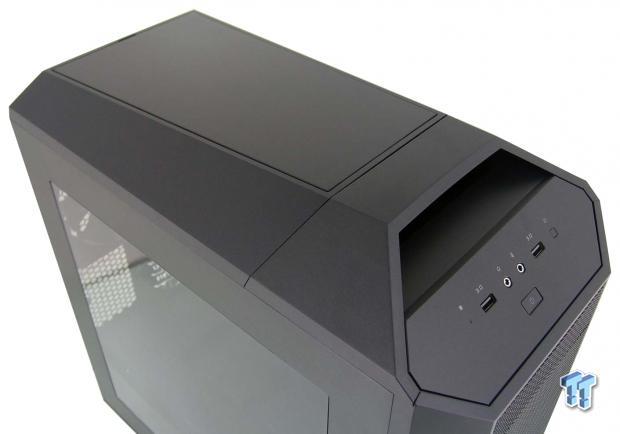
Above the front I/O panel is a large access for your hand to fit and carry the MasterCase Pro 3. Behind that is a long section, which at this time is still on the chassis, and is also covered with a removable plastic top cover, which is magnetically held into place.
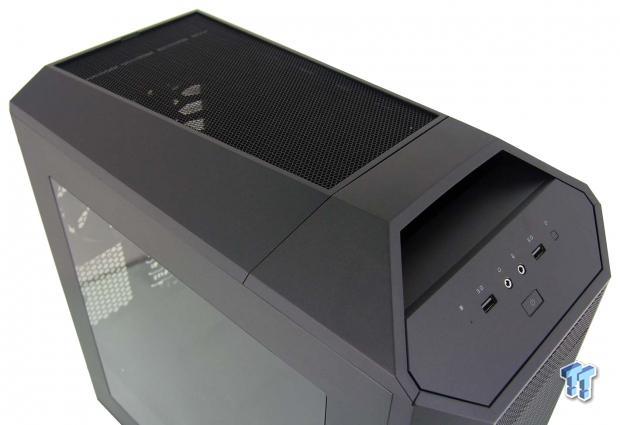
There is a slot at the beck edge that allows you to get a fingernail under the cover to lift it up and off the chassis. Under the cover, we find the chassis sports a full mesh panel in this area, and can be used in either configuration.
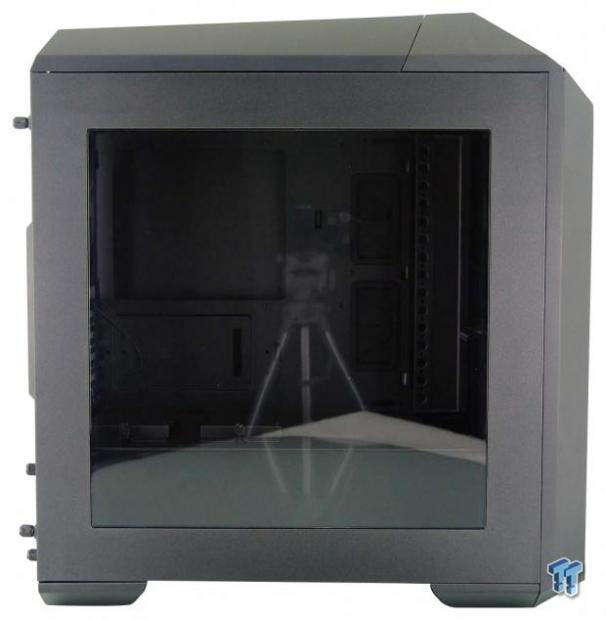
Looking at the MasterCase Pro 3, from the left side, we first notice the huge window, with the least amount of steel around it as possible. The panel meets the top and the front square to them, the top of the chassis thins down as you move towards the back, and captured thumbscrews hold this panel in place.
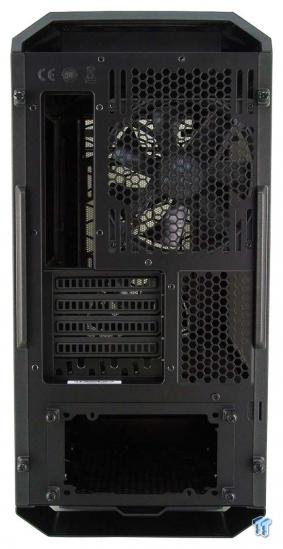
The back starts by offering a wide hole along the top, which allows another access point to carry this chassis. There is the rear I/O slot, and the 120mm or 140mm fan can be adjusted in height when mounted. We then run into the five expansion slots and some passive ventilation before we get down to the PSU mounting bracket, allowing the PSU to slide in from the back of the chassis.
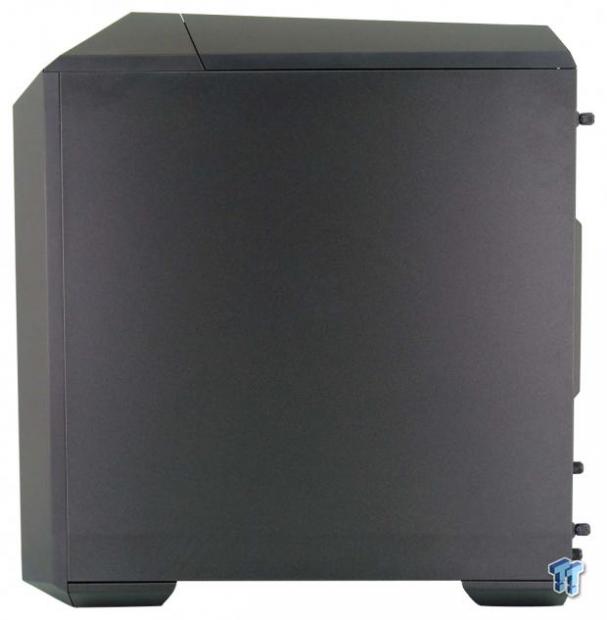
The right side of this chassis is identical to the left side, but of course, there is no window on this side. Again, the lines are tight around the panel, and just like the other panel and the PSU mounting plate, captured thumbscrews are used, so you do not lose or misplace them.
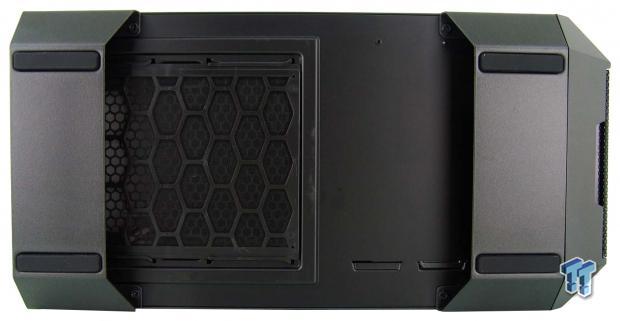
Under the MasterCase Pro 3, we find thin feet applied to the large legs that support this chassis at the front and back of the chassis. Near the front leg, along the bottom, we find tabs which help hold in the removable HDD cage, and at the back is a large removable dust filter to keep the PSU fan clean.
Inside the MasterCase Pro 3
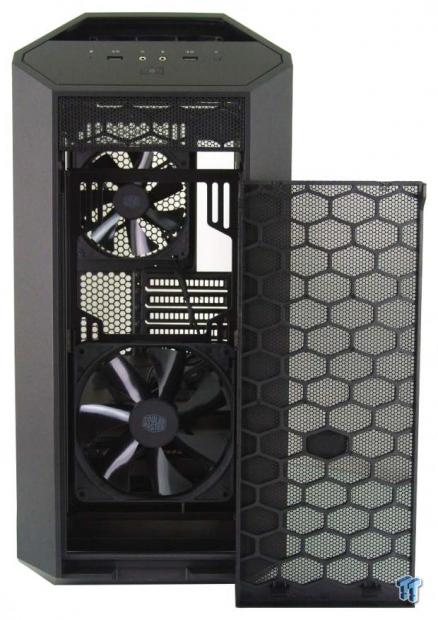
Pulling at the bottom of the mesh insert, allows it to swing out and drop away so that you may access the fan mounting. The entire front panel will also come off of the chassis, and exposes the screws to remove the bracket holding the fan at this time. Even the top bay cover is removable, as it is just clipped into the frame of the front bezel.
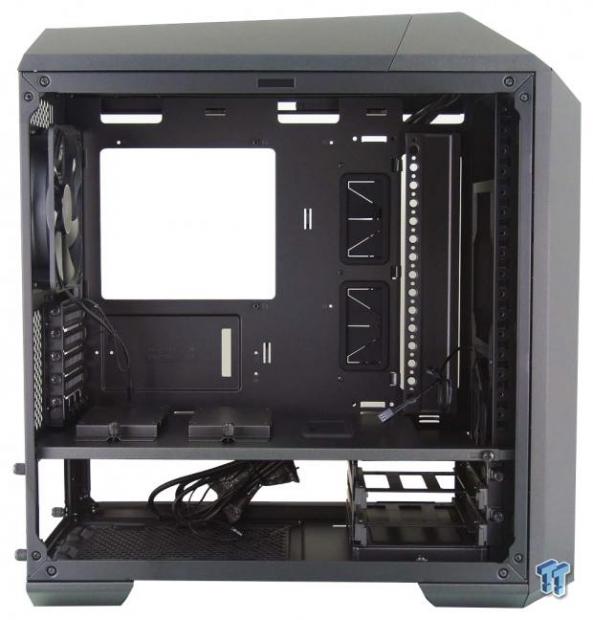
Since we already found the hardware and literature early on, only the wiring is what is left on the inside of the chassis. The front I/O wiring is bundled and ran to the bottom to keep it off the interior of the window, and the 3-pin fan leads are grouped tightly so that they will cause no harm either.
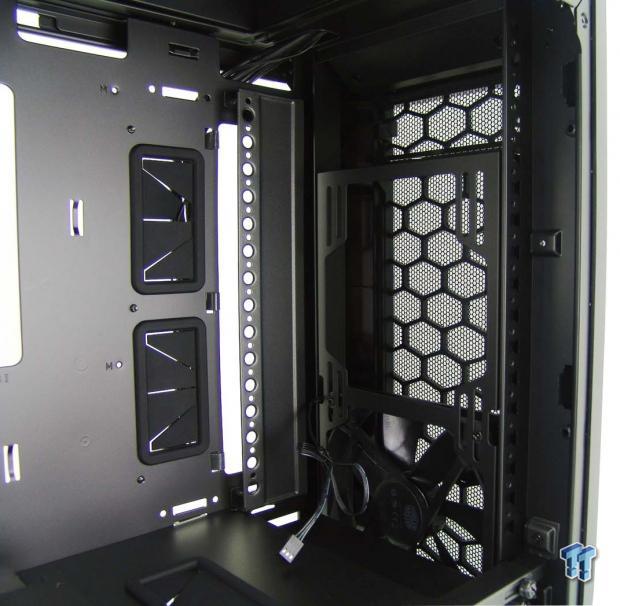
While there is no cage for 5.25" drives, there are brackets to add one found in the hardware. The rail with all the holes to the left, it can be relocated further left, and is used to help support the modular HDD rack, and can also be used to support a reservoir or various other things. There is also a cut out near the front, on the mid-plate, which will allow room for a radiator, and still be able to keep this mid-plate in the chassis.
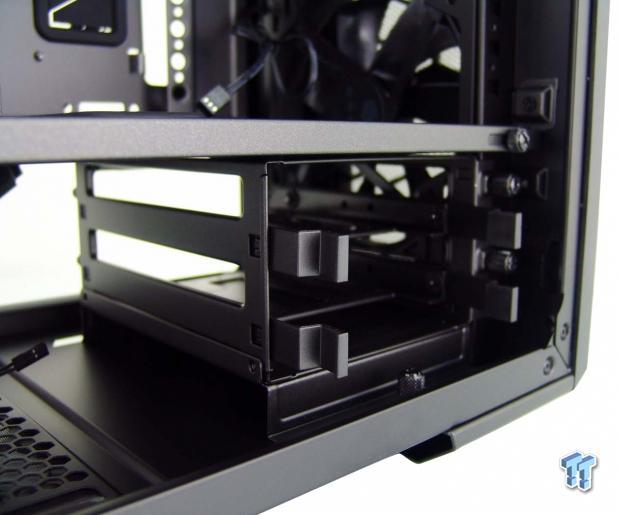
Below the false floor of the MasterCase Pro 3, we find the pair of 3.5" drive trays inside of this removable and movable HDD rack. Two screws at the right allow the cage to be freed, while another on the floor allows for the removal of its base. At the right edge of the mid-plate, we find another screw, which frees up this spot, if you plan to remove the false floor.
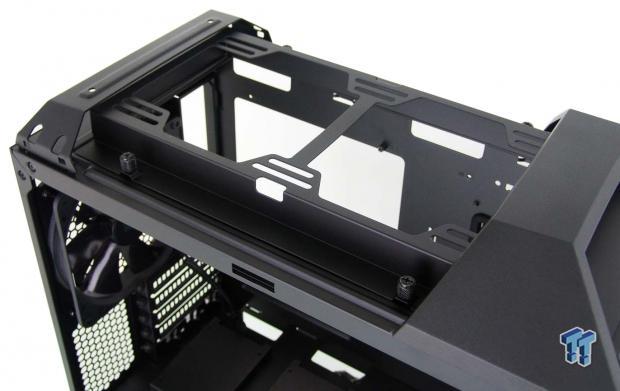
The top panel slides back, and can be then lifted off the chassis frame. Doing so exposes the metal fan bracket for cooling options here. It is the same bracket used in the front, they have captured screws to mount the bracket, and if not for the front I/O panel, both areas would support the same radiator sizes.
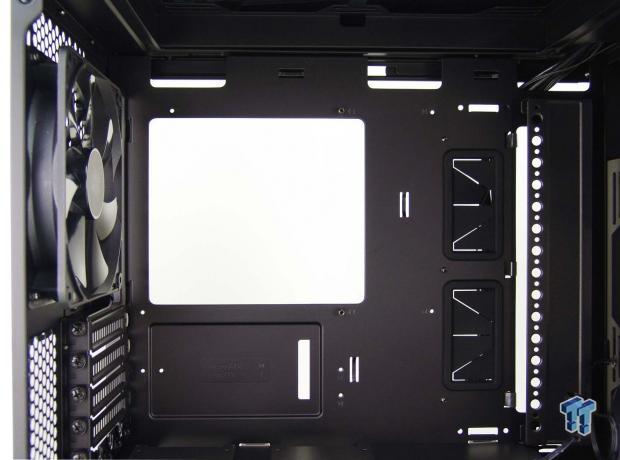
Three holes along the top, two with grommets down the right side, and an open area further right makes wiring easy to accomplish cleanly in this chassis. There are only a select few wire tie points, but there is a better option on the back for that. The CPU cooler access hole is large, and just below it, you have the possibility to place an SSD, but only with Mini-ITX motherboards.
Inside the MasterCase 3 Pro Continued
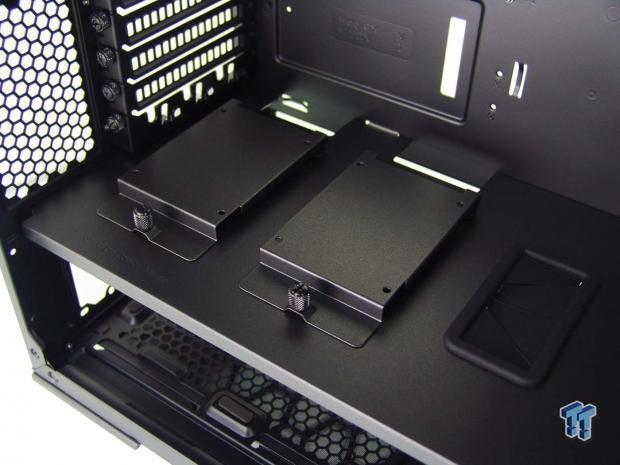
The back portion of that mid-plate delivers two more locations for SSDs, and two trays are provided there for this. To the right of them is a decent sized hole with a grommet, which allows for wiring or tubing to pass through this part of the chassis.
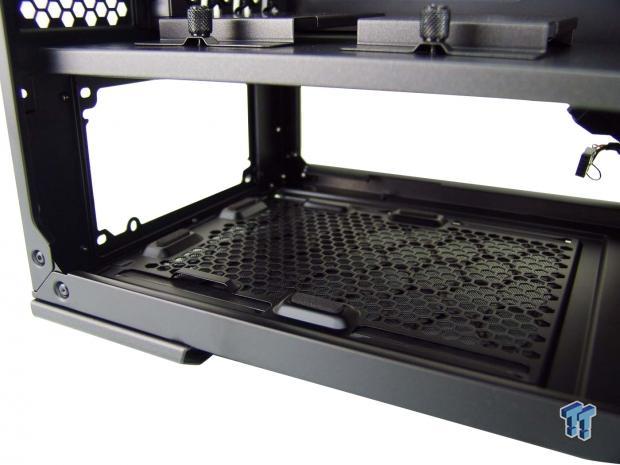
Below the mid-plate, at the back, we find room for the PSU to be installed. The bends of the steel components block entry from either side and is why there is the PSU bracket out back. The ventilation is long and makes it easier on longer PSUs to be installed, and they will rest on the four rubber pads to isolate vibrations and noise.
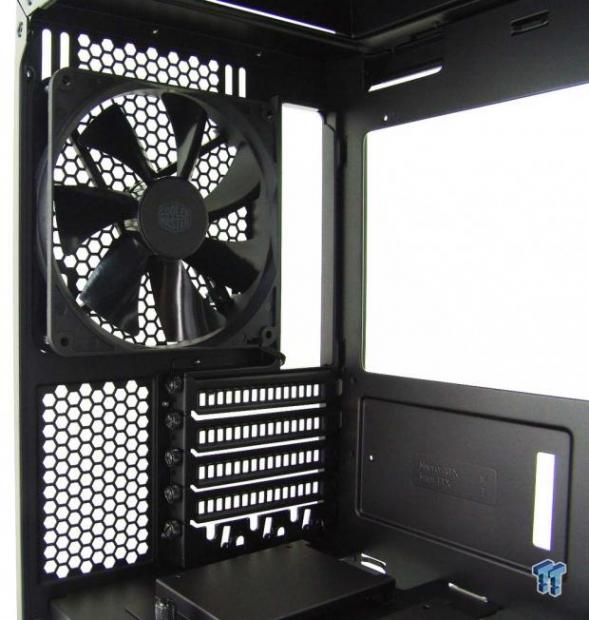
The back of the chassis is where the second 140mm fan is located, and it can be adjusted higher than it is installed now. We also see thumbscrews holding in the slot covers, and the lowest one is made for cord-tending, not to be populated with a card.
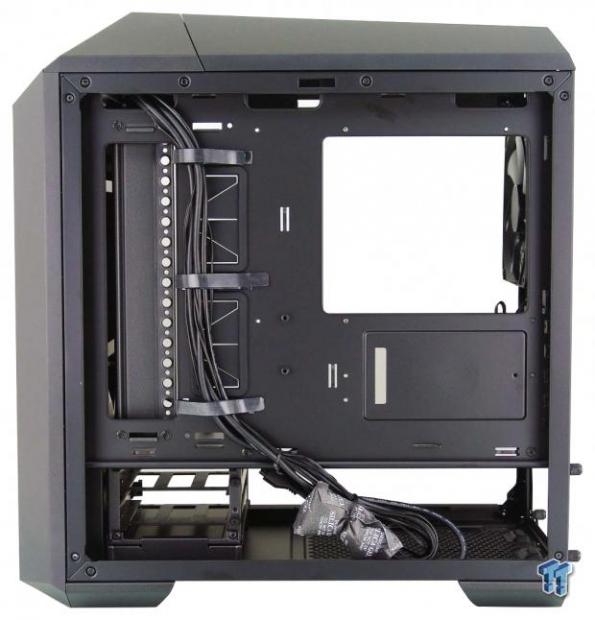
Cooler Master offers hook and loop straps to tend to the wiring behind the tray, and there is at minimum 20mm of room to do this. You can install an SSD tray below the access hole, and nearly the entire left edge is open behind that removable mounting rail.
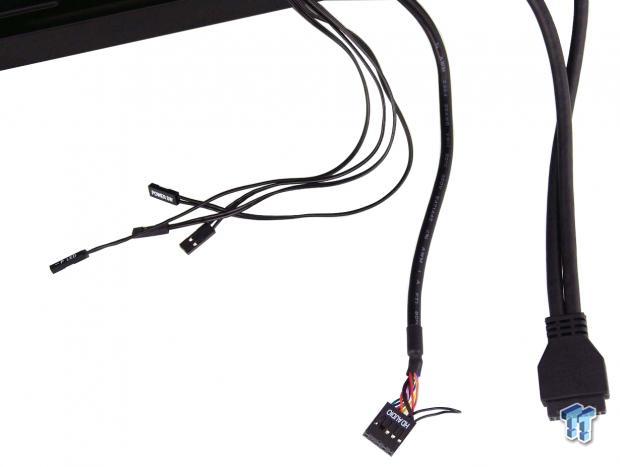
With no USB 2.0 support, the front I/O wiring is condensed. There are thin wires for the lighting and switches in the panel; there are a thick HD Audio cable and a native USB 3.0 connection. We do prefer it all to be black, but the short section of the HD Audio cable will not be that distracting when wired onto the motherboard.
Hardware & Documentation
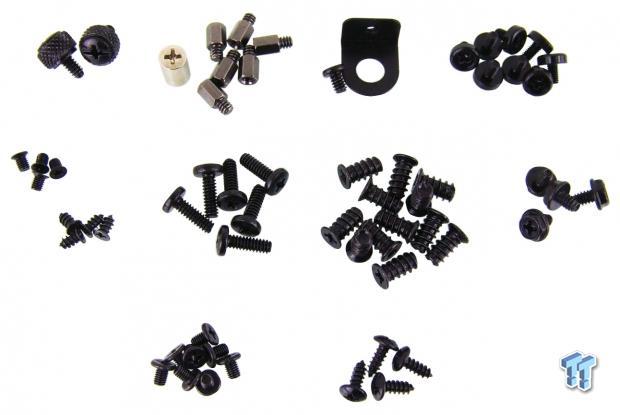
There is a lot offered when it comes to screws and such. The issue is that while the parts are labeled in the manual, they do not state what they are for. We assume the thumbscrews are to lock the HDD trays in place, the standoffs and socket are for the motherboard mounting, there is a Kensington lock loop and screw, and there are eight motherboard screws. In the second row, we think the small screws are for the 5.25" brackets, and screws to mount the controller in this bay. The long 6/32 screws are a bit of a mystery, but we know where the fan and PSU screws need to be used. At the bottom, we find some SSD mounting screws, and self-tapping screws, to lock in the front or top panels.
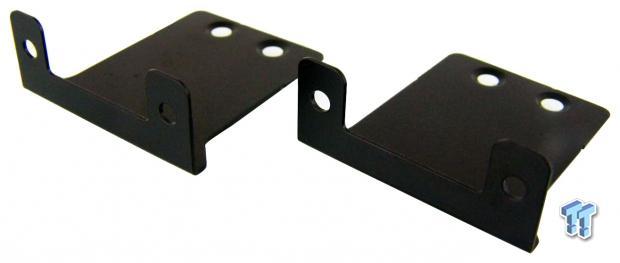
This pair of black metal brackets is what you will need to use if you plan on using a fan controller or card reader at the top of the chassis. The side nearest in the image mounts into the front of the chassis and the pair of holes at the back are used to mount the device.
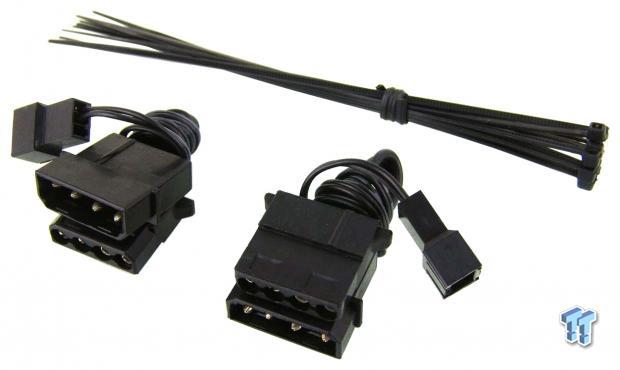
The box of hardware is also sure to include ten wire ties to help manage things behind the motherboard tray. What we were not expecting was to find a pair of 4-pin Molex to 3-pin fan adapters. This way the pair of 3-pin fans can be run at 12V from the PSU, and not needing to take up headers on the motherboard for power.

The user manual supplied by Cooler Master unfolds into a long strip of information. Each panel uses great illustrations and uses minimal text due to the illustrations being so on point. The main issue we found in the manual, is that for the novice builder, the hardware description was lacking, and they are not noted in the steps as to which screws should be used. Cooler Master also sends along the literature covering the two-year warranty. It is here in which you find who to contact, and what reasons are valid for an RMA acceptance.
Case Build & Finished Product
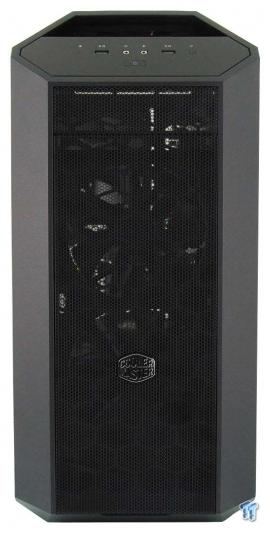
While there is a spot at the top for a fan controller, which could break up the styling, we opted to leave it empty. It is well known that we like cases that keep their initial styling, and with the MasterCase Pro 3, this is, of course, possible to have.
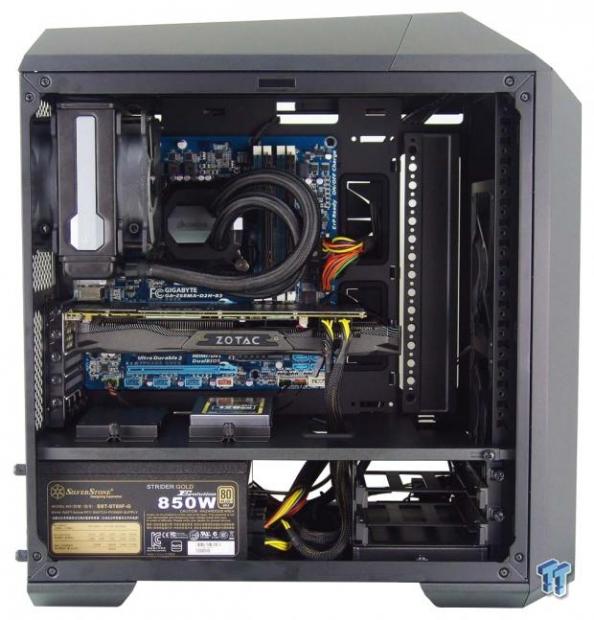
Not one part of the installation had any issues for us. The motherboard uses a pair of helper standoffs to ease mounting, and the video card lined right up, but we did have to flex the back of the chassis just slightly to screw it into place. The AIO and the SSD went right in without issue, and we still have plenty of room to add in more water cooling, even with the Micro-ATX motherboard being used.
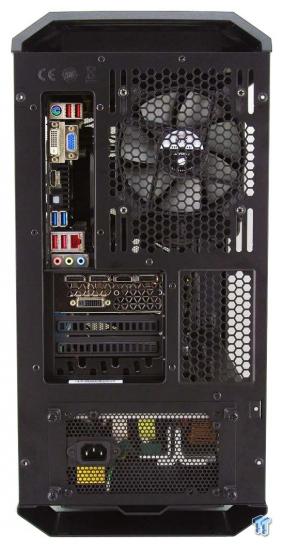
Testing the dust shield fitment had us pressing a bit to lock it in, but once in place, there is no way for it to come easily lose or make any noises. The video card hangs straight across the back, and we also found no difficulty when it came to sliding the PSU in at the bottom, or getting it or the plate mounted again.
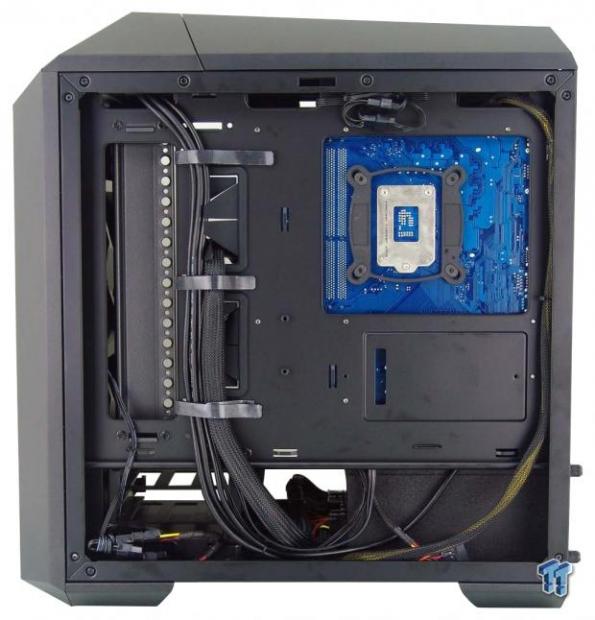
Since the entire bottom of the chassis is open, the wiring flows from the I/O panel, down through the straps, and gently curve at the bottom. They do offer a few points to tie in the 8-pin EPS cable to the right, and we also found room to tie up the AIO fan wiring at the top. Even adding the 24-pin to the straps caused us no problem replacing the door, or holding it securely to the tray.
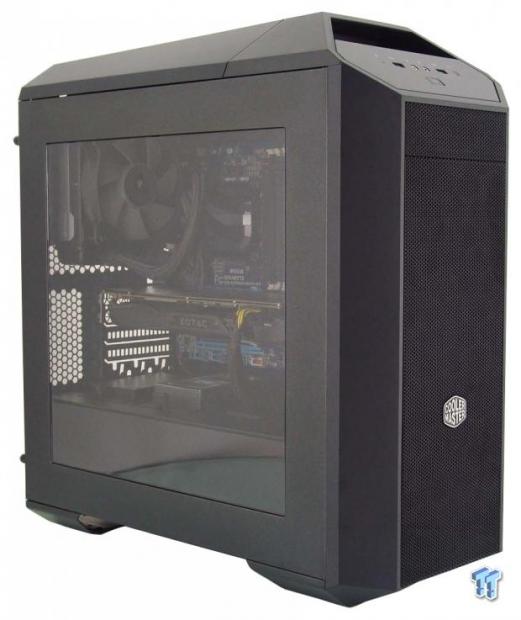
At this point, we have the MasterCase Pro 3 and all of our components closed up and ready for testing. One thing we do want to point out, though, is that now we can see it, notice the bottom section of the side window is blacked out. This way, you get the look of a huge window, but no view of a wiring mess or the HDD rack below the false floor.
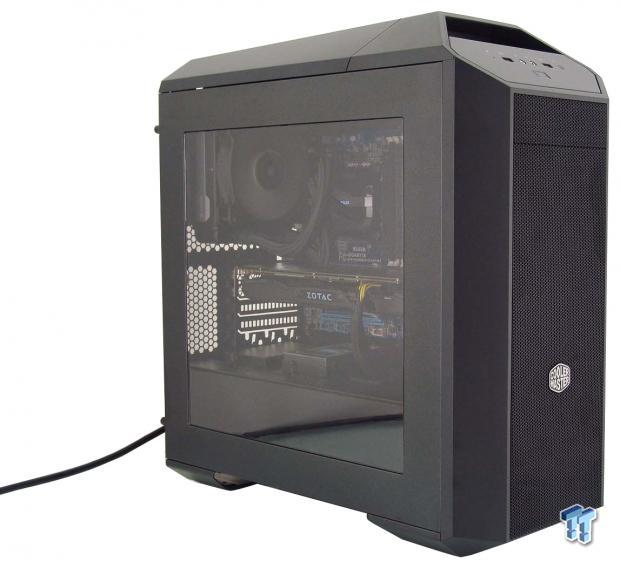
Once we powered things up, the LEDs on the head unit and the video card are easily seen, as is the rest of the hardware in play above the mid-plate. There is a soft white glow to the power button, and an occasional flicker of the blue HDD activity LED, but neither are bright enough to cause a problem.
Final Thoughts
While the reality is that this chassis is not that much more compact than its predecessors, it sure feels that way when looking at it; it is almost an optical illusion that Cooler Master has pulled off with this design. As you place in a Micro-ATX motherboard, it eats up the motherboard tray, and at this time seems to be smaller and better suited to those with smaller systems. On the other hand, when you start removing all of the bits like the HDD cage, the mid-plate over the PSU and look at installing a couple of radiators, you are brought back to the fact that this chassis is quite spacious inside.
The fact that it looks much like its older brothers is something we still like, as we dug everything aesthetically then, and still do now. Not only does it look good, but with just the stock fans in play, the noise level is kept down top 25dB with them running at full speed, and due to the chambered design, even with the top plate covering the mesh, the air flow is quite good.
Of course, with all the modularity the MasterCase Pro 3 brings forth straight out of the box, you still have more options coming soon on the Cooler Master store. Cooler Master will be offering extra "SSD pockets" as they call them, two or three bay HDD cages, a tempered glass option for the left side, and they have even devised a universal VGA holder to help support those saggy cards out there. This will take an extra investment to obtain any of these components, but it is rare outside of the MasterCase series, that a mainstream company went this far to support the chassis in aftermarket options. Although, on the flip side, we don't think it would be asking too much for a discounted rate on a version of this chassis in which all of this is included right out of the box.
However, it is still early in this cases life, and it is quite possible this is slated to happen. No matter how you want to look at the MasterCase Pro 3, the FreeForm Modular System is in full effect and makes it possible to deliver a chassis to fit everyone's personal style. Not something easily accomplished, but with Cooler Master taking a personal effort to be a huge part of the maker movement, it only makes sense that it does.
As we wind things down and sit here pondering the chassis again, we came up with not one major or minor nuisances in which we should try to persuade you away from the MasterCase Pro 3. Of course, the design does set motherboard limitations, but outside of that obvious starting point, we feel this design is top notch with no glaring faults. Considering the $99.99 price point into the equation, we are still left with the feeling that you'll get every pennies worth in this deal.
The styling is on point, the modularity is some of the best in the game, it is solid and stable even with most of the guts removed, and with aftermarket support, this is a chassis that can go on for years and adjust as you change components. In all honesty, Cooler Master has delivered more and put out a better product each time in this series, and at this point, if you plan to use smaller form factor system with room for anything you could need to go with it, you need not look further than this MasterCase Pro 3 from Cooler Master - it is just that good.
Chad's Chassis Test System Specifications
- Motherboard: GIGABYTE GA-Z68X-UD4-B3
- CPU: Intel Core i7 2600K (buy from Amazon)
- Cooler: Corsair H80i GT (buy from Amazon)
- Memory: G.Skill Ripjaws F3-12800CL6D-4GBXH
- Video Card: ZOTAC GeForce GTX 970 AMP. Extreme Edition (buy from Amazon)
- Storage: SuperSpeed 128GB SSD
- Power Supply: SilverStone SST-ST85F-G (buy from Amazon)
- OS: Microsoft Windows 7 Ultimate 64-bit (buy from Amazon)

| Performance | 98% |
| Quality including Design and Build | 99% |
| General Features | 100% |
| Bundle and Packaging | 98% |
| Value for Money | 98% |
| Overall | 99% |
The Bottom Line: The MasterCase Pro 3 is a perfect chassis for those who want things the big boys bring, just for smaller motherboards. The modularity is some of the best in the market and there are options for aftermarket gear - an affordable and sleek looking package. Cooler Master has raised the bar with this design!
PRICING: You can find products similar to this one for sale below.
 United
States: Find other tech and computer products like this
over at Amazon.com
 United
Kingdom: Find other tech and computer products like this
over at Amazon.co.uk
 Australia:
Find other tech and computer products like this over at Amazon.com.au
 Canada:
Find other tech and computer products like this over at Amazon.ca
 Deutschland:
Finde andere Technik- und Computerprodukte wie dieses auf Amazon.de
What's in Chad's PC?
- CPU: Intel Core i7 13700K
- MOTHERBOARD: ASUS ROG Maximus Z690 Hero Eva
- RAM: TEAM DDR5-7200 32GB
- GPU: ASUS GeForce RTX 3090 Eva
- SSD: addlink m.2 2TB
- OS: Windows 11 Pro
- COOLER: Fractal Lumen S36
- PSU: be quiet! Dark Power Pro 1500W
- KEYBOARD: ASUS ROG Strix Scope TKL Electro Punk
- MOUSE: ASUS ROG Strix Impact Electro Punk
- MONITOR: ASUS ROG Swift OLED PG42UQ
Similar Content
Related Tags

