
The Bottom Line
Introduction, Specifications and Pricing
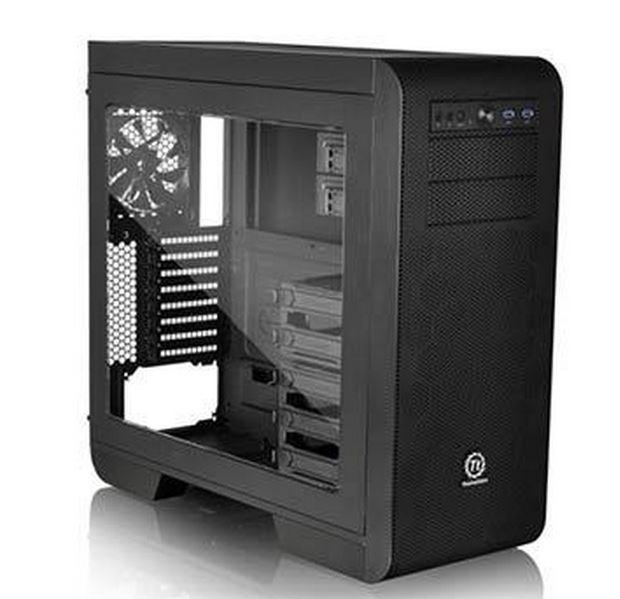
Back in spring of this year, we looked at the flagship chassis Thermaltake released for the Core series, the Core V71. The chassis was labeled a full-tower, but was much closer to a super-tower design. The main concept behind the chassis was to look cool, provide a thermally cool inside, and offer many ways for customers to customize the chassis to fit their specific needs, all while delivering a ton of water cooling capabilities. For those out there that really like the Core V71, but don't have the need or the space for such a large chassis, today is your lucky day, as we now have the mid-tower version of that chassis in our hands.
The Core V71 set the bar very high, even for a smaller chassis with a reduction in cost to follow. We just expect so much in the Core series after seeing a design like the Core V71. Fortunately, Thermaltake still delivers many, if not all, of the same favorable design elements found in the Core V71, even within much smaller dimensions. There is still E-ATX motherboard support, and there is still the modularity and customizability that we expect with the name "Core." Thermaltake also does a very nice job of keeping most of the water cooling options available in this design as well.
So, who is this little brother to the Core V71 that impressed us so? It is Thermaltake's Core V51 mid-tower chassis. For a mid-tower chassis, it sure doesn't feel mid-tower. You almost forget it isn't a full-tower, and that does not happen often, but with the ability to pretty much gut the interior (sans the motherboard tray), and even with a wider E-ATX motherboard in play, you will find more than enough room and options to suit your needs.
As we get up close and personal with the Core V71, the external similarities to the Core V71 are very obvious. However, while the specifications are indeed very similar between the two, the new chassis comes with its own internal layout and concepts that we are sure you will find to your liking.
As the chart displays at the top, this is the Core V51 chassis, and it is indeed a mid-tower chassis, as we can see by the 21.3" height, and not so much by the 22" depth and 9.3" width. The chassis is made mostly of SPCC steel, but there are bits here and there made of ABS plastic. All of the components except for the left side panel window are painted or dyed black.

This chassis offers two removable 5.25" bays, and there are two racks that will house up to five 3.5" or 2.5" drives (or any mix of five) hanging completely separated from the ODD bays. Just behind the bays, we find a motherboard tray capable of allowing the installation of mini-ITX, Micro-ATX, ATX, and even E-ATX motherboards. Then, at the back of the chassis we find the eight expansion slots with the PSU mounted on the floor, and Thermaltake left the adjustable PSU support in the chassis.
Cooling is one of the Core V51's specialties, and we will explain why. In the front of the chassis, you can install up to three 120mm fans or radiators, up to two 140mm fans or the same in radiator support, or a single 200mm fan or radiator. The top of the chassis offers the same as we addressed, but also expands a little. There is room for three 120mm fans, but there is also room for three 140mm fans, or a triple radiator. There is also room for two 200mm fans there as well. In the rear of the chassis, there is room for a single 120mm or 140mm fan, while the bottom offers room for up to two 120mm fans or that same spec in radiator support. As you can see, options are abound for cooling, but as it ships, there is a pair of 120mm fans in the front, and a single 120mm fan in the rear of the Core V51.
There are some limitations (if you want to call them that), which will need to be minded when piecing together a build with this chassis. The CPU cooler can be no taller than 185mm in height, which leaves you with about ninety-five percent of the coolers out there to choose from. If you leave in the HDD rack assembly in the front of the chassis as it is shipped, there is only 310mm of room for video cards, but once it is out of the way, there is 480mm of room from the expansion slots to the front inner frame of the Core V51. They also add a limitation of 220mm of room for a PSU, but note how they mention a "bottom fan." That means the limitation is based on the hole the fan breathes through, and while longer units will fit, they may not align with the intake on floor of the chassis.
This chassis shows Thermaltake put a lot of thought into the design, and they still kept true to what makes a Core chassis what it is. Considering that we are able to find this chassis just about anywhere for right around $109.99, we feel it is just about right. We feel that by the time we finish our review of the Core V51, you will agree that they are on the right track with the Core V51 mid-tower chassis to meeting the demands of today's PC culture.
PRICING: You can find the Thermaltake Core V51 for sale below. The prices listed are valid at the time of writing, but can change at any time. Click the link to see the very latest pricing for the best deal.
United States: The Core V51 retails for $109.99 at Amazon.
Canada: The Core V51 retails for CDN$206.58 at Amazon Canada.
Packaging

As many companies do, Thermaltake also went with the cardboard and black printing. The naming is displayed at the top of the box, and a large rendering of the chassis is offered to the left. The web address is displayed at the bottom.
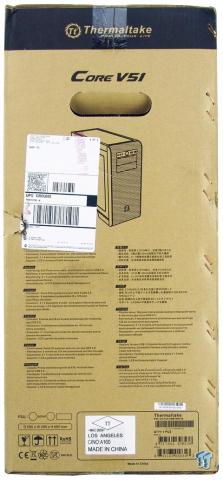
This thin side of the box offers a higher viewing angle for the rendering on the front, and below we find twelve lists of features found in this design. This covers information like LCS support, the amount of bays, I/O connectivity, and the amount of fans installed from the factory.

The back is very similar to the front in most respects, but there is one aspect that has changed. This time, the rendering we are given is an exploded view of the chassis that allows us to see everything that comes out, and the position of the four dust filters. This will also help you gather some ideas for future plans with this chassis.

On our last panel of this chassis packaging, we find a tiny chassis under the naming and handle, but this time, the majority of the room is used for this specifications chart.

For protection on the inside of the box, we find plastic on the inside and the outside of the side panel window, and then the entire chassis is wrapped in a thicker layer of plastic. The thick plastic and the thick Styrofoam end caps did their job admirably, and our Core V51 arrived in very nice shape, free of any damages.
Thermaltake Core V51 Mid-Tower Chassis
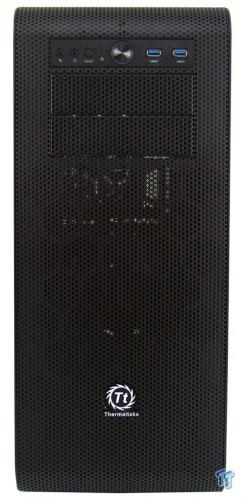
Most of the front, except for the I/O panel and the Tt logo at the bottom, is made of steel mesh that is flat across the front, and it isn't until it curves at the top or bottom that there is any real shape to it. Under the I/O panel, there are two removable covers on the 5.25" bays.

In that front I/O panel, Thermaltake starts at the left with the microphone and headphone jacks, a small reset button, a much smaller HDD activity LED, and a large reset button in the center. To the right of the power button, the panel offers a pair of USB 3.0 ports for easy connectivity.

As we got to the top of the Core V51, we did take the top magnetic dust cover and shift it over some. The filter sits in the slightly lowered fan section, but along with the large holes in the mesh, there are tons of fan options with all the grooves cut in the top.

As we take in the left side of the Core V51, we find a very large window that will afford a view of everything, including the PSU, the motherboard, drives, and even any water cooling you may choose to install. The rest of the steel panel mates well with both the top and front plastic sections, as well as along the bottom where we see the chunky feet carry on the rounded styling.

Since the top offers water cooling holes with grommets, that means thicker radiators will fit above the rear I/O and exhaust fan. Also, we find a cord tender on the back to the right of the eight expansion slots, above the PSU and its filter.

As for the right side of the chassis, it is basically a large expanse of black steel. The bonus here is that the panel offers a few more millimeters of space with the bump out that is pressed into this panel; this will give you much more room to put all of the wiring behind it.

Under the chassis, we find the large plastic feet are connected side to side, and are very sturdy. With the rubber pads on the feet, this chassis will not slide around much at all. Between the feet is a pair of dust filters that split in the middle. One goes out the back, and the one at the front does require the bezel to be removed to access the filter.
Inside the Core V51

With the panels now off the chassis, we get to take a look at the interior. Outside of the bundle of wires at the bottom of the motherboard tray, which are tended to stay out of the way, it is nearly impossible to see the bag of hardware lying in the HDD bays.

At the top, we find this pair of tool-free 5.25" bays. These bays can be filled with obvious things, but they can also be taken out by removing four screws each; the screws are located behind the bezel.

After a small gap of nothingness, we find the five-bay assembly of racks to support storage drives. Each tray is drilled to fit either sized drive, the racks are removable, and you can use just the two-bay section or just the three-bay section, or neither.

With all of the bays now out of the chassis, we can see the options opening up as well. While there are two 120mm fans already in place, there is an adapter plate that can be installed to allow for another to sit atop these two as well. As for the rack to the left, it is not completely useless as-is either, but we need to see the other side to continue that point.

We also wanted to get a view out of the top to show just how many options you have. Not only can you install a multitude of fans and radiators here, but there are also two defined sets for 120mm fans, and one of which allows you to pull everything away from the motherboard to clear much thicker radiators.

As it is, there is a good gap from the top to the first standoff on the motherboard tray; speaking of which, all of the standoffs are installed. We also see a very large access hole, six wire management holes, some with grommets, and seven places to tie wiring.

The space at the back, on the floor, is going to be taken up with a power supply, and you will need to adjust the support bar to fit. In front of that, depending on the PSU length, there are also fan and radiator options now that the bays above are removed.

Looking in at the back exaggerates the gap at the top for cooling gear. From here we can also see the fan with its sleeved cable and three-pin power connection. We also see that in this design, the thumbscrews are kept indoors for more security.

The wiring is somewhat bundled and run for users to get an idea of what needs to be done here. While room to the right is limited to 20mm in total with the door panel on, to the left, there are two locations for a pair of drives to hang using the tabs and clips provided there.

The chassis wiring is long enough to get anywhere you need it to cleanly, and without strain. We have the native USB 3.0 connection, the front panel LED and switch wiring, the three-pin fan leads from the front 120mm fans, and lastly, the HD Audio cable, all dressed in black and ready to blend in.
Accessories and Documentation

This is most of what is provided in the small bag of hardware found in the HDD rack. There is a set of long fan screws for a third front fan, a motherboard speaker, a few standoffs for E-ATX motherboards, and the socket to help install or remove them. At the bottom, we find countersunk screws to use with the drive trays for 2.5" drives. We see the PSU screws, short fan screws, and the motherboard screws in the middle, and to the right are screws for 3.5" drives, attaching an optional plate, and mounting the motherboard.

At the top we have that optional plate for the front of the chassis. After removing the lower ODD bay, this will screw into the front of the chassis to provide the mounting holes for the top of the third fan. Along with the two already holding wires in the chassis, we are given seven adjustable and reusable wire managing straps.
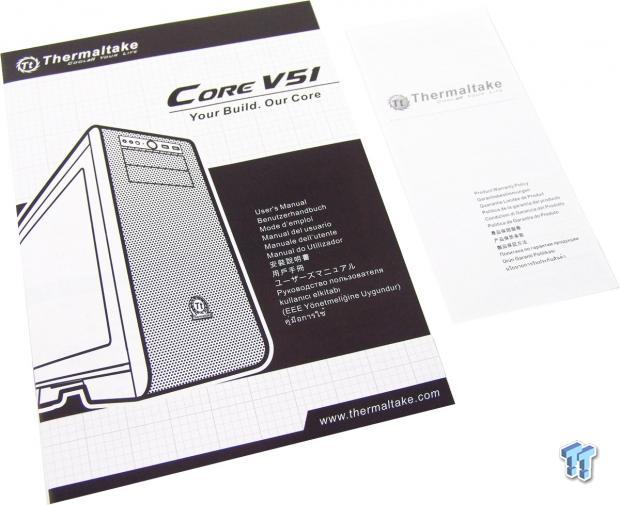
The manual at the left offers everything you will need to know, from start to finish. There is a parts list, instructions for all the components you will need to install, and even diagrams of all of the fan and water cooling options to allow users to take full advantage of what the Core V51 offers. There is also an insert covering the terms and conditions of the warranty.
Case Build and Finished Product
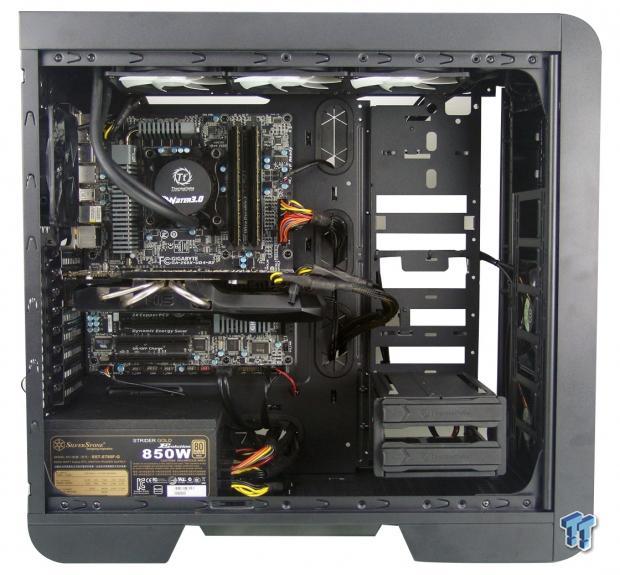
It took a bit of time to accomplish, but we are very pleased with the outcome. The Water 3.0 Ultimate fits into the top with ease, and we gutted the parts we didn't need for better air flow in general. Even though this is a mid-tower and the board is right above the PSU, it really does have a full-tower feel to it in this state.
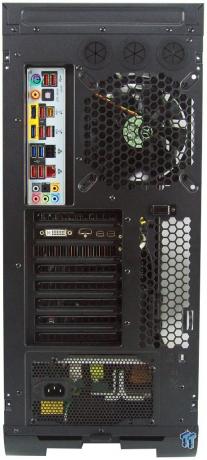
Around back, we had no issues to discuss with the shield installation, securing the card, or with the way the PSU installs; all is well and normal here.

While we realize we left a SATA plug un-powered when we took this image, we had no issues routing the cabling, tending to it, and most importantly, getting the panel back on over this. While in our setup, we did find the need for a fan hub; even stacking the wiring as we did posed no issue for the Core V51.

With the Core V51 all back together and ready for power, we like the external appearance and the view through the window. Even with all the tweaking and stress involved with gutting the chassis and completing the build, the mating lines are still as close and even as they were out of the box.
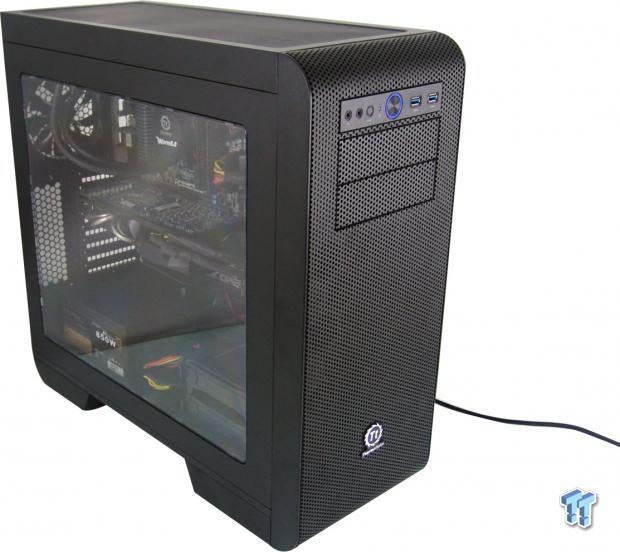
Once powered, things came to life in a big way. We had the fan hub powered with 12V, so the Water 3.0 was putting off a lot of noise. However, when isolated, the stock fans never went over 36dB. Even with the bays in play, and just the stock fans, flow is good, and will suffice for most systems.
Final Thoughts
As we did with its larger brother, we still find ourselves really liking the outward aesthetics that these new Core series cases bring to the market. The simplicity of a flat mesh front panel that just curves to the top and bottom edges of the chassis looks sleek, and the steel, almost gives off a soft vibe. The magnetic filter on the top, the slide out front filter, and the pair in the floor, make this an almost impenetrable fortress against dust. Even with only three fans installed out of the huge amount of options allowed in this chassis, we found our components were nice and chilly while held securely inside of this very stable mid-tower - even with half the guts missing.
With the Core V51, we sort of took the easy way out, using a triple 120mm
AIO, and air cooling for the video card. This chassis has so much more potential than that. If you want to leave all of the bays in, there is still ample room at the top for double and triple radiators of varying thicknesses. Additionally, due to the offset allowed in the top, when using 120mm gear, you can get really thick with the depth, as it is far from the motherboard, coolers, and memory. If you can work a screwdriver, and have no need for the bays, the options open wide. We are talking potential radiators in the front, the top, the back, and even on the floor. Since the bays are not structural to the chassis design as it is shipped, the Core V51 is as rock solid, if not more solid with radiators installed versus the bays.
On the down side... oh, who are we trying to kid with that one? There really is no down side to this chassis, or what it intends to deliver to the customers. With modular systems at play, the option to gut things without destroying the structural integrity, plenty of room for our gear, and the ability to house an E-ATX motherboard without issue, this chassis really sticks in our minds. The Core V51 keeps all the style we loved from the beginning, and offers so many options you will likely run out of money before you could call this chassis stuffed with gear. Then, there are the smaller things like the internal screws for the expansion slots, a cord tender so you don't lose gear at a LAN, and a design that even when filled with fifty pounds of gear, will resist rough handling, and still sit straight as an arrow as you rest it on the table. The Core V51 is impressive, to say the least.
So, in the end, we have a very feature loaded chassis that is built like a brick outhouse. Considering most feature rich mid-tower designs will run you in the hundred dollar range, with a few exceptions, at $109.99, the Thermaltake Core V51 mid-tower chassis is a steal. The design is just that good.
PRICING: You can find the Thermaltake Core V51 for sale below. The prices listed are valid at the time of writing, but can change at any time. Click the link to see the very latest pricing for the best deal.
United States: The Core V51 retails for $109.99 at Amazon.
Canada: The Core V51 retails for CDN$206.58 at Amazon Canada.

| Performance | 95% |
| Quality including Design and Build | 100% |
| General Features | 100% |
| Bundle and Packaging | 94% |
| Value for Money | 99% |
| Overall | 98% |
The Bottom Line: Thermaltake's Core V51 is a mid-tower case unlike most others! Room for almost anything you can think of, options galore, and one of the most thought out water cooling cases in this price range that is solid as a rock to boot.
PRICING: You can find products similar to this one for sale below.
 United
States: Find other tech and computer products like this
over at Amazon.com
 United
Kingdom: Find other tech and computer products like this
over at Amazon.co.uk
 Australia:
Find other tech and computer products like this over at Amazon.com.au
 Canada:
Find other tech and computer products like this over at Amazon.ca
 Deutschland:
Finde andere Technik- und Computerprodukte wie dieses auf Amazon.de
What's in Chad's PC?
- CPU: Intel Core i7 13700K
- MOTHERBOARD: ASUS ROG Maximus Z690 Hero Eva
- RAM: TEAM DDR5-7200 32GB
- GPU: ASUS GeForce RTX 3090 Eva
- SSD: addlink m.2 2TB
- OS: Windows 11 Pro
- COOLER: Fractal Lumen S36
- PSU: be quiet! Dark Power Pro 1500W
- KEYBOARD: ASUS ROG Strix Scope TKL Electro Punk
- MOUSE: ASUS ROG Strix Impact Electro Punk
- MONITOR: ASUS ROG Swift OLED PG42UQ
Similar Content
Related Tags

