Introduction
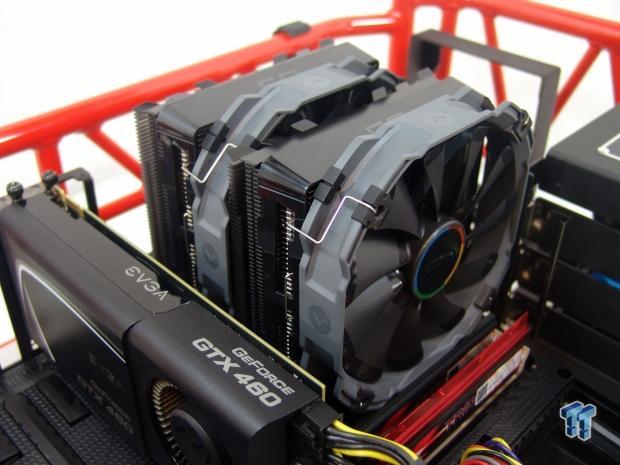
While it may seem like CRYORIG popped up out of nowhere, it seems the company and their products have been an idea and concept for a long time; it has just taken them a while to get all the ducks in a row to launch the company successfully. By visiting their web page, you will also find out that they are absorbing people from some of the larger and greatly successful companies out there (like Thermalright, Phanteks, Prolimatech, as well as others), and are cooperatively putting together in a brain trust of sorts to try to deliver the best products available on the market today.
It also seems as if they are very humble with their roots in the overclocking scene, when top-tier products were coolers like the Thermaltake Blue Orb. With that in mind, it does seem that CRYORIG is equally as interested in feedback from users and the rest of the market, to be able to develop and deliver what they believe are some of the best coolers available on the market today.
What really strikes me as a reviewer is their ability to take that basic cooler design that anyone could build, and take it to the next level in many ways that a lot of companies do not address. Once you see these coolers, it really makes you wonder why these ideas have not been tried before. At this point we won't get into much detail on these ideas, but they encompass things such as DirectCompress Soldering, Heatsink Displacement Optimization, Jet Fin Acceleration System, Heat pipe Convex Align, and for the fans, they have High Precision Low Noise (HPLN) sleeve bearings. As we progress through the review, we will be sure to point out these systems, and explain how they make this cooler design more efficient than some of the more plain designs available on the market.
The cooler we are looking at today is one of two versions that will be released to the market soon. We are looking at their flag ship version today, the R1 Ultimate, but there is also the R1 Universal, which uses a thin fan on the front to allow the cooler to fit in more systems. Other than the R1 Ultimate having the thicker fan on the front, the only other way to tell them apart is the color of the fan shrouds; on the Ultimate they are black, and on the Universal, they are white.
While we have all seen a dual-tower CPU cooler before, you have never seen one with as much attention to detail, or as many "tricks" applied to the design; both of which allow this cooler to have the potential to be the best of the best in dual-tower designs. At this point, I would strongly urge you to continue reading to find out what all of these systems are, and what they do for the end result. You may just be surprised at what CRYORIG has delivered.
Specifications, Availability and Pricing
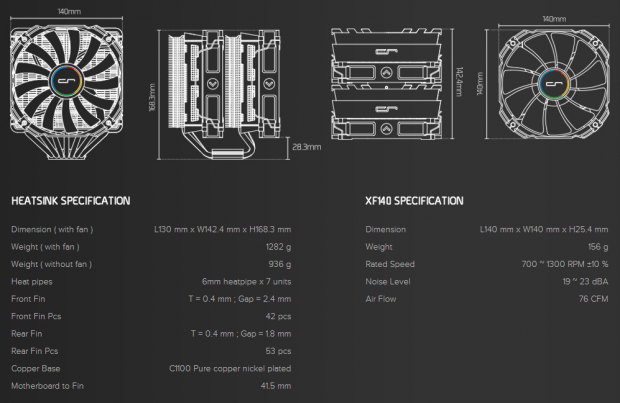
The CRYORIG R1 Ultimate is of course a dual tower cooler, but each tower is comprised of two separate sections of fins. The front half of each tower consists of 42 fins, but the rear half of the towers each have stacks of 53 fins. This is the Jet Fin Acceleration system, which uses the laws of fluid dynamics, where if airflow is squeezed, it will also increase in its speed. Both towers stand 168.3mm tall, they are 140mm in width, and with the fans installed, they are 130mm long. One other thing to consider is that with the fans on the cooler body, the R1 Ultimate weighs in at a hefty 1282 grams.
To take the heat from the CPU, the R1 Ultimate uses a copper base that has seven heat pipes spread across the base in their Heat pipe Convex Align System. This simply means that the further from the center of the base the heat pipes are, the more they are actually raised in the base. The seven pipes are also soldered into the aluminum fins via their DirectCompress solder method, which offers up to 10% more surface contact over other methods. The heat will then rise through the fins in their Heatsink Displacement Optimization.
Here, the idea is simple: Since heat from the pipes radiates into the aluminum in a radial pattern, CRYORIG has offset the pipes across the span of the fins to allow heat to be sent to different areas; whereas a typical straight line has two pipes dumping into the same general area.
Then, of course, you are given a pair of XFR140mm fans to cool the R1 Ultimate. These fans are 25mm deep, and 140mm in height and width. These fans also have rubber pads applied to their corners to keep vibrations and chatter at bay. The fans can spin at speeds from 700 to 1300 RPM, and can deliver up to 76 CFM each. While there isn't much on the chart otherwise, for say static pressure, or starting voltages, but it does claim that these fans should not exceed 23 dB(A) of noise level while in operation.
Currently, as I put this review together, all we know is that this cooler has a supposed release date of January 2014. As we sit halfway through the month at this point, we still see no availability in retail or e-tailer markets. In fact, when you visit the site and look for a store near you, there is nothing provided under any of the tabs on their page. While it may be a little bit before we actually see this cooler start to flood the market, it is rumored that they have set the MSRP for the R1 Ultimate at $89.95.
In comparison to other top-tier cooling solutions, this seems to be on point, and by itself, should be no reason to pass on this design. Hopefully they can get supply levels up so that this CRYORIG R1 Ultimate can be widely available, as I believe that there are going to be quite a few of you out there looking to get one of your very own.
Packaging
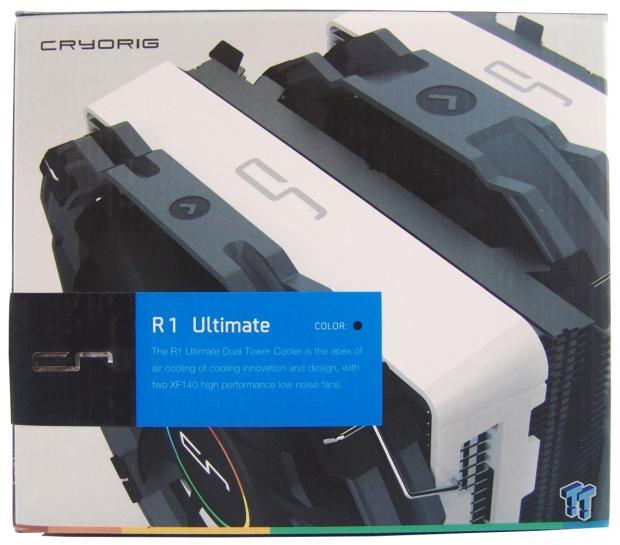
CRYORIG packs the R1 Ultimate into a large cardboard box with (strangely enough) the R1 Universal cooler as the image that takes up the entire front panel. Inside the box is in fact the R1 Ultimate, and it is also marked as black in color. The last bit to notice is the stripe at the bottom with the multiple colors, which you will also see carried over to the fans of this cooler.

As the main image continues off onto the right side of the packaging, there are three things that CRYORIG thinks you need to know about this cooler: It is designed around compatibility with many motherboards (cases and socket types for starters), the cooler installs quickly and in five easy steps, and they are dealing with noise levels by offering low noise PWM fans with acoustic noise cancellation absorbers on them.
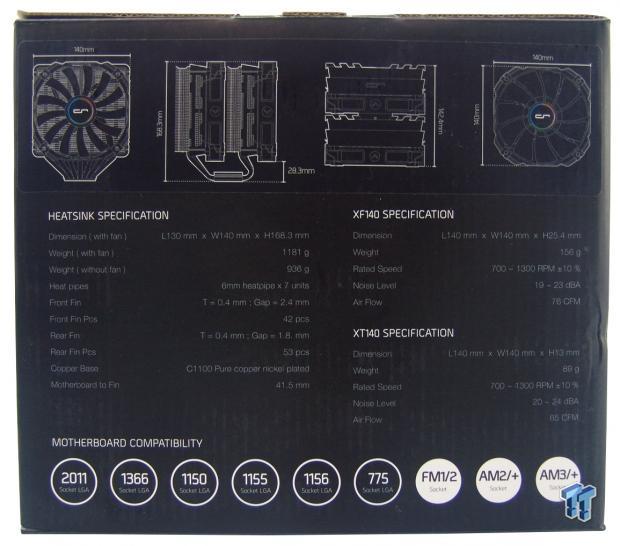
On the back of the packaging, we see the same things we discussed on the previous page. There are dimensional renderings of the R1 Ultimate, and you are also given the full specifications on the packaging, so there is little need to go to the site for more information when pondering this purchase in the store. The bottom of the panel shows all of the compatible sockets that this cooler will install on.
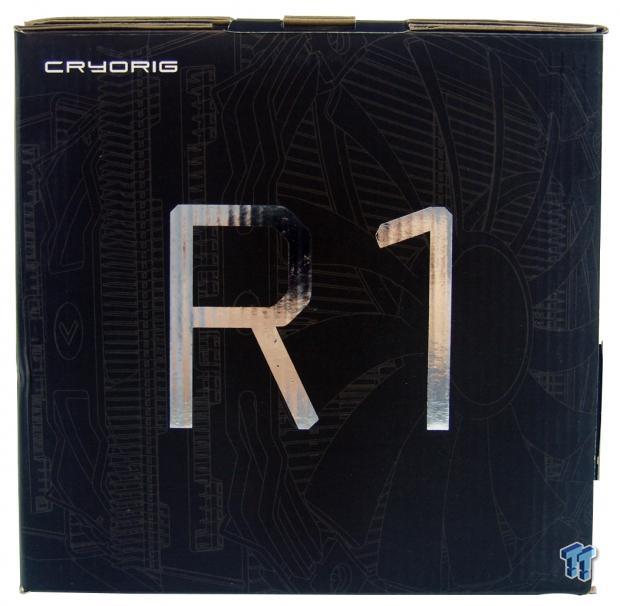
The last external panel offers very little. There is just a rendering of the cooler in grey on a black backdrop, and both the CRYORIG and R1 naming are placed here as well in chromed lettering.

Once you lift the top of the box, you are greeted with the information that not only do you get a three-year product warranty, but by registering this product, the warranty is extended. Also, by registering this product, you are made a VIP member of the CRYORIG website, and have chances to win free goodies.
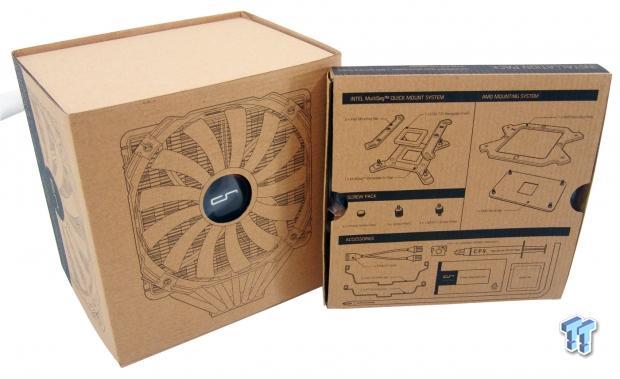
Inside of the box, there is first a thin box that contains all of the hardware needed to go with the R1 Ultimate. Under that box, there is another box that contains the R1 Ultimate. All of the packaging is cardboard other than the bags on the hardware, and the cooler body, and even so, the R1 Ultimate arrived in perfect shape for our testing.
CRYORIG R1 Ultimate CPU Cooler
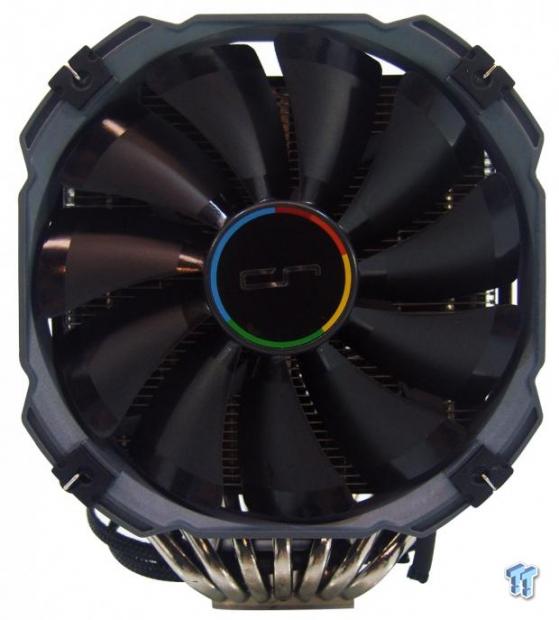
Looking right into the first of two XF140 fans, you notice that it doesn't leave much of the cooler behind it visible. In fact, at this angle, all you can really see are the seven nickel plated heat pipes at the base of the cooler. You may also notice the gradual curve to their placement in the base of the cooler.
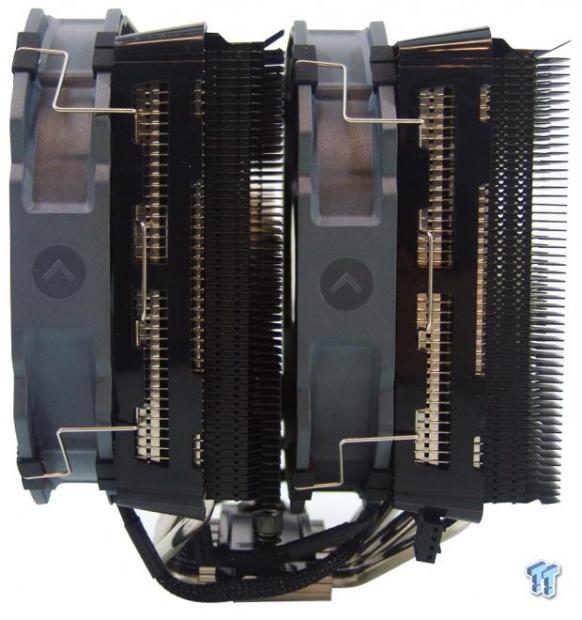
The right side of the R1 Ultimate shows that both fans on the cooler are identical, and that they are attached using wire fan clips that clip onto the side of plastic shrouds. While you may be noticing the two different colors of the fins as well, we will get to that soon enough.
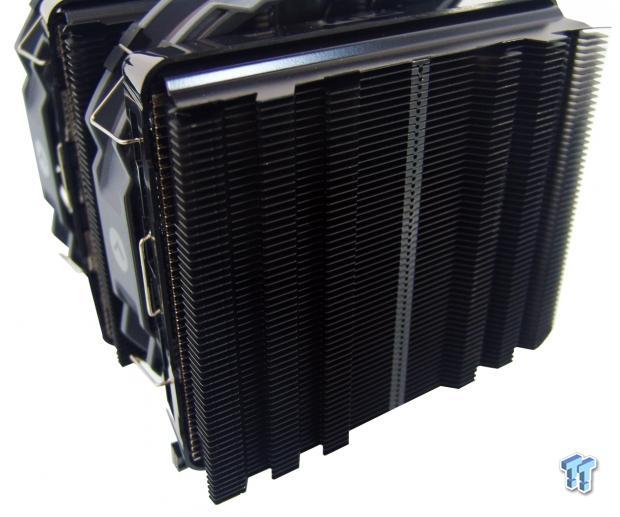
The back of the cooler is also identical to the rear of the front section of fins. While the wide grooves provide spacing to allow the fans to obtain their maximum speeds and ratings easier, they are also cut into the fins to allow access for mounting the cooler in the front section of fins.
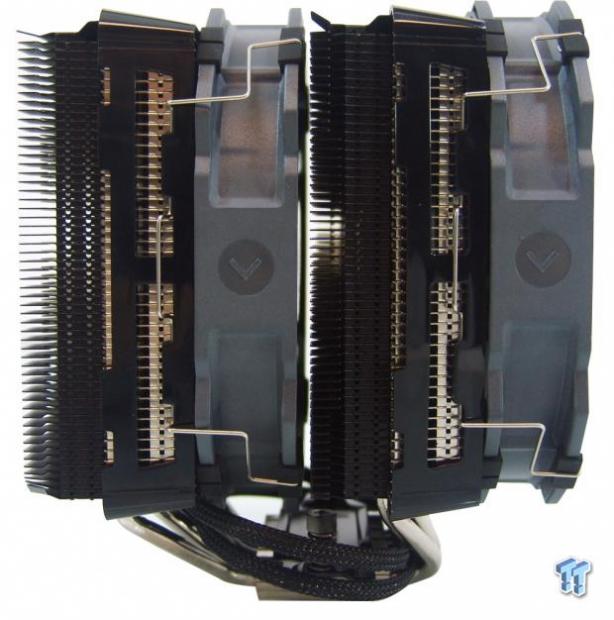
The left side of the cooler looks just like the right side does. There are arrows on the fan that show blade rotation direction, and both fans have braided cables with 4-pin connections at the ends.
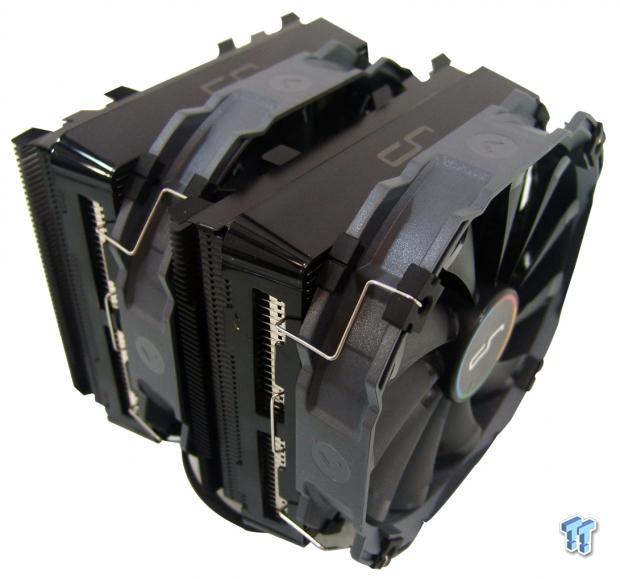
This image is just to give you a better idea of the whole aesthetic appeal of the R1 Ultimate. Outside of what we have discussed already, there are also grey printed "CR"'s on the tops of the shrouds, to show the maker of the cooler once it is installed in a chassis.
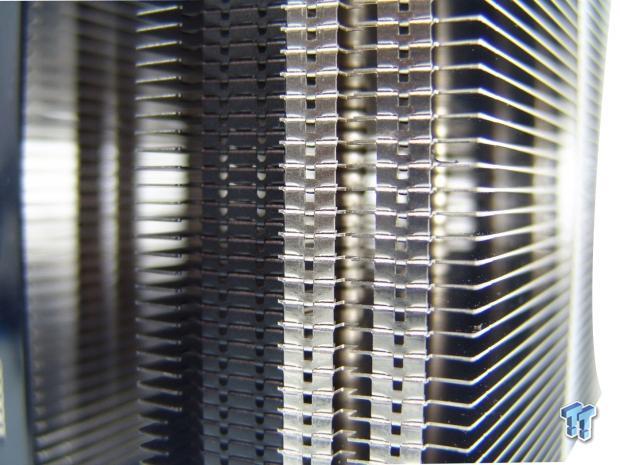
With the front shroud removed from the cooler, we see the front edge is straight and flat, but we can also see the various fin arrangements used in each tower much better. The natural aluminium fins are wider spaced, but as the air flows through the black section of fins, that flow is squeezed through tighter fins to increase air speed and efficiency of heat transfer.
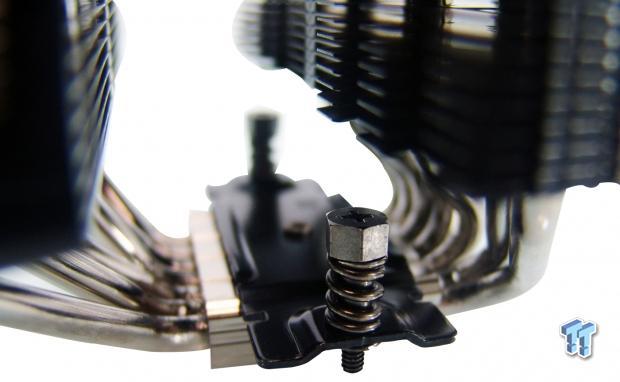
At the top of the base, you will find that CRYORIG has pre-installed the mounting "cross bar" to simplify the installation. This also helps those who want to install the cooler with the motherboard in the upright position, as you don't need another hand to hold the bar, just one for the cooler, and one to drive these screws.
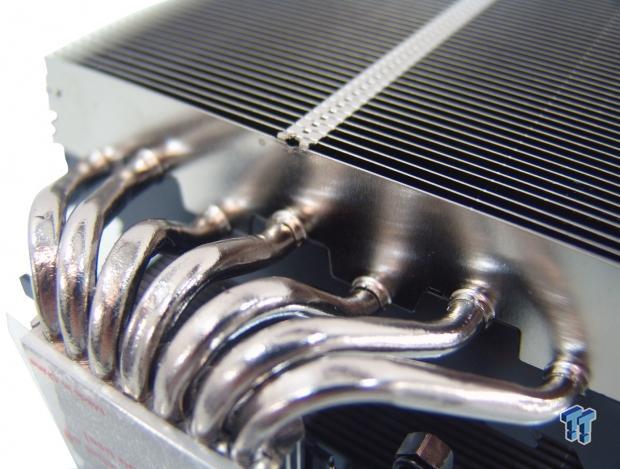
All seven of the pipes leave the base, and make some pretty tight turns as they align to go through the fins. It is also easy to see that the spacing is even, but the pipes are run in a staggered pattern to better distribute the heat from each pipe into the fins.
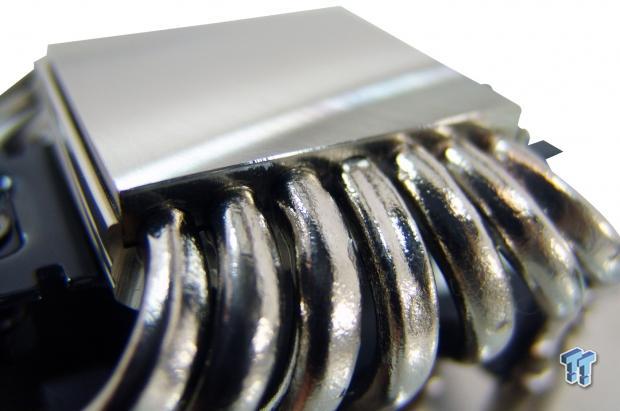
On the flip side of those heat pipes, as they leave the base of the cooler, we can see two things. The first of which is the fact that all of the pipes are soldered into the base prior to the nickel plating, and the second is that the center pipes sit lower in the base than the outer ones do.
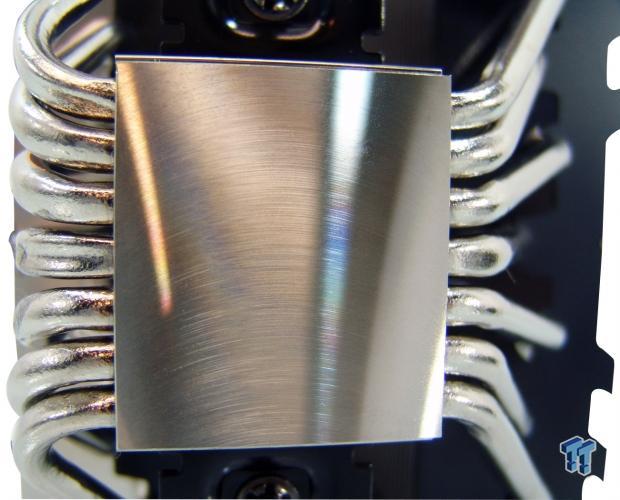
Lastly, we want to show off the mating surface of the R1 Ultimate. While it does ship with a protective sticker over it, once it's removed, we find a relatively flat surface across the base, but there are defined milling marks left to increase the surface area for the thermal paste.
Accessories and Documentation
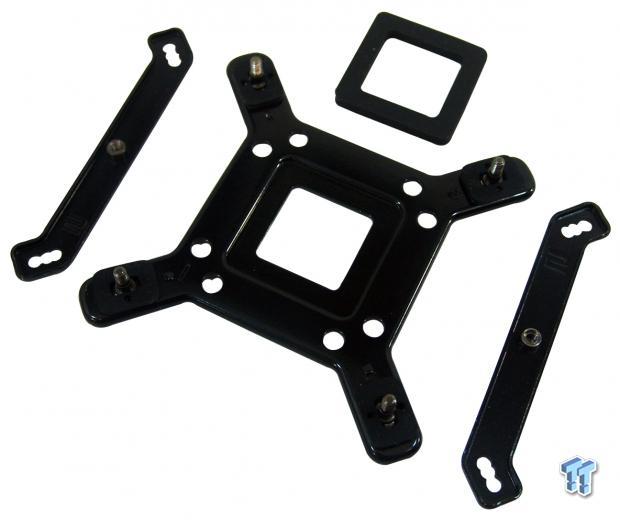
Since the hardware comes in the box in separated sections, we are going to show them in those groups. Here, we have the Intel mounting kit that provides a back plate for all Intel installations (other than LGA2011), a pair of top brackets to lock the back plate to the motherboard, and they also include a rubber LGA775 pressure ring to use with the back plate for those systems.
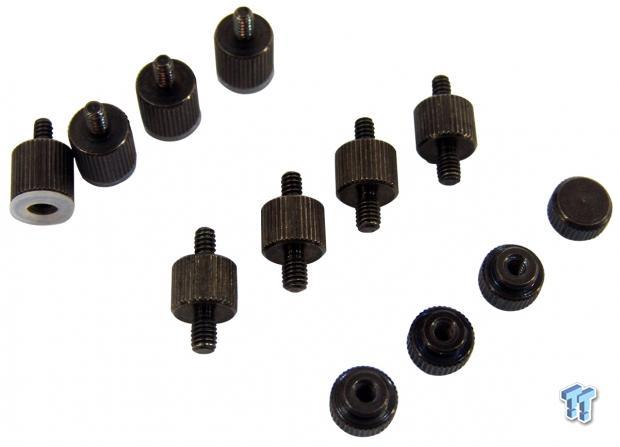
Next in line was a bag full of screws and knurled nuts. At the top are the standoffs for AMD and Intel mounting, and they come with nylon washers already on them to isolate the top of the motherboard. In the middle is the LGA2011 mounting hardware that can only be used on that particular socket. At the bottom are nuts to secure the top mounting brackets, standoffs, and the back plate, all into one cohesive unit prior to mounting the cooler.
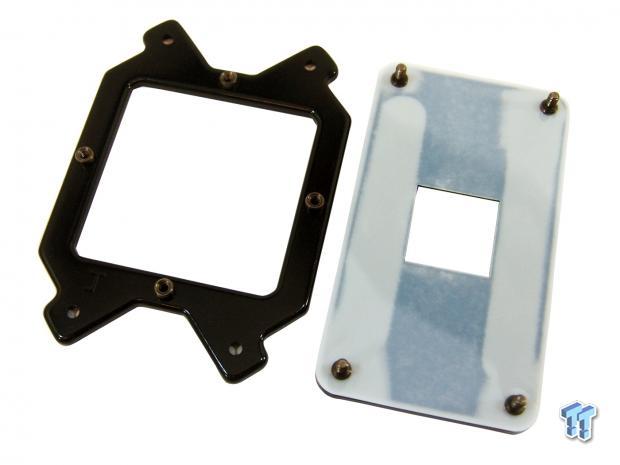
For the AMD users out there, CRYORIG has provided an omni-directional mounting plate so that this cooler will orientate correctly in the chassis, and they also provide you with a back plate that has a layer of plastic applied to isolate the plate from the motherboard. Also, notice that the back plate already has the screws in place, just like we saw with the Intel plate.

The last bits of hardware come as the universal kit. Here, you can find wire fan clips for attaching another 140mm fan, both in standard, and thin variations. In the middle there is a tube of CP9 Cryo-Paste, a Y-splitter to power the fans, four rubber pads for that extra fan (or replacements if you lose some). There is also an alcohol pad to prep the base, and the CPU HIS, along with a long black Phillips screwdriver to mount the cooler more easily.
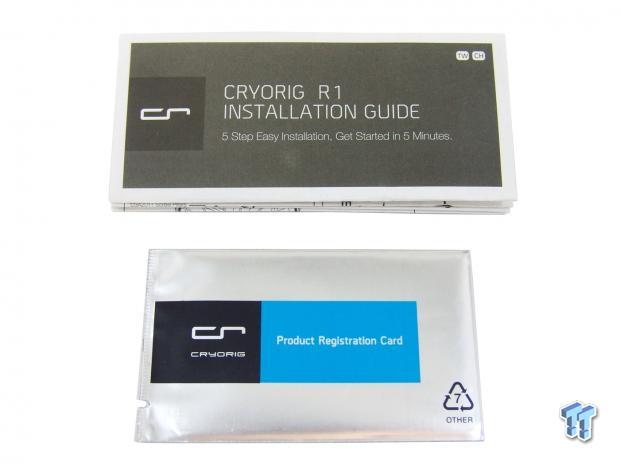
Also, in the hardware box, you will find the manual, and the registration card. The manual is set up to give five steps to mounting the cooler to any motherboard, and it does take less than five minutes to install, or at least for me it did. The renderings are really good, and there is also sufficient text to grasp the concepts if the images just aren't doing it for you.
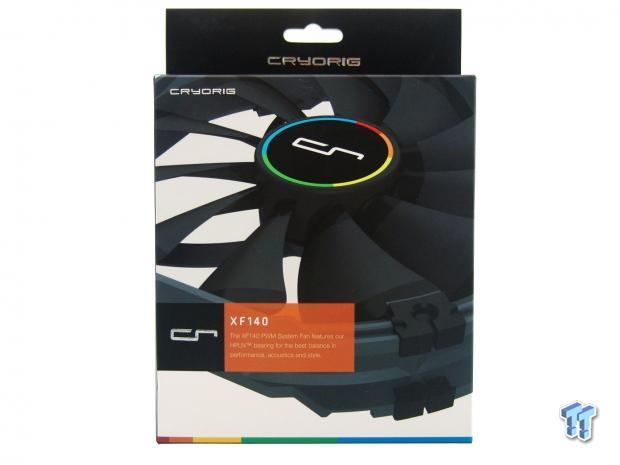
As an added bonus, and for more testing in a three fan configuration, CRYORIG also sent another XF140mm fan for us to use.
Installation and Finished Product
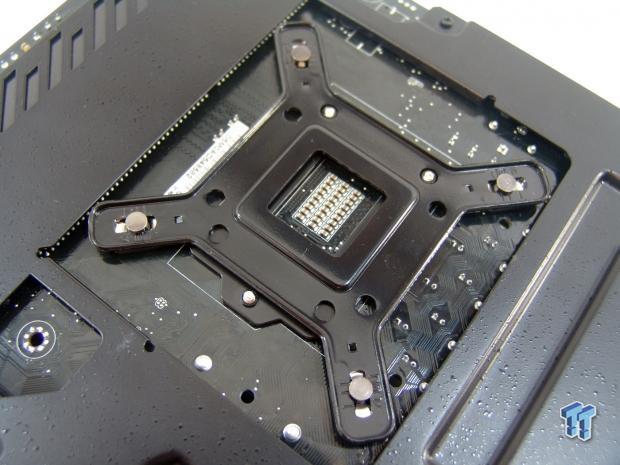
First, you have to adjust the studs in the corners of the back plate to the appropriate letter, A, B, or C; in this instance we are using B. Once that is done, you simply set the plate on the back of the motherboard, and let the studs pass through the mounting holes. Also, the plate is omni-directional, so it can install in all four directions, and still clear the socket screws.
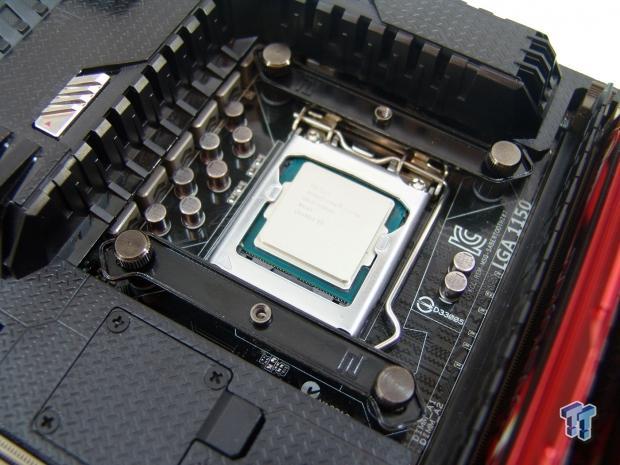
On top, we installed the standoffs, set the top mounting brackets on them, and used the knurled screws to secure them all together solidly. Keep in mind: For Intel mounting, the brackets go at the top and bottom of the CPU, not to the sides like many others.
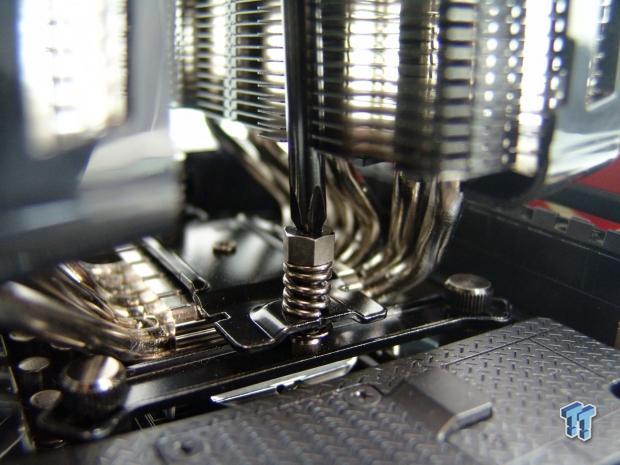
After applying the thermal paste, all you do is set the cooler on the CPU, and align the screws with the holes in the brackets. The screwdriver they provide not only clears the top of the cooler, but it also rides in the groove cut into the fins to get a good angle on the spring loaded screws. However, you do have to remove the second fan to get this done.
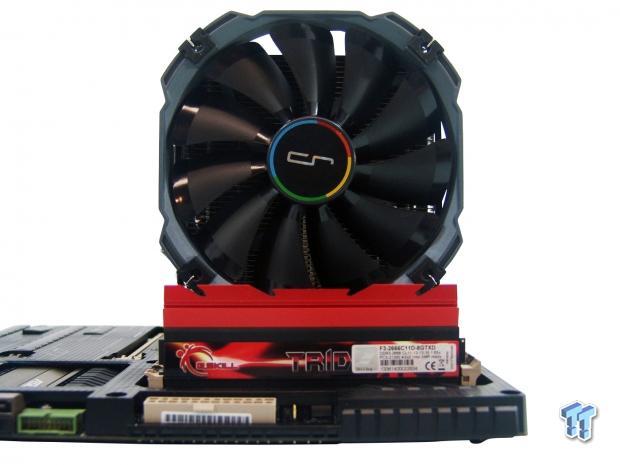
From this angle, it seems that the R1 Ultimate is not much wider than the memory installed. We left the flame top on one stick to show that this cooler was not designed to allow for clearance on this type of taller memory.
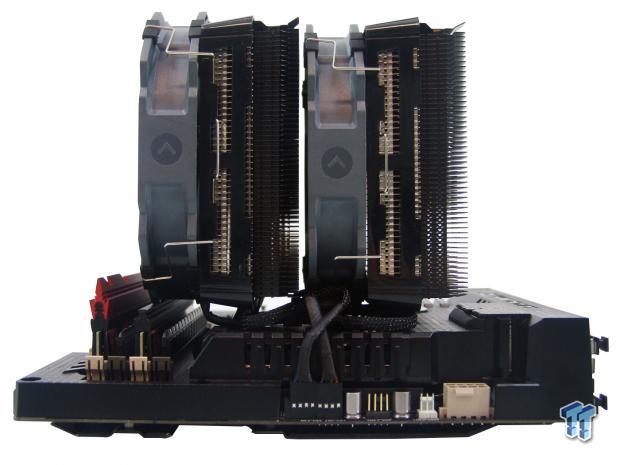
Looking at the R1 Ultimate from the top of the board also proves this about the memory. Even with the flame tip removed, the front fan has to sit right on top of our memory, and even then the fan is raised enough to increase the overall height even more than the 168.3mm specified in the chart.

Once we got the board mounted into our testing rig, and took a step back, any issues we did have with the memory were soon forgotten. To be honest, this is one of the best looking coolers I have installed in quite some time. The lighter color of the fans against the black plastic shrouds and metal fins, provide a look I know anyone would love to have in their rig as well.
The Test System and Thermal Results
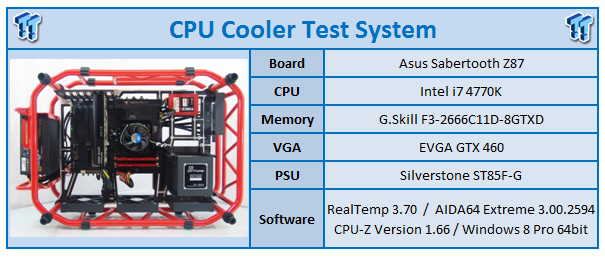
I would first like to thank ASUS, InWin, Corsair, and Fractal Design for supplying products for me to test with. To see our testing methodology, and to find out what goes into making our charts, please refer to our CPU Cooler Testing and Methodology article for that information.
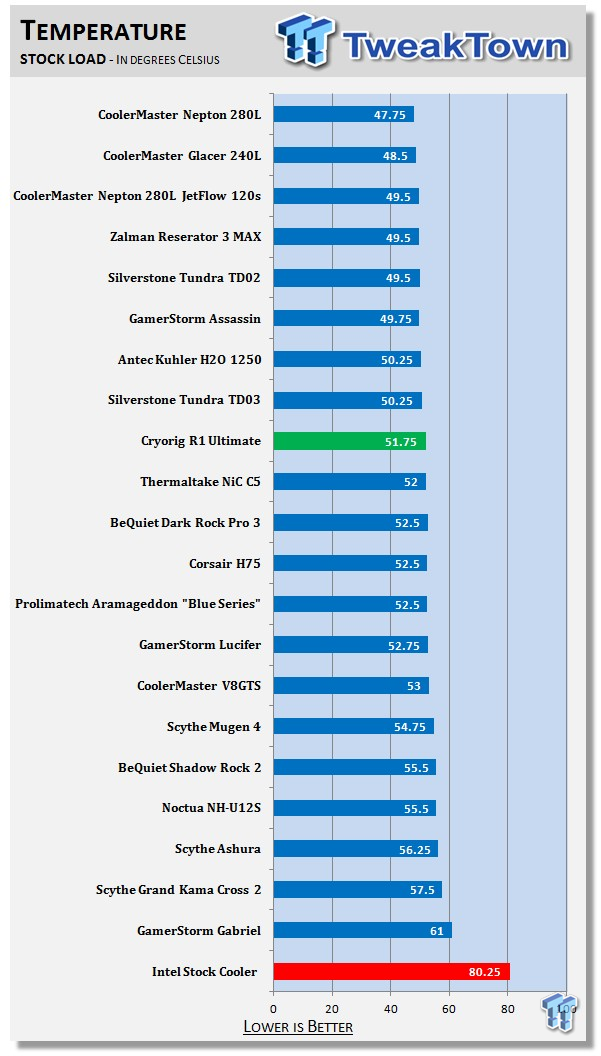
Slightly edging out the Dark Rock Pro 3 we just had a look at: the R1 Ultimate offers us a stock loaded average of 51.75 degrees. Considering they are priced very closely, the choice is pretty easy to make when the gap from dual radiator AIOs is only a degree and a half out of reach at this point.
However, when we added the third fan, we dropped the .75 off the end of the score, and got an average of 51 degrees at that point. Also, for the idle conditions for these tests, we saw the R1 Ultimate deliver a 29 degree average.

As we applied more heat to the cooler in the overclocked testing, we see that the R1 Ultimate has increased its lead on the Dark Rock Pro 3; in fact, it passes the Tundra TD03, and really closes down on the GamerStorm Lucifer. With the average of 71.33 degrees as it comes shipped, it is only 3.75 degrees away from the best performing water cooler we have tested.
Once we added the third fan into the mix, the results dropped to an average temperature of 70.08 degrees, which is quite impressive, especially considering the noise levels are maintained to acceptable levels.
Noise Level Results

With the XF14 fans both only receiving 7.5V at this time, and spinning at 950 RPM, not only did they provide sufficient airflow to the fins, but with the 32 dB rating we took at that time, the noise is inaudible once inside of a typical chassis. Even in the open air system we use, you had to be very close to hear it at all.

While it's not the best on the charts at the overclocked stage of testing, sixth place overall is very respectable. At this point, the fans were getting 12V supplied to them, and we saw speeds of 1410 RPM.
Even though 42 dB is audible, even in a chassis with a side door, it's nothing that will get annoying during the heaviest of gaming sessions using the PWM functionality. Even if you were trying to sleep with this in the room, just let the PWM control step it down, and you should have no issues falling asleep with it still running.
Final Thoughts
At this point, the main question that stands out above the rest is: Was all the ingenuity and trademarked processes worth it? At this point there is no denying that some, or the combination of all of the processes used, does have its advantages. At its current price tag, this cooler is the obvious choice when using a dual-tower cooler on your CPU. Adding the third fan may not be as cost efficient as the initial purchase of the R1 Ultimate on a dollar per degree angle of looking at it, but we were able to drop the temperatures more than a degree at both stock, and overclocked levels of testing. That is not to say you don't have to give some when buying a cooler of this nature though.
While the mounting was easy, this cooler does encroach on the memory, and if this is a real deal killer for you, this is the reason why they make the R1 Universal. The screws on the motherboard weren't blocked near as badly as in other coolers, but raising the fan on the front to clear the memory may also make it too tall to go into a lot of mid-towers, and even some full-tower cases; just something to think about.
In the realm of aesthetics and performance: the R1 ultimate has the Dark Rock Pro 3 beat hands down. I don't know exactly what it is about this design, but the combination of grey on black, with shiny and matte surfaces really made me appreciate it aesthetically a fair bit more than the brushed aluminum top we just looked at on the DRP3. Having a great aesthetic appeal, and being able to take on coolers like the TD03, and creep up into the top of the listings is no small feat. I applaud CRYORIG for what they were able to achieve, even if with a bit more noise than other, similar solutions.
It is a cooler like this that makes me think: Why take the route of buying an AIO? With an AIO, it takes a ton of noise to get these sorts of results, and the only real advantage is to get the massive weight of a cooler like this off the socket, if that is even still an issue. From what I have seen in my years of testing, since LGA1366, this really has not been an issue at all. Over multiple systems, I think sockets and motherboards are now stronger, and don't tent to warp or bend from 1282 grams of weight like they did in the past.
All around, I really like what the CRYORIG R1 Ultimate brings to the table. It is nice to look at, has a ton of features that our charts obviously shows made this cooler more efficient, it is quick and simple to install, and it is priced very well against its direct competition, as well as others like dual radiator AIO solutions that will cost a fair bit more. Considering they also make the XT140 fan (or the thin version), you can do away with the memory clearance issues we saw, but you also have to consider that fan produces 10 CFM less than the XF 140, so you would also need to take the original front fan and install it on the back to keep the level of performance we saw in our results.
I for one, think that as long as CRYORIG stays the course that they have set out upon, the R1 ultimate shows that they definitely have their head in the game, and have the team needed to take air cooling to the next level that we have all been waiting for.



 United
States: Find other tech and computer products like this
over at
  United
Kingdom: Find other tech and computer products like this
over at
  Australia:
Find other tech and computer products like this over at
  Canada:
Find other tech and computer products like this over at
  Deutschland:
Finde andere Technik- und Computerprodukte wie dieses auf