Introduction
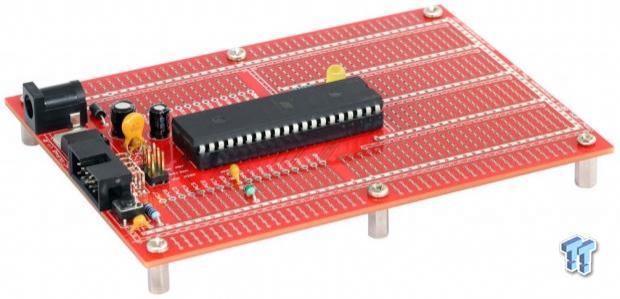
One of my favourite things to do on a cold winter night is to heat up my soldering iron and sit down at my workbench for an hour of circuit board building. Unfortunately, many of the development boards I use in my projects and experiments are pre-assembled from the manufacturer and as such, I do not get to solder as much as I like to. Fortunately, Protostack still understands that many of the makers out there still love to melt some solder from time to time.
Protostack's ATmega32A Development Kit is the first 40-pin AVR development board from the company, with all of its other boards being based on a 28-pin AVR design. The 40-pin ATmega32U is a low power, high performance Atmel 8-bit AVR RISC-based microcontroller featuring 32KB self-programming flash program memory, 2KB SRAM, 1KB EEPROM, 8 channel 10-bit A/D converter and JTAG interface for on-chip-debug. The device achieves 16 MIPS throughput at 16 MHz at 2.7 to 5.5V operation.
These features allow the ATmega32A to execute powerful instructions in a single clock cycle, and the result is throughputs approaching 1 MIPS per MHz, allowing users to optimize power consumption versus processing speed.
Why would you choose this kit over something like an Arduino though? That answer is as simple as: Why wouldn't you. With an Arduino you must utilize a breadboard or various shields when prototyping, and then when it is all over, you will have to either have a custom PCB manufactured, or you will have to etch one yourself.
With a Protostack board, you can simply populate the prototyping space the same way you did your breadboard. Then all you have to do is solder things into place, and connect the proper leads with solder bridges and wire. Then you can leave your project on the board. Alternatively, you can use the Protostack Development board in the same way you would an Arduino, and "stack" additional development boards or prototyping boards on top.
Building the Board
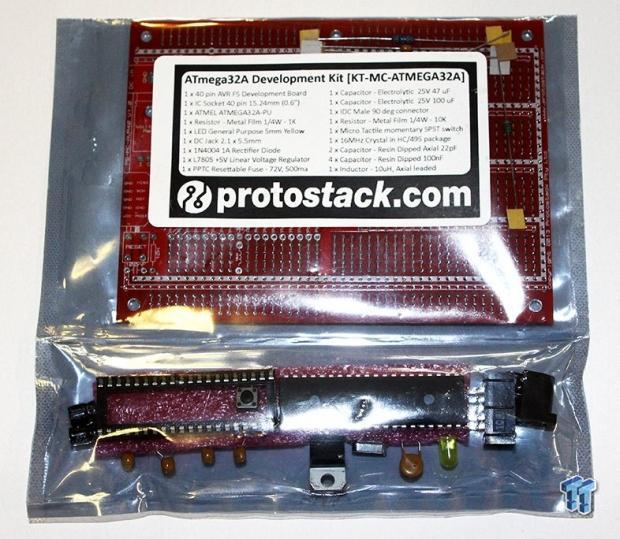
Protostack's ATmega32A Development Kit comes with everything you need to build the board including the ATmega32 U microcontroller, and everything else down to the components that form the power supply. Unfortunately, this kit does not include any hardware to build in a USB to UART converter, so you will need to utilize a programmer to program the board. Protostack recommends using their USBASP AVR Programmer to program the converter.
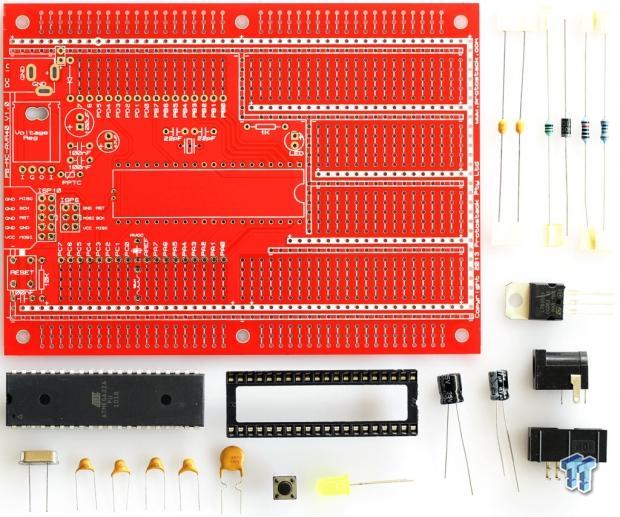
Included in the kit are the following components:
- 1X DC Jack 2.1 x 5.5mm
- 1X IC Socket 40 pin 15.24mm
- 1X IDC Male connector, 10 pin, right angle leads
- 1X ATMEGA32A-PU Atmel 8 Bit 32K AVR Microcontroller
- 1X LED 5mm Yellow
- 2X Capacitor - Ceramic Axial 100V 22pF
- 4X Capacitor - Ceramic 50V 100nF
- 1X Capacitor - Electrolytic 25V 100uF
- 1X Capacitor - Electrolytic 25V 47uF
- 1X 16MHz Crystal
- 1X Inductor - 10uH
- 1X PPTC Resettable Fuse - 72V, 500ma
- 1X Resistor - Metal Film 1/4W 10K OHM
- 1X Resistor - Metal Film 1/4W 1K OHM
- 1X 40 Pin AVR Development Board
- 1X 1N4004 1A Rectifier Diode
- 1X L7805 +5V Linear Voltage Regulator
- 1X Micro Tactile momentary SPST switch
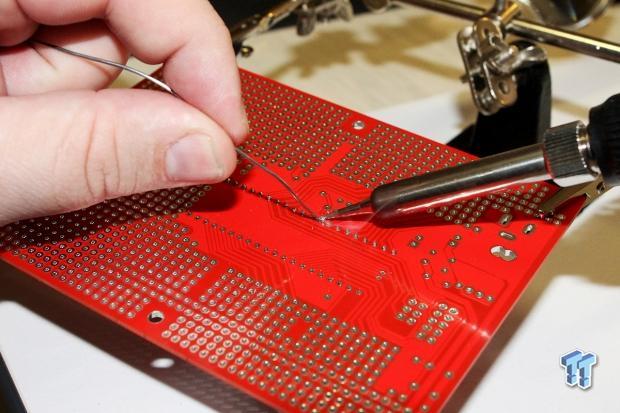
Soldering up the ATmega32A Development Kit is actually quite simple and anyone with a beginning knowledge of soldering can accomplish the task in less than half an hour. I was able to solder up the whole board in just less than 10 minutes, including taking photographs of the process. One thing to note is that some of the components look quite similar and you should always double check their values and reference back to the user manual before soldering them into place.
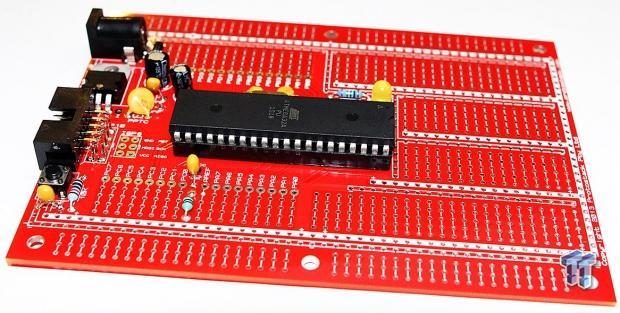
Once everything is soldered up your board should look like the one pictured below. Notice that I have installed the ATmega 32U microcontroller with the #1 pin facing away from the power supply and programming header. I placed the chip in this orientation because the board indicated the chip to be placed like this. The Silk screen on the PCB had the same half circle drawn on it that the top of the chip does. Always pay attention to how the chip is designed to orient as placing it the wrong way will result in failure upon power up.
Features
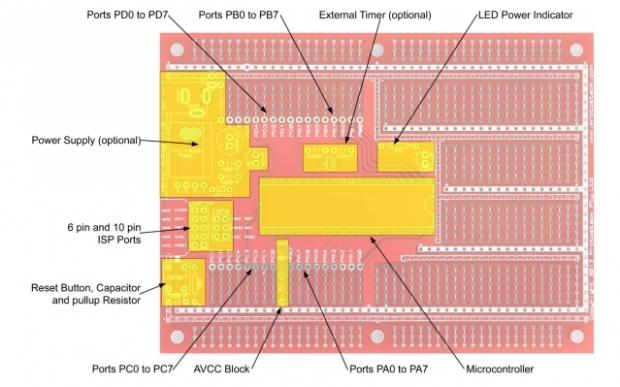
Now that we have the board built, let's take a closer look at its features. Looking at the populated side of the board we will notice the power supply circuit as well as the reset region and programming ports. The power supply can receive input in several different ways, including a CR232 battery holder, JST connector, screw terminals, or a DC barrel jack that comes with the kit. Programming can be accomplished via the supplied 10-pin ISP port or via the 6-pin ISP ports that will need to be populated with header pins. In this section of the board we also see the AVCC Block, LED power indicator, and the External Timer.
Also located in this half of the board are the port headers that have not been broken out. The user is left to decide whether he would like to populate with male or female headers, or if they would like to straight wire to the prototyping area.
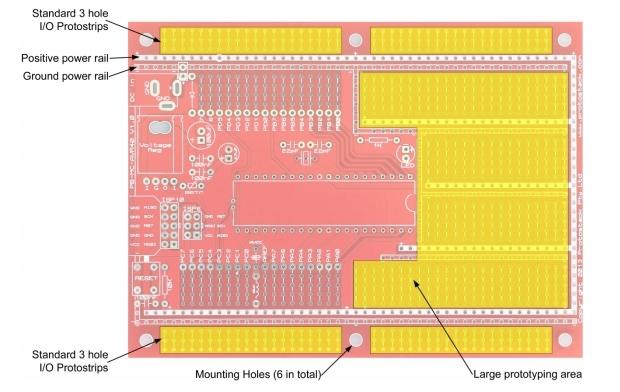
Moving over to the other half of the board we find what makes this board special. Protostack's development boards feature the largest prototyping areas of any development board I have ever seen. The area functions much like a breadboard does, in that strips of six holes are connected to each other, allowing up to five separate connections to the same component lead. The board features 80 of these strips that are surrounded by power and ground rails. The holes are drilled on a standard .100 pattern for compatibility with all DIP and most through-hole packages. You will notice that each of the board's microcontroller ports also features this strip design.
Around the edge of the board is the same power and ground rails that connect everything else, and also 3-hole strips. These holes are designed to be populated with board-to-board connectors which allow for efficient stacking of multiple boards. All of Protostack's development and prototyping boards feature these 3-hole strips for maximum compatibility. Additionally, you will notice six large holes spaced evenly on the edges of the PCB. These holes are designed to work with standard PCB stand-offs and provide both structural support and mounting points when stacking and placing the boards in projects.
Programming
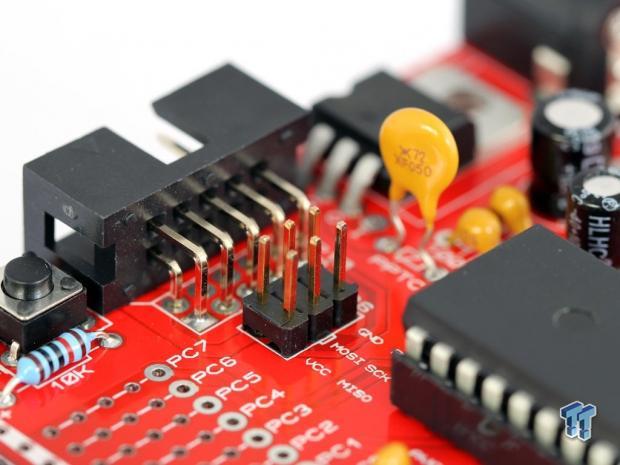
Programming the ATmega32A Development Board is quite easy if you know a few things about AVR programming. As I mentioned earlier, the board can be programmed via the included 10-pin ISP connector and an USBASP AVR Programmer, or you could use something like an Arduino to program the board via the unpopulated six-pin ISP port located directly behind the 10-pin port. I like both methods, and prefer using the 10-pin port as it helps reduce clutter on the board.
I won't go very deep into how to program the board as that could represent an entire article on its own. Instead, I will cover the basics and lightly detail what I consider to be the easiest way. While it is completely possible to install the Arduino boot loader onto the ATmega32 U, sticking with IDEs like AVR Studio or Eclipse and using AVRDude to upload the code to the microcontroller is the easiest.
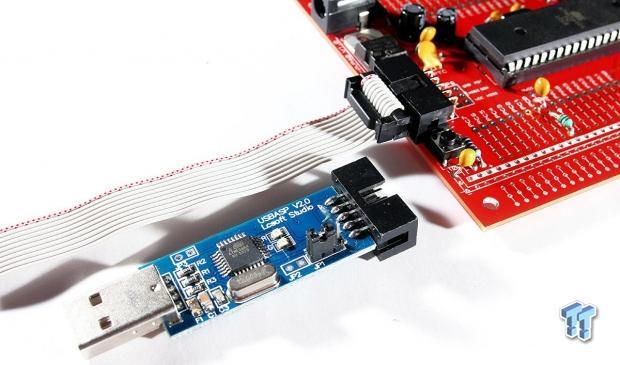
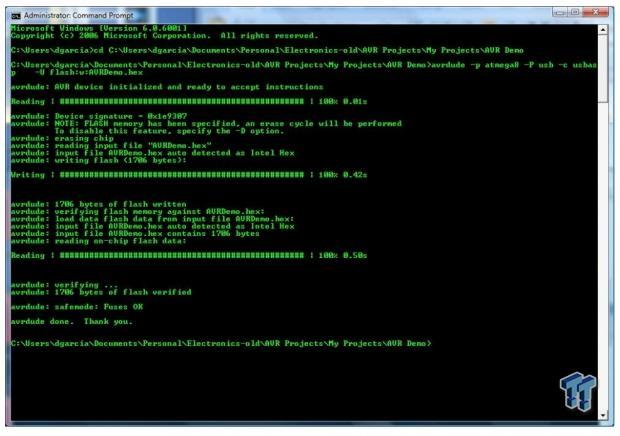
Once you have code written, the USBASP drivers and AVRDude installed, you must connect the board to the USBASP Programmer. This is accomplished by connecting the 10-position ribbon cable to the board's ISP port and to the programmer's ISP Port. Then all you need to do is plug the programmer into a free USB port on your PC. Actually uploading the code to the device takes a little command prompt magic and is done by following these directions:
To download the firmware to your microcontroller, enter the following command:
avrdude -p DEVICE -P USB -c usbasp -U flash:w:FILE
Where
- FILE is the filename of the precompiled binary file , and
- DEVICE is the micro controller type you are programming (eg ATmega32U2).
The full list of device codes is listed here.
Thoughts and Observations
Over the last several years I have had the pleasure of working with about twelve of Protostack's AVR Development boards. In fact, the first custom AVR project I ever built was developed on a Protostack board. The company pays close attention to the quality and features it builds into each board, and actually takes into consideration every piece of user feedback it gets from its customers. Daniel Garcia, the company's founder, designs these boards himself, and makes revisions to them often. This leads to a better product and not something that is stuck with antiquated features or lack of newly discovered features.

I absolutely love the large prototyping area you get with each of Protostack's Development kits, and this is why I choose them for all of my prototyping projects that require an AVR. The fact that the boards are easily stackable with the other prototyping boards he sells makes this a complete ecosystem that any AVR developer should consider using. One of the biggest selling points for me is that all of the holes in the PCB are through-hole plated. This makes for a more solid solder joint, and helps with preventing pad lifting on solder joints that may have been heated a little too much. Additionally, the boards pads have all been coated with solder at the factory, and this makes soldering without extra flux a breeze.
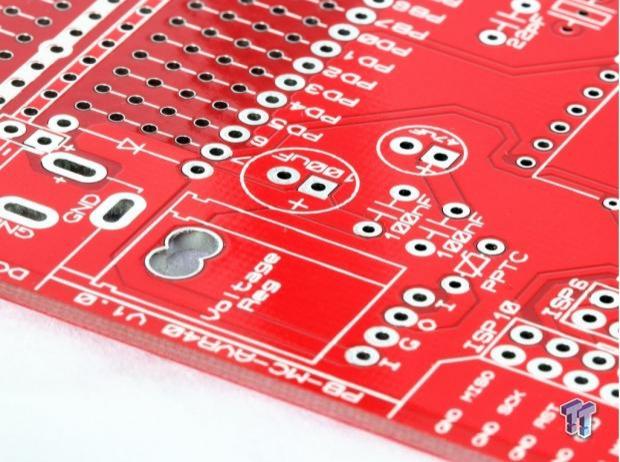
Unlike many of the build-it-yourself development boards on the market, the boards from Protostack feature a bright red solder mask with a very easy to read white silk screen. This makes identifying ports, components, and rails much easier than a PCB of lesser quality. That brings up another point that I would like to make, the FR4 PCB material used in the creation of Protostack's PCBs is very well constructed, and features a nice heavy solder pour on both the top and bottom layers. This aids in both a better quality signal, as well as excellent thermal dissipation from components that may be heat sensitive.
Final Thoughts

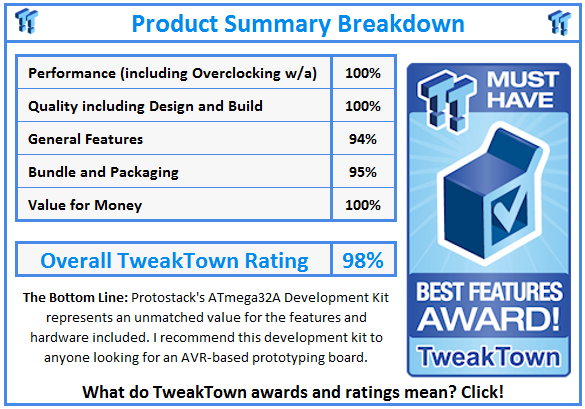
Protostack has a winner on its hands with the ATmega32A Development Kit. The microcontroller featured in this kit has ample program memory for even the most code-heavy DIY projects. With all of the extra prototyping space and stackability, only the sky is the limit to what you can put together with this board. The extra I/O that you gain from the 40-pin chip will definitely come in handy in some of my upcoming projects as well.
The fact that Protostack includes a power supply on this board is a major plus for me as I have yet to dive in and purchase a proper bench-top power supply. My only drawback to this board and Protostack's other projects is the lack of an on-board USB to UART converter. This could be solved by adding solder pads for a FTDI FT232RL USB -UART chip as well as pads and holes for the supporting circuitry. That said, I do fully understand why Protostack chose to leave these components out. The FTDI chip is only available in surface-mount packages, and for some customers that may be a tough soldering task. Someone like me would have no issues soldering on one, and I feel that those who may feel that it is too tough of a task could continue to use the 10-pin ISP header as they normally would.
All in all I am quite pleased with the kit, and I already have plans to use it in an upcoming project that involves Halloween animatronics for next year. Daniel and Protostack have done an excellent job designing a development kit around the ATmega 32U microcontroller, and have gone above and beyond in extra features. With the kit retailing for just $22.85 there is no reason for any maker not to own at least one of these kits. The lack of on-board USB to UART conversion will set you back another $18 for a USBASP programmer, but I see that as an investment in which I will use over and over throughout the years.
Some images used in this review have been provided by Protostack.com.

 United
States: Find other tech and computer products like this
over at
  United
Kingdom: Find other tech and computer products like this
over at
  Australia:
Find other tech and computer products like this over at
  Canada:
Find other tech and computer products like this over at
  Deutschland:
Finde andere Technik- und Computerprodukte wie dieses auf