Introduction
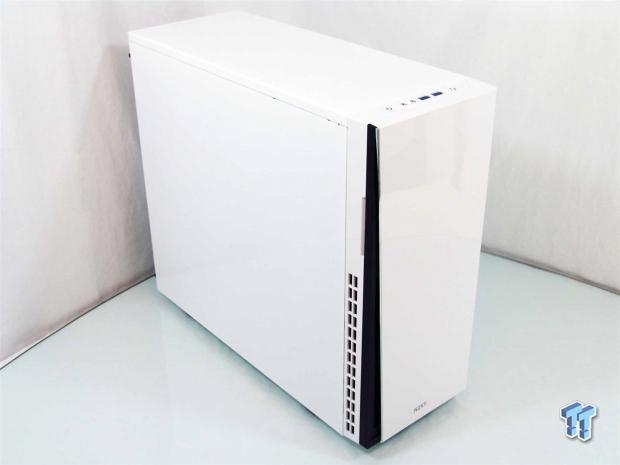
NZXT started way back in 2007 with their first "silent chassis" offering in the NZXT Hush. Back then, even in its day, there were all black cables and tool-less features that on top of the sound dampening materials inside of the door panels, put the Hush into the a bit ahead of its time category. A long time had passed, and along came the H2. Now there were some major updates to the internal case design to move along with the current offerings, but they kept the material inside of the panels. Fast forward to a few months ago, and we took a look at the H620 ultra tower that was more of a silent version of the wildly popular Switch 810 chassis design, but again addressed sounds being emanated for the chassis through the use of a doubled front door and sound dampening.
These all lead us to why we are here today, again looking at a silent chassis from NZXT. This time around it is their third try at a mid-tower design that follows right in line with the Hush and H2. Again things have been updated, and along with the current times, this chassis is available in both shiny black and shiny white finishes. Again the chassis' exterior gets a complete redo and is a design that only slightly hints at its predecessors, and is a chassis that can stand alone in its new design and layout.
As time has passed, there are quite a few things that are basic demands when people look for a new mid-tower chassis. Things like a painted interior is a must, USB 3.0 has to be there, removable or reorient-able hard drive bays, tool-less features, black cabling - the list can go on and on.
What we are going to see from NZXT today is a mid-tower chassis that hits all of the previous points, looks good doing it, stays silent with doubled front panel and sound absorbing materials being used, and as you are about to see, it won't hit the wallet that hard and is really an affordable mid-tower solution for the masses.
Specifications, Availability and Pricing
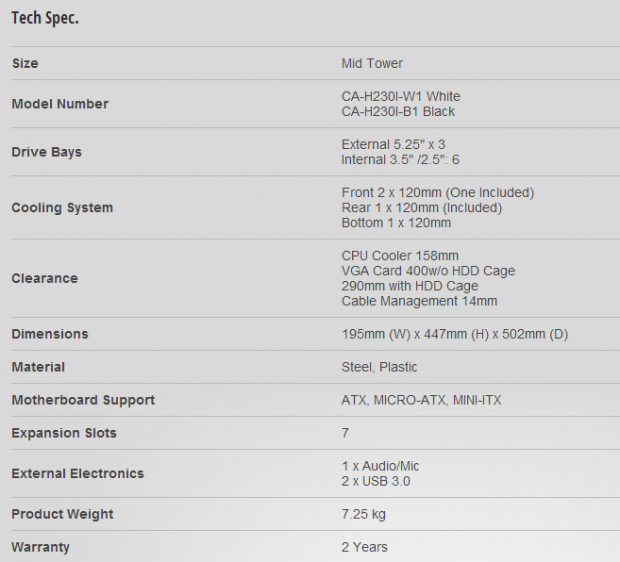
The NZXT H230 that we received for this review is the CA-H230I-W1, or the all-white version. The outside of this chassis is kept very simple both in form and styling. The front of the chassis is flat, made of plastic, and has the thinnest of triangular shaped accent striping that runs up the left side of the bezel. This front bezel is on hinges and is dual layered to help keep sounds inside of the chassis, and this is where you gain access to the trio of 5.25" bay covers that will remove from outside of this chassis. The top and both side panels are completely flat expanses of metal, and offer no options to mount fans. Inside of just the side panels of this chassis, you do have a thick layer of black foam that is used to absorb noises, vibrations, and keep any chatter from entering the environment.
Inside of the chassis, you have room for a pair of 120mm fans in the front, though only one is shipped in the lowest position from the factory. Behind these fans, and below the tool-less ODD bays, there is room for six total 2.5" or 3.5" drives, split into two racks, one of which is removable. Moving on to the motherboard tray, there are seven wiring holes, none of which have grommets, 20 wire tie points, and it can hold Mini-ITX, Micro-ATX or an ATX motherboard. The rear of the chassis then offers a 120mm fan next to the rear I/O, and below that the H230 offers seven expansion slots and room for a PSU at the very bottom. The floor of the chassis is ventilated under the PSU and even offers an optional spot for a 120mm fan, and has a dust filter there, and in the front to keep the inside of the rig free from dust.
Along with the new style, complete white paint job to the inside and outside, the newer more relevant interior layout of the chassis, all comes at a very reasonable price point. As I look around, there are only a select few places offering the chassis outside of buying direct from NZXT. All of them are set to the same base price of $69.99. All of the locations are charging shipping, and if you want the black version, the price does not change. Both Newegg and Amazon are charging $9.99 for shipping.
As more shops pick up this new H230, I am sure you will find e-tailers starting to drop shipping costs, but for now, I still say the near $80 pricing is very good for what this chassis offers.
Packaging
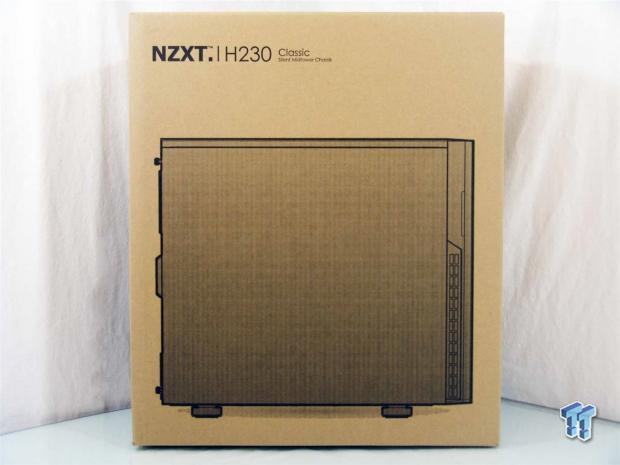
Helping to keep the pricing in the chassis, the packaging is very basic with the plain brown cardboard printed in just black. Here NZXT offers the chassis name and its place in the Classic series of cases, and even offers a rendering of the left side of the chassis to take up most of this panel.
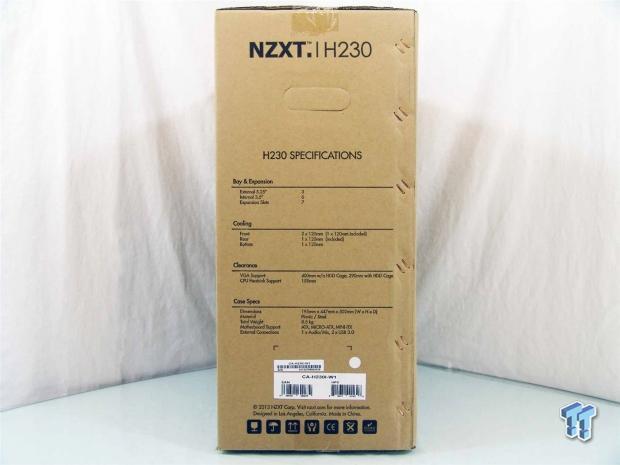
Here NZXT offers the name of the chassis at the top, and under the handle offers a simplified version of the specifications we just went over on the last page. Also the large sticker at the bottom indicates the model number of the chassis inside the box, and here it shows we have the white version.
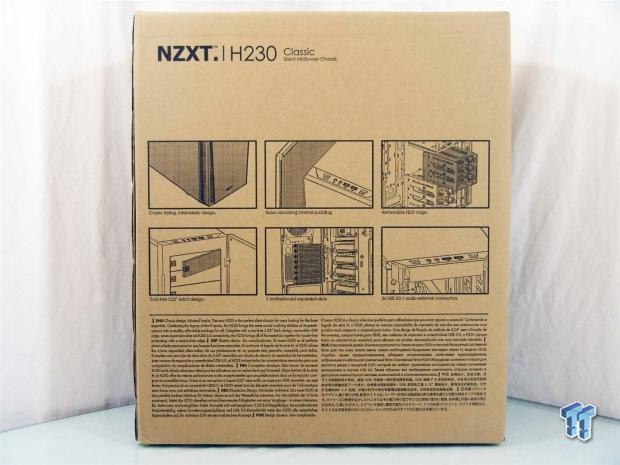
Around the back there are six images shown to display the design and detail, the internal padding, the removable bays, the removable bay covers, the expansion slot count, and it finishes with an image of the front I/O panel. At the bottom is a description of the Classis series and more specifically what the H230 offers, repeated in four languages.
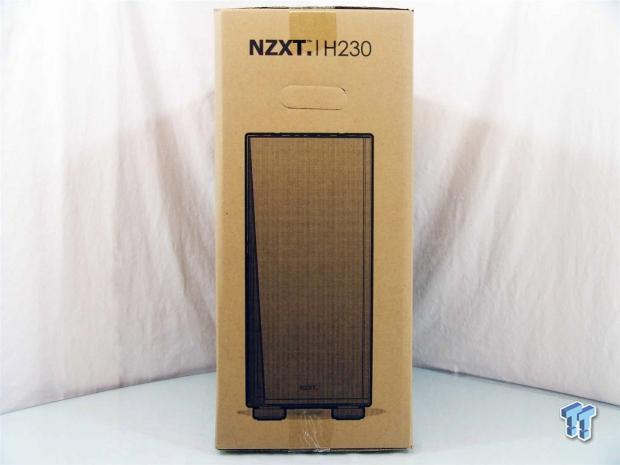
That leaves us with this last panel to look at, and here, along with the brand and name of the chassis, the entire length of this panel is then taken up with a rendering of the front of the chassis, so you can admire the simple and sleek styling.
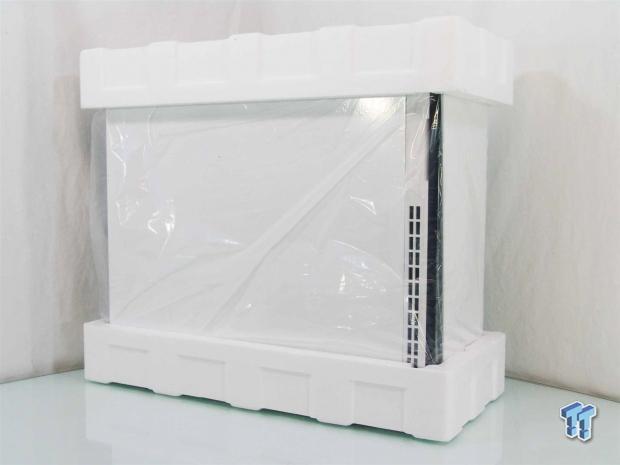
Inside of the box, this H230 chassis was wrapped in a clear plastic liner to keep the shiny paint and plastic in perfect shape for the customer. To keep the chassis from getting damaged from larger impacts in transit, NZXT used thick Styrofoam end caps that did a great job of delivering an almost perfect chassis to me.
NZXT H230 Mid-Tower Chassis
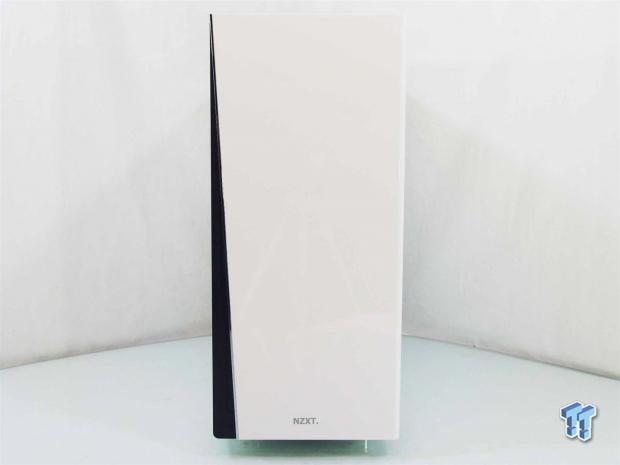
The front of the H230, in this instance, is completely white and shiny all the way from the top edge to the bottom where it says NZXT. The left side of this bezel offers the only bit of flash and contrast to this design with the long black triangle running down that side.
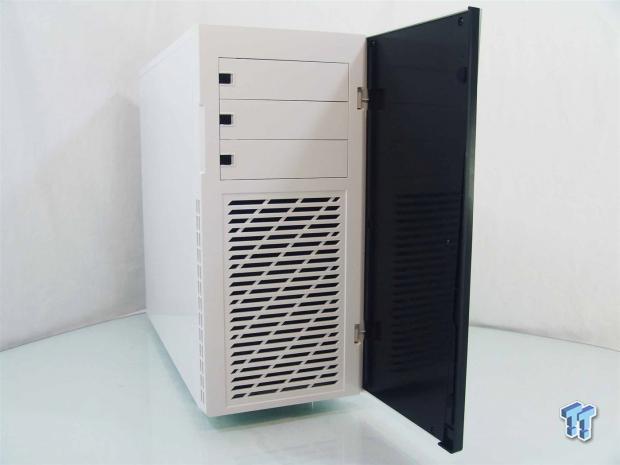
Swinging the door to the right, correctly I might add, you can see the inside of the door is another layer of plastic that is screwed to the front white cover. Behind the door there are three removable bay covers, and the large ventilated area below that will allow a pair of 120mm fans to draw air into the chassis.
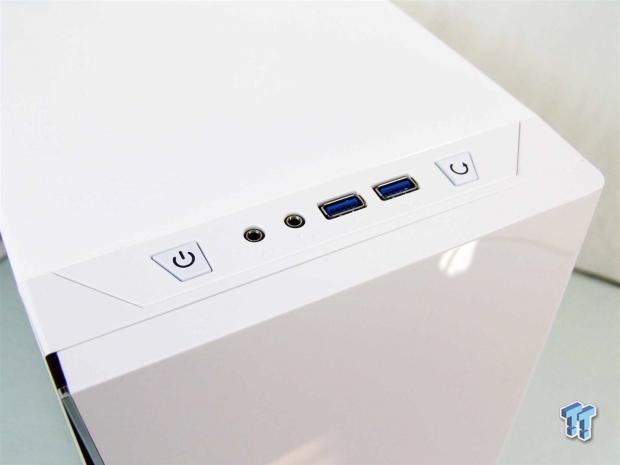
The front I/O panel is at the top of the front bezel for two reasons. One is so that you can set this on the floor and have great access to the USB 3.0, HD Audio and switches, but it also allows NZXT to make the bezel come off without needing the I/O or its wiring to go with it.
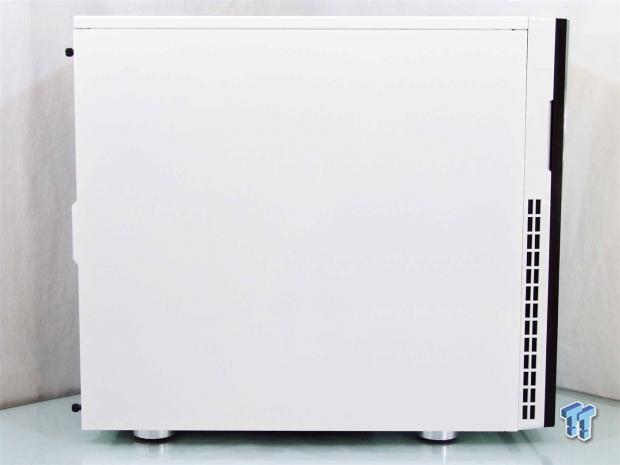
The left side of the chassis offers a solid white door panel with nothing to break up the large area. On the side of the bezel there is more ventilation to allow more air into the front fan, and you can see the edge of the black section as it shows plainly on this side.
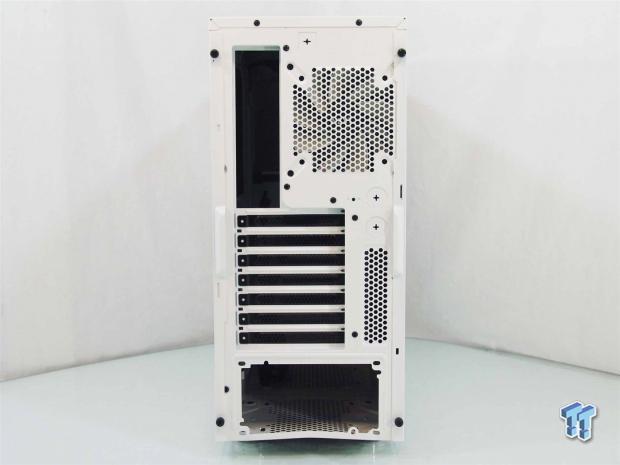
The back of the chassis has a square pop-out section maybe for running wiring, above the rear I/O and fan positions. There are seven expansion slots with ventilation next to them, along with a pair of pop-out tubing holes for water cooling. That just leaves the slightly bent PSU area at the bottom.
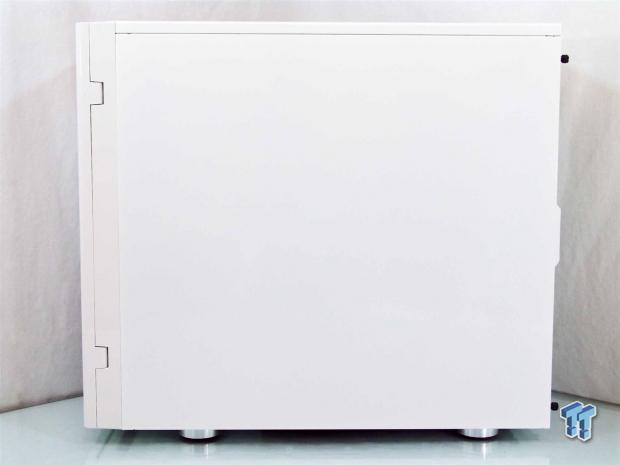
The right side of the H230 offers very little to discuss. You can make out the hinges in the front bezel that support the front door, and again the panel is flat and glossy white.
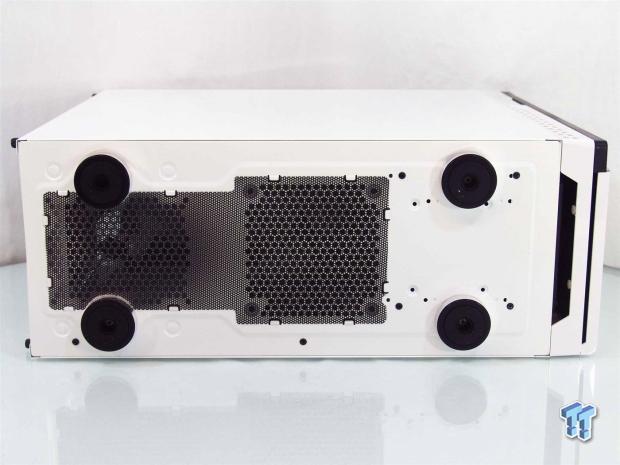
Under the chassis you are given large round feet to support this mid-tower chassis and you can also see the one piece dust filter used to cover both the PSU intake, as well as the slot for the optional 120mm fan.
Inside the NZXT H230
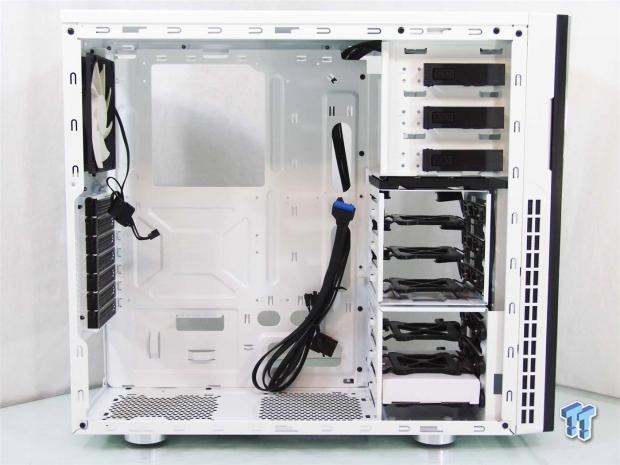
The first look inside of the H230 shows you all the things I have been talking about. It also shows that the wiring has been tied up for transit, and there is a white hardware box found inside the lowest of the HDD trays.
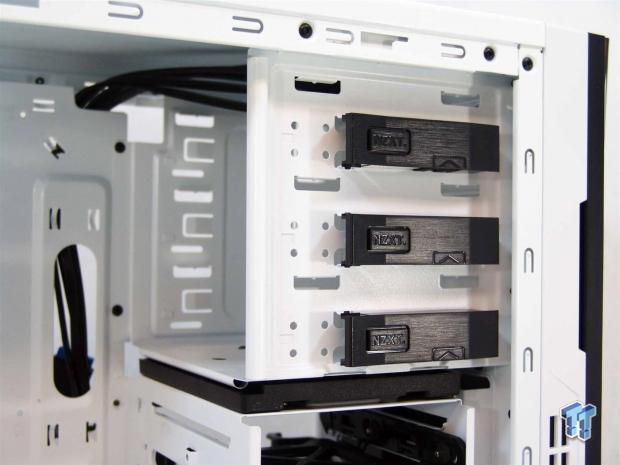
The three 5.25" bays have these tool-free clips on this side of it. These will do a sufficient job of locking devices into the bays, and has all the holes needed to back it up with as many screws as you think it will take.
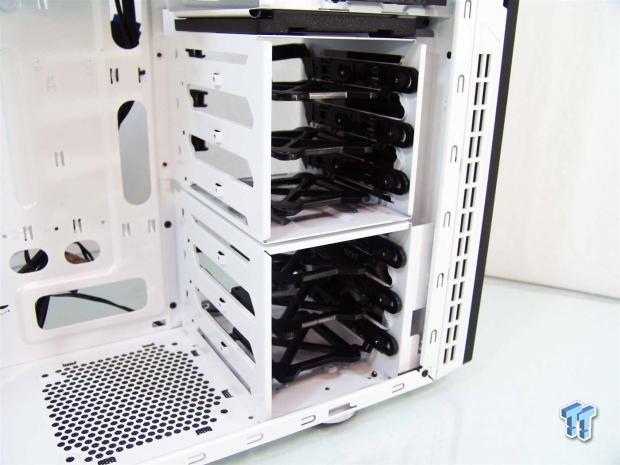
The lower two-thirds of the front of the chassis is taken up by the six 3.5" bays with plastic trays that will also accept 2.5" drive installations. An added bonus is that the top section is completely removable for longer video cards or even maybe a pump/res combo to sit there.
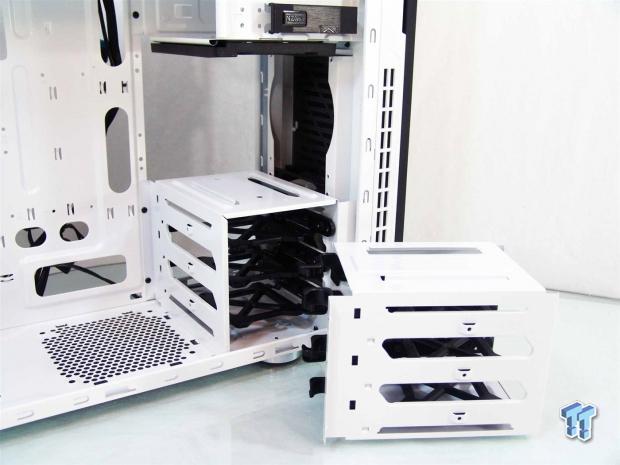
The top section will slide right out of the rack with the removal of a pair of thumbscrews on the back side of the chassis. You can now also see that the top hole in the front of the chassis does not have a fan, but you can move the one at the bottom up to improve on the internal airflow.
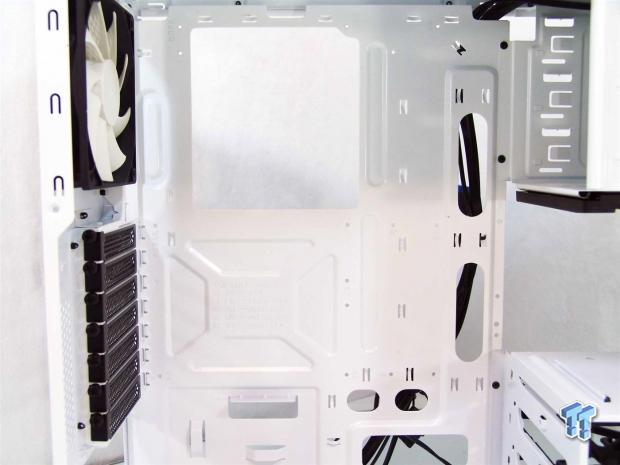
The motherboard tray is set very high in this chassis, but with no top fans in the chassis, there is nothing to get in the way there. You are also given plenty of tie points and places to run the wiring, that even without grommets in place, you can still have a very clean finished product if done correctly.
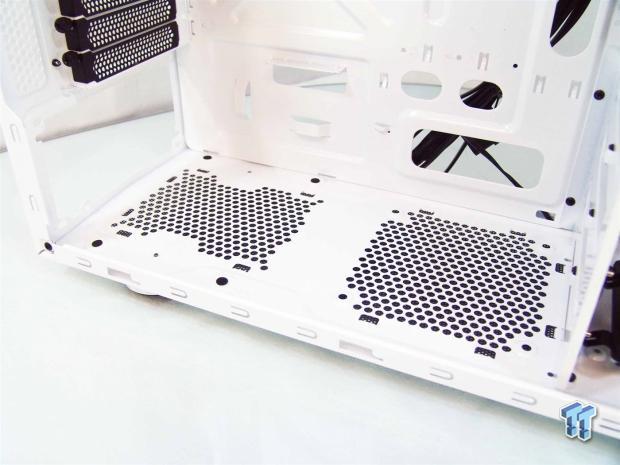
The floor of the chassis will allow for the PSU to sit all the way to the back of the chassis over the ventilated area there. If the wiring will allow for it, you also have the option to add another 120mm fan to the floor in front of it to also help improve on the thermal dynamics of the chassis.
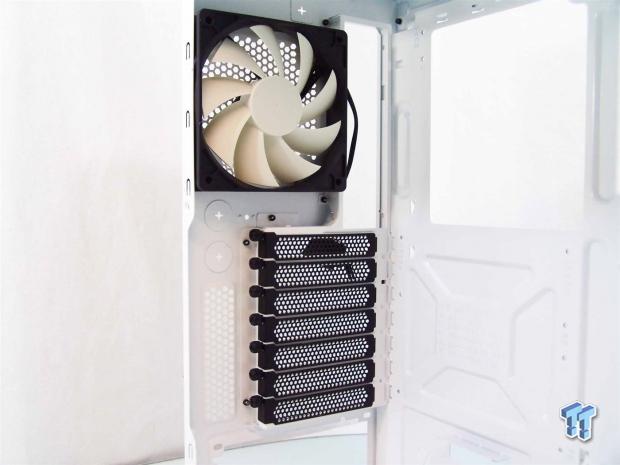
The back of the chassis is where the second pre-installed fan is located, and this is set up to exhaust the chassis. The black ventilated expansion slot covers are held in place with thumbscrews and will make swapping or adding cards very easy in the H230.
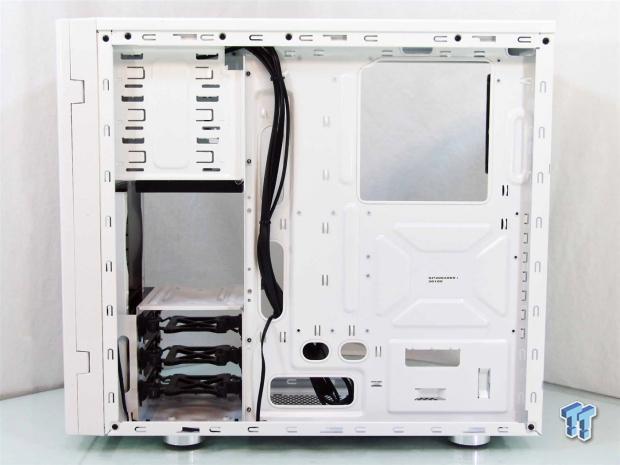
Behind the motherboard tray, you have roughly 20mm to 25mm of room to hide wiring across the back of the tray. Off to the left, the drives point out the back to help hide wiring, and this area is also deeper to hide more wiring if it is needed.
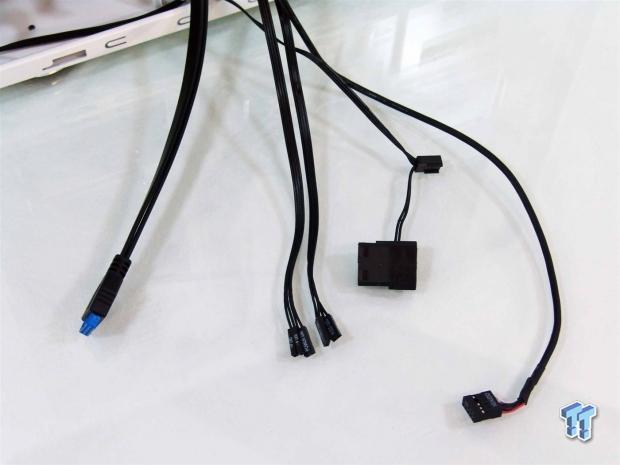
The chassis wiring is also pretty simple. All in black, you get the USB 3.0 connection, the various front panel connections for LEDs and functionality, and the HD Audio connection. I also added in the fan lead to show that both fans have the option to use a 3-pin fan power lead or a 4-pin Molex connection for powering them.
Accessories and Documentation
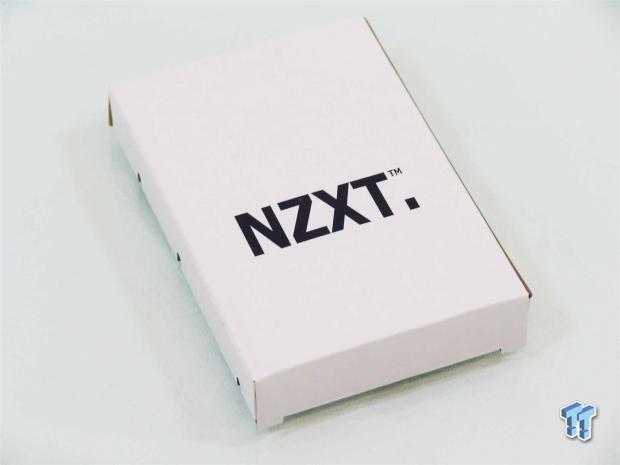
As I mentioned, there was a white box with the NZXT name on it stowed away in the lowest hard drive bay. It is inside that you will find both the bag with all the goodies in it, but you will also locate a folded up manual.
[img]24[/img]The hardware that is shipped comes in bags that are plainly labeled. There are ODD screws, motherboard screws, 2.5" drive screws for the trays, PSU screws, fan screws, stand-offs, and some 8mm screws I didn't have use for. You are also give three wire ties to help manage the build.
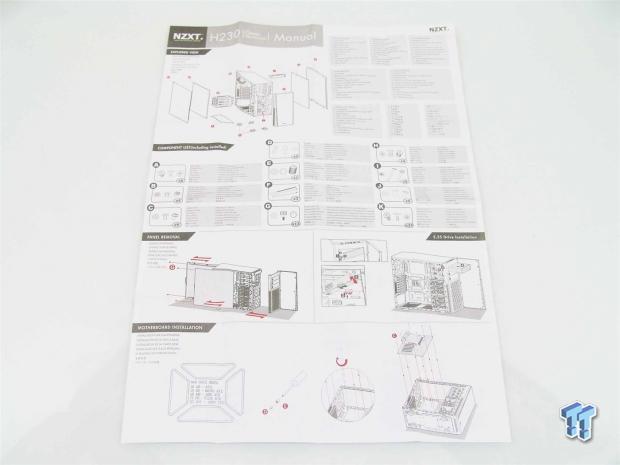
Unfolding the manual gives you two large sheets of instructions to follow. This side it starts off with an exploded diagram of the chassis with all of the components being labeled. They then deliver a parts list, and get right into opening the chassis, installing an ODD, and how to get the motherboard into the H230.
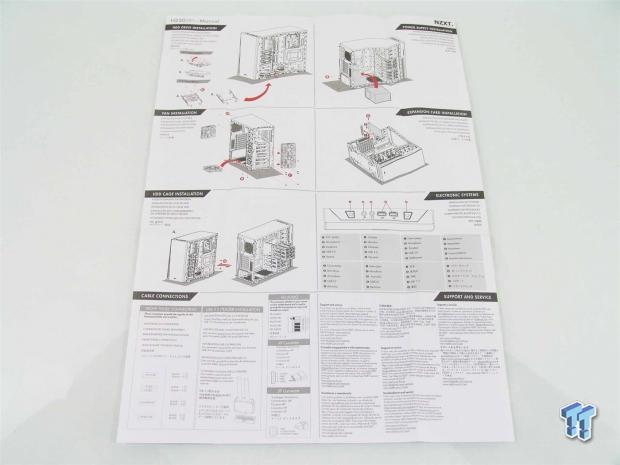
On the reverse of that things continue with the installation of the HHDs, adding a PSU, where all the fan slots are located, installation of the video card, and how to remove the HDD rack. Things end here with some wiring diagrams and the basic terms for support and service of its two year warranty.
The Build and Finished Product
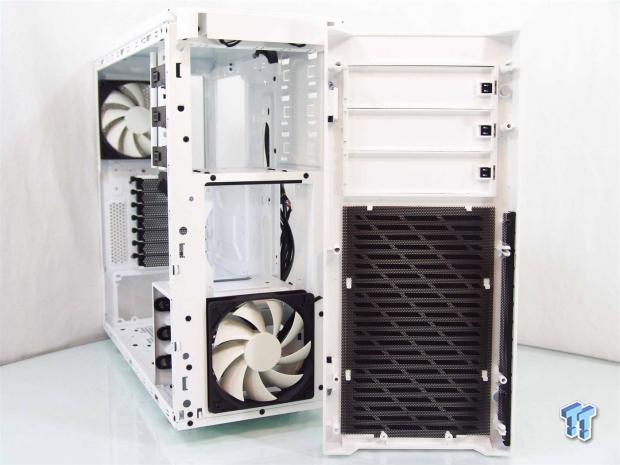
Removing the front bezel just takes a tug at the bottom and the entire door and assembly pops right off. Behind the bezel you see the filter of mesh in the front and on the side, and you can now see the single front 120mm fan that NZXT installs for you.
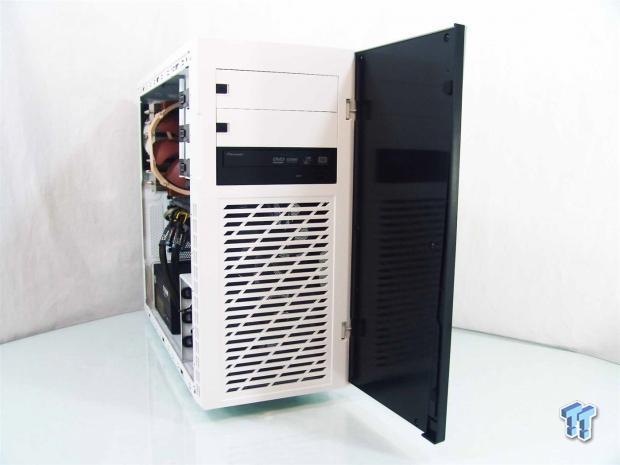
Adding a drive does not require the removal of the bezel, I just wanted to move the fan up first. Then all I had to do was remove the bay cover, slide in the DVD drive, and make sure the clip on the side locks properly into place to secure it. Again I just want to say, I am glad this door swings the proper direction.
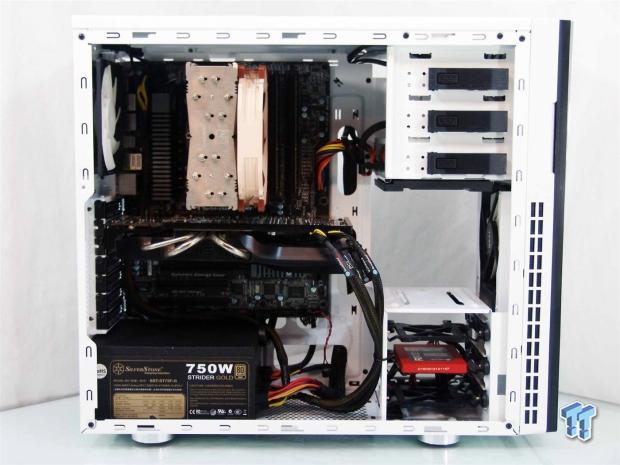
Even with this long HD 7950 cooler, I could have left the top section of bays in place and had plenty of room left. I just thought removing it is what most users will do, so I did. As for the rest of the build, the motherboard fits as it should, and wiring it was a breeze, leaving a very clean looking build.
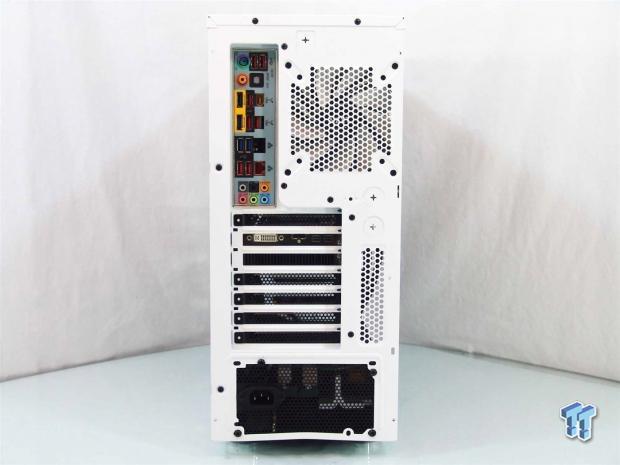
The rear I/O dust shield pops right in, and I had no issues with the chassis flexing and messing with the expansion slots alignment. The bend at the bottom isn't that bad, and you can see the PSU still installs without having to fix it.
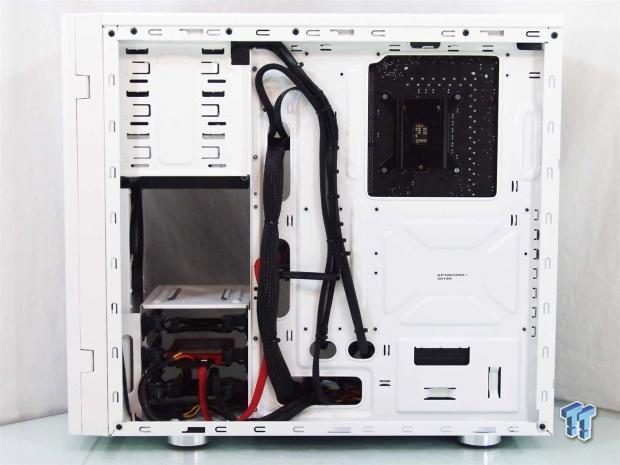
It surprised me to see how simple the back of the chassis is to wire and keep clean. All of the front I/O wiring tucks in with the SATA power lead, and even the 24-pin for the motherboard fits back here, without causing conflicts with the door panel or its padding.
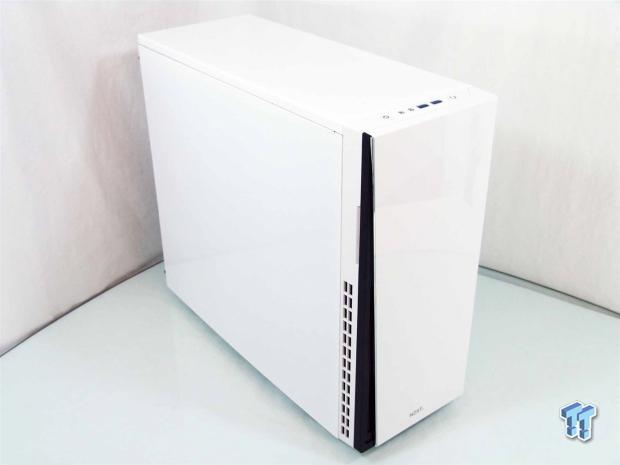
When the H230 is all back together and ready to be powered up and tested, one of the nicest things is that what you buy is what you get. Nothing I added to the build detracts from that original design and style, and with this chassis, I really like that simplicity about it.
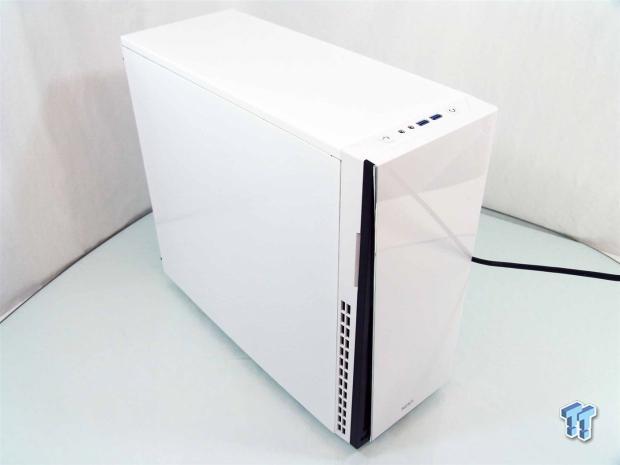
Even when the H230 is powered on, it is very hard to tell anything is going on at all. If it weren't for the post beep and the dim white LED that backlights the power button, there is nothing that screams that the H230 is running. With the choice of Noctua cooler and the way this chassis is designed, you have to put your ear within six inches of the chassis to even hear it running.
Final Thoughts
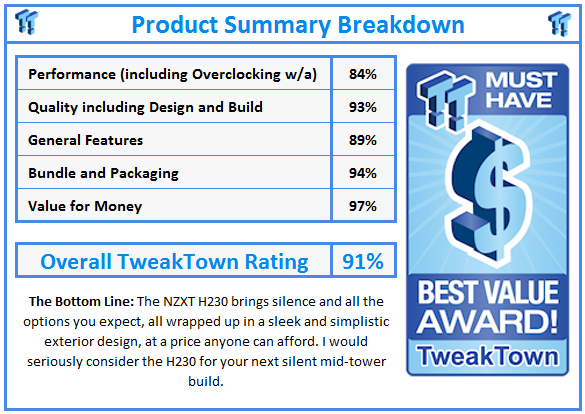
NZXT hits the nail on the head with two things in my mind with the H230. They have successfully incorporated a near silent addition to the Classic series of cases with a sleek and somewhat elegant design that only has a couple of things to give it a unique style that is easy to distinguish as being NZXT. The second and most key to buyers, is that they did it and are delivering it at a really good price. This means that you can get an all white mid-tower chassis, or an all black version, that keeps up with the times, and shows that even the simplest of designs can stand to be upgraded to offer all of the latest and greatest in what we expect inside a chassis.
The chassis is well built, has good front I/O offerings, decent interior features, which would have been great or excellent if rubber grommets had been installed. Even with the panel off, the bezel removed, and the top section of the hard drive cage pulled out, the H230 stands strong and is resilient to twisting or any bowing. The fans inside are sufficient to deliver average temperatures inside of the chassis, but I would recommend you buy one optional fan for the front of the chassis.
The chassis isn't really water cooling ready, but with the pop-outs in the back, you can hang a radiator on the back and get the wiring tended to as well. Even though the H230 doesn't appear to offer much at face value, once you take in the total package, you can understand the idea that is going to make this chassis a near silent winner for system builders looking for a simplistic design, with as much sound absorption as possible.
Even with the slight deformation of the rear of the chassis below where the PSU installs due to some harsh shipping, as you could see in the review, it did not interrupt the installation of the PSU in any way, so I am willing to overlook that sort of inconsequential damage. So, with everything we have just seen, and hitting back on the point that this H230 in white or in black is only going to cost you $69.99 before any shipping charges are applied, you can see why I think this chassis is a really good deal.
It offers everything a $50 chassis has to offer, looks better than most of them out there, and with the H230, sound absorbing materials are used to make a sleek and simple design, as silent as possible, without intruding on space and usability.


 United
States: Find other tech and computer products like this
over at
  United
Kingdom: Find other tech and computer products like this
over at
  Australia:
Find other tech and computer products like this over at
  Canada:
Find other tech and computer products like this over at
  Deutschland:
Finde andere Technik- und Computerprodukte wie dieses auf