Introduction
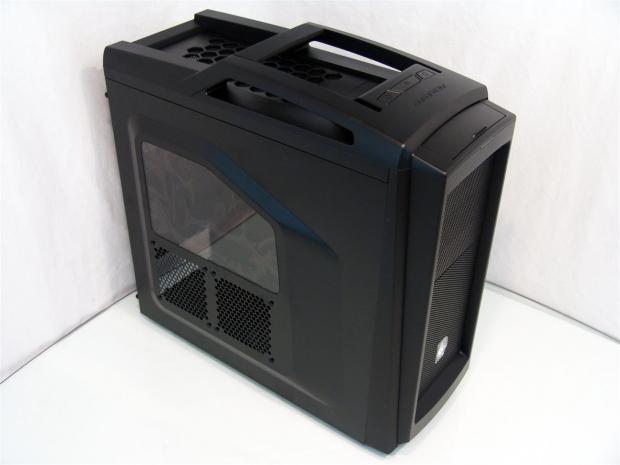
If you have followed my reviews for any length of time, you know Cooler Master keeps me busy with various products throughout the year. As such, the company no longer needs any introduction as they are almost as common place in the home in some fashion that they are easily recognizable and already have a huge following.
What I would like to bring to light is that we have done many reviews over the years of cases that have done really well, and eventually get a second chance at life with some sort of a redo. In most instances, the second version of the chassis will add USB 3.0, or maybe adding a window if the original wasn't equipped with it, but on the whole, most attempts at the second version fall sort of flat with little thought to every aspect. They tend to be more of a "lipstick" approach to just make more money off of what had done well in the past.
This is one of the rare occasions where the manufacturer only kept the basic styling to give you that "I can see how this is a Scout" impression when you see it. Cooler Master only kept what was important, and really gave the original chassis design a serious sprucing up to compete in today's ever changing market for enclosures. Not only was the outside refined, portability improved, and design features on the outside all changed, the inside gets a fair amount of changes applied to it to also give users more of what we demand of our cases these days.
Today we are going to be examining the Storm Scout 2 from Cooler Master. While the name harks back to a portable, clunky, squared off design with an odd looking door, let me tell you, if that is what you expect to see now, you will be pleasantly surprised. In reality Cooler Master listened to its customers needs and wants, updated the feature set to modern standards, and is delivering you a much improved design and layout to carry the Storm Scout naming.
I have to hand it to Cooler Master. In the short time I have used this chassis, they have sold me on a case that I really wasn't too fond of with the original, and I bet by the time you are done reading this you will be sold on the Storm Scout 2 as well.
Specifications, Availability and Pricing
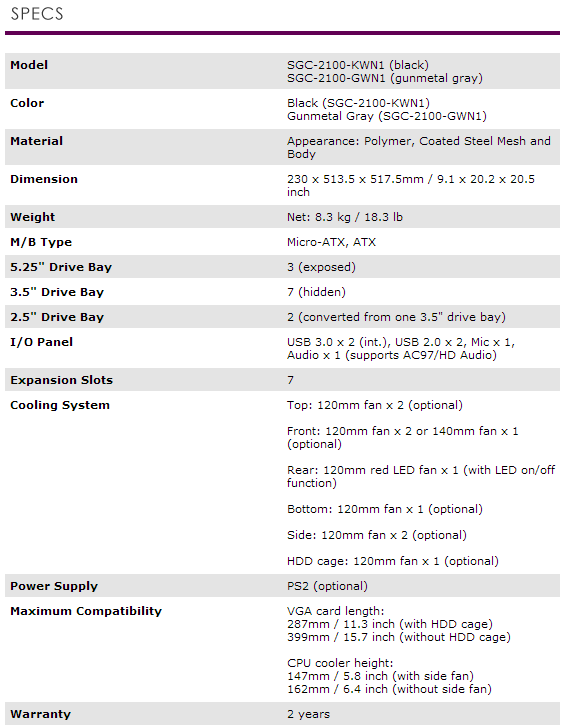
There are two versions of the Scout 2 chassis, one that will arrive in all black paint as mine is, or there is a gunmetal grey option. Comprising most of the chassis is steel for the frame, panels, and motherboard tray. On the front there is a fair bit of steel mesh with ABS plastic making the outer shell of the front bezel, and it is also used on the top to cover the I/O, fans, and handle construction. That brings me to the comfortable feel of the polymer handle that will allow users a soft but secure grip on the chassis when you need to lug it around. Since the chassis is only 20.5" tall, it classifies as a mid-tower entry, and when empty, the Scout 2 weighs in at 18.3 pounds.
What you will find in and around the CM Storm Scout 2 is as follows. There are three 5.25" bays and seven 3.5" drive bays in two sections of bays. The top section, holding four of the bays, is removable to allow for longer video cards, leaving three in the bottom that are permanent. As for 2.5" drives, there is an included adapter that converts a 3.5" bay. Above all of this you have the front I/O with the basic amenities as well as USB 3.0.
The motherboard tray will hold either an ATX or a Micro ATX board, and in the back there is a 7+1 slot configuration under the rear I/O. There are plenty of places for fans in the Scout 2 as well. Two in the front, one in the floor, two in the top, two in the left side panel, and the last hole in the rear, of which Cooler Master only filled the rear exhaust with a 120mm fan with red LEDs to cool the chassis. As far as the other seven optional positions, they will all accept 120mm fans.
The CM Storm Scout 2 chassis was just released to the public as of September 25th and is already on shelves at most locations I tend to shop from. If you do end up liking what you are about to see, you are going to have to pony up $99.99 for the case from most e-tailers I found through Google shopping. What may break the deal is the shipping, and currently Newegg has the better deal of $119.98 including shipping fees.
The Scout 2 definitely falls under the $150 mark that will break a lot of sales for most buyers, so it seems we should be good to go. Now I just have to show you what the CM Storm Scout 2 delivers for this price.
Packaging
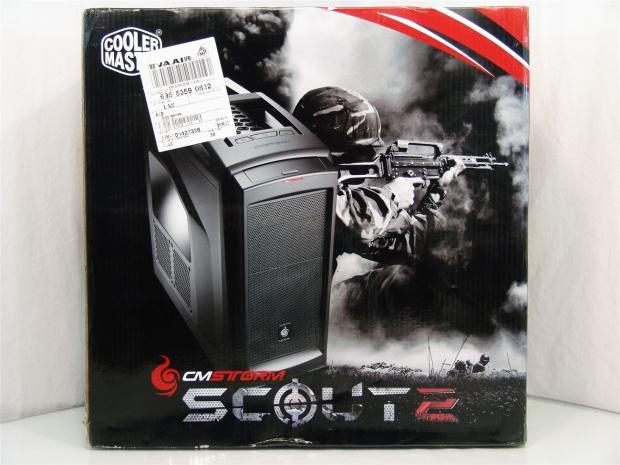
Two things are apparent as soon as you see this box. First, as with any Storm product, we get the black, red and white theme. Second, as the Scout name signifies, Cooler Master sticks with the military action images to go behind the chassis image to spice things up a bit.

The red slashes carry over to the next panel and you see there isn't much offered here. Just an image of the Storm Scout 2 a sticker with vital part number and bar codes, and that this is a mid-tower case in around 20 languages.

Around back we see that the box took a good hit in transit, but we will soon see if that means anything. Other than that there are three images of the chassis with 14 features being shown. At the bottom only six are chosen to list in the multi-lingual section.

Under the FedEx stickers is the Scout 2 name followed by the list of specifications that the stickers didn't cover, thankfully. As with all the cases there is the sticker to denote if a PSU is included and as you can see by the lack of markings, we do not have a PSU in ours, yet.

It seems Cooler Master was a step up on the packaging, as the dent I saw on the side was absorbed by the Styrofoam running down the front of the chassis. If this were a typical pack job, the foam would have been at the top and bottom, and I am pretty sure that hit would have caused some damage. As for this sample, the plastic liner, Styrofoam, and the cardboard were plenty to deliver me a perfect looking sample of the Scout 2.
Cooler Master Storm Scout 2 Mid-Tower Chassis

The front of the CM Storm Scout 2 is rounded at the top and flat and square at the bottom. The plastic at the top is thick and thinner bands run down the sides of the mesh and it is again thick at the bottom. At first glance it almost reminds me of a Corsair 600T, but the similarities stop at this angle.

At the top, partly over the front bezel, and on the top piece is the front I/O panel under the cover, and the lighting, power, and reset buttons.

Once the cover is slid back, it exposes the 3.5mm audio jacks, two USB 3.0 ports and two USB 2.0 ports. When not in use, just slide the cover over it again to keep dirt and debris from mucking up these connections.

Further back you can see there is plastic over the fan holes as well as covering the steel support structure for the handle. While the core of the handle is steel, CM uses a softer compound polymer to make any moving you have to do comfortable on the hands.
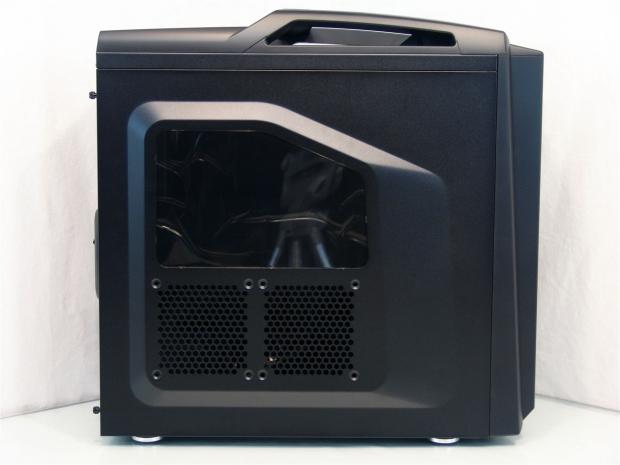
The left side panel features a bump out in it to allow the proper spacing for the optional fans you can mount here. Above the fans you do get a medium sized window to still be able to peek through and see your hardware.

Around the back you find the rear I/O, a large pair of water cooling holes, and the exhaust fan in the top. Working your way down you run into the 7+1 slot configuration, with the +1 slot holding a "wire-tender"
cover currently. This leaves us the mounting of the PSU at the bottom of the Scout 2.

On the right side there is less to see, more or less just an expanse of black with the angular bump out that matches the other side. Here it is there to allow you to be able to pack a bunch of wires behind here and the door will still slide back into place easily.

The plastic feet with the aluminum trim on the sides are screwed to the chassis and are padded with rubber to keep it from sliding around. There is a removable filter under the PSU, but nothing covering the optional 120mm fan mounting in front of it.
Inside the Cooler Master Storm Scout 2
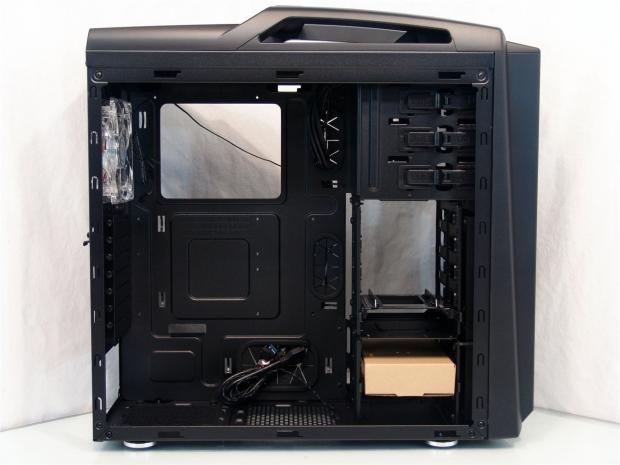
Removing four thumbscrews then pulling the panels off allows us to glance inside of the Scout 2. You see that the hardware is shipped in the hard drive bays in that cardboard box and even that the wires are tied up and ran where they can't move around in transit.

The three 5.25" optical drive bays have flip style latches on this side to secure the drives. As for the other side, you must use screws to secure any device there.

The seven hard drive bays are broken up into a group of four at the top with three at the bottom. Also in the top section, there is an adapter included to allow you to be able to mount a 2.5" drive in this chassis.

This is why the hard drives were broken up into two groups. The top left side of the bays will come out once you remove five screws. This allows for what used to be a 287mm video card length limitation and expands that to 399mm.

Above the motherboard, in the roof of the chassis, you can install two 120mm fans. You need to remove the plastic cover to gain access to the screw holes by unclipping these six tabs. There is an arrow in the top side that shows once unclipped; it slides out in front of the handle.

The motherboard tray is clearly marked for both ATX and Micro ATX motherboards. Around the right edge and at the bottom there are three wire management routing holes, and this time the Scout 2 gets grommets. There are also seven convenient locations to tie up any loose wiring.

At the bottom of the chassis you will need to install a power supply. Of course you will be using the screws through the steel in the back to carry most of the weight, but there are also rubber pads to isolate the PSU from the floor to keep the fan grille from rubbing there.

Inside of the rear panel you see the all clear fan used to exhaust the chassis. This is 120mm and has red LEDs in it that you can use the button on top of the Scout 2 to turn on and off. The seven expansion slots run full covers with no ventilation, and the +1 vertical slot is to lock in a mouse or keyboard cord.

Behind the tray there is at least 20mm of space to pack in the wiring or connect the hard drives with. Don't worry if you think this space is limited, remember, we have that bump in the door to give us a full inch to do what we need to in here.

Untying the wiring from the front panel you do also get a pair of two-pin LED power leads that hang at the top of the chassis to go along with what you see here. The USB 3.0, F_Panel connections, USB 2.0 and the HD Audio/AC'97 connections all come in black to not stand out in the completed build.
Accessories and Documentation

The cardboard box that was shipped in the hard drive bays was held into place with a pair of slides that can also be used to install a hard drive. Now we can see what is in the box.
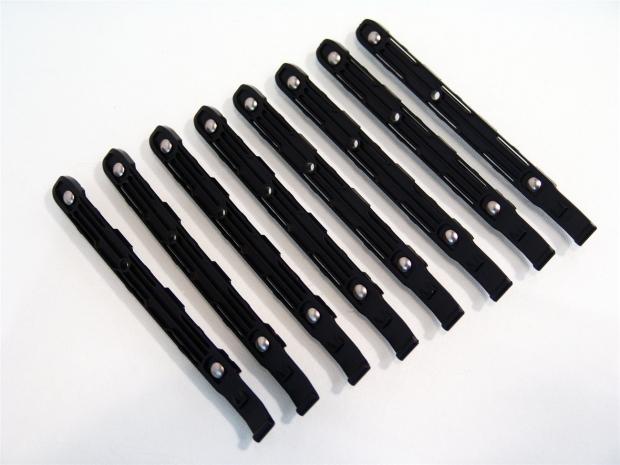
Inside of the box you get another eight slides. This means we are fine to fill five of the seven slots, six if you are using the adapter tray, but what about the other bay? It would have been nice to get enough to use all of the hard drive bays.

You also get ten wire tie straps, a chassis door lock, a socket to aid in the standoff installation and a motherboard speaker.

There are six ODD screws, eight long fan screws for the front of the case and ten M3 screws in the top row. On the bottom there are 14 hex-head screws to use for the motherboard and PSU mounting, and nine standoffs/risers finish off what was in that box.

With this little tray you are able to install one 2.5" drive through the bottom of it on bottom side of this. With the rails on the top, you can install another on this side for a total of two 2.5" drives on this one tray.

The front of the installation guide is pretty nondescript. It just has Cooler Master on it and locations for points of contact. On the right there are mentions of all of the covered languages, but that is it.

Most of the technical information like wire diagrams and parts lists are on the other side of this, but I unfolded it to show you what you are given. You get good illustrations and that helps, because covering so many languages doesn't allow a lot of room for detailed instructions.
The Build and Finished Product

As I was doing my final check after the build I realized I hadn't added the optical drive yet. It is a good thing that none of the wiring is connected to the front bezel as I had that all tied up as well. At this point I just picked a bay cover to remove, and slid the drive in latching it with just the clip on the left.

With the bezel back in place I found the ODD spacing is perfect and really makes it so that there aren't any odd spaces - the finish is flat and level. Even breaking up the mesh on the front, the drive looks at home all snug in the chassis.
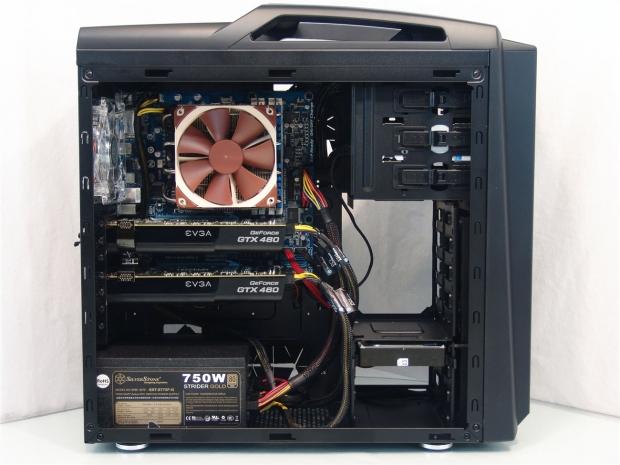
Since my ATX build is tied up with water cooling, I figured it was a good time to show the old Micro ATX system off. Everything went in well, the wiring went to everything it needed to, and you can see there is plenty of room for longer cards to the right of those 460s.
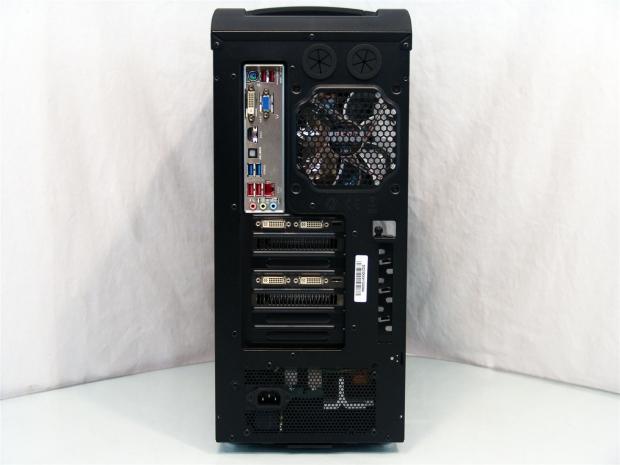
No surprises in the back, either. The dust shield went in pretty easy, there weren't issues with the cards aligning or mounting, and the PSU went in smooth as well, even though it negates the 120mm fan mount in front of it.
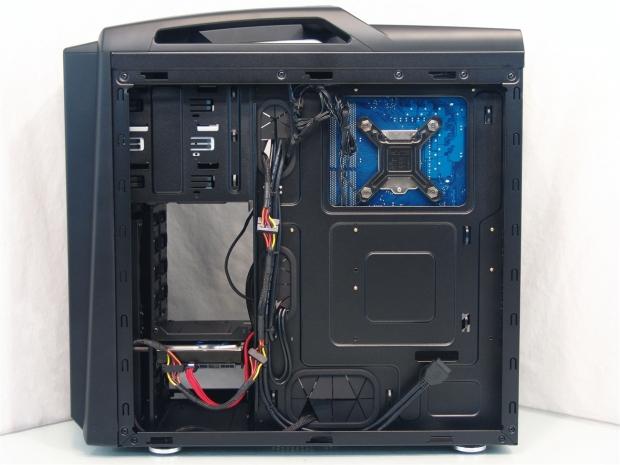
As you can see the finished wiring is really clean and there was no problems getting it this way, just a lot of zip-ties. I also made sure to pack the wires right on the left edge of the motherboard tray, where the room is least. Even so with the doors allowance and the room here, the panel went on as if there was nothing there.
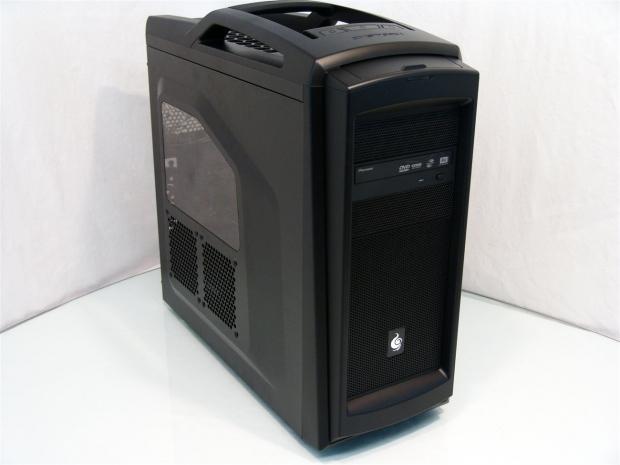
As I always do, I like to step back and appreciate the competed build before I add the power and get to the testing.

I also thought you might like to see the view given to you through the window. You can't see everything, but there is a great view of the CPU cooler and the top video card in my build. I am pleased with the view given here.
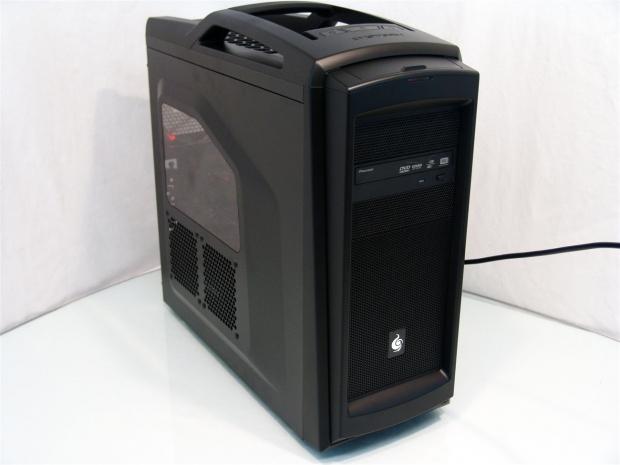
Once powered up, there isn't the brilliance that most images portray of the Scout 2, but rather just a hint of LED lighting. The rear exhaust fan has four LEDs in the corners to give the inside a touch of ambiance. On the outside, all there is to see is the glow of the strip under the front I/O panel. It will glow red on the left when it's powered, and flicker on the right to the HDD activity.
Final Thoughts
The CM Storm Scout 2 is definitely a step up from the original in almost every way possible. The front is more rounded, and while still an aggressive looking unit, it should be pleasing to anyone who sees it. I like that Cooler Master covered the I/O panel, and the new handle is much improved over the first Scout. While we are at it, I may as well cover the deeper bump outs on the second version. They not only allow more room behind the tray, but on the left, you get a much better view, and a different fan arrangement.
Internally you are given options and amenities that would please any builder. Removing part of the HDD cage to allow for much longer cards, the 7+1 slot configuration, seven locations to add fans to, and this time native USB 3.0 - what more can you want at this price?
The cooling setup was less than spectacular as the Scout 2 is shipped. That isn't really the point here, though. Cooler Master, like many others, realizes that most stock offerings in a case get ripped out for better ones anyway. So, why not let the customer choose, and not have a pile of worthless fans lying around. If you want it quiet, the 120mm in the back is near silent as it is, so keeping the levels low is easy. If you want to have a jet engine next to you during a game, more power to you, in the Scout 2, the choice is yours. As for the rest of the build and my time with the CM Storm Scout 2 there is nothing that comes to mind that will trip you up, or may be an issue later down the road - the design is just that good.
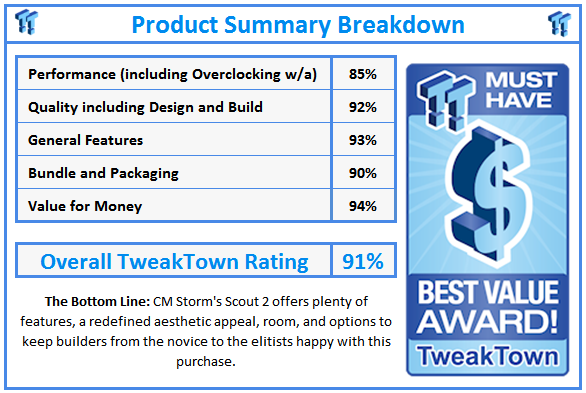
With everything you have seen here, it makes me really like the Scout 2, when I really wasn't impressed with the original. That in itself is saying something for the second incarnation. While it does keep enough of the original to be recognized, that is it. For the base price of $99.99 just about everywhere I look, I really feel you are getting your money's worth with this purchase.
The Scout 2 really is a stylish, feature rich, portable solution to gamers on the go, or even those who want to act like they do. I just don't see how you could lose with this investment in the Cooler Master Storm Scout 2.


 United
States: Find other tech and computer products like this
over at
  United
Kingdom: Find other tech and computer products like this
over at
  Australia:
Find other tech and computer products like this over at
  Canada:
Find other tech and computer products like this over at
  Deutschland:
Finde andere Technik- und Computerprodukte wie dieses auf