Introduction
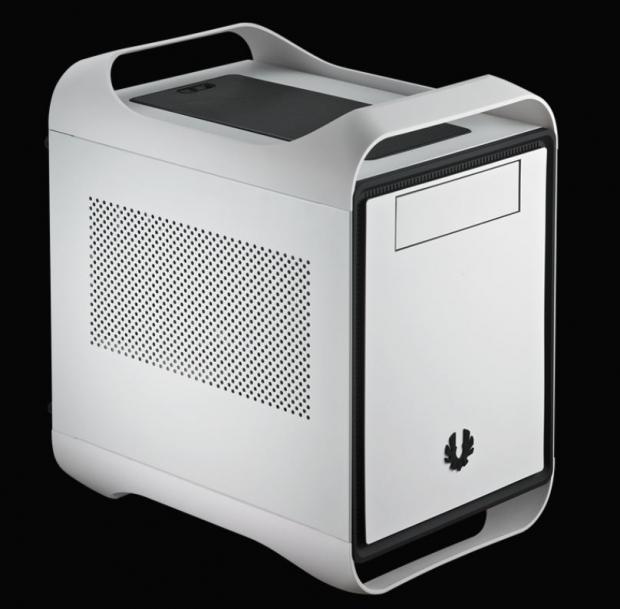
A while back in the BitFenix Inner Circle I remember seeing renderings of this chassis design. At that time there wasn't too much being said as to the final plans, but in essence there was a more square looking Apple G5 case that was the craze to mod not too awfully long ago. Without any mention at that time to motherboard compatibility, it was really tough to grasp the reality of size from drawings of the exterior of a case. At the beginning, there weren't even images of the back, so I wasn't sure if I was looking at something large enough to house four way video card setups and ATX motherboards or if this was going to be something I could sit on my desk.
It just so happens that the latter scenario is what is the reality with the latest in innovative chassis design from BitFenix. With a much bigger push for powerful, yet tiny Mini-ITX based systems, BitFenix saw a way in with their perfect rendition of a LAN box. As always BitFenix is close to their user base and whole heartedly appreciates comments and feedback they get from their designs. The chassis we are about to be looking it, while very compact in nature, it a terrific culmination of what users asked for, what the design could fit and even now and then BitFenix throws in a curve ball or two just to keep you on your toes as you look at all the possibilities that can happen in its first Mini-ITX only chassis.
If somehow you missed the title and had no idea what you were reading about, I am of course talking about the highly anticipated by me and highly raved about chassis, the Prodigy. As the first group of these went out to the few sites they could accommodate with the limited number of cases and those were the black on black versions. While I didn't make it in the first round, the wait was worth it as I received the white on white version with black only for the trim.
There is a lot to cover for such a small entrant to the market and I have a sneaky suspicion that after you are done looking at the white BitFenix Prodigy, your next move after reading this will be shopping for a new Mini-ITX motherboard for your CPU.
Specifications, Availability and Pricing
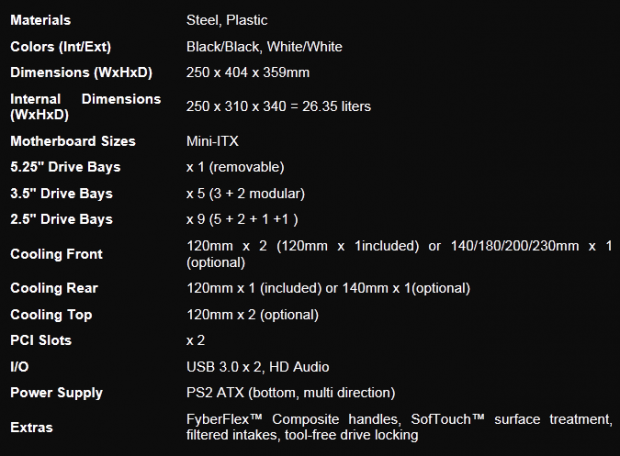
This Mini-ITX chassis has a square steel frame inside of the plastic and FyberFlex composite handles that take that square box and give it a rounded and smoothed over appearance. All of the four FyberFlex handles along with the center portion of the front bezel also receive SofTouch coating. The all white chassis, both inside and out, only has a ring of black trim on the front to go with the black BitFenix logo and a mesh panel on the top to detract from an otherwise stark white chassis. The coolest part about the exterior has to be the FyberFlex feet. These things are literally built flexible to "œbounce" or absorb shocks from lugging it around and tossing it up onto a table, since the Prodigy is small and easily portable.
If the looks alone don't get you going, what happens inside should. There is a total of over 26 liters of space internally if everything was out of the chassis. As it is shipped there are a few things taking up that space. On the front there is a single, removable, 5.25" drive bay with a twin-cage system for the five 3.5" drive bays. Now 2.5" storage drives can fit in these bays too, but there is a twist here. Remove both sections of the hard drive bays and two more 2.5" drive mounting locations appear. One other cool feature is the plastic rack on the inside of the right door panel. This is screwed into the steel and offers yet another two places to go ahead and mount 2.5" drives. Don't worry if you are a little confused, I will show them all to you soon enough. In the left two thirds of the chassis there is the horizontal motherboard tray for Mini-ITX based motherboards with the PSU mounted conveniently underneath of it. What really takes the cake is that you can load in any dual slot card up to 320mm long and with the modularity of this design it actually leaves you with dual 120mm radiator possibilities internally.
As I look around, I don't see too many locations currently in the US where you can buy the Prodigy. I was able to locate it at Newegg.com for $79.99 before shipping. For what is contained within and the stunning appeal of the aesthetics the BitFenix Prodigy, it is going to make tons of people search frantically for a Mini-ITX board just to have the opportunity to tinker inside and see what sort of good you can pack inside of one.
While I won't be loading up any water cooling gear in the build, I hope to show you that a little time and consideration of the parts you choose, this case can work just as well as a media rig with tons of drives next to the TV just as well as it can be that "œsleeper" that no one expects to be packing a GTX 680 or an HD 7950 like I am going to do.
Packaging
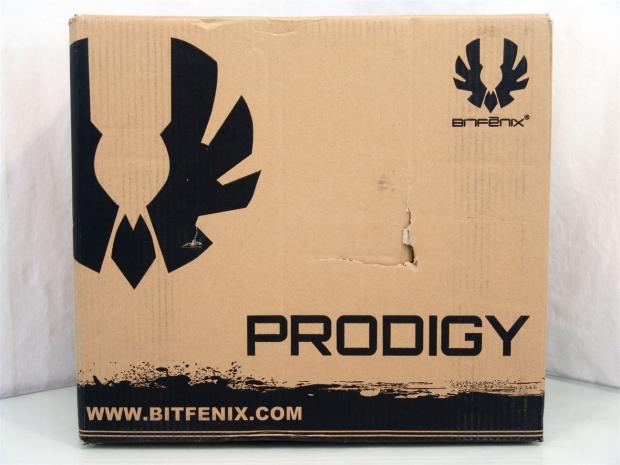
The outer packaging is kept simple to offer every last dime of the asking price to go into the chassis. The plain cardboard with black printing on it still offers the large logo and the Prodigy name along with the BitFenix web address.
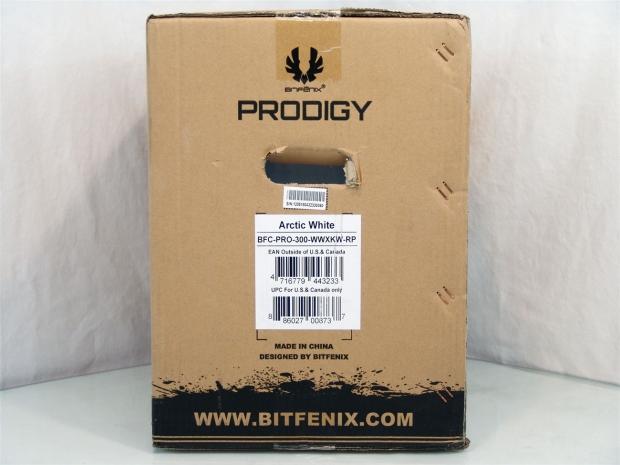
This shows that we have the Arctic White version of the Prodigy or the BFC-PRO-300-WWXKW-RP to be exact. For the sake of my fingers, I will just call this a white Prodigy.
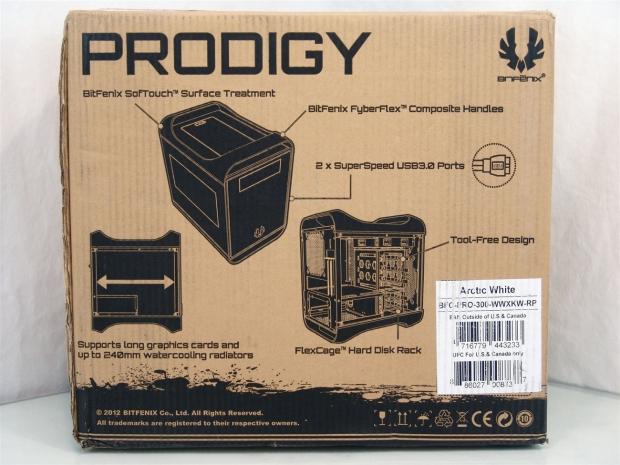
The back is a bit more interesting. It starts by pointing out the SofTouch treatment, the FyberFlex Composite handles and the two SuperSpeed USB 3.0 ports with a Native connector backing it. It then goes to show that long video cards and radiators can fit and closes with the image of the inside showing off the tool-free design and the FlexCage system.
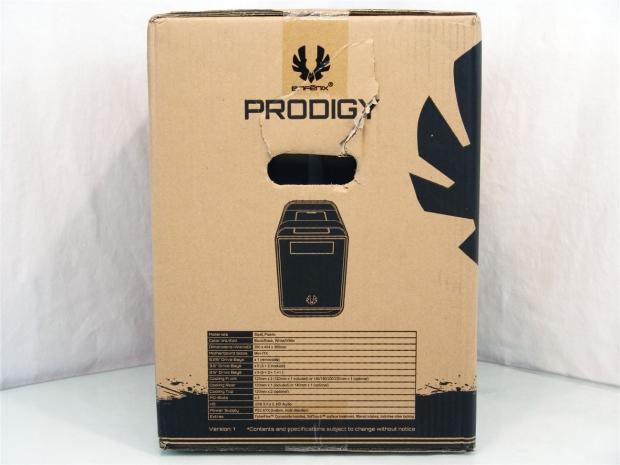
The last outer panel shows the Prodigy head on and has the bottom taken up with the specifications for this chassis.
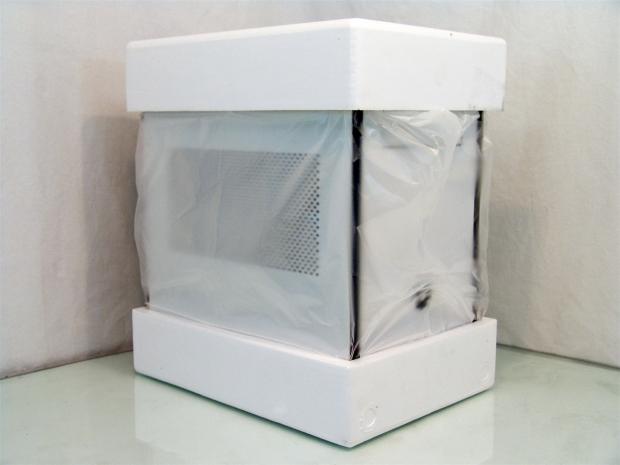
The inner packaging is sufficient enough for my box to have taken a few hits and the case survived intact and in great shape. With a thin plastic liner around the case and the Styrofoam to center and support it, the relative lightweight of a chassis is protected well for transit anywhere.
BitFenix Prodigy Mini-ITX Chassis
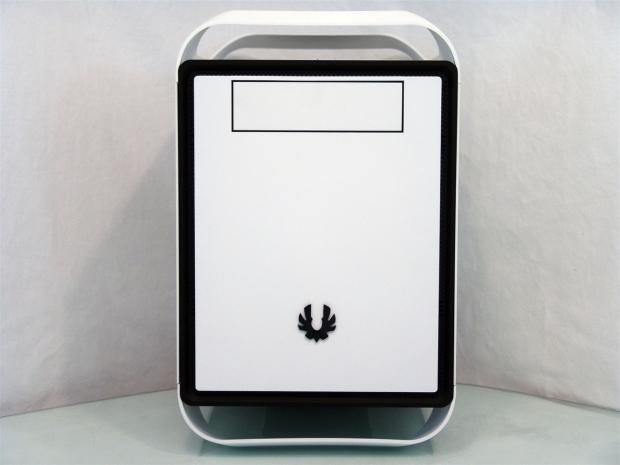
The front of the Prodigy is dead flat with the large white expanse of SofTouch coated plastic offering you a single 5.25" bay with the cover in place now, the black logo at the bottom and the thick black ring around the edge with venting to allow for intake to the chassis.
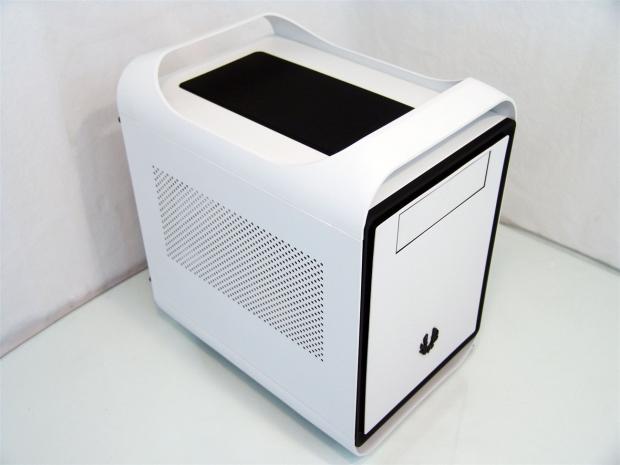
At the top, between the pair of FyberFlex composite handles, is a large removable mesh panel to allow the chassis to ventilate passively in the configuration in which it is shipped.
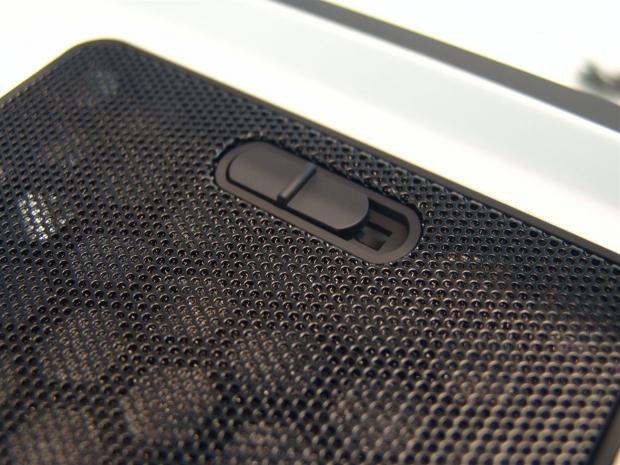
Under the front handle is a slide lock that will allow you to remove the mesh panel for access to mounting fans underneath of this.
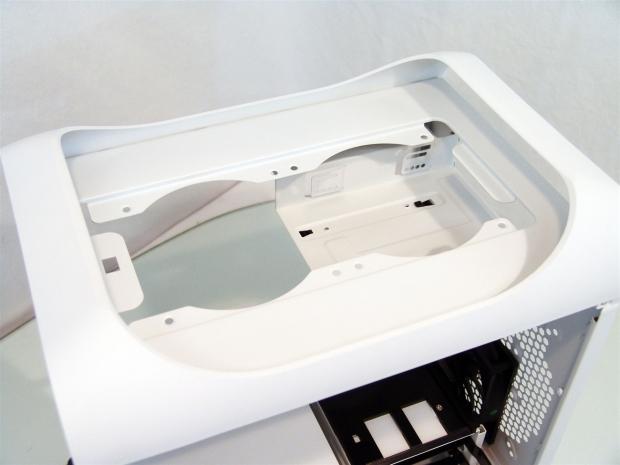
There isn't a deep well under the mesh, rather just enough room to take care of mounting fans or a radiator to the steel in the middle with the pre-drilled holes in it.
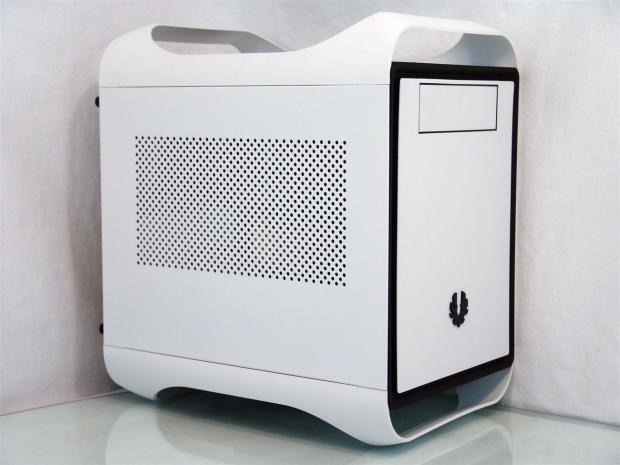
The left side of the chassis offers a large ventilated area with the pattern of small round holes. You will soon see why this is in place, as it allows the video card you select to draw in fresh cool air to keep temperatures down inside of the Prodigy.
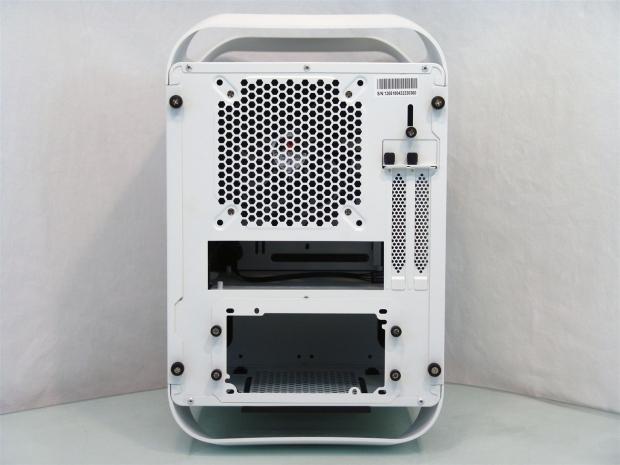
Behind the Prodigy you get an idea of the internal layout. There is a 120mm or 140mm fan mounting position above the rear I/O area. To the right is a pair of expansion slots with the PSU being mounted at the bottom if this chassis.
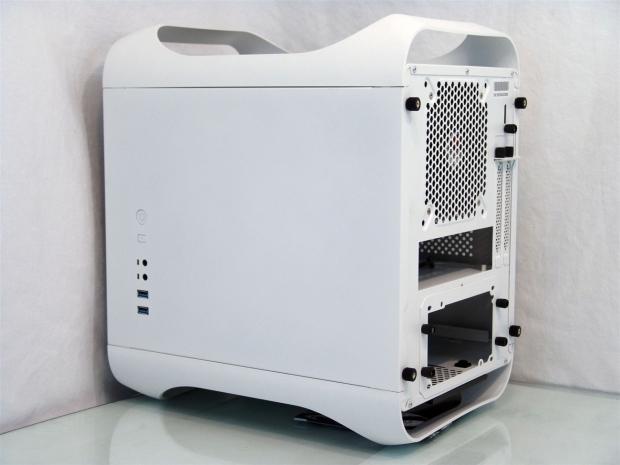
The right side of the chassis is plain white steel; that is until you run into the front I/O panel at the front edge of the panel.
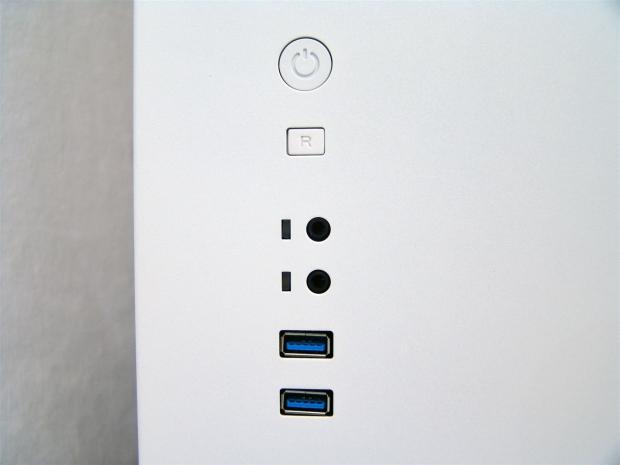
The front I/O offers white power and reset buttons to blend into the chassis. Next to the headphone and microphone jacks are the power and HDD activity LEDS, leaving the pair of SuperSpeed USB 3.0 ports to end the list.
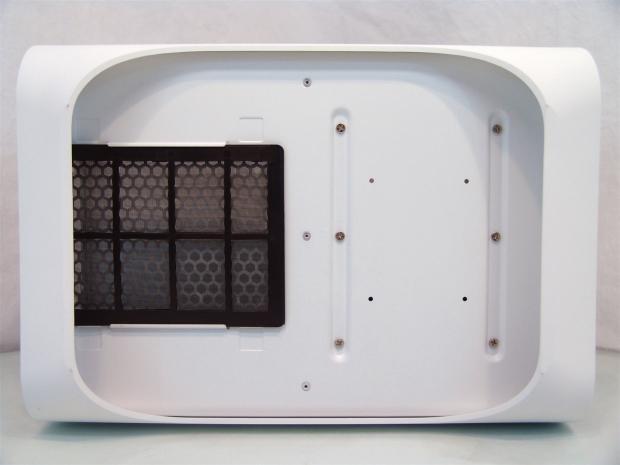
I mentioned that the FyberFlex handles absorb shock delivered to the chassis. They are not only the handles on top, but they are the feet for the chassis as well. On the floor of the chassis there is a removable and washable dust filter for the PSU and six screws for the HDD rack that I will get to later.
Inside the BitFenix Prodigy
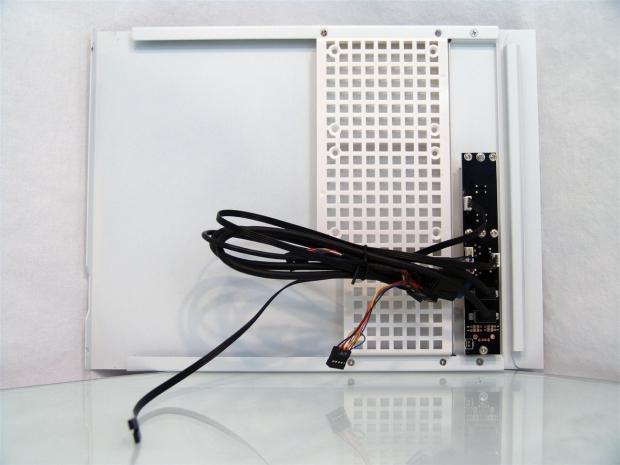
On the inside of the right door panel you will find the plastic rack that will hold an additional two 2.5" drives. The wiring is attached to the door panel and contains power, power LED, reset and HDD activity F-panel leads, a native USB 3.0 connection with a built in USB 2.0 tail and an HD Audio connector.
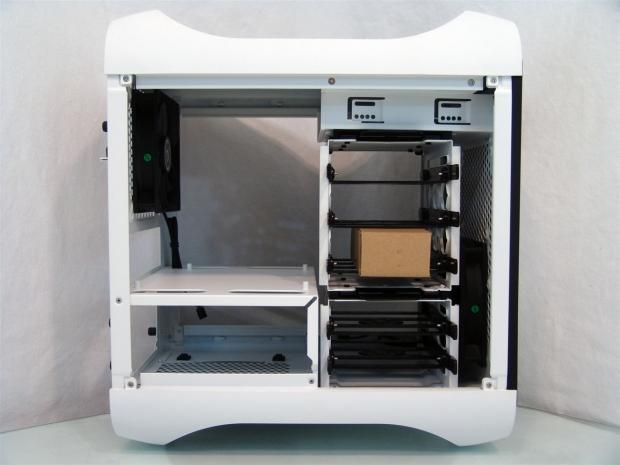
Our first look inside the Prodigy shows that this chassis is very well appointed with the FlexCage and optical drive bays on the right. You can tell right away that you are going to need a smaller PSU to sit under the motherboard tray on the left.
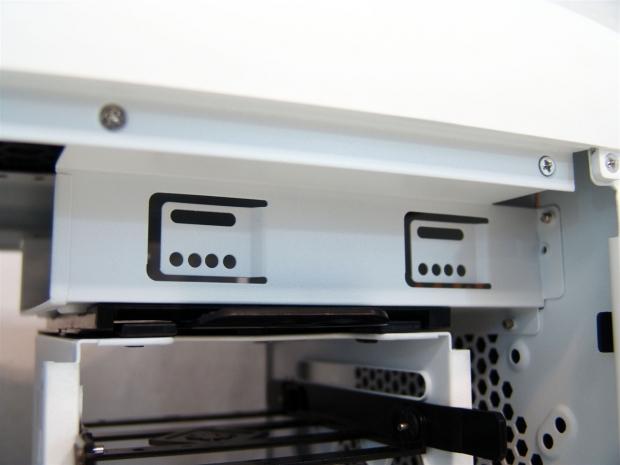
The single 5.25" bay will of course hold any optical drive or bay device you want to put in here, but it is also removable with six screws keeping it in place currently.
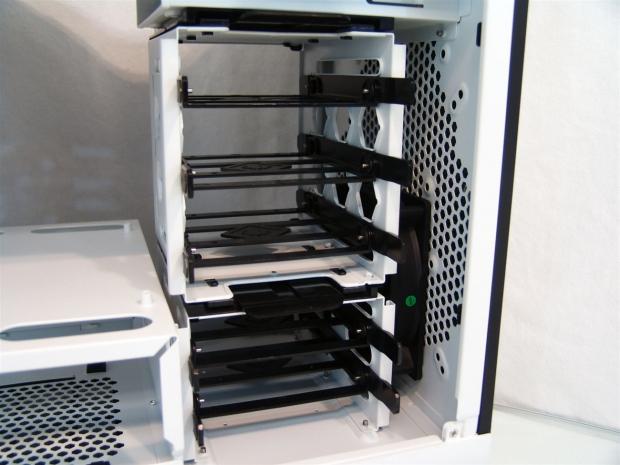
The FlexCage is a two part system that has three drive bays in an easily removable sled in the middle. Under it are two more drive bays that take a little more work to get out, but are also removable. The plastic trays allow for both 3.5" and 2.5" drive installations.
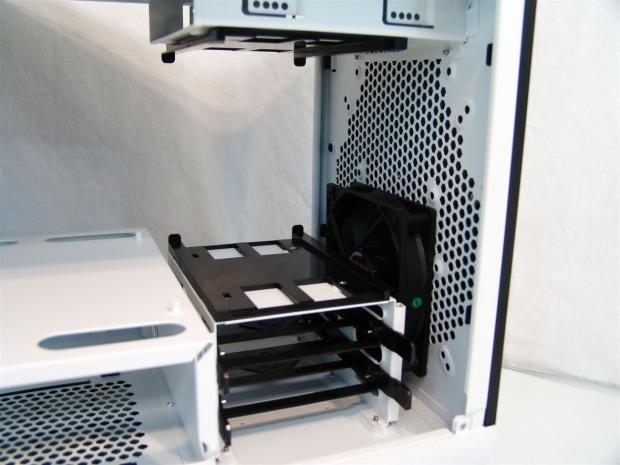
To remove the top three drives you just press on a clip at the top and the three drive cage slides right out of the way leaving the two drive bays in a cage that is screwed down.
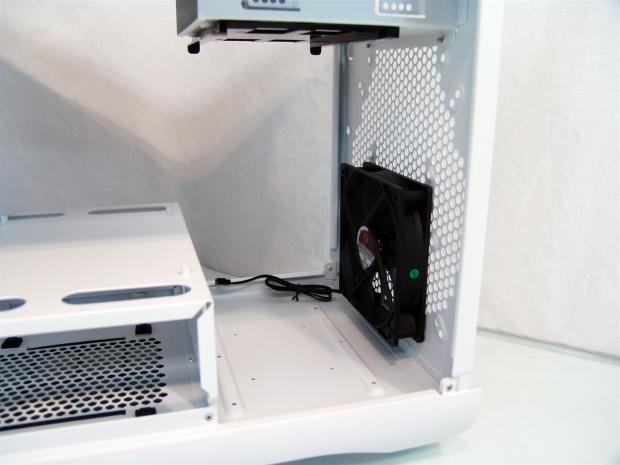
Remember those six screws on the underside of the chassis? If you remove them, you can also pull the bottom two drives and the frame out of the chassis for even more space for things like water cooling.
Inside the BitFenix Prodigy Continued
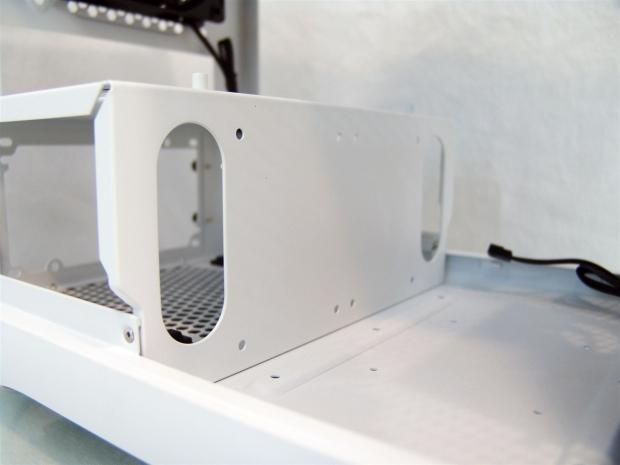
With the lower section of the FlexCage removed, it exposes another pair of mounting locations on the upright for the motherboard tray and one on the floor of the chassis to the right.
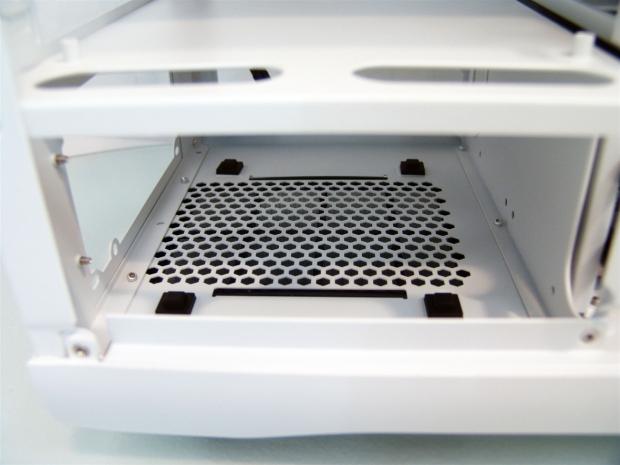
To support the power supply as you slide it in from the back, there are these four raised rubber pads to help keep the PSU aligned with the rear of the chassis while also isolating vibrations the PSU may cause from the Prodigy.
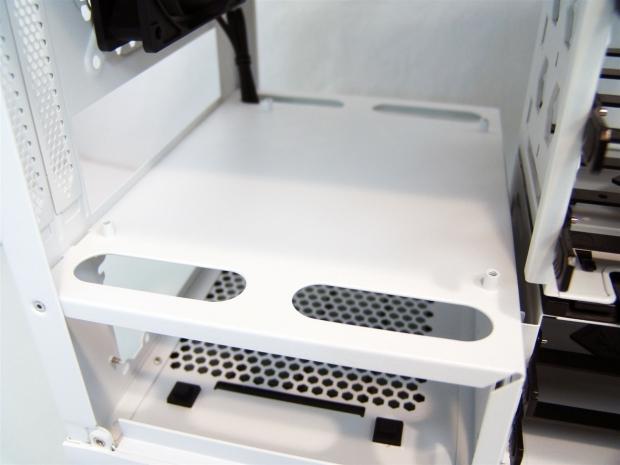
The motherboard tray has the risers painted along with the chassis since the Prodigy only accepts Mini-ITX motherboards. There are also four large holes to be able to cleanly pass wires from the PSU to the motherboard or any case wiring for that matter.
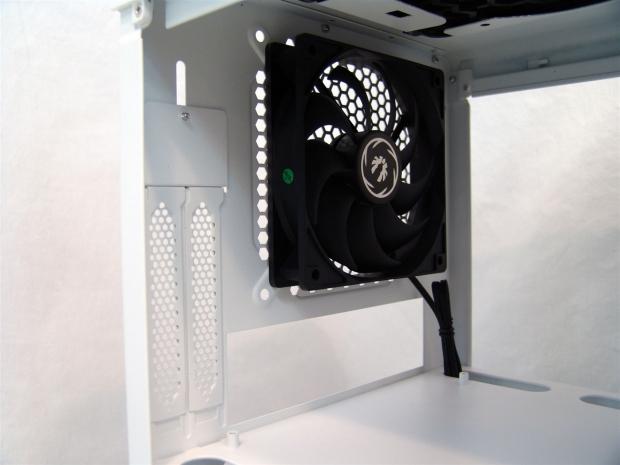
BitFenix chose to fill the rear exhaust hole in the chassis with a 120mm fan. You can also use a 140mm fan here if you want to.
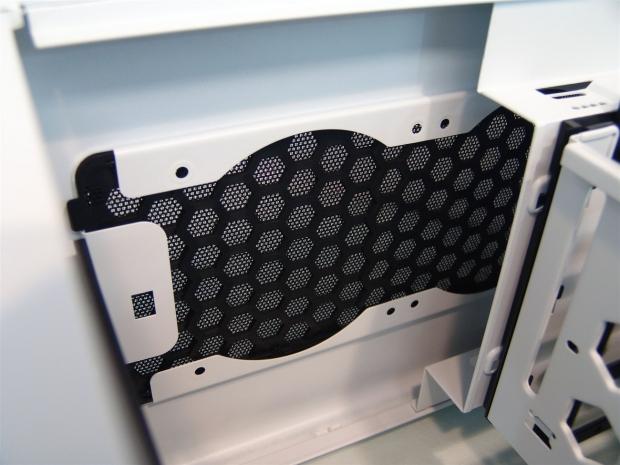
If you are just installing fans in the top, you don't have to remove the 5.25" bay, but it will become unusable. If you plan to hang a radiator in there, you definitely want to remove the bay.
Accessories and Documentation

The Prodigy Quick Installation Guide is very well done. It thoroughly covers all aspects of the Prodigy and how to disassemble and remove every component for complete customization with just the flip of a few pages. Even if you don't read that well, just following the images of this guide will get you through the build easily.
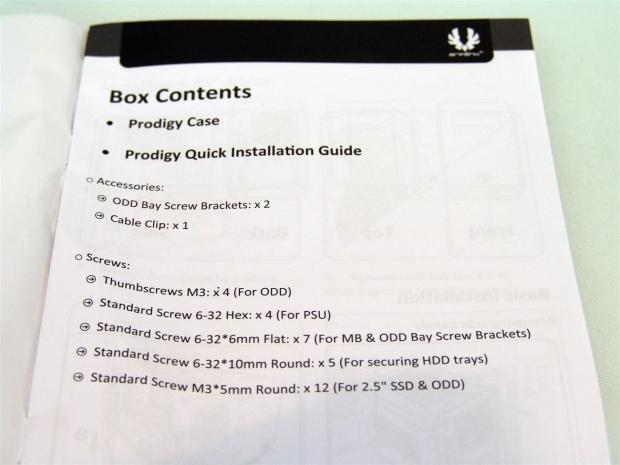
The main thing you want to check when glancing at the guide is right in the front. You should verify this parts list against what you find in the cardboard box that was shipped inside the FlexCage bays.
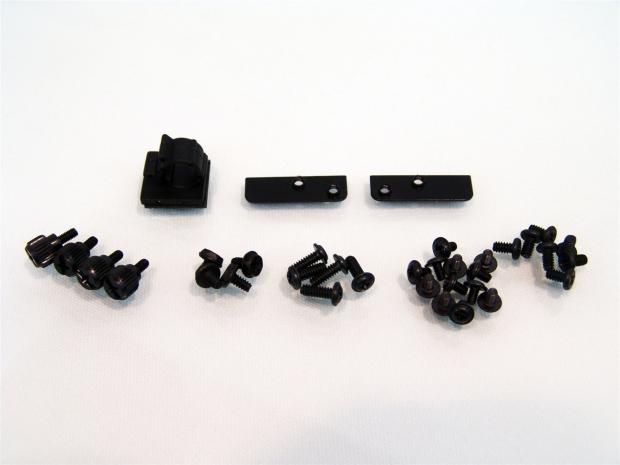
With my Prodigy, the cardboard box has a zip closed bag with all of the included bits in it. There is a pair of ODD brackets to the right of the wiring clip with adhesive on it. The thumbscrews are for the ODD installation, followed by the four PSU screws. There are the hard drive tray screws in the middle, 12 SSD screws, the last group is for the motherboard and optical bay devices.
The Build and Finished Product
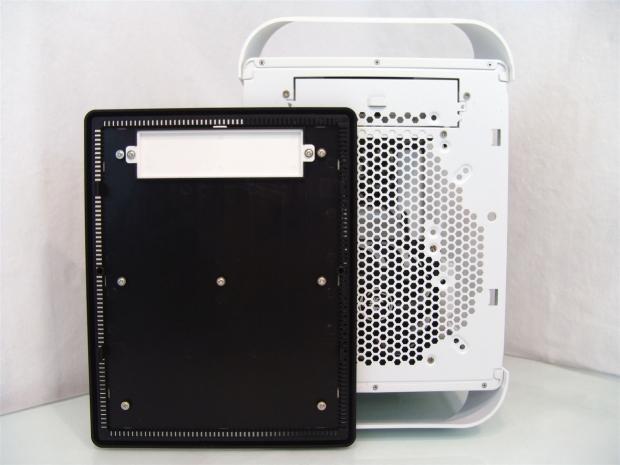
I had to remove the front bezel with a gentle tug and it came right off. This shows the bay cover is screwed into the bezel and the white outer skin is screwed to the black backer. There is a plate in the 5.25" bay that needs to be removed and you can use a 120mm on up to a 200mm fan in the front.
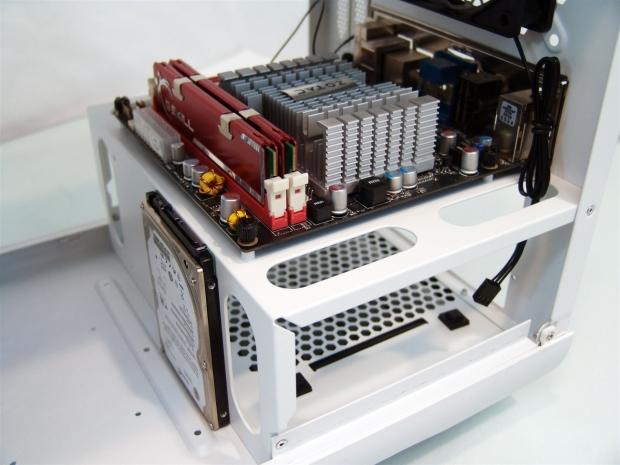
After sliding in the CVC drive I went straight to the motherboard and hard drive installation. I noticed the thumbscrews fit the risers so I used them to mount the board. As for the 2.5" drive, it fits nicely up against the steel and the connections stay out of the way.
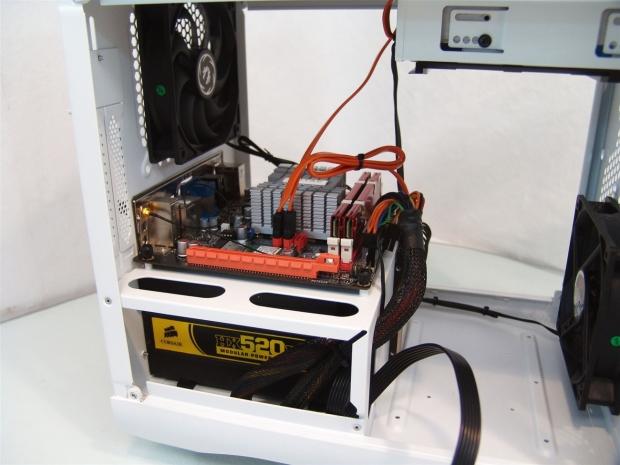
I had to dig out the HX520 as it is the shortest PSU I have on hand and the limited room of 160-165mm of PSU space, including the wiring, this was the only solution that would fit.
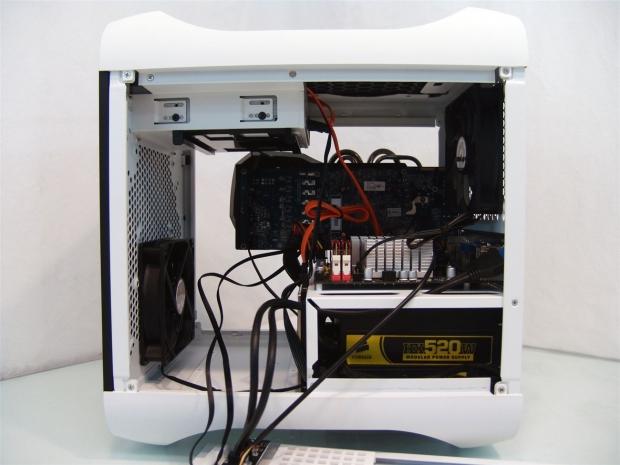
The next step was to connect all of the front I/O wiring and once that was in place I installed the video card. There is even plenty of room for an average sized tower CPU cooler on the right and with the drive bays gone, the left side is now a vast cavity awaiting some sort of water cooling goodies.
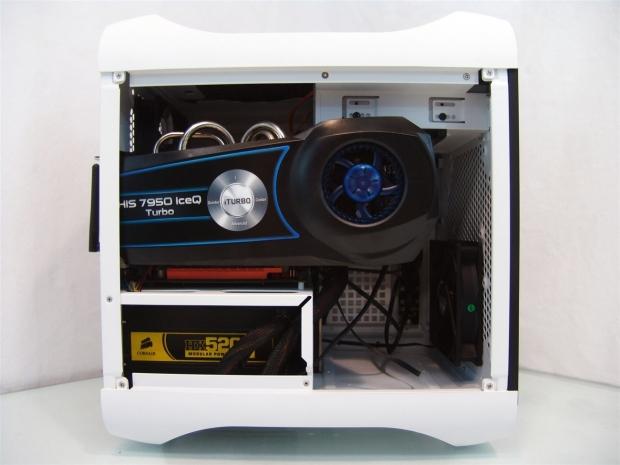
That's right. The Prodigy even allowed me to fit the HIS Radeon HD 7950 with the IceQ Turbo cooler on it. It is a close fit, but I was able to get the door on even though this cooler is a bit deeper than the standard two slot design.
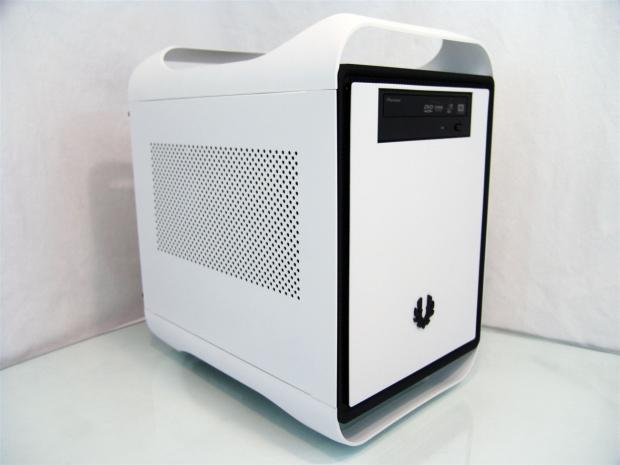
Closing up shop and getting ready for the testing phase, the only visible change outside is the addition of the DVD drive. I see they just got a shipment of the new Recon fan controllers, maybe they should offer those in white as well to match this chassis.
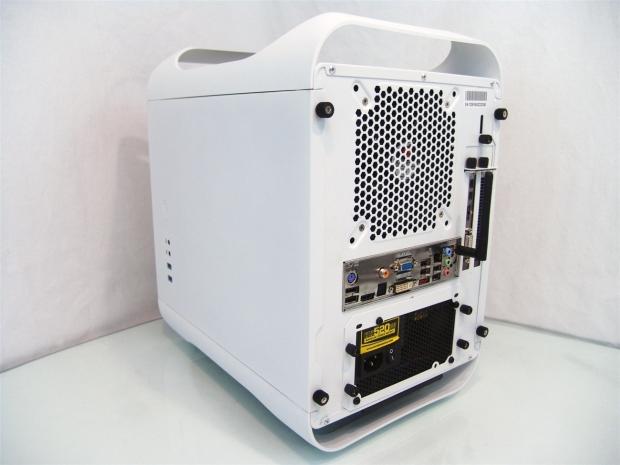
Around in the back the Prodigy fills right up. The PSU plate and it sliding in the back of the chassis is functionally fine with good clearance to get the PSU into the case. The dust shield and the video card both went right into place with no issues to speak of either.
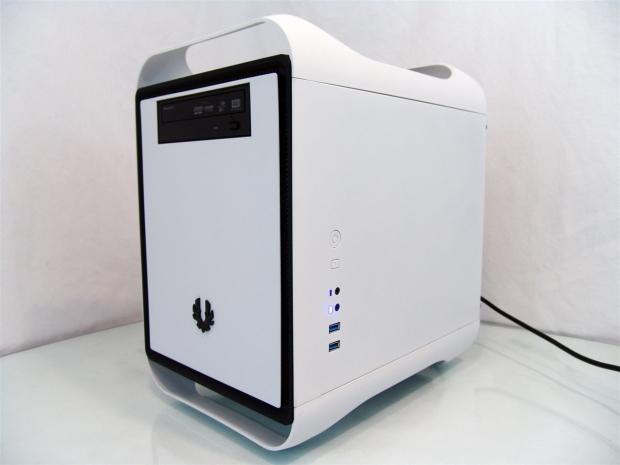
I must have snapped about ten images to try to catch not just the illuminated power LED, but I wanted to get the blue glow of the HDD activity light just above it. Not too sure if it's a slow shutter speed or piss poor reaction time, but this is what I ended up with for the powered image of the Prodigy.
Final Thoughts
Any way I can think of to detract or nitpick at the Prodigy, I come up empty. There is a noise issue with my specific video card I chose because the fan rests right on the tiny holes on the left panel and causes a whistle. Had I used any standard two slot video card, this would not have happened, so I can't take that out on the Prodigy.
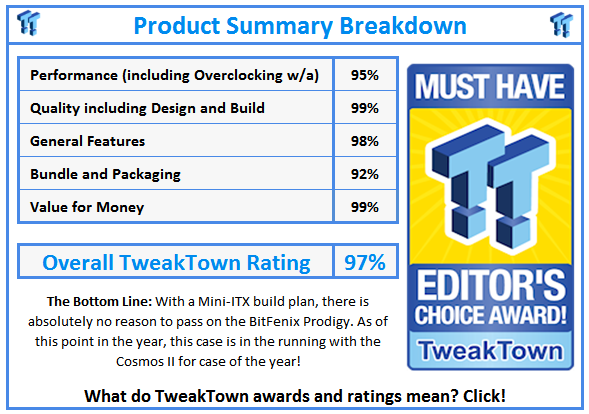
What I do come up with is an almost endless list of reasons as to why you should buy this pint sized chassis from BitFenix. On the basic level it is very solidly built, it offers great modularity and it's all tied up in a stunningly attractive outer aesthetic. Going to a deeper level you are given ample amounts of room inside, you can install a dual 120mm radiator in the top of this chassis as well as in the front. With the FlexCage's out of the way there is plenty of room for the pump and reservoir inside as well. With all the features and options in the Prodigy, it is making me search for a new Mini-ITX board to go ahead and try my hand at packing this chassis full of power and water cooling.
The stock cooling consisting of the pair of 120mm Spectre fans, one in the front and one in the back, it keeps the Prodigy pretty well cooled. Even with the whistle of the video card fan, the ability to draw in fresh air brought temperatures within two degrees of open air testing. With the cages out of the way, it improved the internal airflow and kept the Ion within reason of any Mini-ITX chassis I have used this build in. Besides the water cooling aspect, even if you depend on just air cooling, there is a ton of options for front fan cooling, right up to a 200mm fan and the possibility to add two 120mm fans to the roof, the well ventilated chassis can be turned into a very well ventilated chassis capable of handling the overclocks we all know we are going to apply to these "œsleeper" builds inside of the BitFenix Prodigy.
To be really honest, when I saw what the Prodigy can do and just how much is offered, it is more of a surprise to me that they aren't charging more than they are for it. At the listed price of $79.99, buying the Prodigy will make you feel good about this investment every time you glance over at the case or have to work inside or maintain this chassis.
Most cases come and go through the labs at TweakTown, as I can't build systems in all of them - I would need a much bigger house. The BitFenix Prodigy is one case that took me from being excited to see it and review it for you, but once it was in my hands, I knew right away the BitFenix Prodigy Mini-ITX was a case that not only isn't leaving my house anytime soon, I am giddy like a kid at Christmas coming up with the list of parts to pack in it. It's just that good.


 United
States: Find other tech and computer products like this
over at
  United
Kingdom: Find other tech and computer products like this
over at
  Australia:
Find other tech and computer products like this over at
  Canada:
Find other tech and computer products like this over at
  Deutschland:
Finde andere Technik- und Computerprodukte wie dieses auf