
The Bottom Line
Introduction, Specifications, and Pricing
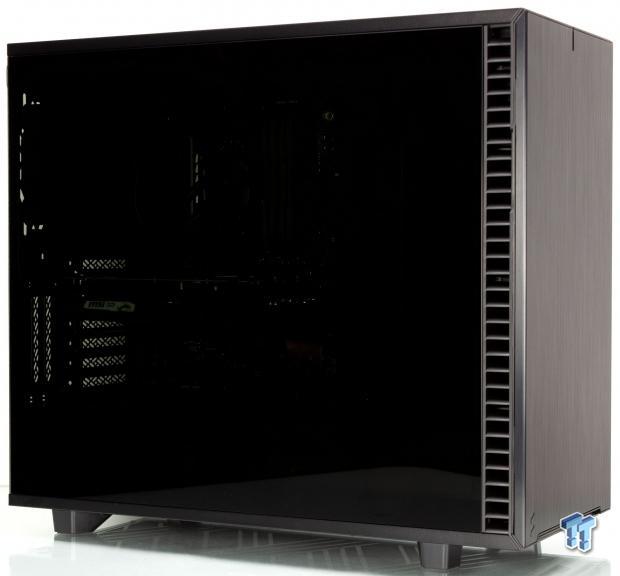
Fractal Design is no stranger to our case testing and probably to most of you reading this. Their Define series over the past several years have defined (pun intended) the Fractal Design stance on how the PC chassis should be designed along with its evolutionary progress. This has garnered Fractal an almost cult-like following, which many manufacturers would likely give precious body parts to achieve. Fractal Design, along with other incumbents in the industry such as Be Quiet and Nanoxia albeit smaller, has pushed the industry towards adopting silence focused PC chassis options.
The chassis we have today is the Define 7, and it is the next evolution of the Define series. This time Fractal has opted to remove the R or S series designation form the Define series. While simplifying things, this may end up limiting their lateral scalability due to having to adopt a new identifier now should they decide to make new models of the Define 7 series, such as the Define 7 XL, which launches alongside the standard Define 7. As stated in the first paragraph of this coverage, Fractal has always had its roots in creating a silence focused enclosure. Still, they have done serious work in offering modularity to the platform. This will ensure users can get airflow and balance the silence to match their cooling needs and audibility desires.
Key features as pulled from the Fractal Design source materials are as follows:
- Spacious and extensively adaptable dual-layout interior easily accommodates large motherboards up to and including E-ATX
- Support for radiators up to 360 mm in front, 420 mm up top, or 280 mm in the base in the default Open Layout
- Convert to Storage Layout for up to 14 HDDs along with 4 dedicated SSD mounts and one ODD bay (6 HDD/SSD + 2 SSD brackets + 1 multi-bracket included)
- 5.25" ODD bay converts to an additional 140 mm front fan mount with filtered louver covering
- Silence-optimized construction with industrial sound-damping bitumen on the front, top, and side panels
- Top cover can be removed to swap in the included ventilated top panel for additional cooling options
- New chassis design opens up to fully expose the case interior on three sides for totally unhindered installation and cable routing
- Anodized aluminum front panel with reversible dual-handed hinges and magnetic latching
- Nine 120/140 mm fan mounts with three preinstalled Dynamic X2 GP-14 fans
- Versatile new multi-brackets convert any unused fan position to an HDD, SSD, pump or reservoir mount
- Two vertical GPU slots for use with the Flex VRC PCIe riser (available separately)
- Five front USB ports including one USB 3.1 Gen 2 Type-C
- Ultra-slim Nexus+ 2 fan hub with three PWM and six 3-pin connections logically placed in-line with cable channels
- Redesigned HDD cages with sturdy four-point supports
- Tool-less, top-latching panels offer quick access and prevent accidental drops
- Bridgeless expansion slots ensure obstruction-free connections
- Ventilated PSU shroud with two-part removable cover and additional SSD/multi-bracket mounts
- Easy-to-clean high airflow nylon filters on the front, top and base with full PSU coverage and convenient front access
- Detachable PSU cable shield and integrated cable guides with Velcro straps simplify cable management behind the board
As you can see, Fractal is quite proud of the new Define 7 and has at least on paper done a lot to push the Define series to a new level of modularity, silence, and performance. Now let's take a look at the specs and what they add to the puzzle.
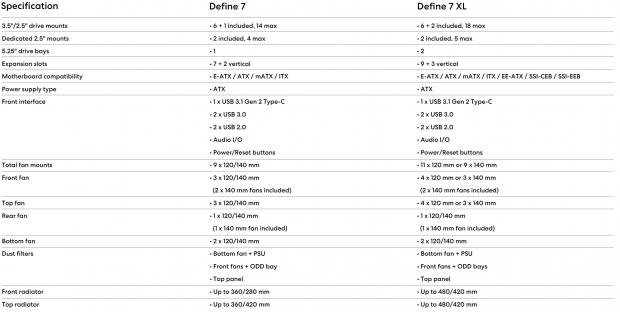
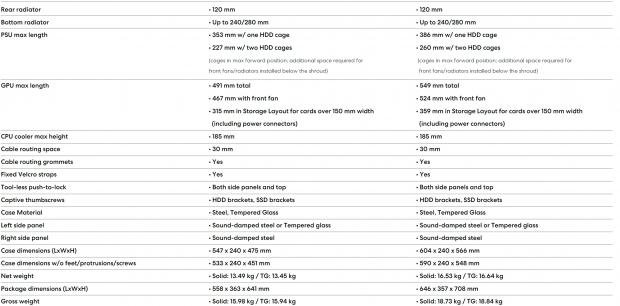
The chassis is the Define 7, has several versions (9 versions) based on various color options, along with TG or solid and even tint level of the glass models. The Define we have today is the black with Dark TG, which comes with a part number of FD-C-DEF7A-03. As you can see below, the nine models of Define 7 are also joined by a larger Define 7 XL option, which reaches up to $209. The measurements for the Define 7 is 475mm high, 547mm deep, and 240mm in width.
This is very sizable for a mid-tower chassis, but it also means we likely will not see issues with a top-mounted 120mm based AIO or Radiator for custom liquid cooling. This is a trap many mid-towers we have witnessed recently fall into. The XL version measures in a bit larger at 566mm in height, 604mm deep, and 240mm in width. This enables the XL version to offer more 120mm fitment for even more extensive liquid cooling options for fitment.
- Define 7 Black Solid ($159.99)
- Define 7 Black TG Light Tint ($169.99)
- Define 7 Black TG Dark Tint ($169.99)
- Define 7 Black/White Solid ($159.99)
- Define 7 Black/White TG Clear Tint ($169.99)
- Define 7 White Solid ($159.99)
- Define 7 White TG Clear Tint ($169.99)
- Define 7 Gray Solid ($159.99)
- Define 7 Gray TG Light Tint ($169.99)
- Define 7 XL Black Solid ($199.99)
- Define 7 XL Black TG Light Tint ($209.99)
- Define 7 XL Black TG Dark Tint ($209.99)
While the list may be sizable, do note that there are only a few price levels. The solid Define 7 regardless of color will have an MSRP of $159.99, Add tempered glass, and it rises to $169.99. The XL version starts at $199.99 for the solid version, and the tempered glass options increase this again by ten dollars to $209.99.
Motherboard fitment for the Define 7 is from ITX up to EATX. Opting for the XL will get you to support up to SSI CEB and EEB. This means that this Fractal chassis can fit some of the most extensive multi-socket workstation configurations, which makes some sense as professional system integrators such as Puget Systems use Fractal chassis. I think this one will fit their needs nicely for the heavier lifting. HDD and SSD fitment for the Define 7 reaches up to seven 3.5" & 2.5" mounts with the included hardware and expandable up to fourteen if needed. Dedicated 2.5" mounting is two out of the box but can be expanded to up to four if you purchase more trays separately.
The XL model comes standard with eight 3.5" and 2.5" mounts and can expand up to eighteen. 2.5" fitment for the XL is the same two included but can be expanded up to five total with extra trays. PSU fitment for both models is virtually unlimited with the preinstalled single HDD cage. The PSU area reaches up to 353mm with one cage in the Define 7 while the XL reaches up to 386mm. Installing two HDD cages drops PSU length to 227mm and 260mm for the XL version. This is more than enough for any current-gen PSU, even the insane long 1600W units.
Cooling fitment has grown quite a lot compared to previous Define series chassis. Define 7 can fit up to nine 120 or 140mm fans. The XL version can fit up to eleven 120mm fans or nine 140mm fans. Radiator fitment for the Define 7 can fit up to a 360mm or 280mm up front; the top can fit up to 360mm or 420mm, the rear is up to 120mm, and the bottom even offers up to 240 or 280mm. The XL version offers up to 480mm or 420mm in the front and top, while the rear and bottom provide the same 120 and 240 or 280mm mix. The CPU air cooler limit should you opt for a tower that would be 185mm on both the standard and XL models. Both the standard Define 7 and the XL version come with three 140mm based DC chassis fans, two in the front intake and one rear as exhaust.
The price, as mentioned previously for the model we have on hand is $169.99 MSRP for our black model with dark tinted tempered glass. This places the Define 7 in a higher-priced range where features and build quality start to be needled down upon, and feature sets can make a world of difference. The competition for Define 7 is as follows. At ten dollars below the Define 7, we have the H500P from Cooler Master, Fractals own Define R6, and even the Crystal 570X from Corsair. At the same price point, we have the PM01 from SilverStone and the NZXT H710i models.
At slightly above the Define 7 price point at up to $179.99, we see the Define S2 vision from Fractal and the Mirror version of the 570X. So, it does seem that Fractal has some stout competition, even if over half of it is its chassis models.
Shannon's Chassis Test System Specifications
- Motherboard: ASUS ROG Maximus XI Hero (Wi-Fi) Z390 (buy from Amazon)
- CPU: Intel Core i7 8700K (buy from Amazon)
- Cooler: Corsair Hydro Series H60 (buy from Amazon)
- Memory: Corsair Vengeance Pro RGB CMW32GX4M4C3000C15 (buy from Amazon)
- Video Card: MSI GeForce RTX 2060 Gaming Z (buy from Amazon)
- Storage: SanDisk M.2 256GB
- Power Supply: SilverStone Strider Platinum 1000W (buy from Amazon)
- OS: Microsoft Windows 10 Home 64-bit (buy from Amazon)

Packaging
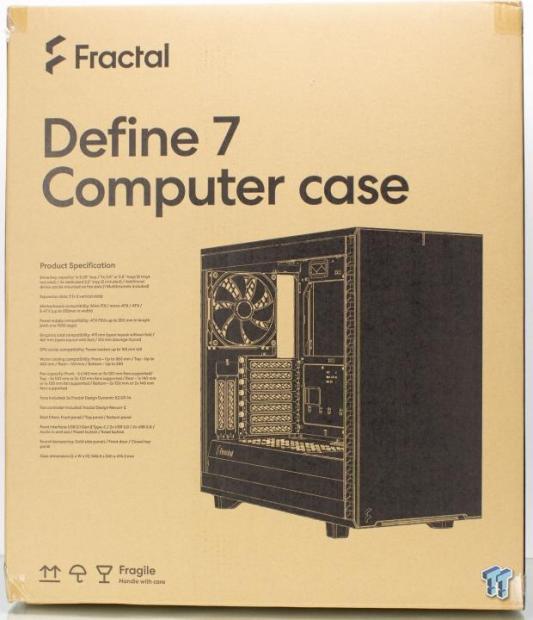
The Define 7 package comes with the new logo we saw on the Vector RS we looked at recently. The main panel of the packaging shows a largely dominant product name and black chassis image showing a three-quarter shot where you can see some of the internal chassis details. There is also quite an extensive listed specification list showing the fitment and features of the Define 7 chassis. The bottom has a few safety or instructional icons for shippers to help avoid damage.
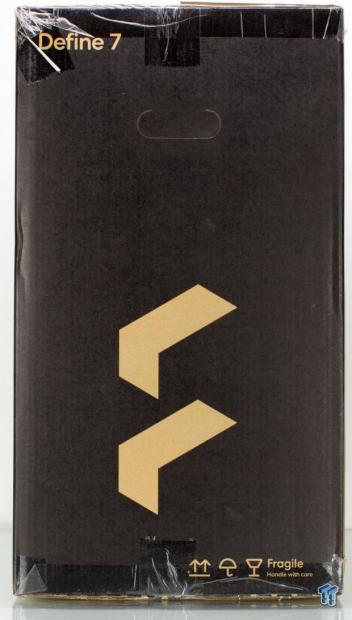
Spinning the package ninety degrees, and we see a mostly black printed panel with the fractal logo taking up the negative space. The fractal name adorns the top along with the same instructional icons flanking the lower edge.
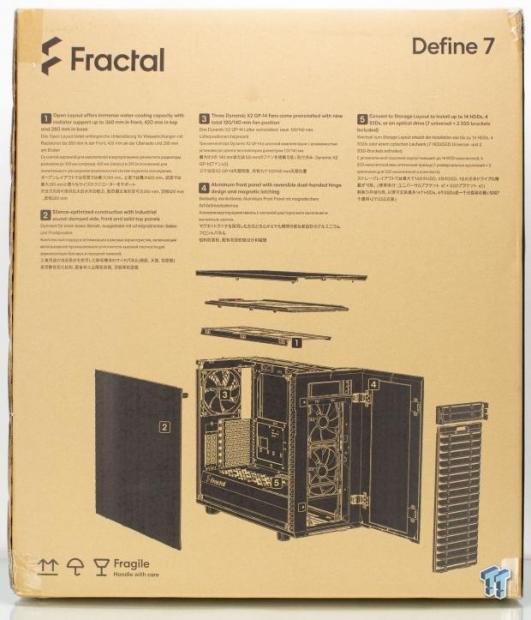
Spinning the package another ninety degrees, we find the broad opposing side of the box and its breakaway view of the Define 7. This specific view is a semi-exploded view highlighting five feature callouts Fractal felt were noteworthy. The ability of the chassis for liquid cooling, the adjustable capabilities of storage mode vs. open are shown along with the dual position hinged door are all listed here among some other notable inclusions.
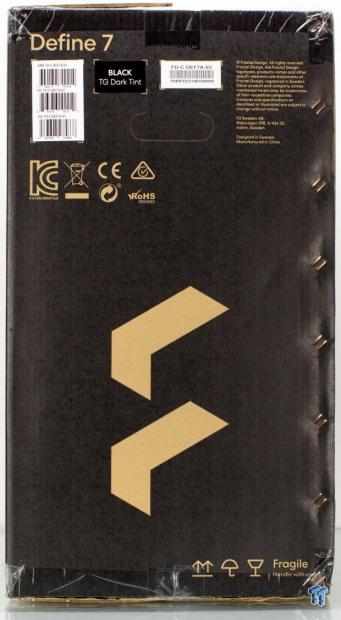
Spinning the package, the final ninety degrees, and we see a near mirror of the opposing side and its negative space logo. However, on this side, we find all of the inventory control labelings, along with some essential compliance, regulatory, and safety iconography.
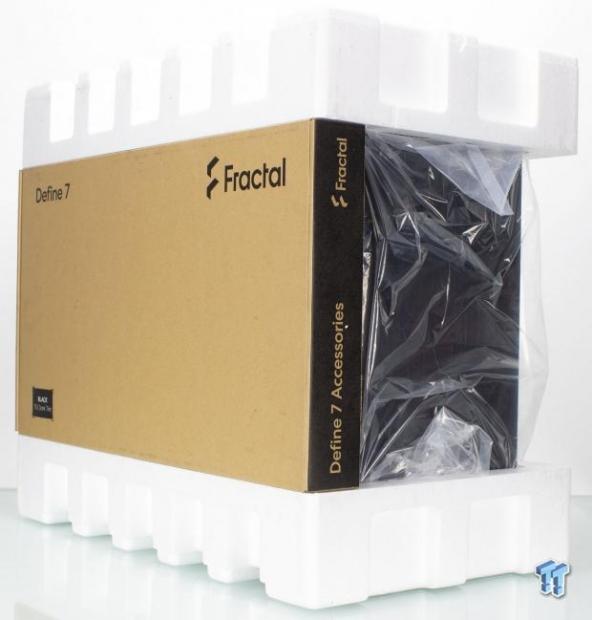
Pulling the define 7 form its packaging, and we are greeted by a massive accessory box residing adjacent to the glass panel. This is something we saw with the Vector RS as well and is necessary due to the inclusion of additional components along with a top panel that allows you to convert and balance the Define 7 for the noise and airflow needs your build may require. The foam end caps are hard Styrofoam, and the chassis is wrapped in a plastic bag to ensure abrasion damage is avoided. The glass panels have a cling film as well to ensure it remains protected during transit.
Fractal Design Define 7 Mid -Tower Chassis
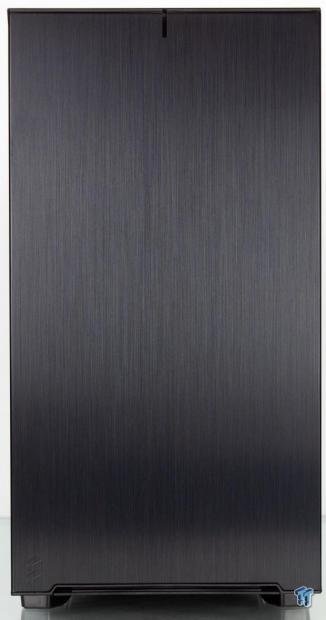
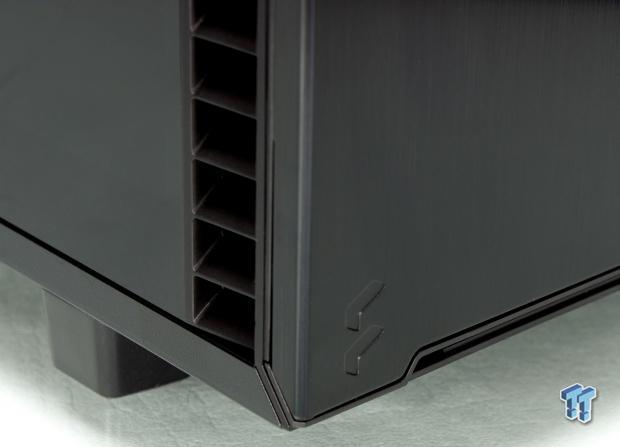
The front panel or door of the Define 7 looks the same as previous Define series chassis with a brushed metal outer skin on a plastic swing open door. The slit in the middle of the front panel is where the power LED is located and enables it to be seen on a chassis that is at eye level on a desk. The lower left edge of the front door is adorned with the new Fractal Design logo stamped into the exterior metal skin.
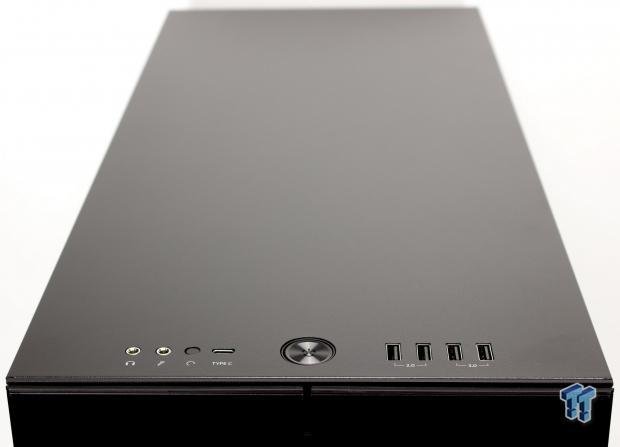
The top of the Define 7 is smooth solid steel, but as you will soon see this top is retained with ball and socket style retainers. This can be swapped with an airflow edition top panel, which allows air to vent from installed cooling in the roof of the chassis. Upfront, we can also see the I/O, which we will move to next.
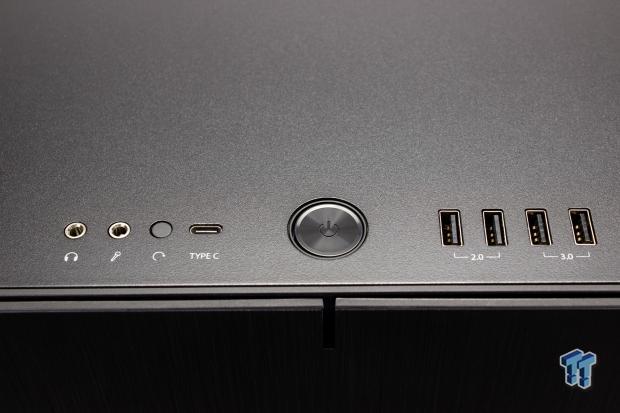
I may have complained about Fractals I/O arrangement in the past, but they did exactly what I had called out for them in the past. Here is the full list of I/O on the Define 7:
- Headphone 3.5mm jack
- Microphone 3.5mmm jack
- Reset button
- USB 3.2 Gen 2 Type-C port
- Power Button with power LED in the slot on the front panel
- 2x USB 2.0 Type-A ports
- 2x USB 3.2 Gen 1 Type-A ports
As you can see here, there is no waste to the I/O with several connectivity options form the aging 2.0 USB up to USB 3.2 Gen 2. The only thing omitted from the I/O would be an HDD LED, which has become increasingly unnecessary as newer NVMe SSD's can render them useless. In some cases, the data access may not even register due to the speed and access latency of modern storage mediums.
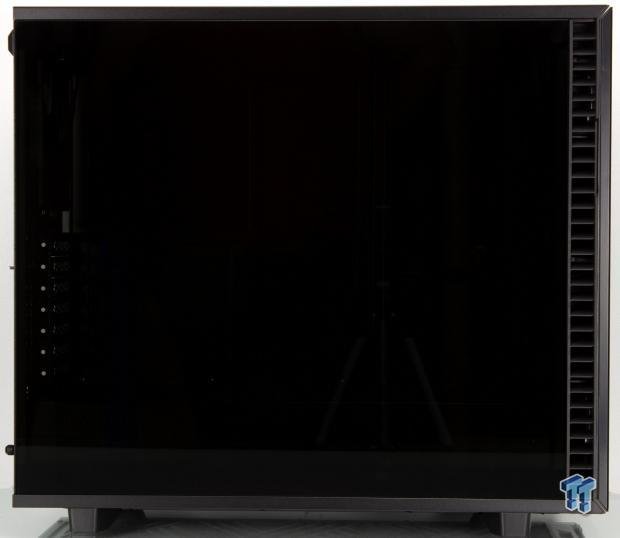
We have now rotated the Define 7 to show the tempered glass panel, which covers the main chamber. The glass is dark tinted as the label indicated, and as you can see, even with photo lights blasting the chassis you cannot see much detail of the inside structure. We do get a nice view of the side air inlet louvers, which direct airflow into the front fan inlets with the front door closed. Whether or not the front door impacts airflow or cooling performance, we will determine at the time of testing.
The side panel on the Define 7 is retained via a friction fit with ball and socket connections and is toolless with the ability to use the top-mounted thumb grips, which means you can open the panel with a single hand. There are areas where you can secure the panel with screws behind the front panel should you want them locked into place.
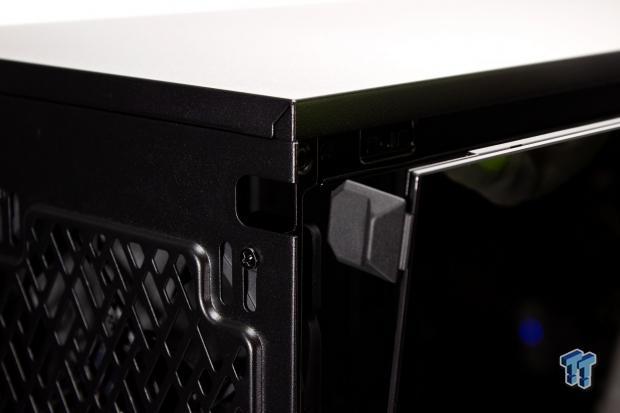
Here we have the thumb pad previously mentioned, which is what you would use to pop the side panels off of the chassis ball and socket retention. Do note that if you are uncomfortable with this retention, as previously mentioned, you can install screws behind the front panel, which will lock the panel in place.
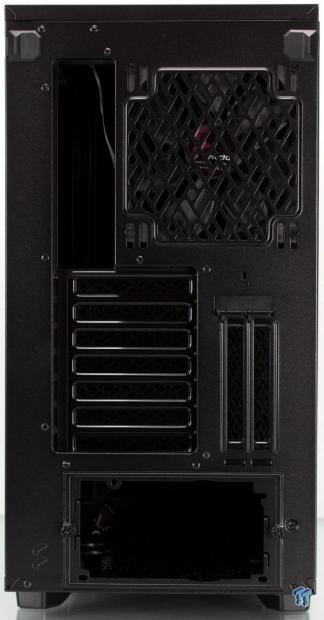
The rear I/O area of the Define 7 is standard for the most part. Looking to the top and we can see the previously mentioned thumb grips which are used to pull the panel away from the chassis to be lifted off. As you can see, both the main and cable management panels can be removed in the same way. Everything else is standard, but there is one thing to note, which is the ample space between the motherboard I/O cutout and the cable management panel, which signifies the larger space reserved for cable management. This space is listed as 30mm, which is quite massive and 7mm more than the previous version of Define chassis.
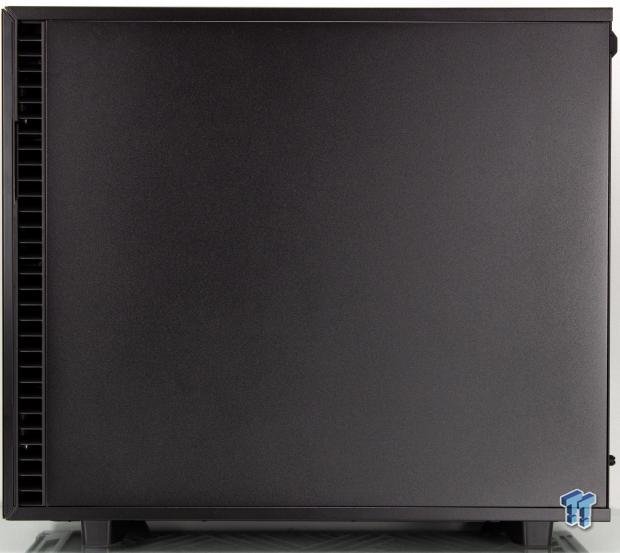
The cable management side is where we find ourselves now, and this side is covered by a steel panel that is backed by sound deadening material. This panel uses the same quick-release thumb grip to remove the panel. Toward the front panel, we see the same louvers design from the main panel view, which means the front fans can pull from both sides.
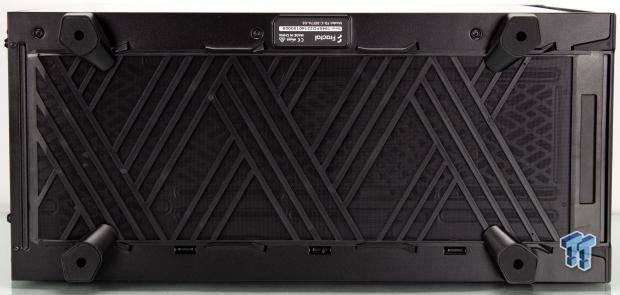
The bottom of the Define 7 is primarily covered by the removable filter, which runs the entire length front to back and is removable from the front for easy access and cleaning. There is also a tag dedicated to the serial number of the chassis and four uniquely angled feet designs with rubber pads to avoid skidding on the desk.
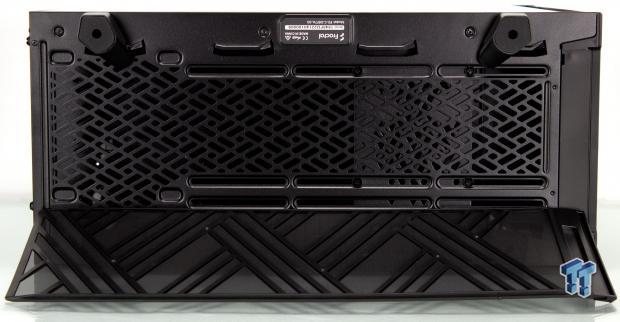
Pulling the filter from the bottom of the chassis reveals the slotted mounting, which works for both fans and radiator mounting, or for the preinstalled HDD cage, which you can adjust its positioning to fit your needs best. An additional HDD cage can be purchased separately should the need arise, and it can be installed down here as well.
Inside the Define 7
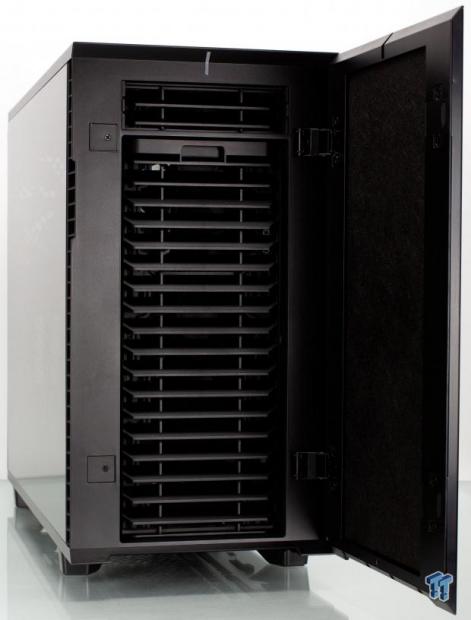
First up, we must open the door to show inside the sound dampened door. We see that behind the door, we find a more intricate door hinge along with the removable filters and louvers in place to direct airflow into the front fans. This is a nice convenience feature as the front filters can be removed and cleaned without removing the front panel.
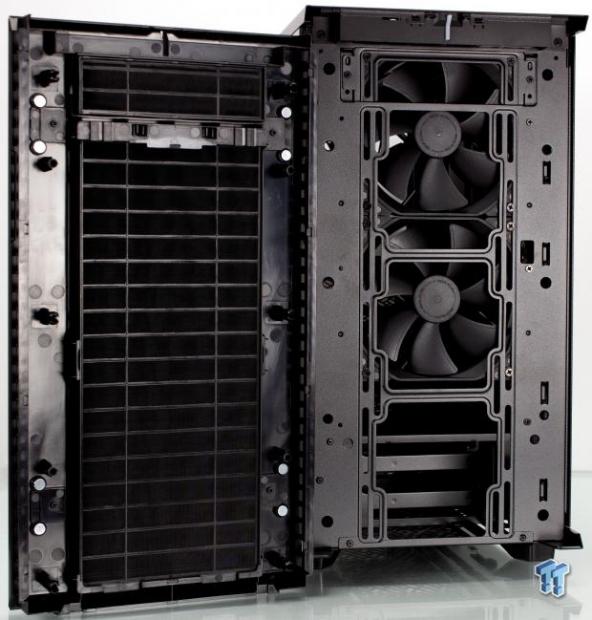
Pulling the front panel was easy enough as it has plastic pegs that cause a friction fit to retain the panel to the chassis body. Here you can see the slotted front mounting for cooling fans or radiators. Toward the top, you can see the 5.25" ODD bay opening, which comes with a fan mounting bracket preinstalled with a fan as most users do not need or want an optical drive, but there is still a userbase which requires this.
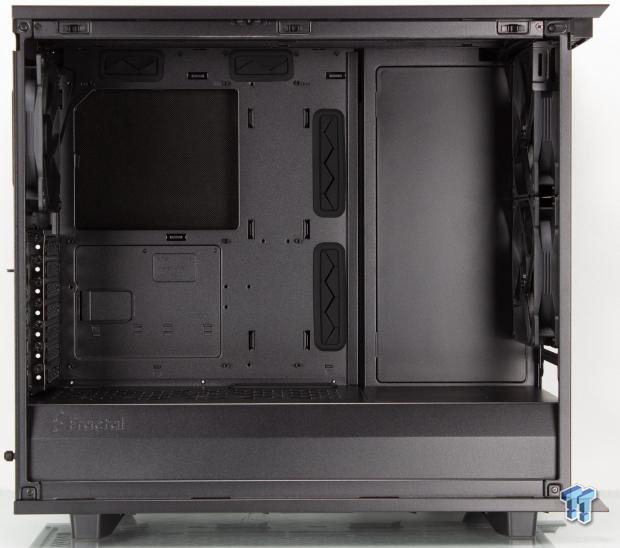
Peeking behind the dark tinted glass shows us where all our parts will soon be nestled. Fractal decided to ship the Define 7 in open configuration this time around, as I am assuming many users liked it in that mode. However, should you need a large amount of storage possible, it is as simple as pulling that flat-panel covering the portion toward the front panel, which can move toward the glass panel to enable the multitude of HDD trays behind it. The open expanse of the Define 7 is massive and should fit most any liquid cooling or extreme build you can come up with. This is not quite to the level of something like the PCO11D XL, but it's close.
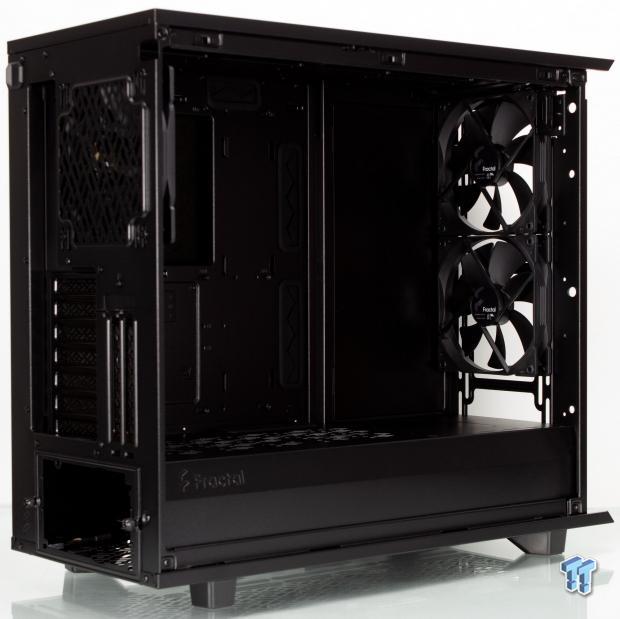
Looking into the inside of the front panel mounting and we can see the two preinstalled 140mm fans dominate the front mounting, but with the removal of a panel on the PSU shroud will allow even more cooling to install down into the PSU chamber area.
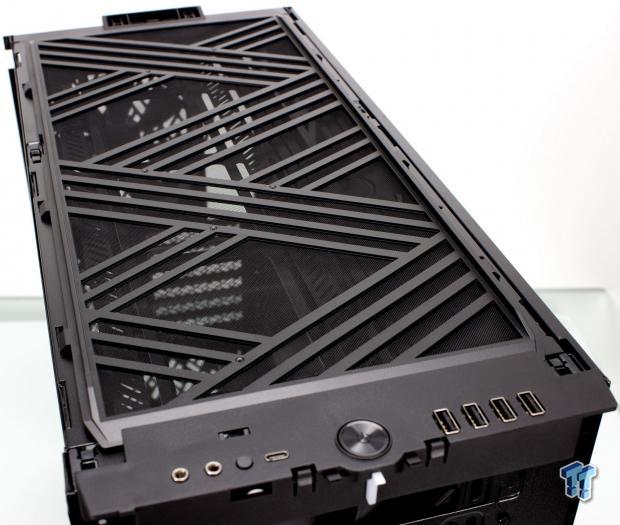
The top panel of the chassis lifts off with ease as it is retained by ball and socket retention. Once removed, we find a removable filter that spans the entire top of the chassis from front to rear. The filter lifts off after sliding backward about half of an inch.
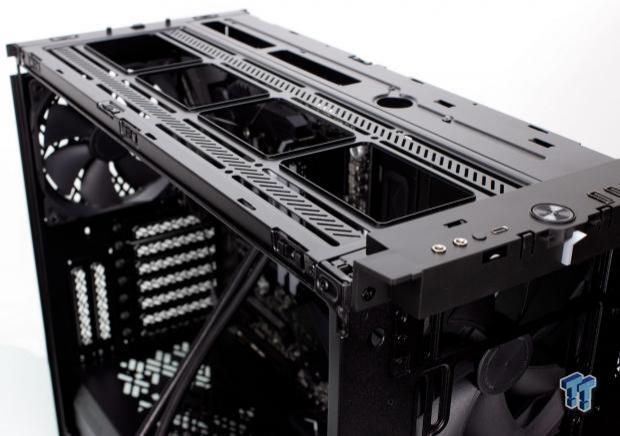
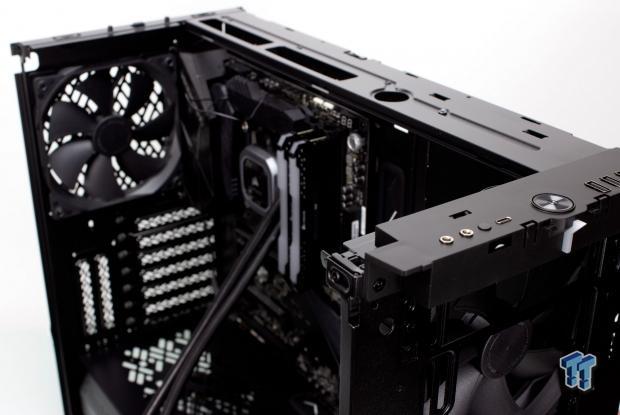
Removing the filter, we now see the top mounting for radiators or fans. One thing that I found very cool was that the section of the top and outer frame bar comes off to allow easy access during building. As you can see, there are two screws, one at each end front and back, which can be removed, then the top mostly comes off the chassis. This will allow a more comfortable build along with the preinstallation of radiators or fans without having to fuss about inside the chassis.
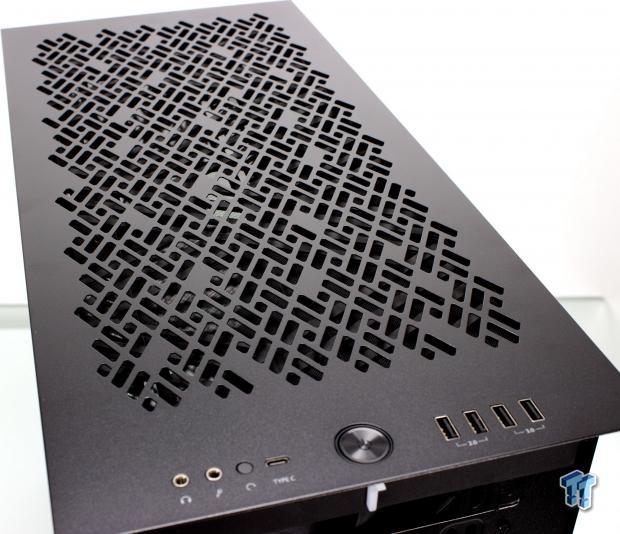
Here we have the airflow panel, which we fitted to ensure it works as expected along with to observe any potential issues during swapping or using the two panels. Keep in mind that the original panel was solid steel with sound deadening lining the interior of the panel. As you can see with the ventilated airflow panel, the ventilation cutouts are spanning the entire area where the filter we observed previously resides.
Inside the Define 7 Continued
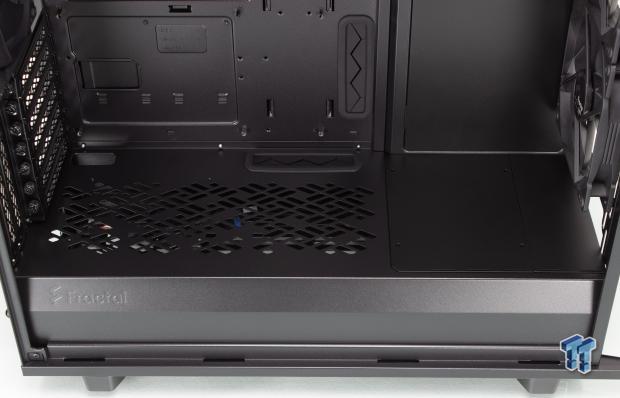
Here we have the PSU shroud of the Define 7, and it is vented to allow airflow between the chamber, which will significantly help if a radiator or fans are installed in the lower chamber. To the front of the PSU shroud, we find the removable panels toward the front panel, which allow for radiators or other devices to pass through into the lower PSU chamber. This feature, unlike what we have seen in the past, now comes in two pieces; this should allow you to install fans or even thin radiators into the lower area without opening the massive hole unless needed due to thicker radiator fitment or even reservoirs.
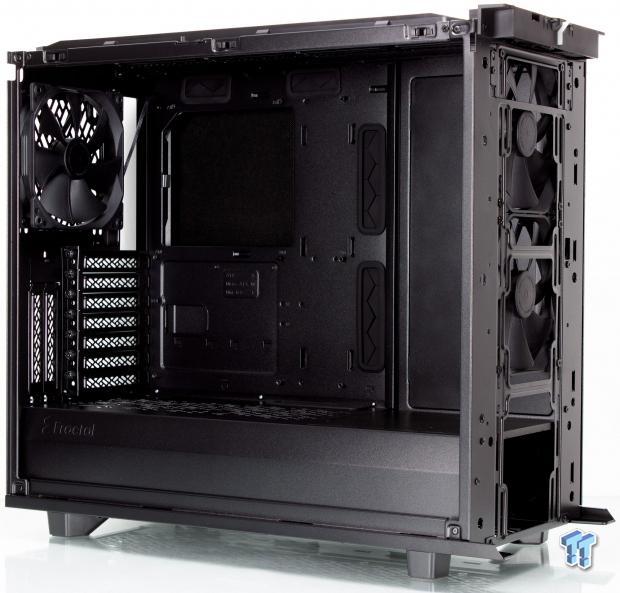
Here we look at the rear of the chassis from the interior. We see the preinstalled 140mm DC fan here along with the massive CPU cutout, which should easily service any cooler we have seen as of recent. There are seven internally accessible expansion slots along with two externally accessible, which are the vertical option for the GPU and require a VRC riser cable, which is sold separately.
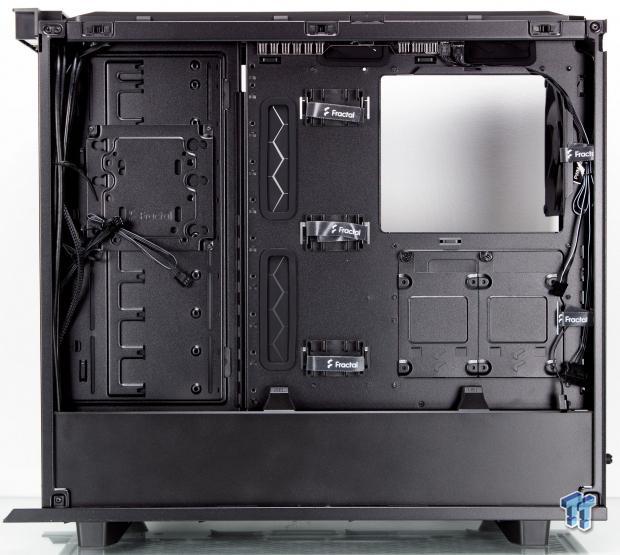
The cable management area surprised me a bit when I removed the rear panel. The first thing I noted was the lower PSU and HDD cage area cover, which obscures the view of this lower area, so you do not see any bundled PSU cables or anything else like mechanical HDD, which you may not care to look at. This is less necessary with a solid side panel but had a window panel be back here; this could make a huge difference. We also see a combo bracket for HDD or SSD mounting on the left, and more can be added if you need them and can be purchased separately.
There are also two SSD trays on the back of the motherboard tray, and a couple more can be added depending upon your needs. The preinstalled cable management guides back here with Velcro straps are excellent and help to give a natural flowing place to route your cabling. You may notice the wiring coming from the top-mounted fan hub, and that's where we will be looking next.
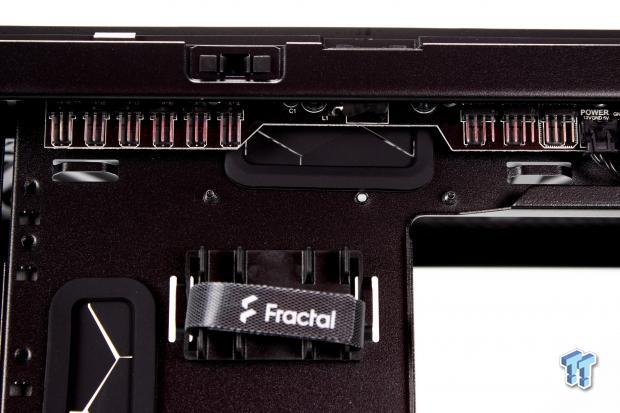
Under the middle of the top lip of the Define 7 chassis, we have the new fan hub, which supports up to three PWM and six DC 3-pin fans. The leads coming from this unit are a SATA power cable and a 4-pin PWM header to pass the PWM signal to the attached fans. I do like this design as it can be superior to the mid-mounted options we have seen on other chassis. This requires managing large bundles of fan cables to the middle of the viewable area; this one moves it up top where cables can be tucked into the lip channel.
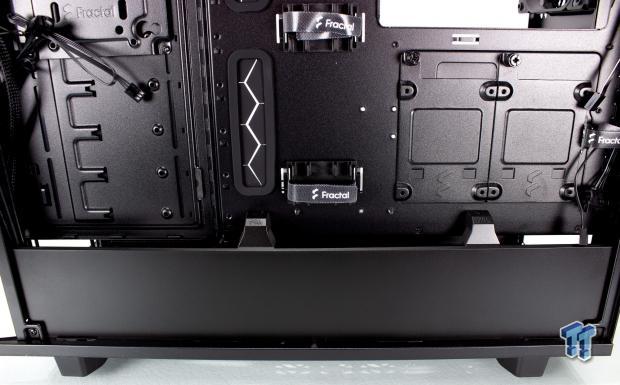
The lower section cover has two pull latches that are retained with ball and socket style retention. Once pulled away, the plastic shield will bow a little to pull the small side tabs out of their slots, and the panel can be removed. As you can see from above, the shield has a gap that allows cables to pass between the area behind the shield up into the exposed area for a neat transition between chambers.
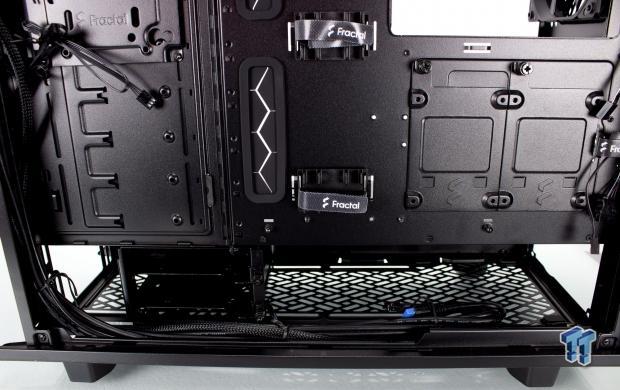
With the lower panel removed, we can now see the vast open space for a PSU to be installed along with its adjacent HDD cage. Another cage can be added if you need additional 3.5" storage in the chassis. Otherwise, this area allows for more than enough for a large PSU along with a massive bundle of unused cables to be hidden down here. We can also see the front panel cables looping over down here form the front area, and they appear to be adequately long enough to attach to any system you choose, with some excess just in case. The PSU area has four raised rubberized foam feet where the PSU can rest to avoid vibration or abrasion from metal to metal contact.
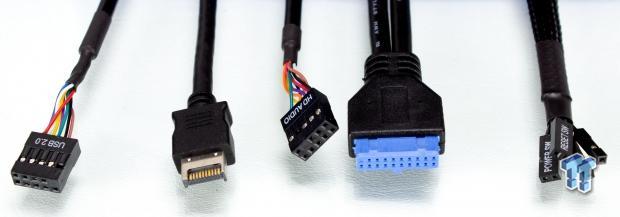
The integrated chassis front panel cables are as follows:
- USB 2.0 10-pin connector
- USB 3.2 Gen 2 connector
- HD Audio connector
- USB 3.2 Gen 1 20-pin connector
- Power, Reset, and Power LED connectors
I know I have said it, but it bears repeating, as I am pleased to see Fractal offer a full I/O with five usable ports. This is great as sometimes you need to plug in something like a dongle that does not require USB 3.2 speeds, and it would be unfortunate to waste that performance on a device like that. Here you can install two USB 2.0 devices and still have plenty of high-speed connectivity left over for your needs.
Hardware & Documentation
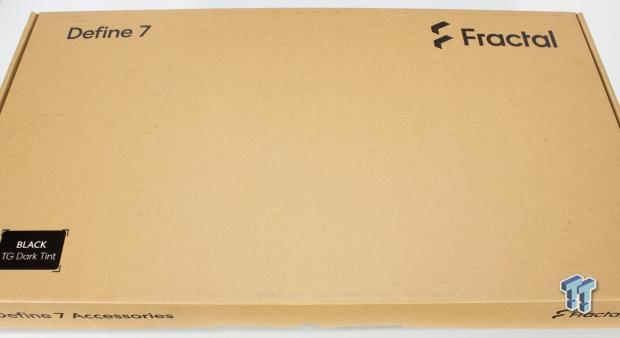
Here is the accessory box, which we showed when we unpacked the Define 7. This thing is massive, and for a reason, it contains the airflow top panel along with other parts.
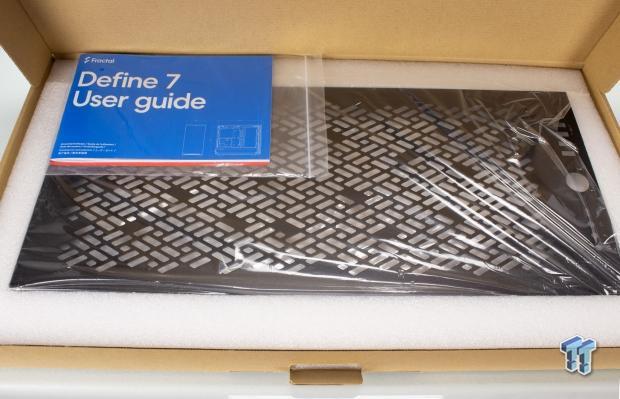
Opening the accessory package, we see the top-level retains the airflow panel along with the manual and paperwork for the chassis. We have already shown the top panel on the chassis lets dig deeper in this package to see what else comes in here.
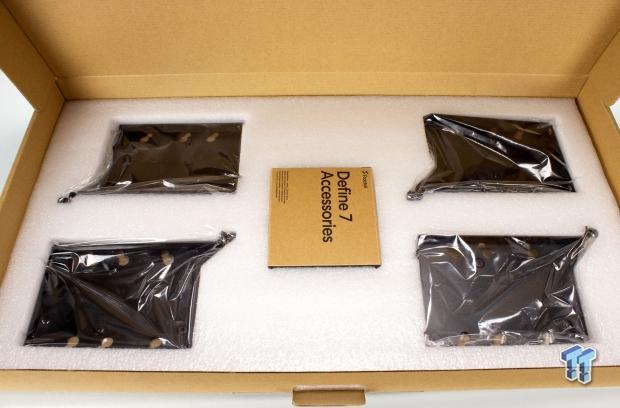
The second layer of the accessory pack retains the mounting hardware box in the middle along with with four 3.5" HDD trays which can be used in the front area if you swap the internal panel to storage mode rather than the open layout.
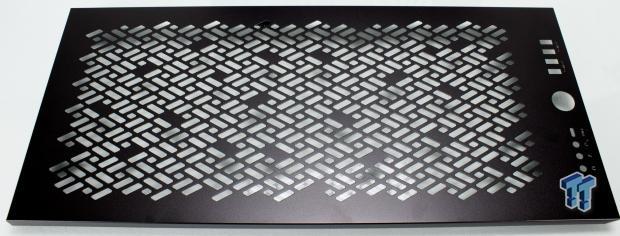
Here is the airflow model top panel, which allows for airflow to the roof of the chassis should you install radiators or fan in the top.
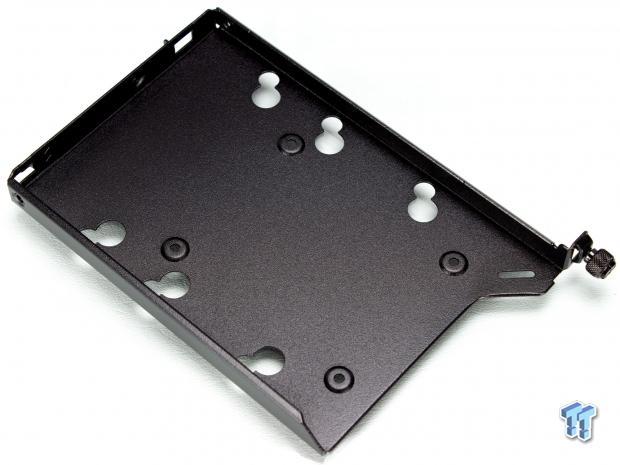
Here we have one of the four HDD trays which can lock into the movable panel we looked at in the main chamber. Four come with the Define 7 chassis, but several more can be added to reach the total 14+ that the Define 7 is capable of.
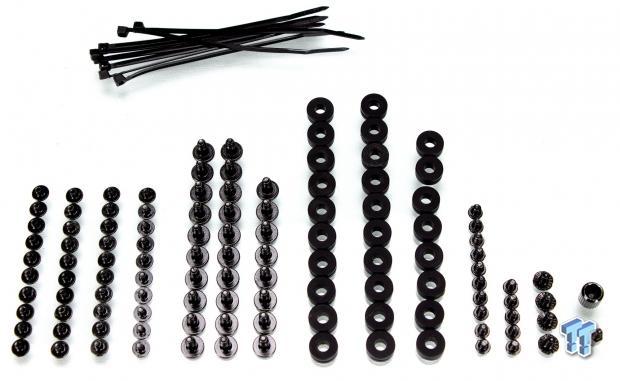
Here we have the hardware that comes in the middle of the accessory box; this is all if the fasteners and bits for mounting and building.
- 40x m3 mounting screws
- 28x HDD mounting screws
- 28x rubber isolators for HDD mounting
- 15x mounting screws for Motherboard mounting
- 4x screws for PSU mounting
- Standoff and installation tool
- 8x zip ties
Inside the fastener box, we also receive a small cleaning cloth for the glass of the chassis, which has a Fractal logo on it.
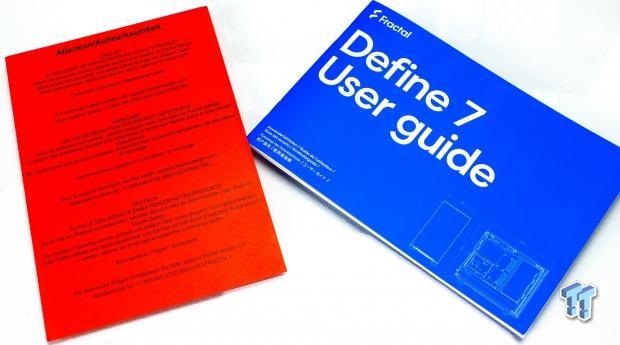
Here we have the blue manual for the Define 7 chassis. Also included is a bright red leaflet that informs the customer that if they have any issues to contact Fractal Design first before returning the product, sometimes simple problems can be resolved via customer support.
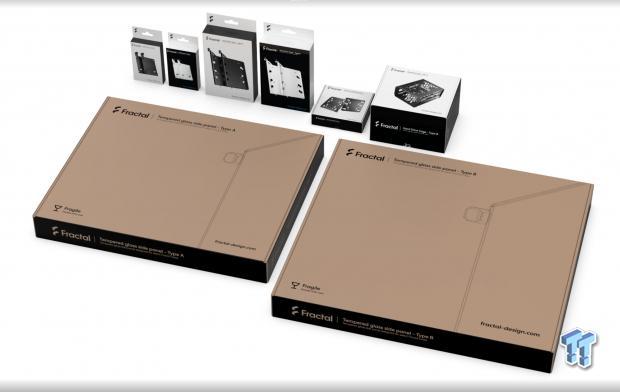
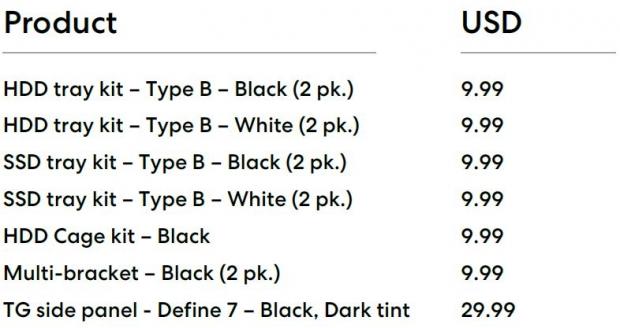
Here are the various accessories you can get for the Define 7 series chassis. As you can see, you can get everything to expand the storage of the chassis along with even adding tempered glass side panels should you want to do this.
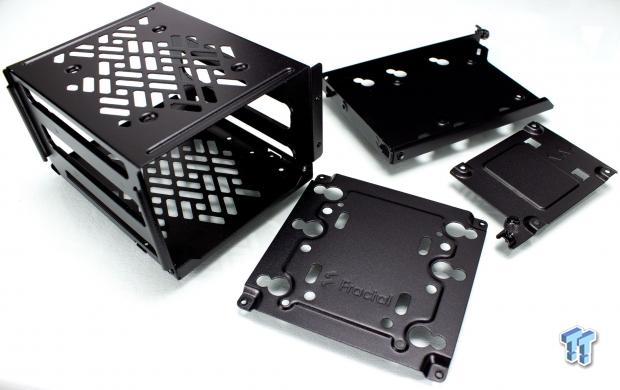
To show the accessories, Fractal did send them to us, minus the tempered glass panel, so you would see what you get when ordering the accessories to expand on your Define 7.
Case Build & Finished Product
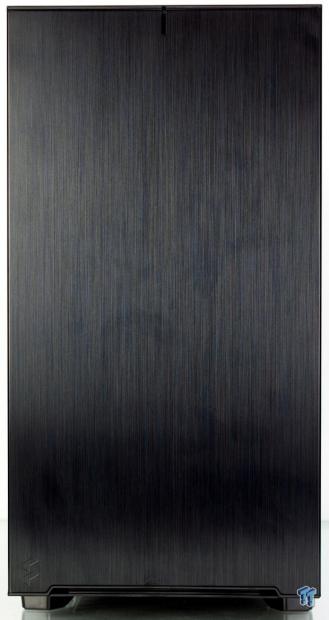
We have now completed our build in the Define 7, and from the front, as it's a solid door, not much has changed. However, you will notice that even though I tried my hardest to wear gloves during the build and also when cleaning the panel post build, fingerprints still will be a regular thing with brushed metal finishes.
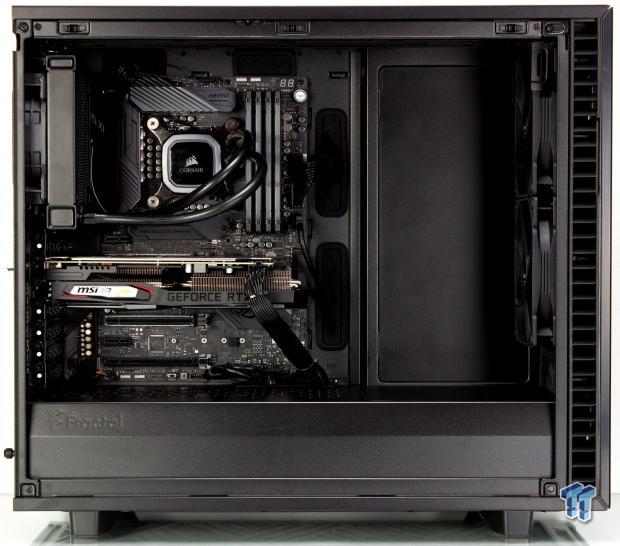
The Define 7 being a sizable chassis, even the non-XL version, as we have allowed for installation with ease. For default solid panel testing, you will note that we installed a 120mm AIO in the rear as that is a typical installation when you are using a single radiator cooling solution. For this testing, we varied between the solid top with the door closed, with the door open and even with the ventilated top in place. While our build is plenty powerful, you can see that the Define 7 is made for more. Its made to fit massive levels of hardware and cooling, and this is why it seems rather basic or barren due to the vast swath of available hardware space that is unused by the test configuration.
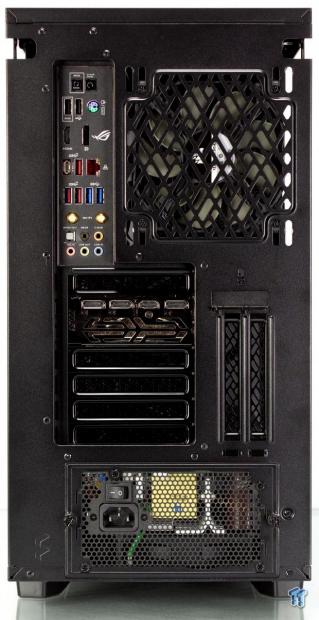
The rear of the chassis filled in as expected, one thing I would like to note is that the absence of separator bars on the PCIe expansion slots is welcome. This allows for the installation of GPUs or other slotted devices without the worry that a display cable may be blocked by a metal crossbar that is just slightly in the way. In the rear fan slot, we can see the 140mm fan was removed to fit the AIO in the rear. The slotted 120mm fan mounting does not make much sense here as the innermost part of the slot is the only place where you can mount a 120mm.
As you can see, both opposing sides have open unusable slotted fan mounting, which was odd. I can only assume during manufacturing; it was easier to make both the 120 and 140mm mounting slots similar in size.
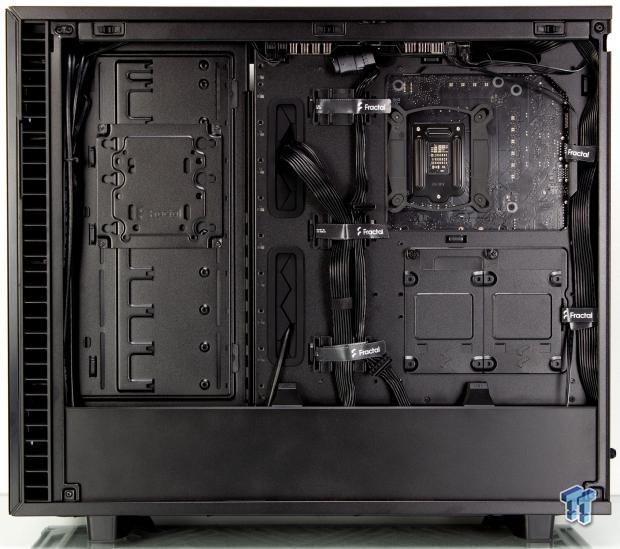
The cable management of the Define 7 is quite good, and that lower panel makes a lot of what would be mess disappear. The plastic cable routing slots were nice and helped to guide cables along a defined path. The preinstalled Velcro straps meant I only needed approximately four zip ties to make things tidy beyond what the Velcro could handle.

With everything now build and assembled, you can see that the dark tinted glass keeps things looking shiny and classy, but your hardware is almost invisible. There is an add-on effect from this, is that your cabling does not need to be nearly as tidy and small things may not be seen with such dark glass.
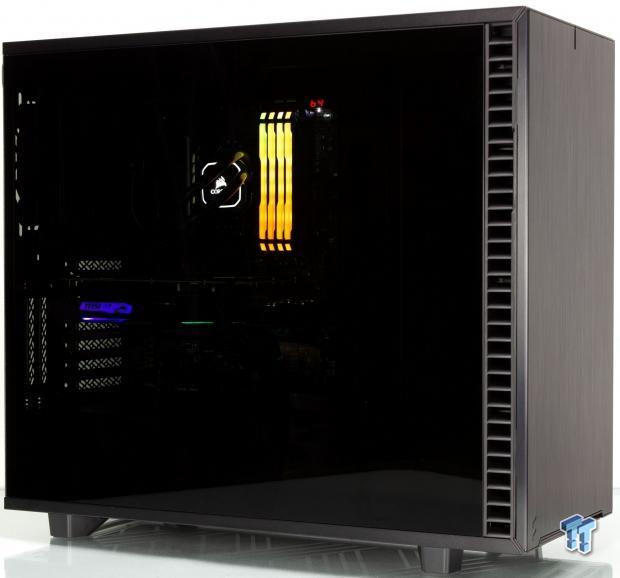
With everything lit up, you can see how much light is blocked by the tint as even with photo studio lights blasting the panel, we only see the LED-lit components and a slight area around them where it was bright enough to illuminate elements.
Final Thoughts
When Fractal first mentioned that they had a Define 7 coming, I was cautiously optimistic. Fractal has done so much in the past to push the Define series to new heights that, at some point, you assume the tricks will start to fade, and it will become "more of the same." However, Fractal pulled off enough unique features and improvements to leave me impressed with the Define R7, with some caveats regarding performance, which we will look at now.
During testing, we had a measured ambient of 21C with an RH of 44%.
The first configuration was with the solid panel in place, and the front door closed, which netted us a less than optimal 54.4C delta over ambient. The GPU showed a 41.6C Delta over ambient, which for anyone who has read any of my previous reviews will know that is less than impressive. I did have some concerns about the front door, so I opened it and reran the testing to find that the delta on the CPU dropped by over 5C, which tells me that the front fans are a bit starved for air with the door closed.
Another thing to note is that with the front door open, I observed less fan noise from the chassis as the chassis fans throttled less to maintain optimal system temps due to the increased airflow. The Define 7 can add many fans, and this will likely help the situation with the top airflow panel, but even with the airflow panel installed in our test configuration, it did not change the results. I assume this new Define chassis with a Meshify style front will do very well, but the door as it sits appears to choke it off.
What we like
I like the steps Fractal took to enhance the modularity of the Define chassis. I do feel that the enhancements in liquid cooling capabilities we have seen over the years is an excellent thing as it enables Fractal to service a market that just a handful of years ago was not possible. The new ability to remove the top mounting location for cooling, which integrates the frame rail, is fantastic as it opens the working space to make builds easier.
The new fan hub is helpful and will enable some users with liquid cooling builds to optimize multiple fan connections better. The easy to remove side panels are fantastic and work very well; the slotted bottom retention ensures the panel will not just fall off or down as you remove it. Everything is filtered, which is excellent and should make for a much easier to maintain and clean PC.
What do we think could be better?
I feel like front panel doors on cases are hard to pull off, as balancing silence and performance is a tough nut to crack. It would add cost in a significant way. Still, I do wish Fractal could make the front modular like the top offering an alternate front panel or even just the door plate for a mesh version, which would allow users to choose between silence and a hit to airflow, or more cooling but the potential for more noise. I also do wish that Fractal included PWM based fans for the Define 7 as that sort of smooth ramping may have helped with the noise we experienced in the front panel closed testing.
At the $169.99 price that the Define 7 demands, I think Fractal has done some things very well. The chassis is excellent, and except for the door choking off performance, it is a stellar chassis. Fractal earns a top spot for its features, and even a good position for value when compared with the competition. However, there is no looking past the drop in performance by closing the front door. And I do hope that Fractal offers this base chassis with airflow oriented front panel options such as an updated Meshify soon, as that would likely be a fantastic solution.
Overall the Define 7 is a solid, feature-rich, and capable chassis hindered by its front panel. The Define 7 will serve you well as far as fitment. Just be aware of the cost of the attempt at silence.
Shannon's Chassis Test System Specifications
- Motherboard: ASUS ROG Maximus XI Hero (Wi-Fi) Z390 (buy from Amazon)
- CPU: Intel Core i7 8700K (buy from Amazon)
- Cooler: Corsair Hydro Series H60 (buy from Amazon)
- Memory: Corsair Vengeance Pro RGB CMW32GX4M4C3000C15 (buy from Amazon)
- Video Card: MSI GeForce RTX 2060 Gaming Z (buy from Amazon)
- Storage: SanDisk M.2 256GB
- Power Supply: SilverStone Strider Platinum 1000W (buy from Amazon)
- OS: Microsoft Windows 10 Home 64-bit (buy from Amazon)

Performance |
90% |
Quality |
96% |
Features |
98% |
Value |
90% |
Overall |
94% |
Fractal Design has made a near perfect upgrade to the Define series with the new Define 7. It is a stout package with tons of modularity, just be aware of the inherent cost to performance in the pursuit of silence.

Similar Content
Related Tags

