
The Bottom Line
Introduction, Specifications, and Pricing
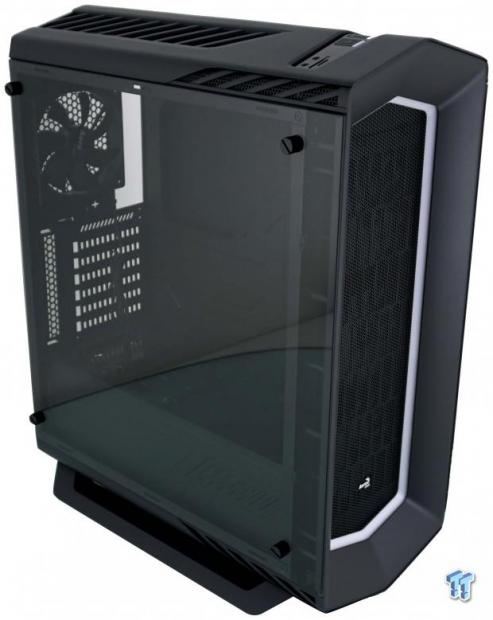
Between writing the last review for Aerocool and the one we are bringing to you know, something has been pointed out to us, which seemed to slip past us. We were under the assumption that the Project 7 series was an entirely new bird. As was pointed out to us; there were reviews of cases from this series almost a year ago. Now, that being said, we will not look at this chassis any differently. We just wanted to clear the air, if, in our last review, we came off a bit weird with what you may have already seen from other sites or online while shopping.
That out of the way, we can now move on to the reason you are here reading this, a refresh of the P7-C1. The P7-C1 was and still is a prized case by those who got their hands-on one, but Aerocool thought they could improve upon the chassis, and brings it into this year's latest and greatest technologies. Aerocool has taken the P7-C1 and rather than just add an LED strip and a naked hub to control it, this time around we get a kit called the P7-F12 Pro added into the mix.
The new release of this case is known as the P7-C1 Pro. What the P7-F12 Pro adds to the mix is a new way of lighting. Not only do you get a trio of RGB fans down the front of the case, but there is a new hub called the P7-H1, which allows for software customization as well, rather than the simpler options we saw in the P7-C0. Other than the removal of a pair of buttons from the front I/O, those of you who were aware of the original Project 7 cases, will find something very familiar here.
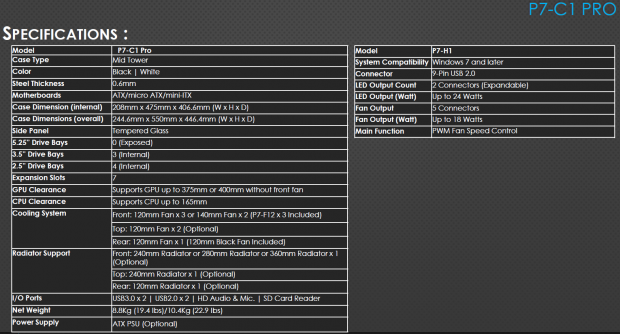
Sent over to us was a sales brochure, and in it were the specifications charts you are seeing. The P7-C1 Pro mid-tower chassis comes in black or white and is made of ABS plastic and 0/6mm thick steel panels. This chassis is capable of having an ATX, Micro-ATX or Mini-ITX motherboard installed in it, and offers the tempered glass to view it through. The P7-C1 Pro is 244.5mm wide, stands 550mm tall, it is 446.4mm deep, and weighs in at 8.8kg, or just less than twenty pounds. There are no optical bays, but there are three locations for 3.5" drives and four to house 2.5" drives in. At the back, the P7-C1 Pro has seven expansion slots, which are not replaceable.
Cooling is handled with four fans in total, three 120mm fans in the front, and a 120mm fan in the back. The front of the chassis can hold any three 120mm fans or a pair of 140mm fans. The top of the case will allow for a pair of 120mm fans, and the back is said only to fit 120mm fans. Water cooling options are as follows. A 240 or 280mm radiator can go in the front, a 240mm radiator in the top, and the rear of the chassis is an option for a single 120mm radiator.
On the right, we see the mention of the P7-H1, which is the hub part of the P7-F12 Pro kit. It requires Windows 7 or newer to run with and is controlled via a USB 2.0 connection. The hub delivers two spots for 4-pin LED output, with a total of 24W of power. The hub also has a set of five fan ports, which can draw up to 18W, and is done with another lead from the hub using PWM to control the fans.
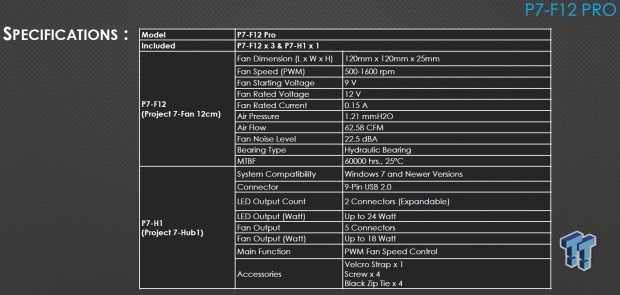
We also grabbed the specifications for the F7-F120 Pro kit, so we could see what it is capable of. There are three 120mm fans, which we already mentioned were RGB LED capable, but with this chart, we see all of the details. These fans can spin at up to 1600 RPM, with 12V of power, and push 1.21 mmH2O of pressure with 62.58 CFM of airflow too. The fan blades spin on a hydraulic bearing, they should last 60,000 hours, and all while being rated at just 22.25 dB(A) of noise. The lower section is for the hub, and we have covered that. We do not get screws though, there were no extra zip ties, nor was there a Velcro strap, but Aerocool does make certain it can be mounted, and there are zip ties in the hardware.
The part that will hinder many from jumping on the P7-C1 Pro would have to be the price. You will find a few upgrades over the P7-C0, externally, internally, in the feature set, and in overall attractiveness to this chassis, and we have no issues there. However, the reality is that Aerocool is asking $164.99 for the P7-C1 Pro. Yes, there are fancy new lights, yes they can be software controlled, yes this case looks awesome, but the mid-tower segment of the market is flooded with $100 options that are doing fantastically well. To ask this sort of price for a case made of steel raises the bar to a higher position for Aerocool, we just hope they have what it takes to convince you that the investment is worth it.
Chad's Chassis Test System Specifications
- Motherboard: GIGABYTE GA-Z68X-UD4-B3
- CPU: Intel Core i7 2600K (buy from Amazon)
- Cooler: Corsair H80i GT (buy from Amazon)
- Memory: G.Skill Ripjaws F3-12800CL6D-4GBXH
- Video Card: ZOTAC GeForce GTX 970 AMP. Extreme Edition (buy from Amazon)
- Storage: SuperSpeed 128GB SSD
- Power Supply: SilverStone SST-ST85F-G (buy from Amazon)
- OS: Microsoft Windows 7 Ultimate 64-bit (buy from Amazon)
Packaging
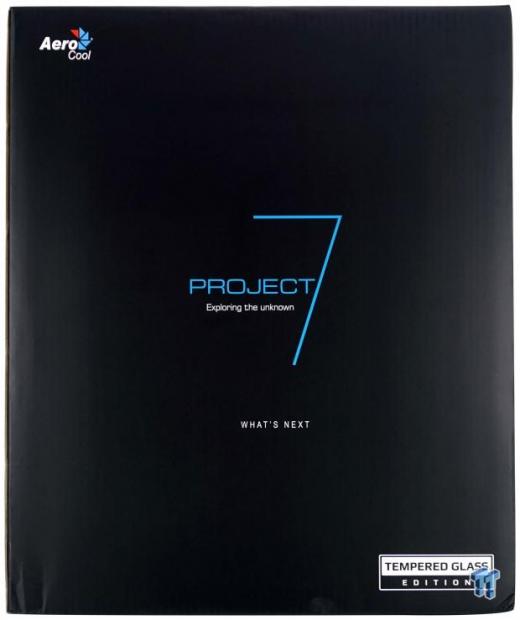
Since we called this panel the front on the P7-C0, we figured we would start here again. This time the box is black, which highlights the bright blue Project 7 in the center. In opposing corners, we see the Aerocool name and log in one, and in the other is the notation that this is the tempered glass edition.
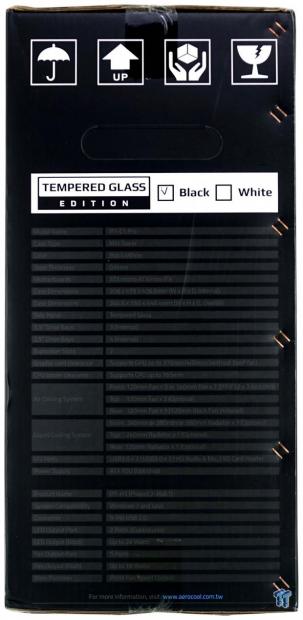
Icons top the side panel, but under the handle, we see the TGE notification as well as a check in the box for the black color option. While it is hard to see, the gray lines, they are the specifications for the chassis as well as the included P7-H1.
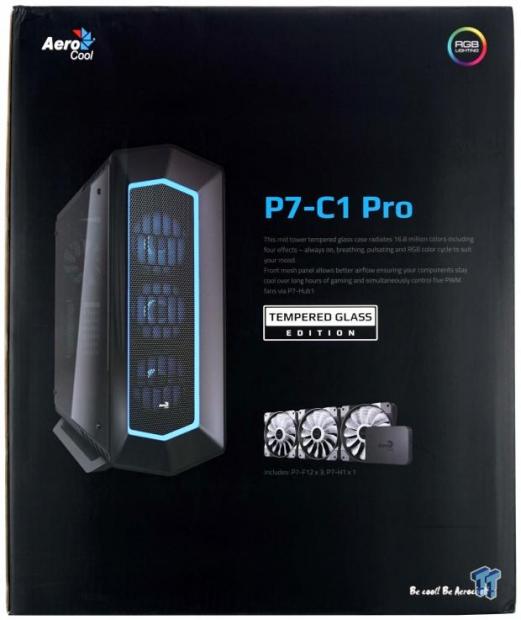
The second large panel has the company name and logo at top-left, while at top-right, we see Aerocool mentions the RGB Lighting. In the center is the name of the chassis is an image of both the P7-C1 Pro and the P7-F12Pro kit, and at the bottom is the Aerocool tagline.
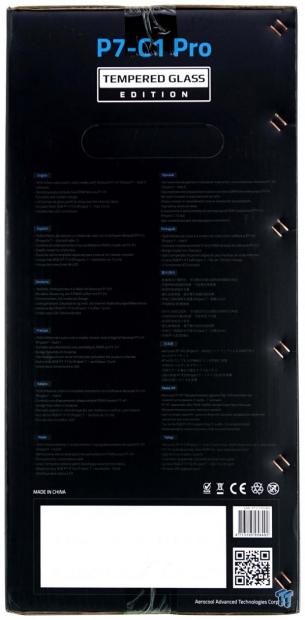
With the name of the case and its edition status gracing the top of the panel, it leaves room for features to be listed. In many languages, you will see mentions of the 16.8 million color choices, control of the lights and fans with the hub, the design, the tempered glass, included fans, and LED connectors.
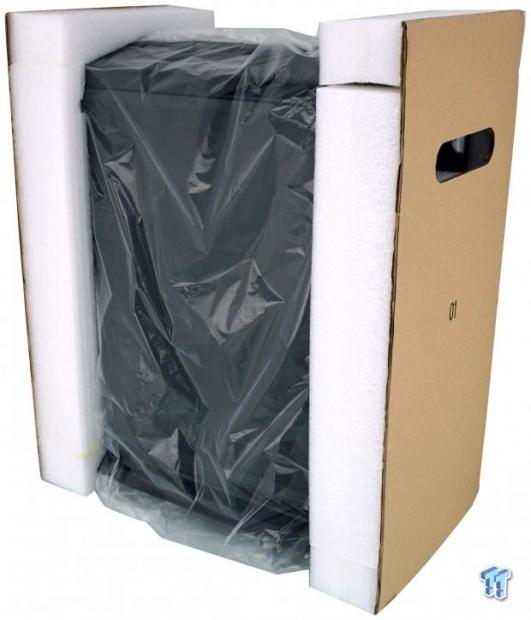
Protecting the P7-C1 Pro is first a layer of plastic which is wrapped around the chassis. Once the liner is on, the front and back of the case are supported with dense foam glued to cardboard. Both measures were successful in the delivery of this excellent specimen, and while we do find plastic stuck to the shiny bit of plastic, we did not find plastic on either side of the glass panel.
Aerocool Project 7 P7-C1 Pro Mid-Tower Chassis
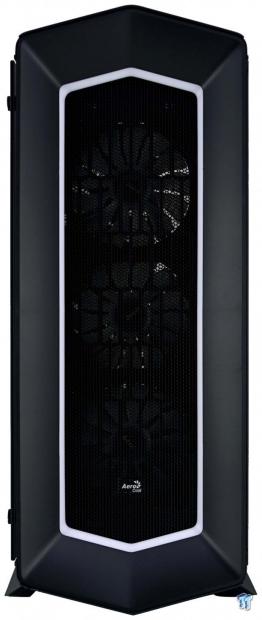
The front of the P7-C1 Pro resembles what we found in the P7-C0, yet is different. The angle of the side sections is more drastic this time, and the white plastic ring is thicker in the P7-C1 Pro as well. We still find the Aerocool label at the bottom, but this time we see the feet out on either side too.
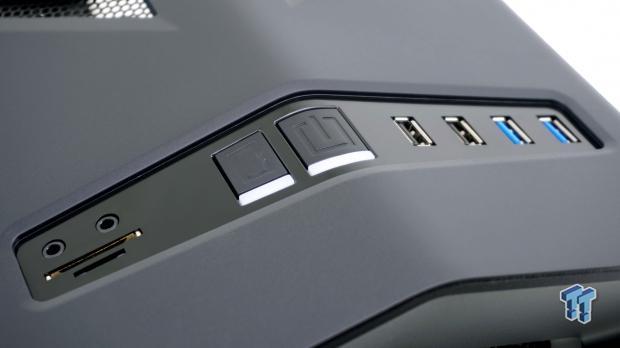
The front I/O panel is slightly different than the original P7-C1. HD Audio jacks and card readers are found on the left, and in the middle are two large buttons to reset and power the PC. Gone are two smaller buttons which used to there. TO the right, we then run into the pair of USB 2.0 ports, followed by a pair of USB 3.0 ports.
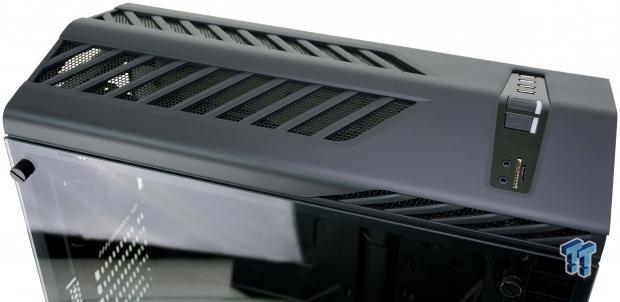
The top of the chassis is angled, highest in the center, and made of plastic. Not that far behind the front I/O panel, the P7-C1 Pro opens us with angles slots of mesh to allow the chassis to breathe through the top. We see similar vents near the front, on the side of the top panel, which do work but are more for show.
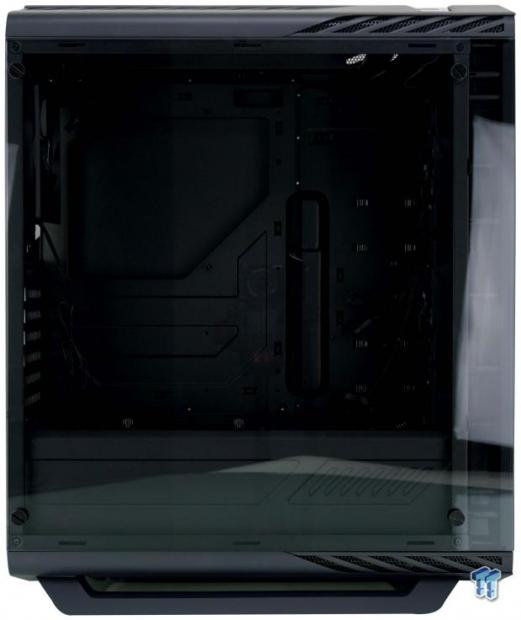
The left side of the P7-C1 Pro is covered from front to back with a very slightly tinted tempered glass panel. It uses thumb screws to attach to the chassis in the corners, while the bottom of the chassis shows us more venting and the rail style feet of the case.
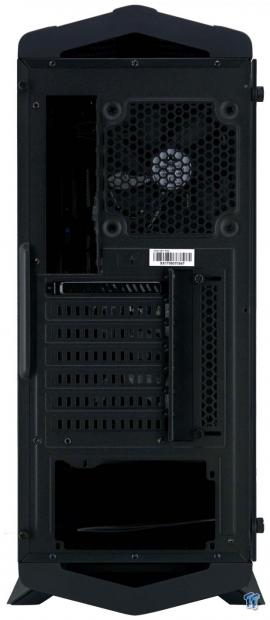
Out back, at the top, the hole there is to grab and lift the top panel off the chassis with. Moving down, we find the rear I/O next to an exhaust fan, with the seven expansion slots and the external cover plate below that. The bottom of the chassis is where the PSU goes, and the hole at the bottom is for accessing the dust filter.
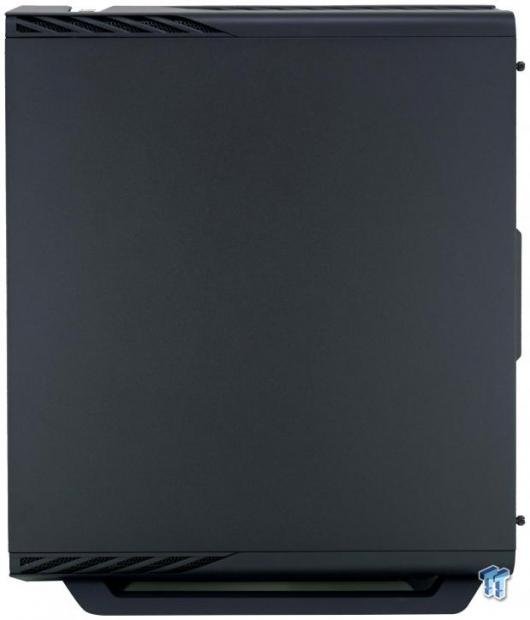
The right side of the chassis is a vast expanse of steel, which is painted with a textured finish. We do find more venting to match the other side, at the top and the bottom, but what we don't find is a huge bump to lessen the aesthetics.
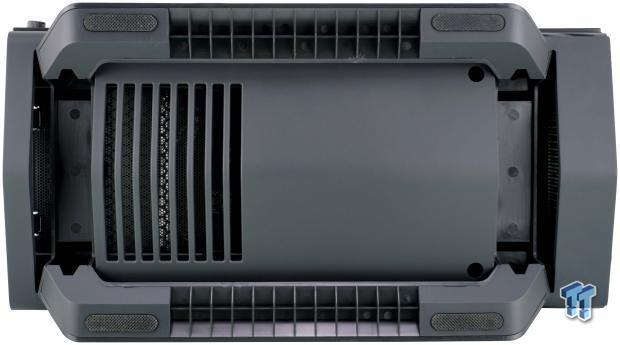
The rails to either side of the chassis are made of plastic and use large rubber feet to ensure the case will not slide around. Not only are the legs screwed into the bottom of the chassis, but so is the plastic cover panel, and while slotted for air to the PSU, it is complicated to remove the filter for cleaning.
Inside the P7-C1 Pro
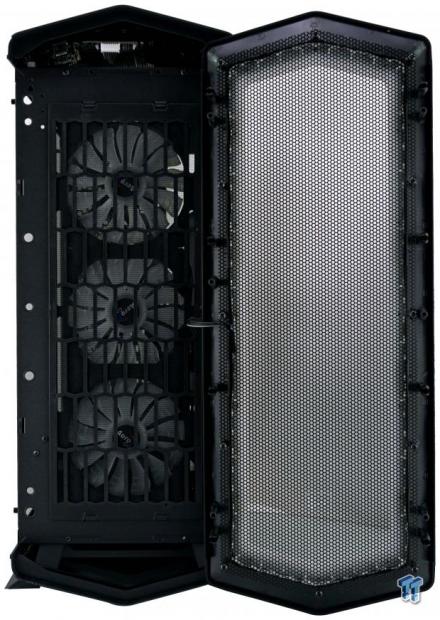
It is better to pull the top panel first, but the front bezel is removable, just be mindful of the LED cable that connects it to the chassis. The holes in the steel mesh don't impede on airflow much, but it is backed with a clipped in dust filter.
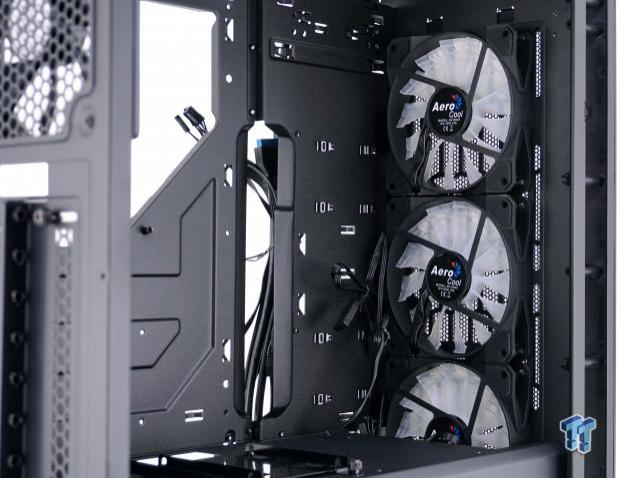
Behind the bezel and wall of steel, we find this trio of 120mm fans hanging here. Each uses a 3-pin connector for power, but also have a 4-pin connection for LED control. The frames are black with rubber pads in the corners, and with clear blades, it helps to carry the LED lights in the hubs outward.
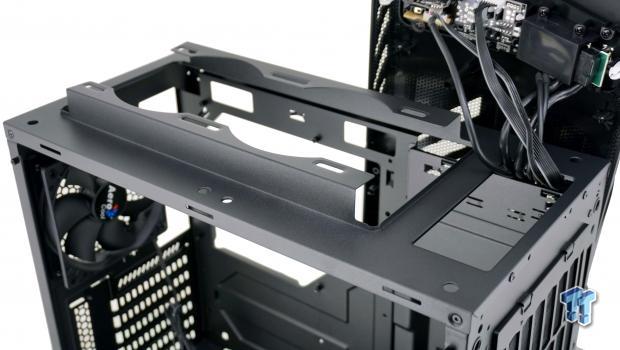
The cover over the top of the P7-C1 Pro is removable, but the front I/O panels is wired through the top of the chassis. While the top will not go far, it does clear access to the 120mm optional fan mounting locations.
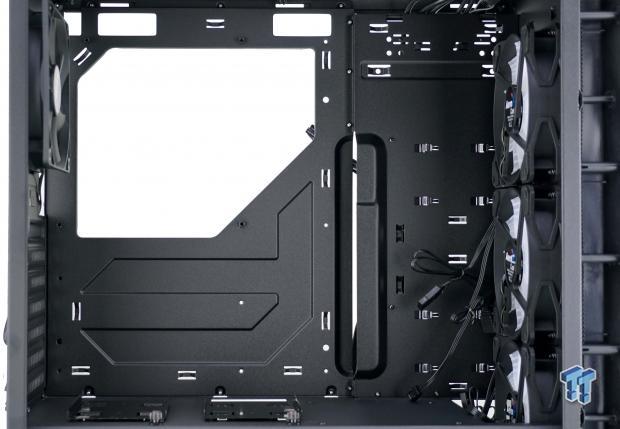
Three holes at the top of the motherboard tray and a slot down the right side allow for the passing of wires to the front. With a large access hole, fourteen wire tie points, the motherboard tray is ready and able to make this open area stay as open looking as possible.
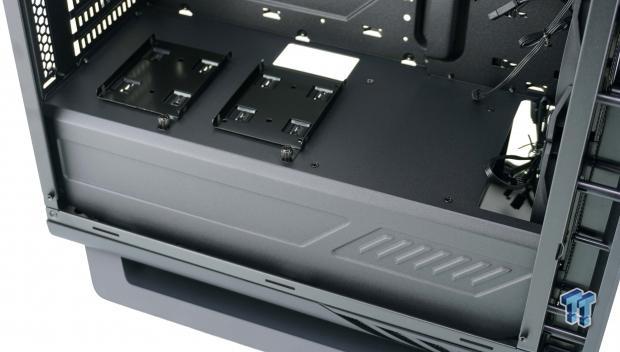
The PSU cover is a touch close to the front to allow for a radiator to slide past it and is why only 240mm or 280mm radiators can be used there. There are four screws to remove the HDD cage, a large hole for wires to go through, and a pair of SSD mounting trays on the top. The left side is stylized, and we have seen this design before.
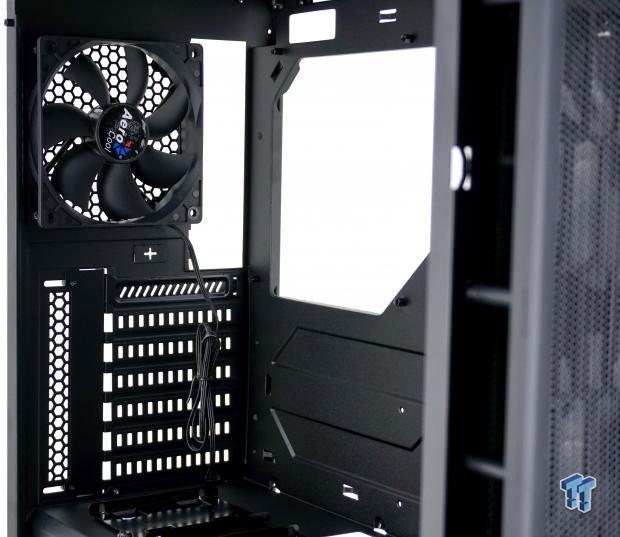
Hanging inside of the back of the case, we find the all black 120mm exhaust fan, with a long lead to connect it, and a 3-pin connection on the end of it. The top slot cover is replaceable, but the following six are break-out style and are screwed in externally.
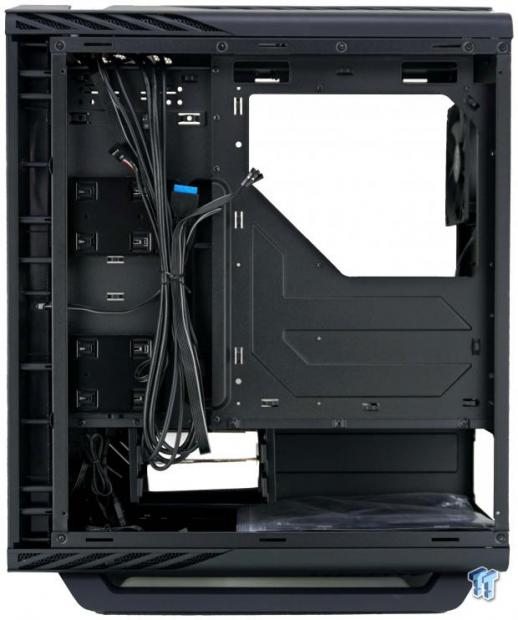
Looking into the right side of the chassis, we see that the wiring has been bundled on the left, and partially block the view of the other two 2.5" drive trays. We see two boxes of goodies in the HDD cage, and to the right is the manual for the P7-C1 Pro.
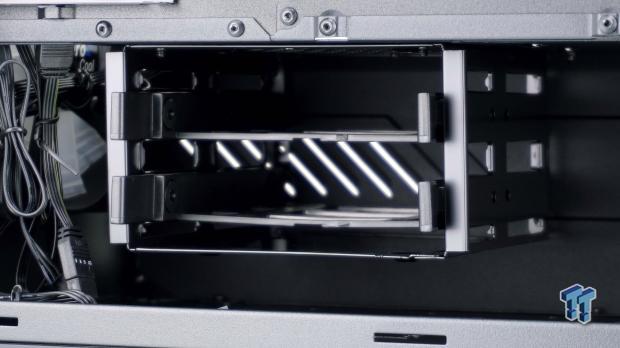
The HDD cage trays are drilled for 2.5" drives as well as for 3.5" drives. Drive mounting sends screws through grommets to isolate vibrations, while the smaller drives screw directly to the plastic. There is also the option to remove this, by removing the four screws from the top of the PSU shroud.
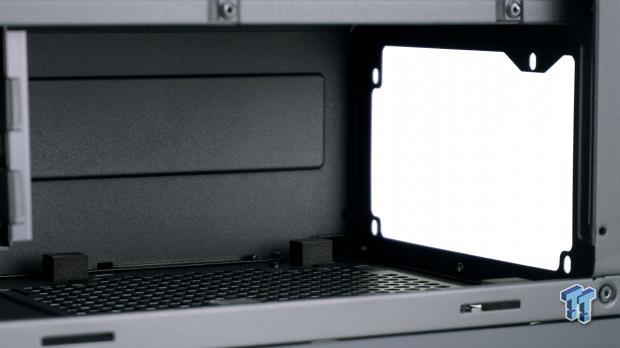
There is honeycomb mesh on the floor; dense foam pads used to support, and to install the PSU long term, you insert screws through the back, which you need to provide.
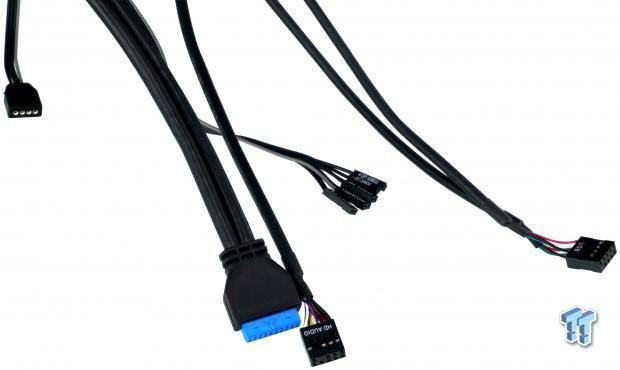
The cables are long enough but do not leave much extra to aid in getting the top panel out of your way later. There is the 4-pin RGB LED connection from one of the fans on the left, and the longest leads are the USB 3.0 and HD Audio cables. To the right of those, we run into the power, reset, HDD activity and power LED wires, with the USB 2.0 lead off to the far right.
Hardware & Documentation
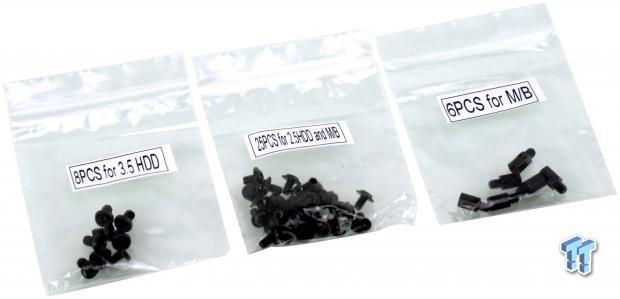
With this P7-C1 Pro, we were sent three bags of bits. In the first bag are the eight 3.5" HDD screws, while the middle bag contains the screws for the motherboard and 2.5" drive installations. The last of the bags is where Aerocool ships the remaining standoffs, as only two are pre-installed. Also, notice that we were not given screws for the PSU.
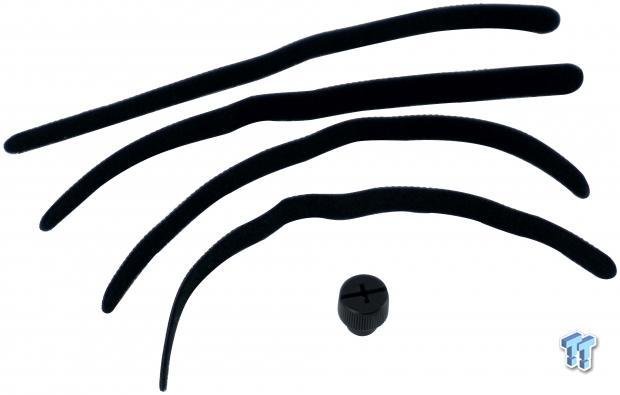
To help with wire management inside of the P7-C1 Pro, Aerocool chose to go with long, thin, Velcro straps to bind wires together. In front of the four straps, we found this case to come with a plastic standoff tool. While it could be handy, we found the plastic is not strong enough to securely fasten them.
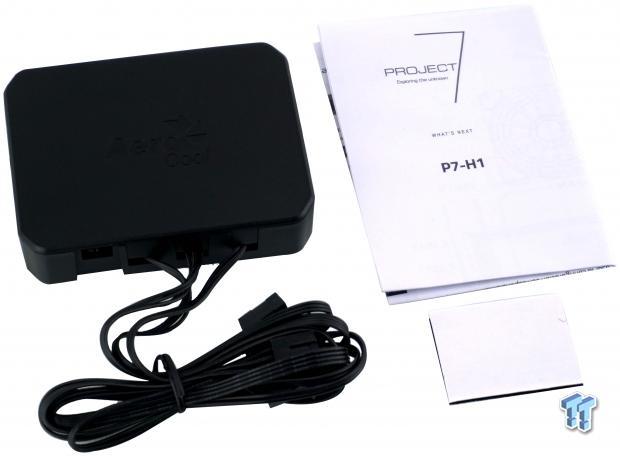
In the second box, we found the brains of the Aerocool P7-F12 Pro system, instruction for how to use and possibly pair with up to eight other hubs, and a Velcro mounting pad which hangs the hub inside of the chassis. With five fan ports and two LED output ports, there some wiring to make the magic happen connected to the box as well. There you will find the USB 2.0 cable for communication, a 4-pin PWM fan control lead, and the 4-pin Molex to send power to the hub.
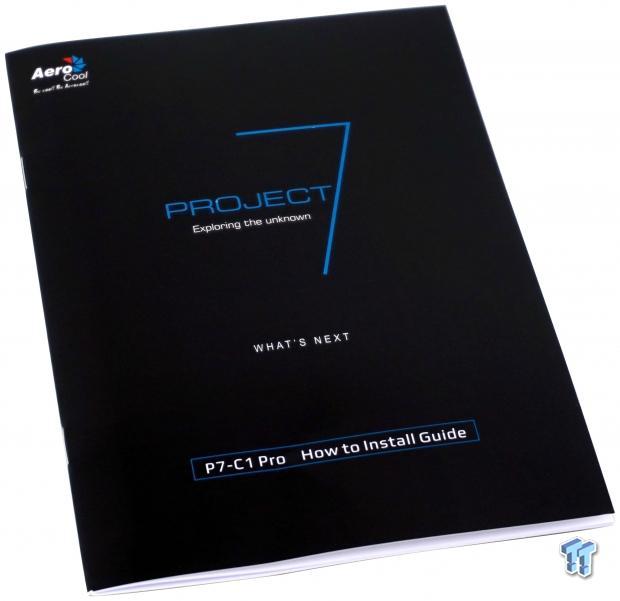
The last thing we found was the literature. In this manual, there is a wiring diagram, if the paint on the connections is too small to read, and there is a parts list to ensure you have everything you are supposed to. After that, there is a section for each major component's installation process, which should get a novice builder to a completed state easily.
Case Build & Finished Product
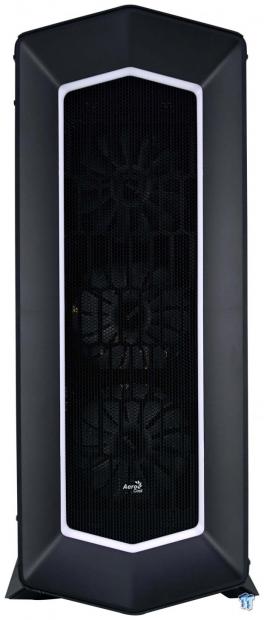
With the deletion of optical bays in the P7-C1 Pro, the front of the case looks no different than it did originally, and the only thing that could change at this point is the view of fans if for some reason you wanted to remove the reason this case was made.
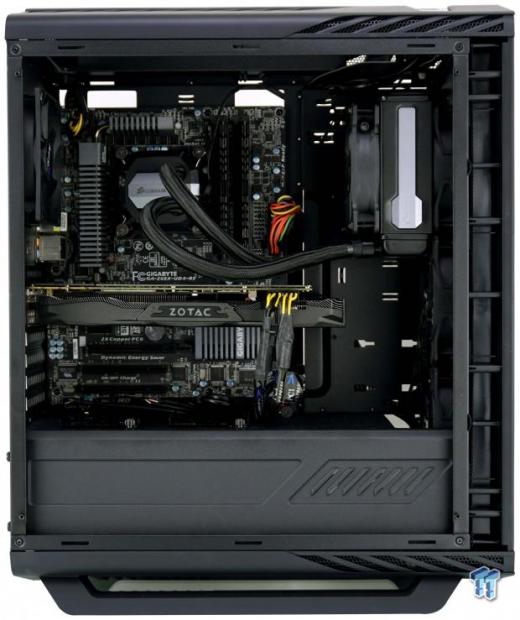
Inside, we found plenty of room to get the motherboard installed, wires are hidden, and the GPU is nearly level. By using this AIO, you can see how fat of a radiator can fit even with cards longer than Founder Editions. No complaints to be had here.
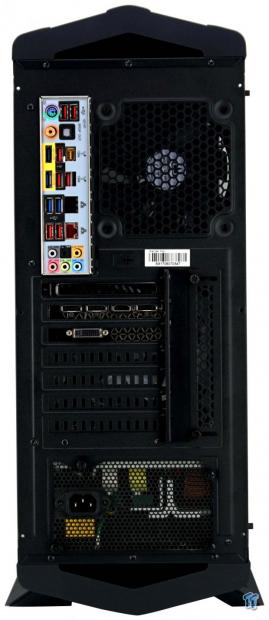
The back of the case filled out as we cover the rear I/O hole, and the shield snapped right in. We had no issues mounting the video card, and once the cover is closed, there some additional ventilation. To get the PSU mounted, we dug into the sorter and pulled out some thumb screws.
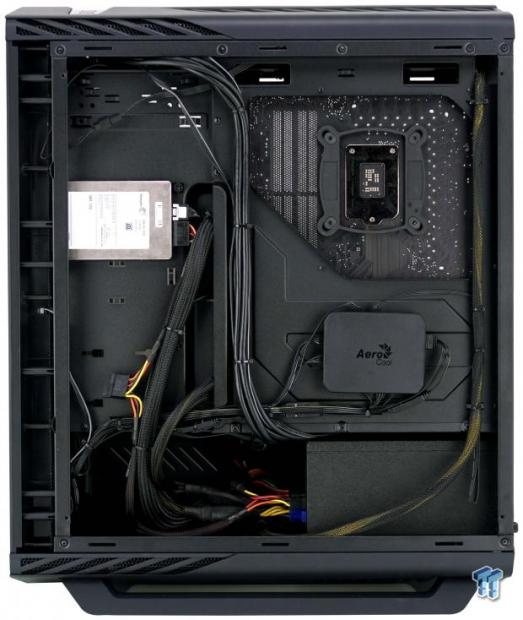
While it is possible to get the wires managed and under control, there are many wires to have to contend with. We spent nearly an hour routing, tying them to the motherboard tray, and grouping things so we could get the panel back on, and not have a rat's nest of wires hanging everywhere. The bonus is that there is enough room to mount the hub anywhere, and none of the wires impeded putting the panel back on.
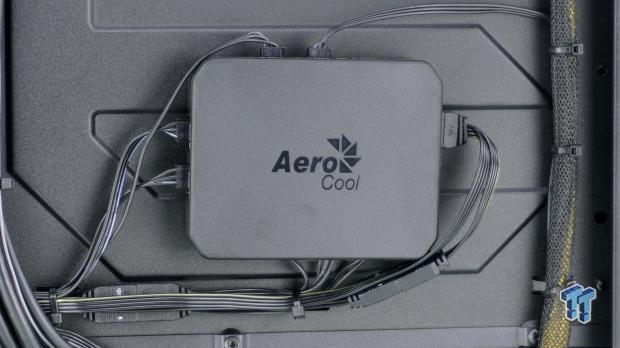
Using Velcro to mount the hub, we do find it to be a bit loose for our liking; we would prefer foam tape to lock the hub to the motherboard tray. We used four of the five fan ports to power the stock fans, and for our needs, to connect the RGB LEDs on the fans, we daisy-chained them together from one of the two LED output ports, leaving another for LED strips or more fans.
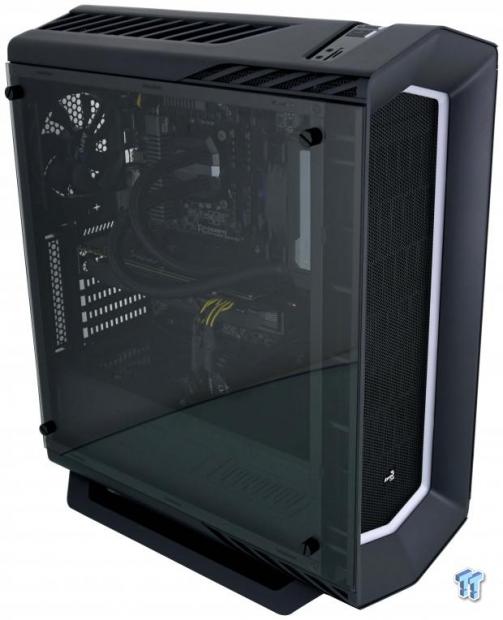
While the aesthetics of the P7-C1 Pro are slightly aggressive, we like the look and appeal it brings. What we love about the P7-C1 Pro is that Aerocool was not heavy handed with the tint of the tempered glass side panel. It means that we can see all of the components, and any additional lighting is plainly visible as well and will flood the room with light through it.
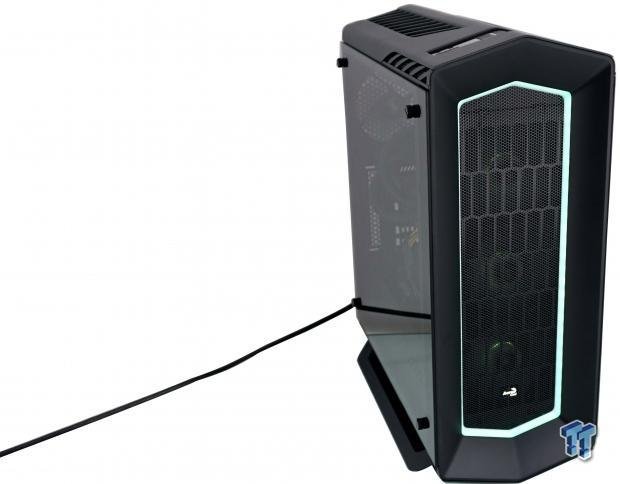
Adding power to the P7-C1 Pro, without the software, the RGB LED lighting is set to solid green as seen by the bunches of tiny LEDs behind the white strip on the bezel. The white bar in from of the power button glows blue signifying the PC is powered and running, while the bar in front of the reset button flickers red, as the storage drive is accessed.
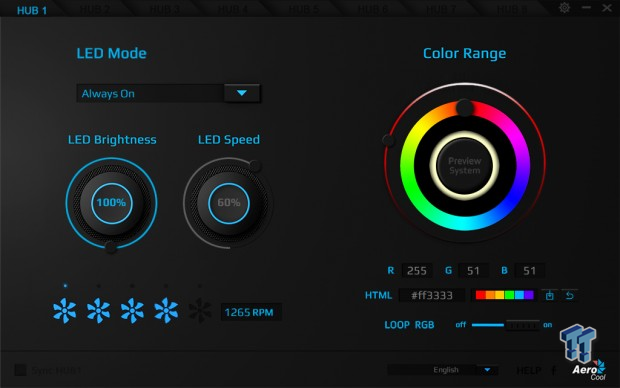
We did mention software, and what you see here is HUB 1 controls in Aerocool's P7-S1 software suite. The mode can be changed from always on, to breathing or pulsating, and in some of the modes, the LED speed can be adjusted, but in all modes, the brightness can be addressed. There is an indication of the number of fans connected to it and a readout of the first fans RPMs.
To the right is the multiple ways of addressing solid color choices. You can take a spin on the wheel and look for options that way; you could use RGB codes, HTML codes, or pick from the presets. The last option is to enable or disable the loop RGB mode option.
Final Thoughts
Stylistically, the Project 7 P7-C1 Pro is pleasing to the eye, and the addition that the P7-F12 Pro adds to the exterior not only ups the cool factor but also gives you way more options than its previous version or the P7-C0 we just looked at. The features include things like water cooling support, and while not the best out there, it still can fit most needs.
There's modularity with the removable HDD cage, which opens the underside of the PSU shroud from stem to stern. There are options as to where to place SSDs, if front to be viewed, or hidden behind the motherboard tray. There's plenty of room for the vast amount of wires that make up the chassis and the build and still has room to stick the hub behind the scenes too. Externally the P7-C1 Pro is aggressively styled, but with the tempered glass panel putting your components on full display, the finished product is quite nice. Many things will draw you to this flame.
There are some things which left us scratching our heads, though. First of all, I can buy a more affordable chassis from Aerocool and get PSU screws, but I spend nearly double that amount, and I don't get any? Strange. I realize PSUs when new, come with a set of screws, and I get you can always use the old ones, it just seemed out of place when comparing cases, both from the same manufacturer.
Then, there is the issue removing the PSU dust filter. Screwing the bottom of the chassis onto the case leaves almost no room to reach in the back and remove it. On top of that, it doesn't slide or is magnetic; it has to be placed into six tabs to hold it to hold it there.
The last thing we need to address is the software. While we had no issue installing the software, we did notice that we could not change the brightness of our system, but otherwise, all of the options worked as intended.
There one last hurdle that needs to be overcome to obtain the P7-C1 Pro is the cost. While we do feel that the chassis is well equipped, we feel some things were overlooked and could have been handled differently. At $164.99 for a mid-tower case, even with what is included with the $49.99 P7-F12 Pro system, is stretching things a bit. Without the fans and hub, this chassis is a fancy version of the P7-C0, which has an MSRP of $104.99, which we also thought was a bit steep. There are those who will fall in love with the looks, and to be honest, we do like the way things went and how well the P7-C1 Pro displays itself and the hardware, and will likely pay the MSRP.
For us, we feel Aerocool is close, and had we not seen the small inconsistencies and complications of this design, we could get fully behind it. However, at this level of price, the bar in which it is measured against changes, and at this level, we feel there are quite a few similar solutions we like just as well, maybe even better. It still comes recommended from us; it's just a bit on the expensive side of things.
Chad's Chassis Test System Specifications
- Motherboard: GIGABYTE GA-Z68X-UD4-B3
- CPU: Intel Core i7 2600K (buy from Amazon)
- Cooler: Corsair H80i GT (buy from Amazon)
- Memory: G.Skill Ripjaws F3-12800CL6D-4GBXH
- Video Card: ZOTAC GeForce GTX 970 AMP. Extreme Edition (buy from Amazon)
- Storage: SuperSpeed 128GB SSD
- Power Supply: SilverStone SST-ST85F-G (buy from Amazon)
- OS: Microsoft Windows 7 Ultimate 64-bit (buy from Amazon)

| Performance | 97% |
| Quality | 90% |
| Features | 99% |
| Value | 85% |
| Overall | 93% |
The Bottom Line: Almost perfect and it deserves all the attention it will receive! At the same time, there are some fine points that could be smoothed out with the PSU dust filter and the two cent parts. The Project 7 P7-C1 Pro is a better case than the original, but pricey.
PRICING: You can find products similar to this one for sale below.
 United
States: Find other tech and computer products like this
over at Amazon.com
 United
Kingdom: Find other tech and computer products like this
over at Amazon.co.uk
 Australia:
Find other tech and computer products like this over at Amazon.com.au
 Canada:
Find other tech and computer products like this over at Amazon.ca
 Deutschland:
Finde andere Technik- und Computerprodukte wie dieses auf Amazon.de
What's in Chad's PC?
- CPU: Intel Core i7 13700K
- MOTHERBOARD: ASUS ROG Maximus Z690 Hero Eva
- RAM: TEAM DDR5-7200 32GB
- GPU: ASUS GeForce RTX 3090 Eva
- SSD: addlink m.2 2TB
- OS: Windows 11 Pro
- COOLER: Fractal Lumen S36
- PSU: be quiet! Dark Power Pro 1500W
- KEYBOARD: ASUS ROG Strix Scope TKL Electro Punk
- MOUSE: ASUS ROG Strix Impact Electro Punk
- MONITOR: ASUS ROG Swift OLED PG42UQ
Similar Content
Related Tags

