
The Bottom Line
Introduction, Specifications, and Pricing
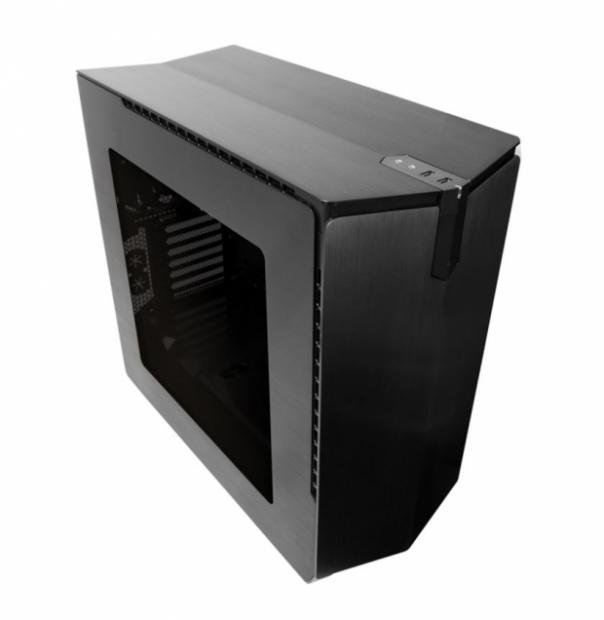
Until we were asked to have a look at their latest chassis, we honestly had no idea about Honbontec or what they were about in any fashion. We have come to find out that HBT+ is a company ran by someone with many years experience in the tech market, who was watching the market stagnate and wanted to do something to change that. It is said on their product page that HBT+ has an ear on the pulse of all of the latest and greatest trends, but see trends as an opportunity to improve and revolutionize the chassis and cooling market. So rather than following suit and copying parts from other manufacturers, they offer products with all the latest and greatest of that segment, but also take the time to add their spin to it as well.
The chassis sent to us is a hybrid design of sorts. By this, we mean that while the exterior is made of aluminum, anodized black, and is offered with a brushed finish on all of these parts, the heart of the chassis is made of steel. We all know aluminum cases are light, yet at the same time, without extra bracing added into the frame, they can tend to not be the most structurally correct offerings. On the flip side, steel is heavy, strong, and less flexible, but the look of textured paint on steel isn't exactly top notch. Building a chassis with a steel interior lends all of its strength and rigidity, while the exterior is sleek, sexy, and something anyone would want sitting next to them.
As we dig into their latest creation, the HBT+ Gravity 6 mid-tower chassis, we discover the personal flair in which Honbontec sets their cases apart from the rest of the world. The Gravity 6 is not only amazing at first glance, but it is also so well equipped that it leaves nobody wanting when it comes to its feature set. While it may remind you of something that SilverStone should have come up with by now on the outside, once the doors are off and you get time to get acquainted with the Gravity 6, we are confident that our readers will admire the HBT+ Gravity 6 as much as we do.
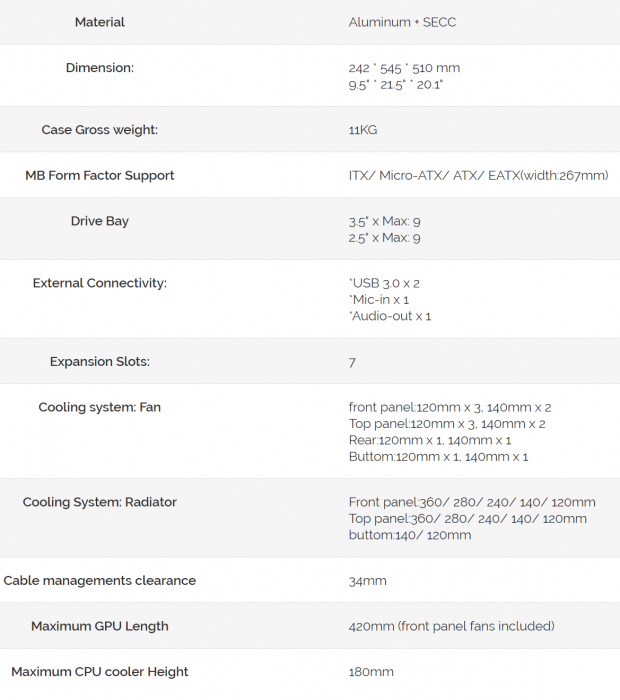
In the chart offered by HBT+, we are first shown the materials which make up the Gravity 6. It states the use of aluminum as well as the use of SECC steel, but there are some parts made of ABS plastic as well. The Gravity 6 is shown to be 545mm tall, 510mm from front to back, 242mm in thickness, and weighs in at just 11KG. While classified as a mid-tower chassis, the Gravity 6 can house Mini-ITX, Micro-ATX, and ATX motherboards as we would expect it to, but can also house an EATX motherboard too, as long as it is not over 267mm in width.
Inside of it, there is room for up to nine drives, although only five drive bays are present when the case is shipped. Each of these locations will allow for both 3.5" and 2.5" drives to be installed. The front I/O panel contains a pair of USB 3.0 ports, a power button, and HD Audio jacks. At the back of the Gravity 6, and part of what classifies this as a mid-tower, are the seven expansion slots.
When it comes to cooler, there are a plethora of options inside of the Gravity 6. The front of the case will allow for three 120mm fans or a pair of 140mm fans. The top of the chassis offers the same setup, but the frame there is removable to make installation simpler. The rear can house either a 120mm or 140mm fan, and we also find that the floor offers the same setup for optional fans as the rear does. Water cooling support is rich as well. The front of the chassis will house a 120mm, 140mm, 240mm, 280mm or 360mm radiator, and the top offers the same, where the radiators can be used at the same time without conflict as well. There is a mention of the floor being used to support a 120mm or 140mm radiator, and no mention of the back doing the same, but there is no reason it cannot be done.
There are some limitations to consider when it comes to the Gravity 6 chassis. What we love is that behind the motherboard tray, HBT+ designed the Gravity 6 to offer 34mm of room for wiring and hidden drives. With just fans installed in the front of the chassis, video card length is limited to 420mm, which is plenty of space. However, if you plan to use water cooling in the front of the case, you will lessen the room left for video cards. The last of the clearances shown is that the CPU air cooler can be 180mm in height, which covers dang near every air cooler on the planet. One thing that is not mentioned on this chart is that HBT+ warranties all of their goods for two years.
Pricing for the HBT+ Gravity 6 is also as impressive as the look, specifications, and features found with this chassis. While there seems to be some retail pricing manipulation going on at Amazon and Newegg to make you feel like you are getting a better deal, currently listed pricing is all we are concerned with. Newegg currently is selling the Gravity 6 for $129.99, which takes us well past that magic $100 price point for a mid-tower chassis. However, if you decided to go to Amazon to purchase the HBT+ Gravity 6, you will find it listed there for only $109.99 at this time.
While slightly past the magic mark of acceptability in mid-tower chassis pricing, once you absorb what it is HBT+ is giving you in the Gravity 6 mid-tower chassis, we feel the slight bit extra in cost will be a moot point once you see it.
Chad's Chassis Test System Specifications
- Motherboard: GIGABYTE GA-Z68X-UD4-B3
- CPU: Intel Core i7 2600K (buy from Amazon)
- Cooler: Corsair H80i GT (buy from Amazon)
- Memory: G.Skill Ripjaws F3-12800CL6D-4GBXH
- Video Card: ZOTAC GeForce GTX 970 AMP. Extreme Edition (buy from Amazon)
- Storage: SuperSpeed 128GB SSD
- Power Supply: SilverStone SST-ST85F-G (buy from Amazon)
- OS: Microsoft Windows 7 Ultimate 64-bit (buy from Amazon)
Packaging
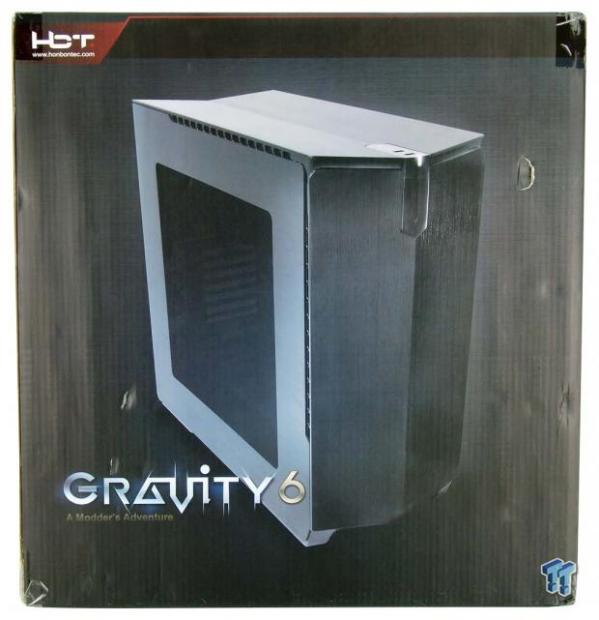
The packaging for the Gravity 6 holds nothing back. A red accent at the top offers the HBT+ name and delivers the Honbontec site address too. The bulk of the panel is made to look like brushed aluminum so that the large image of the chassis blends and pops all at the same time.
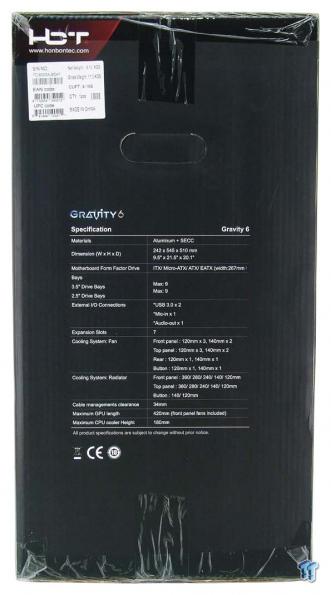
The next panel in the revolution of packaging images, we find it to be black. There is the red accent at the top again with naming, but the bulk of the panel is used for the specifications chart.
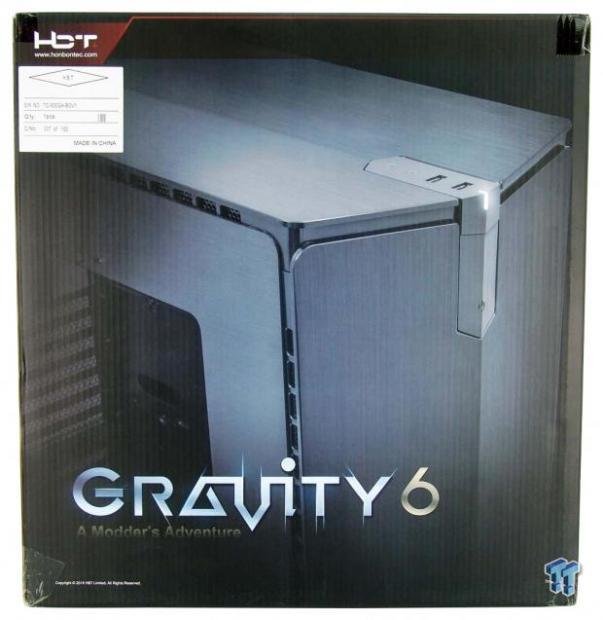
The other large panel, and possibly the front of the box as well, shows resembles the first panel slightly. While we can still find the company information at the top, we get a much closer view of the Gravity 6, and the "A Modder's Adventure" tagline is also easier to see this time.
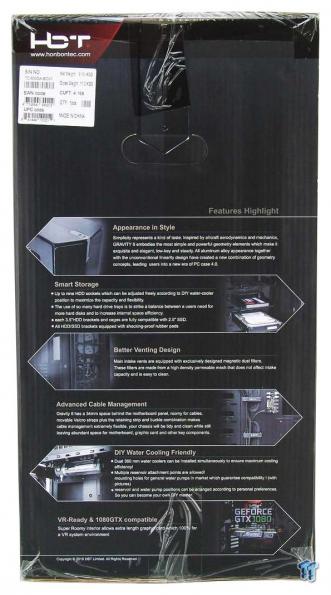
The last of the external panels is left in black, but this time covers some of the features. The headings of appearance in style, smart storage, advanced cable management, DIY water cooling friendly, and VR ready and 1080 GTX compatible all allude to what will be found within the Gravity 6.
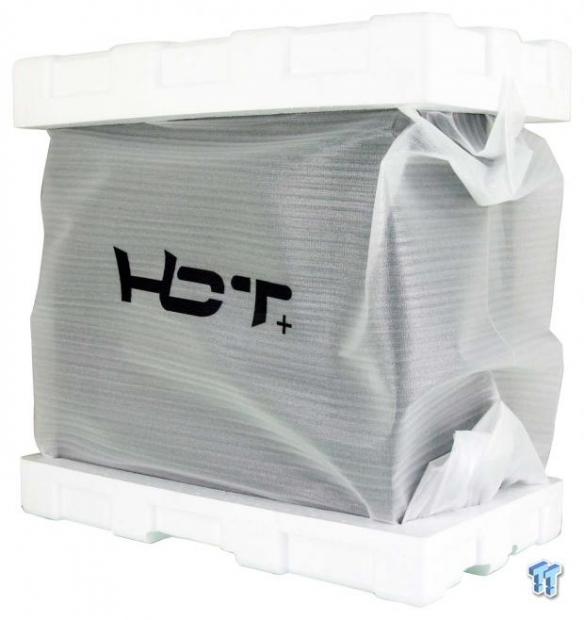
Even the interior packaging is stepped up slightly with the Gravity 6. While the Styrofoam at the top and bottom of the chassis is of normal thickness, rather than a clear plastic bag, the brushed aluminum surfacing is protected with a foam bag this time.
Along with the fact that both sides of the window are covered in plastic, to help elevate the packaging, HBT+ is printed onto the bag as well. In this instance, everything did its job with flying colors, as our Gravity 6 is in perfect condition for images and testing.
HBT+ Gravity 6 Mid-Tower Chassis
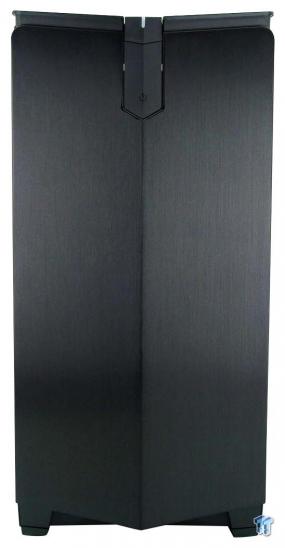
The HBT+ Gravity 6 is faced with a 3mm thick sheet of aluminum mounted atop a plastic bezel. The corners are rounded, the front is angled, where it is highest on the center line and is cut out for the lower section of the front I/O panel. We also see a slightly raised top section, which inverts the angle used, reminding us of something like the Raven Series of cases.
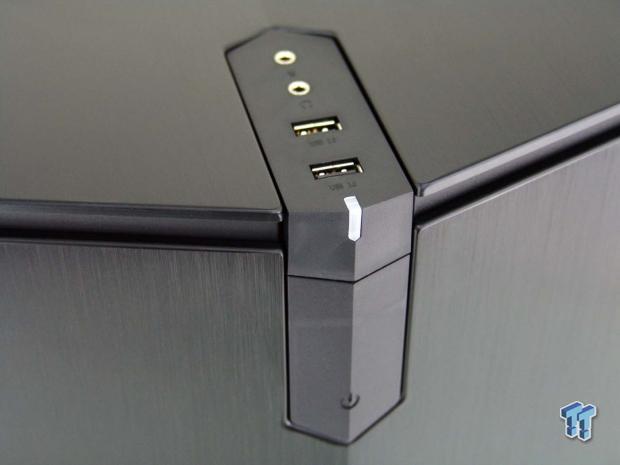
The front I/O panel is both on top of and down the face of the Gravity 6. Connectivity is all up top, where we find the HD Audio jacks and USB 3.0 ports. The power LED is on the corner where the panels meet, and down the face, is a large power button.
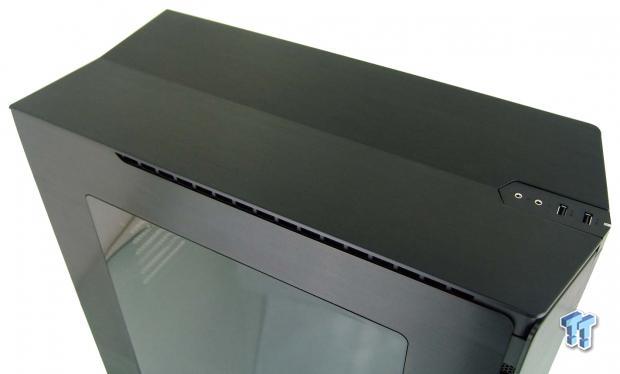
The top panel on the Gravity 6 is angled at the front edge to match the profile of the bezel, but the entire expanse is covered with another 3mm thick sheet of brushed aluminum. The angle we saw at the front is carried down its length, it is cut to surround the I/O panel, and uses the sides and back to allow ventilation.
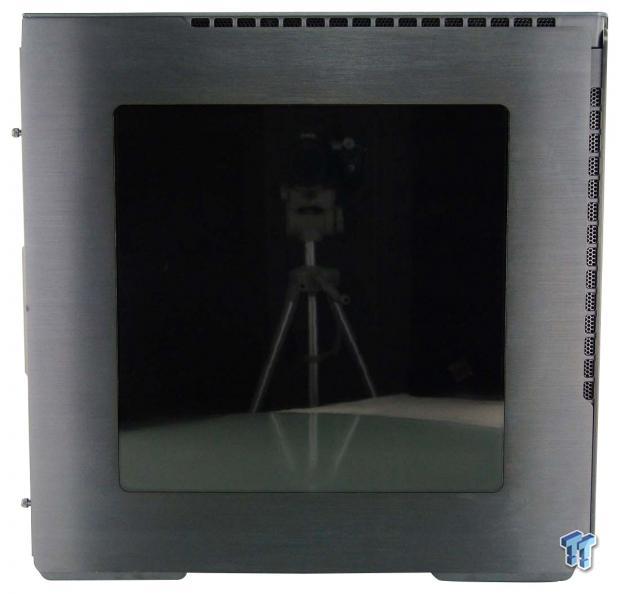
The left side panel is also made of aluminum, and taking up the majority of the panel is a dark tinted window. The panel is cut along the top and the front edges to clear the venting offered in those locations, and offers rounded corners except at the top, near the back.
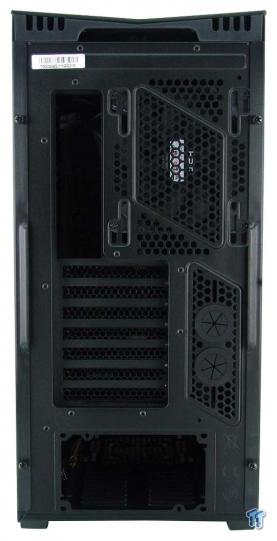
Even at the back of the chassis, the angled top continues and has venting on either side of it. Below that, we find the exhaust fan location and the rear I/O cutout. Then, there are seven expansion slots which are vented, the area next to it is as well, but we also find a pair of grommets for external water cooling. At the bottom is where the PSU will reside, and both panels are held in place with thumbscrews.
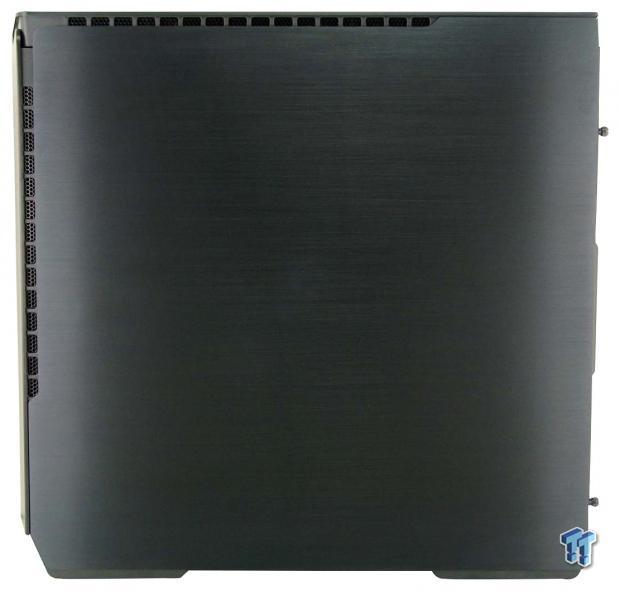
The right side of the case mimics what we saw on the left, but there is not a large window this time. Just a vast expanse of brushed aluminum to look at, which is cut at the front and top again to allow the same breathability on this side of the Gravity 6.
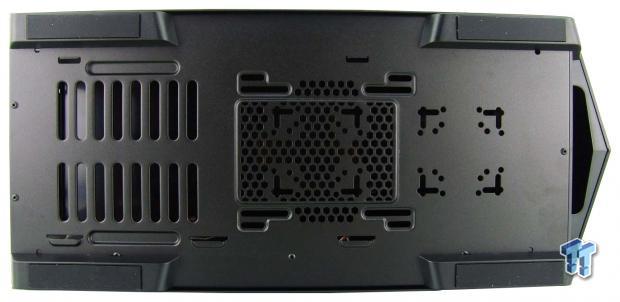
Underneath of the chassis, we see long plastic feet very near the edges, and they have rubber applied to each of them as well. The back is slotted where the PSU is to go in, and the optional fan location is also well ventilated. We do see tabs for a dust filter, but sadly one is no present here. Near the front of the case is a multitude of holes in the floor, and these are used for pump or reservoir mounting.
Inside the Gravity 6
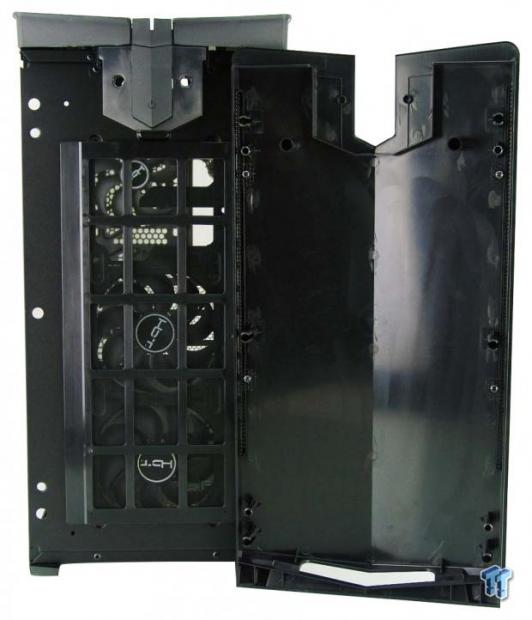
The interior of the front bezel is made of black plastic, pops off the case easily, and leaves the wires behind. The front of the chassis is seen to have a large dust filter which is magnetically attached to it.
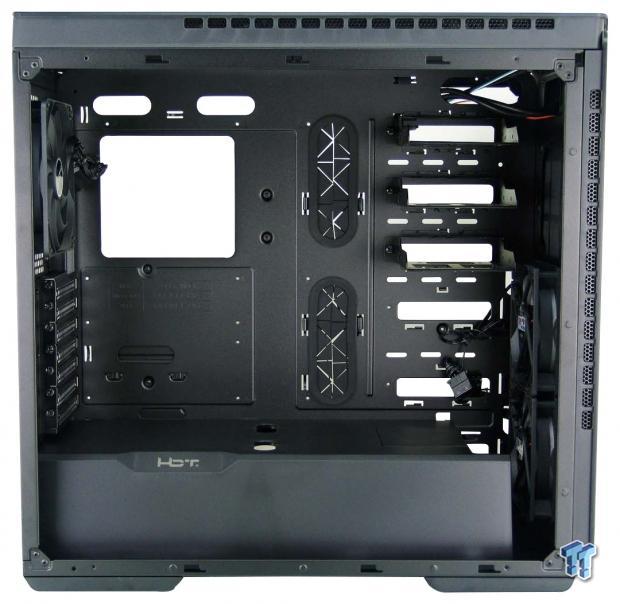
The initial view of the interior, it seems like there are no bays to see. The wiring has all been hidden already, and we are left with a vast open space with a full-length PSU cover at the bottom.
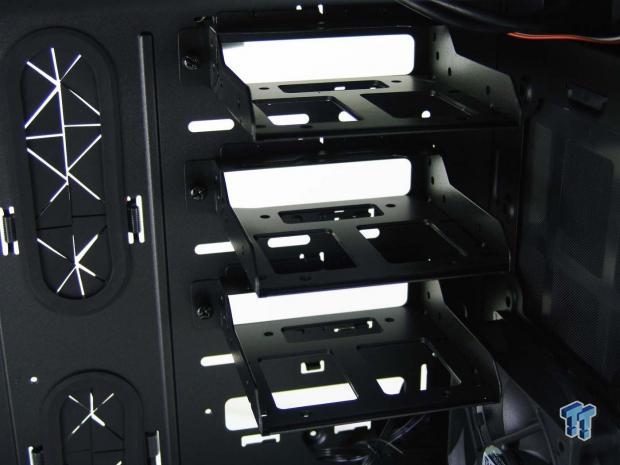
Although there is not a single option for 5.25" devices, there are three trays we found mounted to the motherboard tray. There can be removed or rearranged in lower locations, but each tray is designed to allow a 2.5" or 3.5" drive to be installed on it.
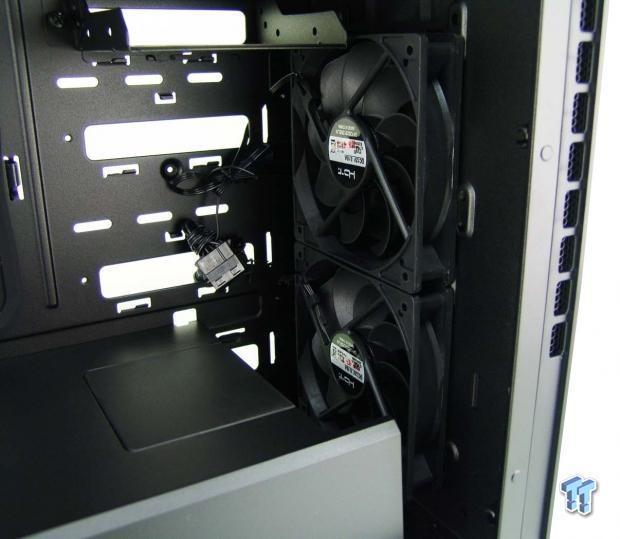
The lower half of the inside, still at the front, is used to support a pair of 120mm fans out of the box. Each fan is 3-pin powered, but also comes with a Molex power adapter, for those of you who opt not to use the PWM fan hub.
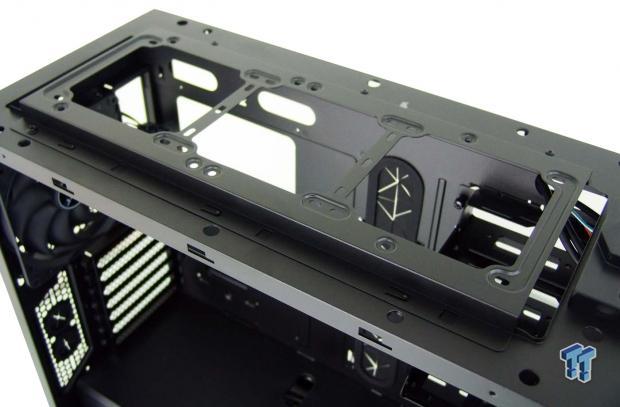
To add more room inside of the Gravity 6, and help to support water cooling effectively, the chassis is built with a removable section. This will house three 120mm fans or a pair of 140mm fans, and due to the offset, it makes more room to add radiators as well.
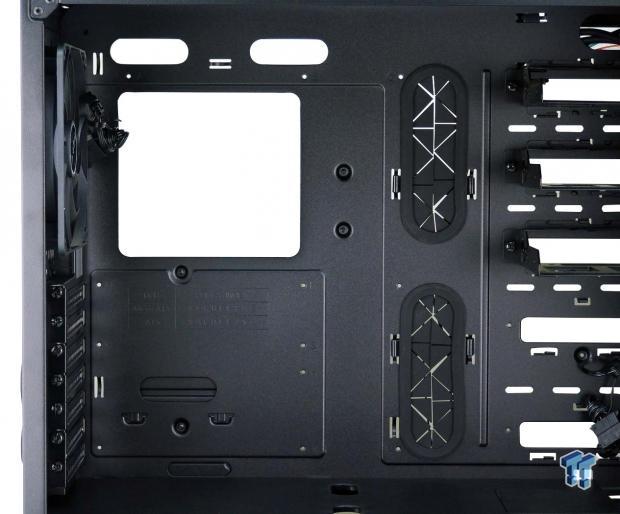
The motherboard tray offers up four holes to manage wires, and the larger two on the right come with grommets in them. The CPU cooler access holes are sufficient, but not the largest we have seen. The motherboard tray is clearly marked at each standoff location, and it offers eight attachment points for wiring.
Inside the Gravity 6 Continued
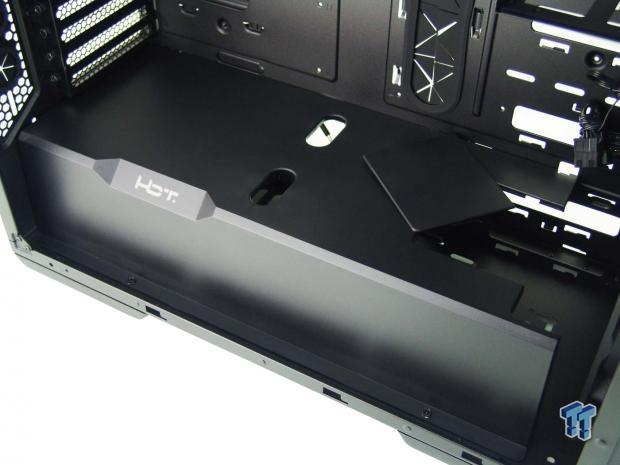
At the bottom of the Gravity 6, is a full-length plastic PSU cover. The edge is angled and is also used to show off the HBT+ name. There are two holes near the middle, for GPU power leads and front I/O wiring, while the front edge has a removable section so that thicker radiators and water tubing can be easily installed.
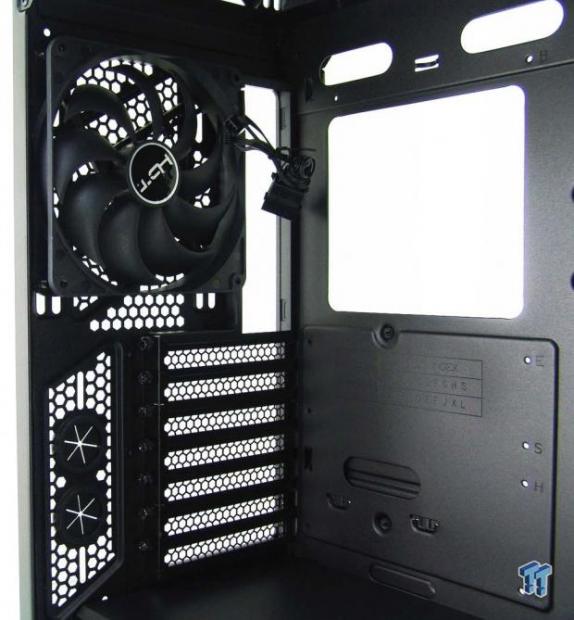
At the back of the chassis, the seven expansion slot covers are found held in place with thumbscrews. HBT+ also ships the third fan in this location, and it too is a 120mm fan. It is also 3-pin powered and comes with the Molex adapter too.
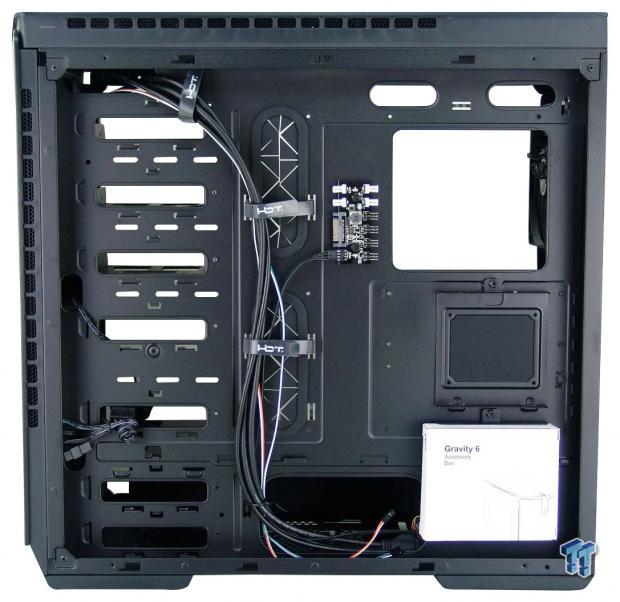
Not only is this space behind the motherboard tray 34mm in depth, but we also find that the Gravity 6 comes with hook and loop straps to help manage wires. From this view, it is easy to see all seven drive rack locations on the left that the trays can be used in, and the hardware is shipped in the bottom right corner.
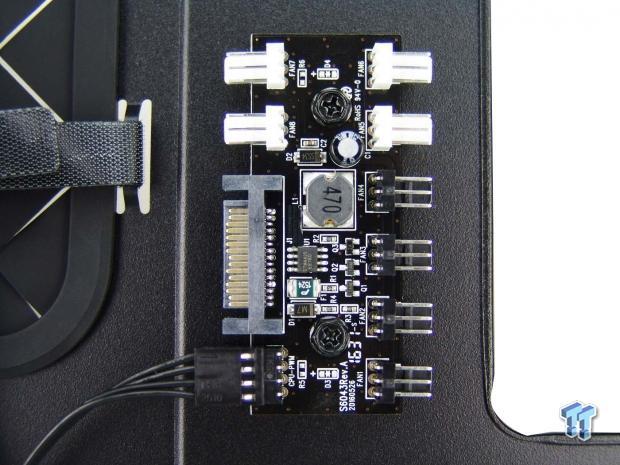
Just to the left of the CPU cooler access hole, there is a fan hub screwed to the motherboard tray. This hub requires a SATA power connection, and that the PWM signal cable is plugged into the motherboard. Not only can the three fans be plugged in here, but a total of eight fans can be connected.
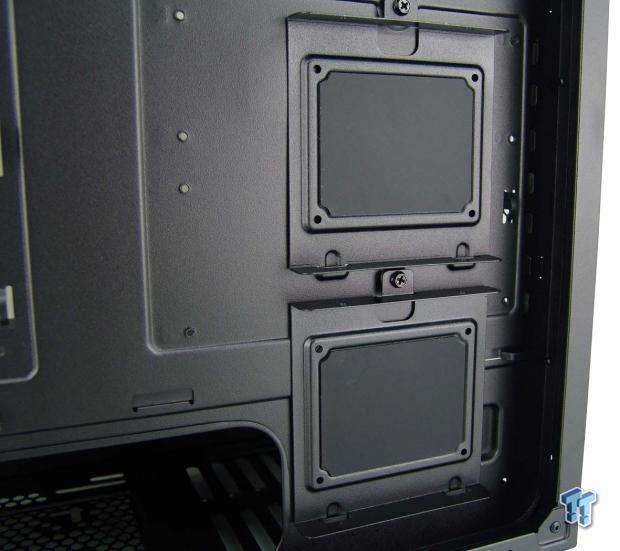
Behind the motherboard tray, we also find two more locations for storage drives. Both trays are screwed into place, they have rubber pads to isolate the drives, and both 2.5" and 3.5" drives can be utilized with these.
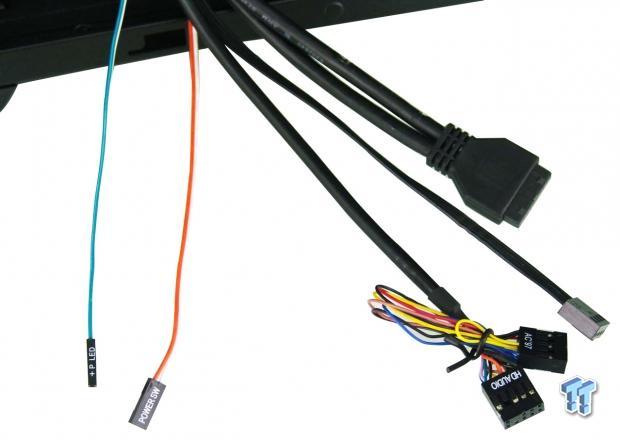
The length of the cables is enough to get them connected but does not leave much to spare. The native USB 3.0, fan and HD Audio cables are all dressed in black. Sad to see, though, is that the power switch and power LED cables are sent orange and green instead of black as well.
Hardware & Documentation

Five bags of hardware are found inside of the white box. In the top row, we find the 6-32 motherboard screws and HDD screws if using the hidden trays. There are standoffs and a socket, and we are also sent an extra set of thumbscrews. The hex head 6-32 screws are used for the PSU and internal drive bays, while the bag of M3 screws is used to secure the 2.5" drives.
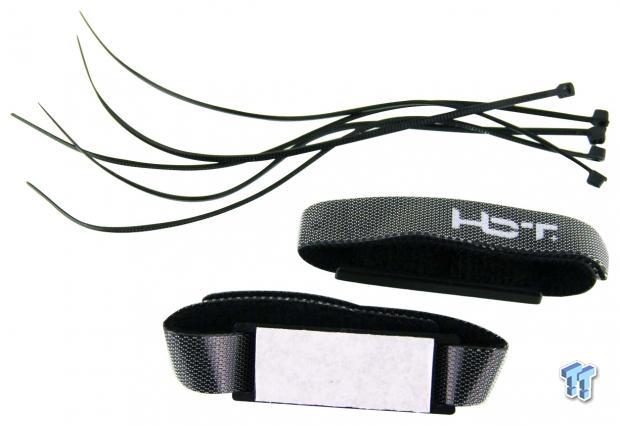
To help manage wiring behind the motherboard tray, Honbontec sends along five zip-ties to keep wiring close to the motherboard tray. If the pair of loops pre-installed there are not enough, another pair can be found with the hardware. These come with adhesive on the back of the plastic portion holding the loop and is how they are attached to the motherboard tray.
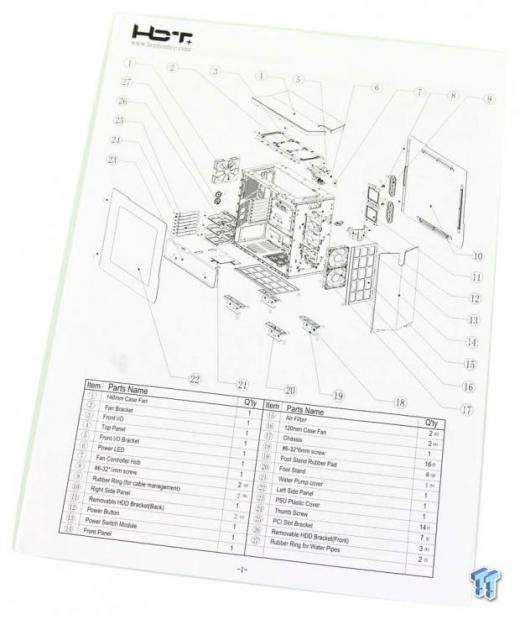
The manual for the Gravity 6 is thorough and starts with an exploded diagram of the case. Each and every part is marked and described so that when you move through the installation process to follow, it is easy to reference what parts are being addressed.
There is also a parts list inside of the manual, with good renderings and descriptions of processes throughout. While this chassis is geared to the enthusiast, even the most novice builder should have no issues.
Case Build & Finished Product
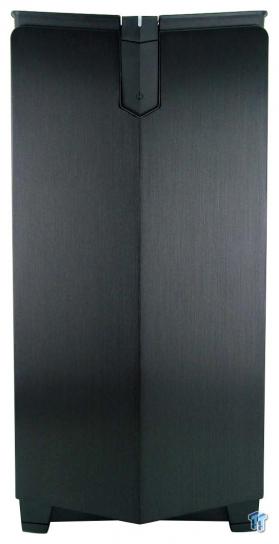
We loved the aesthetic found at the front of the Gravity 6, and no matter what you happen to install inside of the chassis, the view of the front is unmolested. Just a vast expanse of brushed aluminum swept back to either side of it.
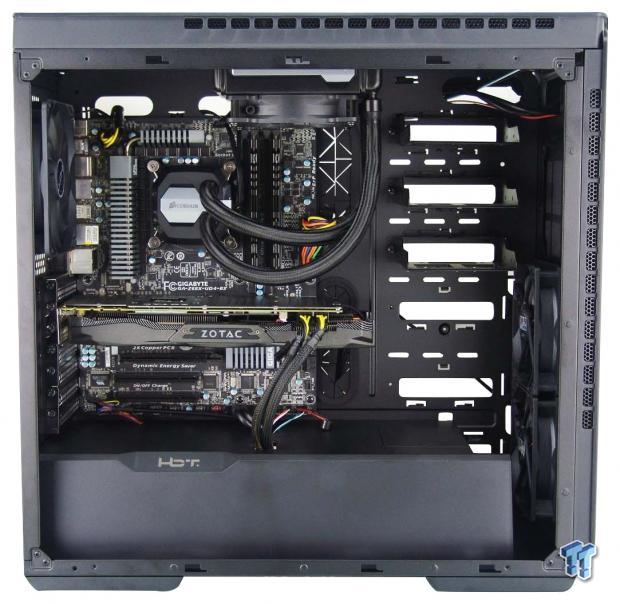
Since the HDD trays did not block any access, we left them in place. The motherboard, video card, and the AIO all went into the chassis without issue and were easily mounted in their respective locations. Even with the vast openness of this layout, the result is clean and unencumbered.
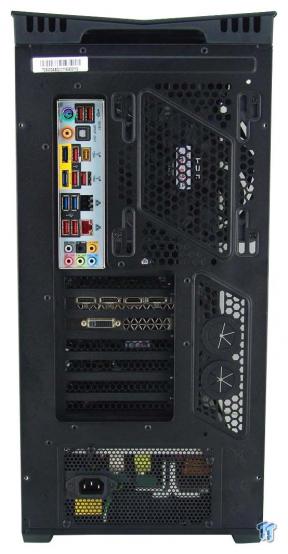
Even at the back of the case, we ran into no issues with getting everything into place. The dust shield snaps right in; the card aligns horizontally as well as with the screw holes, and the PSU gave us no troubles either.
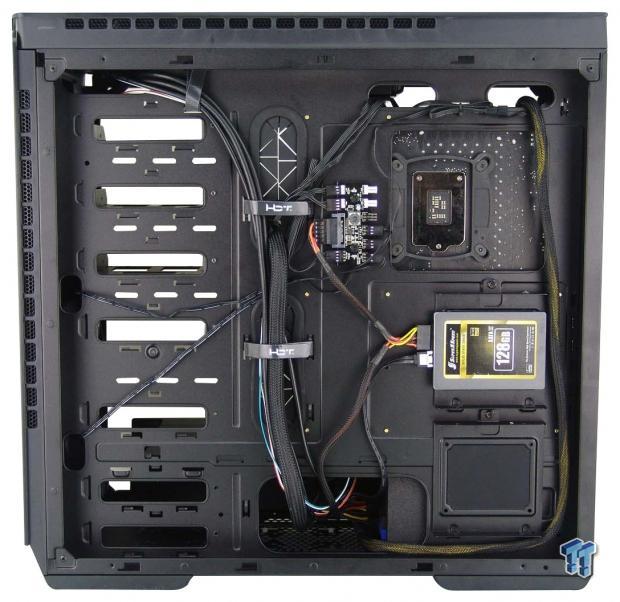
In this setup, we did not find a need to use the extra straps, but they are handy when it comes to builds which are more involved than this one is. All of the fan leads made it to the hub; our wiring tucks in without conflicting the door, and we decided to hide our SSD back here.

Once the Gravity 6 is all reassembled and awaiting power, we get to admire all of that brushed aluminum, the angles used, and sit here admiring the body line gaps and style of what we have housing our gear. The only downside to this is that the window is tinted so darkly, that a view inside is reduced severely.
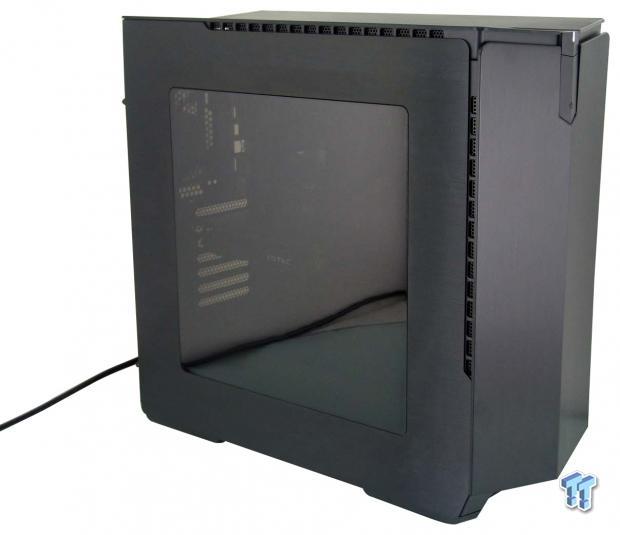
Giving the Gravity 6 the juice, it comes to life with a slight hum, where we took a reading of just 31 dB from the back side of the case. There is a bright white LED shining at the top of the front bezel, and we can also make out the video card and AIO LEDs inside it. If you want a good view of the internal components, we do advise adding some interior lighting of some fashion.
Final Thoughts
With this being our introduction to Honbontec, HBT+, or whatever you prefer to call them, they certainly chose a stellar case for us to see first. We cruised through their previous designs and were sort of "meh" with what we saw, but the Gravity 6 puts them on a whole new level of chassis design.
The aluminum cladding on the outside is much nicer to look at than steel, and the angular design and strips of ventilation deliver a sleek, simplistic, yet attractive appearance. The only thing that stands out in our mind with its looks and outward appearance is that we do wish the side window was not tinted so dark. Even with half of the tint, it would still have kept the dark and mysterious look, but the view of all of the hardware inside would have been drastically increased. Of course, this darkness can be overcome; you just need to invest in some form of chassis lighting, whether LED fans, LED strips, or CCFL lighting. One other thing we almost forgot is that we do also wish there was a PSU dust filter included with the Gravity 6.
Inside of the Gravity 6, we are also left with very little to complain about. We appreciate the lack of ODD bay and mucking up the external appearance of it, and the HDD trays are also great. Their ability to be moved up or down in the interior is a nice touch, but if you need more storage compatibility, we did not see anywhere currently listing extra drive trays. The PSU cover is not plain and is the only place in the entire design where any naming is found at all. The hidden drive trays are convenient, the 34mm of room behind the motherboard tray is deeper than most, the multitude of wire management options, and the inclusion of an eight fan PWM hub is also top notch.
Then, of course, there is also plenty of room for additional cooling, of which it does not lack out of the box, and you could also install a pair of 360mm radiators without them conflicting with each other or the motherboard.
Since it is only the tint level of the side window and the lack of a PSU dust filter as something, we felt the need to pick on the Gravity 6 for, which says tons about its build quality, feature set, and aesthetics. There are many places that HBT+ could have taken a wrong turn, and they simply didn't. This sleek and aggressive looking aluminum-clad chassis are even offered with a reasonable price, which just makes everything about the Gravity 6 that much better.
As long as you are willing to shop for the best deal to be had, the current $109.99 listing, in our opinion is not asking too much for this case at all. While we do tend to prefer mid-towers priced at $99.99 and to come fully loaded, the Gravity 6 mid-tower is the exception to that rule. Even without a PSU dust filter and we found the window to be a bit dark for our liking, many will gravitate to this chassis, and is likely why it was called the HBT+ Gravity 6 in the first place.
Chad's Chassis Test System Specifications
- Motherboard: GIGABYTE GA-Z68X-UD4-B3
- CPU: Intel Core i7 2600K (buy from Amazon)
- Cooler: Corsair H80i GT (buy from Amazon)
- Memory: G.Skill Ripjaws F3-12800CL6D-4GBXH
- Video Card: ZOTAC GeForce GTX 970 AMP. Extreme Edition (buy from Amazon)
- Storage: SuperSpeed 128GB SSD
- Power Supply: SilverStone SST-ST85F-G (buy from Amazon)
- OS: Microsoft Windows 7 Ultimate 64-bit (buy from Amazon)

| Performance | 98% |
| Quality including Design and Build | 99% |
| General Features | 93% |
| Bundle and Packaging | 86% |
| Value for Money | 94% |
| Overall | 94% |
The Bottom Line: HBT+'s Gravity 6 is mastery in the form of a mid-tower chassis! While it does lack a dust filter at the bottom, the looks, styling, build quality, layout , and features show that Honbontec left nothing on the table; it is all right here in this case.
PRICING: You can find products similar to this one for sale below.
 United
States: Find other tech and computer products like this
over at Amazon.com
 United
Kingdom: Find other tech and computer products like this
over at Amazon.co.uk
 Australia:
Find other tech and computer products like this over at Amazon.com.au
 Canada:
Find other tech and computer products like this over at Amazon.ca
 Deutschland:
Finde andere Technik- und Computerprodukte wie dieses auf Amazon.de
What's in Chad's PC?
- CPU: Intel Core i7 13700K
- MOTHERBOARD: ASUS ROG Maximus Z690 Hero Eva
- RAM: TEAM DDR5-7200 32GB
- GPU: ASUS GeForce RTX 3090 Eva
- SSD: addlink m.2 2TB
- OS: Windows 11 Pro
- COOLER: Fractal Lumen S36
- PSU: be quiet! Dark Power Pro 1500W
- KEYBOARD: ASUS ROG Strix Scope TKL Electro Punk
- MOUSE: ASUS ROG Strix Impact Electro Punk
- MONITOR: ASUS ROG Swift OLED PG42UQ
Similar Content
Related Tags

