
The Bottom Line
Introduction, Specifications, and Pricing
Seemingly, Thermaltake is not short of ideas when it comes to chassis design, and delivered one of the largest cases we have ever had the opportunity to review with this latest submission. This chassis design is very much along the lines of models you would find from Mountain Mods, in the aspect of it is a chassis that comes completely torn down and requires assembly; and yes it even reminds us of cases from Caselabs. This is not to say this is a direct copy in any way, as the chassis you are about to see is like no other we have seen before in its entirety.
The chassis we are bringing forth today is a huge super-tower solution for those in the system building game that are true enthusiasts and have a ton of money to spend on the amount of gear it takes to attempt to fill this massive chassis. Not only will this chassis house just about every standard form factor up to and including XL-ATX motherboards, but it also dwarfs any system installed in it. There are tons of options for cooling this chassis with air or water cooling, and not just the typical offerings either. Modularity is also a key factor in this design, where it allows users to make up their minds and add in bits or arrange and install them as needed since the entire chassis needs to be built after it shows up at your door.
There is so much to cover with this chassis, and if you are one of the lucky few who are attending CES this year, be sure to stop by the Thermaltake suite and get a view of this chassis for yourselves, you will not be disappointed. For those of you who cannot attend, we are going to try our best to help wrap your minds around what this new Core W100 Super-Tower Chassis from Thermaltake is all about. With so much to cover, we may as well dig right in and be ready to stay for a bit as we take a spin around this chassis. Get comfortable and grab a beverage, this chassis review is quite a long read, but very much worth the time to have a look at the new direction Thermaltake is taking in massive chassis design.
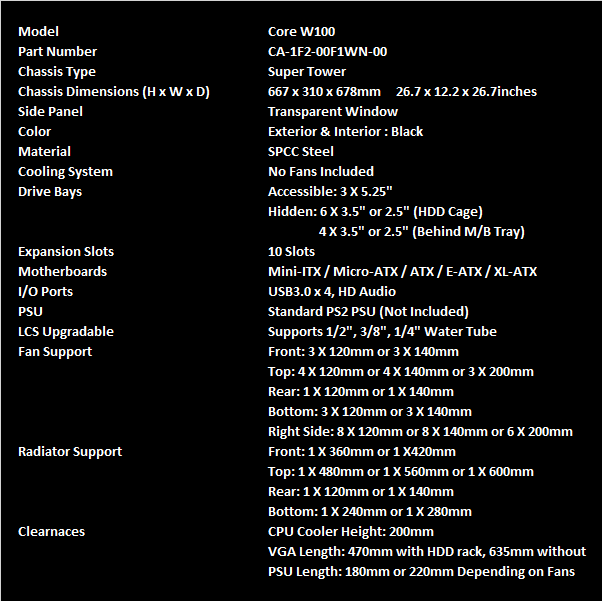
As mentioned, the Core W100 is a super-tower chassis, and its dimensions of 26.7 inches from front to back and top to bottom and its 12.2-inch depth defines that this is so much more than a full-tower design. The Core W100 comes in one color option at this time, which is black on black, and all versions currently come with a clear window in the left side panel of the chassis. All of the chassis is comprised of SPCC steel components aside from bay trays and optional feet, and once assembled is strong as an ox.
Inside of the chassis, there are options for the drives and storage. There are three HDD cages that can house a total of six 3.5" drives or 2.5" drives, but these cages can either be mounted behind the bezel or via a pair of support rails. They can also be installed back further into the chassis with access from the side panel. As for ODD bays, there are none in the traditional sense, but they have included six brackets that do allow the chassis to support three bays of optical drives or bay reservoirs. In the back of the chassis, there are ten expansions slots to go along with the fact that you can install motherboards from Mini-ITX right on through XL-ATX.
Cooling in this design is left to the user to define, as there is nothing in the form of any fans included in this kit. The way the Core W100 is designed, you can install up to nineteen 120mm fans, nineteen 140mm fans, and even has the potential to be cooled by nine; that's right we said nine 200mm fans. This also makes a ton of room for water cooling options as well. You have the front, top, bottom, and the rear of the chassis for placement, but there are also optional racks that can be installed to house water cooling behind the motherboard tray if needed as well. If this is not enough room for your needs, Thermaltake is also offering a P100 counterpart that is a pedestal that matches aesthetically to the Core W100 design.
We appreciate that in this design, special limits are called clearances, as there are not any limitations on this design. As to the CPU cooler, you can install air coolers up to 200mm in height, which covers every cooler we have ever had our hands-on. Video cards can be somewhat limited if the drive cages are not mounted to the front of the chassis, where their length can only be 470mm, but without cages blocking them, there is 635mm of room. Also, there are PSU limitations, but only if you install fans or cooling into the bottom of the chassis. If three fan locations are filled you have 180mm of room in there, and if you populate only two, that room is increased to 220mm, which covers most PSUs on the market.
Pricing is a bit steep, and outside of the Level 10 chassis, one of the most expensive Thermaltake cases to date. While we are told that the Core W100 and its pedestal should be available at the time of reading this review, be prepared to dig into the deepest reaches of your pockets to obtain this. The chassis itself has an MSRP set of $329.99 for what you are about to see in this review. If you want to opt into grabbing the pedestal later, the MSRP on the P100 is set to $129.99. There is also plans to sell both components in the same box, saving you near $20 to get it all together at the MSRP of $429.99. While this is way out of most budgets when it comes to cases, when you figure the thousands of dollars it takes to fill this chassis with gear, the price of the Core W100 is just a drop in the bucket.
Chad's Chassis Test System Specifications
- Motherboard: GIGABYTE GA-Z68X-UD4-B3 (buy from Amazon)
- CPU: Intel Core i7 2600K (buy from Amazon)
- Cooler: Corsair H80i GT (buy from Amazon)
- Memory: G.Skill Ripjaws F3-12800CL6D-4GBXH (buy from Amazon)
- Video Card: Zotac GeForce GTX 970 AMP. Extreme Edition (buy from Amazon)
- Storage: SuperSpeed 128GB (buy from Amazon)
- Power Supply: SilverStone SST-ST85F-G (buy from Amazon)
- OS: Microsoft Windows 7 Ultimate 64-bit (buy from Amazon)
Packaging
Since our sample is a pre-release version, the packaging is this plain brown box. With the retail versions, it will sport black printed panels with all of the usual things like a chassis images, specifications, and features as they typically do.
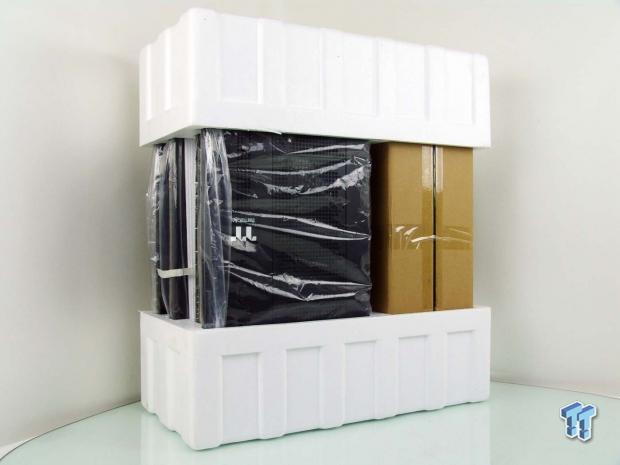
We were never told this chassis came in this manner; it was not until we removed the cardboard box that we found that this chassis is broken down into each component, and requires being built by the user. Following some online instructions we were provided, it took us roughly ninety minutes from unboxing to having a built chassis.
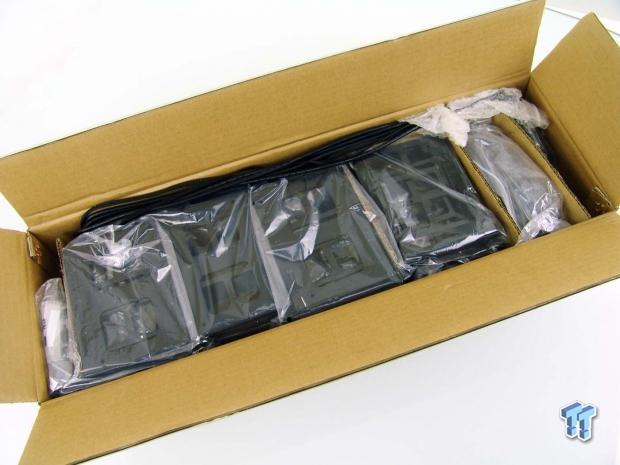
As for all of the goodies you need to build and customize the chassis, there is one enormous box that ships with everything you need. We will be expanding on what comes in this box in the hardware section, but we wanted to take this time to stop and show the level of attention offered to even the hardware.
It is all packed in various bags to protect the bits and even comes in different compartments to ensure nothing is damaged in transit.
Thermaltake Core W100 Super-Tower Chassis
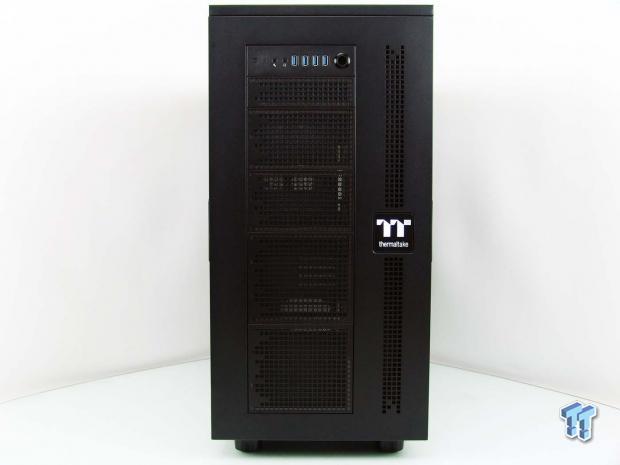
After the build process, this is what we have. The front bezel of the chassis snaps onto the frame of the chassis, offering a completely open intake that allows fans and bays to be placed anywhere they are needed most, with the I/O panel at the top of it all. Also, we see a new logo for Thermaltake's high-end gear, and soon the square mesh above and below it will glow from LEDs placed behind it.
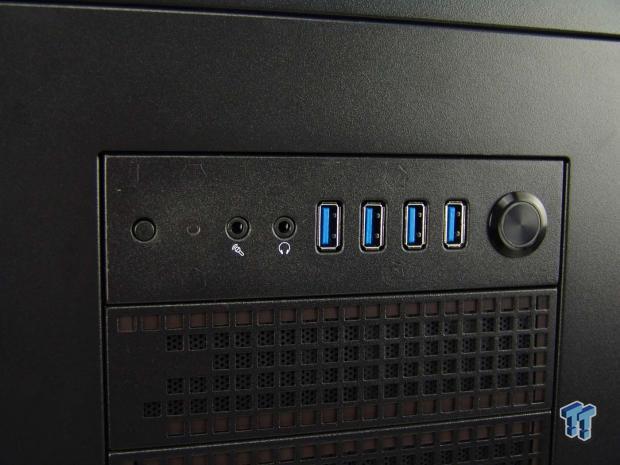
The front I/O panel offers a tiny reset button on the left followed by a pair of HD Audio 3.5mm jacks. There is a section of four USB 3.0 ports, and a blue LED-backlit power button to finish it out on the right.
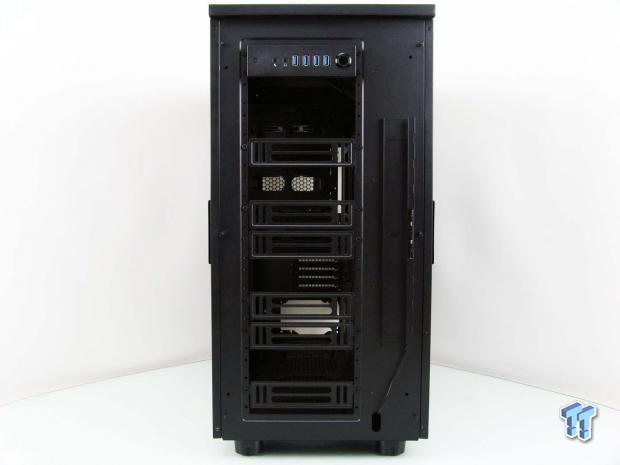
To access fan mounting or to install the HDD cages or ODD brackets, you need to pop off the bezel. Behind it, we find bay covers that can be moved as needed, and to the right, we installed the bracket that includes an LED strip powered via a 4-pin Molex connection.
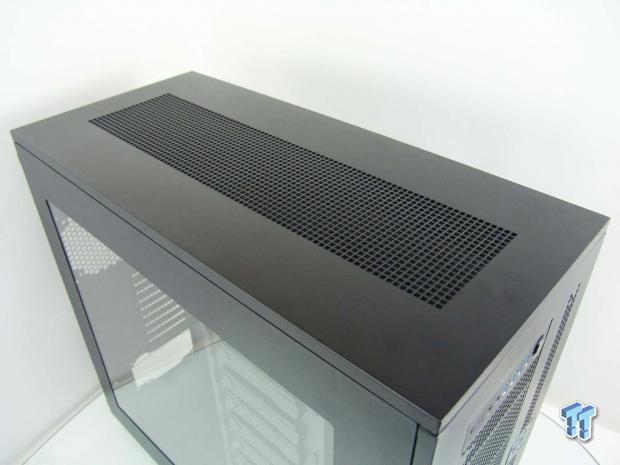
The top of the chassis is just like the front, where it offers a snap on cover panel, again sporting square mesh from front to back. Under this, the top of the chassis is completely open and requires one of the optional radiator mounting brackets of fans or water cooling is intended to be placed under this cover.
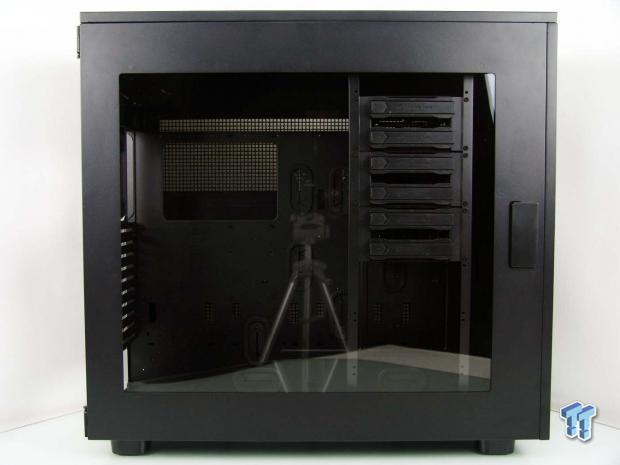
The left side of the chassis offers a huge window to view the gear you place inside of the chassis. At the front of the case is a handle that lifts and allows a grip to release the magnet and latch that keep it closed. Also, this panel swings open on the hinges at the back and is also removable.
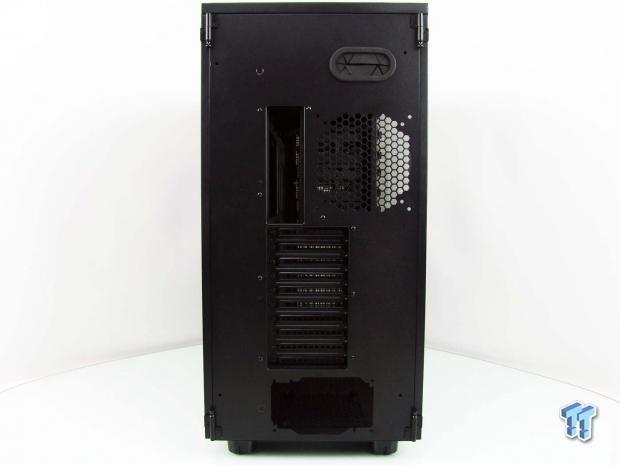
The back of the chassis is the first you get a real sense of the size of this beast. There is a lot of room at the top, and even a grommet for running wires or cooling externally. Below that we see the rear I/O location, exhaust fan location, and even with ten expansion slots and the PSU at the bottom, you get the sense now that this chassis is massive, and it is.
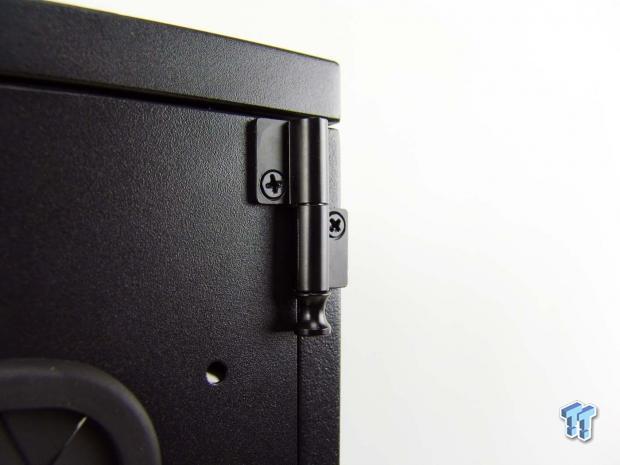
Holding the side panels in place are two hinges much like this one in the image. To release the doors, you pull the pin down on the top hinge, releasing it from the chassis, and the lower hinges also offer this same spring loaded pin, but with the top one out, the door will slide right out of the lower hinge.
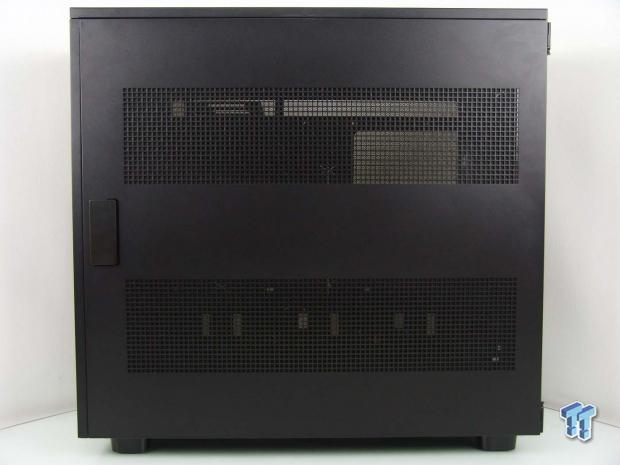
The right side of the chassis is not just an expanse of steel panel either. Here we find two long areas of the square mesh, and these are made so that the optional radiator mounts that can be placed behind it have access to cool fresh air, or in the other direction, allows heated air from the radiators to pass through the panel.
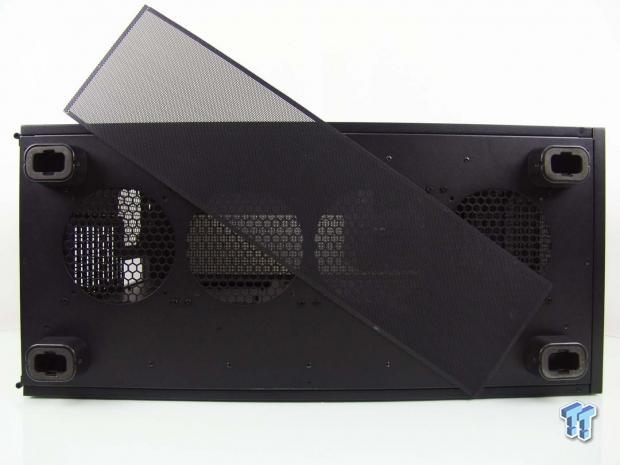
Under the chassis, we opted for the large plastic feet rather than using the provided casters. The floor of the chassis is the only area to come with a dust filter, but it covers four fan locations, with the one nearest the back used to ventilate the power supply.
Inside the Core W100
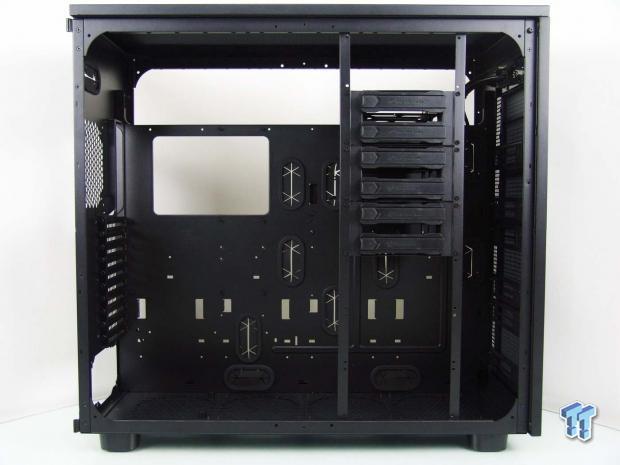
This is the way we chose to build our W100. We mentioned the HDD bays can be mounted in the front bezel, but if you planned to use water cooling there, you could offset the bays like we did here. Even in this orientation, you can go with the bays high like we did, or lower them depending on what you like. Otherwise, the rest of the chassis is just a vast open cavity awaiting massive amounts of gear.
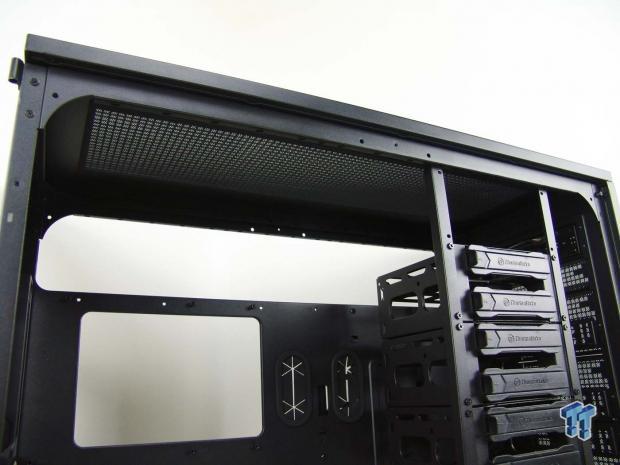
Without a ton of time to prepare to get this review live for you to read for launch day, we did not install one of the optional radiator supports in the top of the chassis. As you can see there is plenty of room here for the fattest of radiators and fans on both sides, all of it not conflicting with the top of the motherboard that sits lower in the chassis.
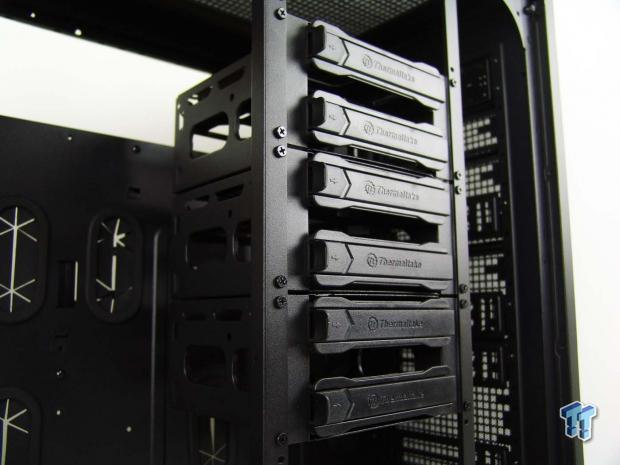
We opted not to install any of the ODD bay brackets since we do not use an optical drive, but we can see them being used for reservoirs or pump/res combo units. With none of that in here, it allowed us to move the drive bays up, offering room for either six 3.5" drives, 2.5" drives, or a combination of them in these slide out plastic trays.
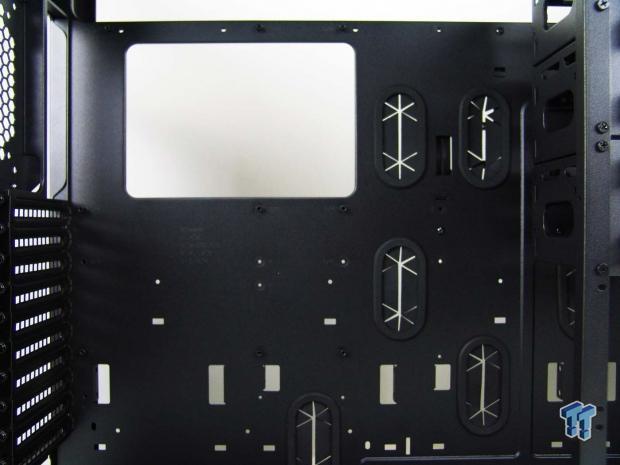
The motherboard tray is large and is plainly marked for the standoffs of each of the optional form factors this chassis can house. There are plenty of wire management holes with grommets along the right side, and most of the extra holes are for the bits that hold the HDD racks behind the motherboard tray.
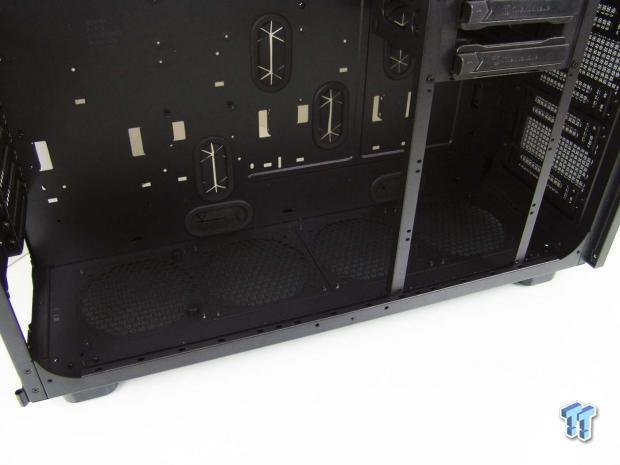
Of course, you need to leave room at the back of the chassis for the PSU, but in this design, even with the HDD bays used in this manner, the floor is open to accept a triple radiator without anything blocking it. There are also grommets very low in the chassis to allow wiring fans and such much easier down here too.
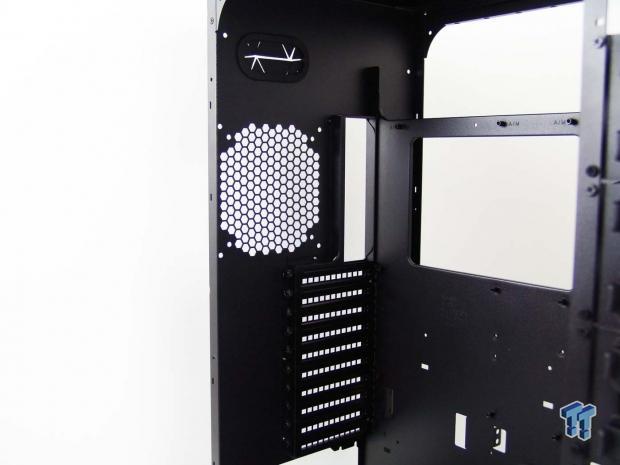
The rear of the chassis offers a spot for a 120mm or 140mm exhaust, and below that we find that there are ten ventilated and removable slot covers, all held in place with thumbscrews.
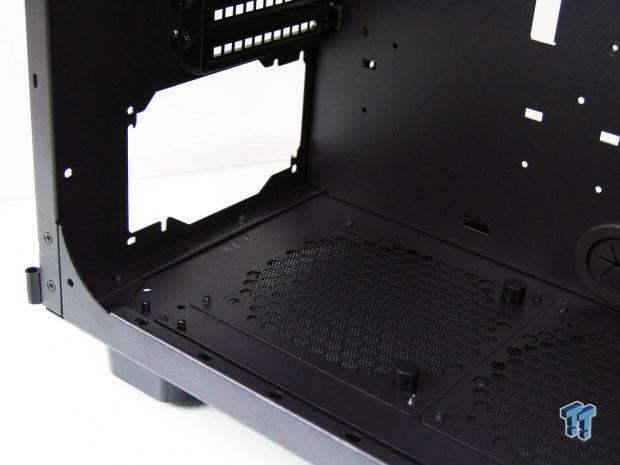
The PSU area is raised off the floor of the chassis, and in the hardware, you will locate four rubber supports to keep the PSU level and the screw holes aligned with the back of the chassis. If you do not plan to use water cooling here, the PSU can be of any length, which is helpful for those beastly PSUs over 1KW.
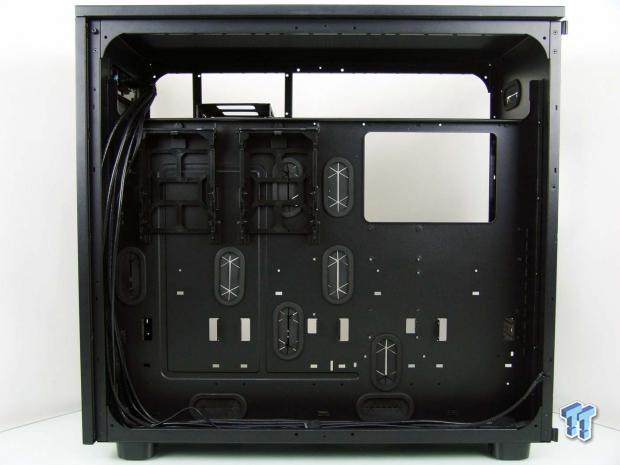
Behind the motherboard tray, there is plenty of room. You have the option to install four HDD trays in the back, of which we installed two at the top, and three spots are located along the bottom, which we did not install. You can also take two of the radiator supports and install them across this area from left to right if desired, but do so during the build process; it simplifies getting them in.
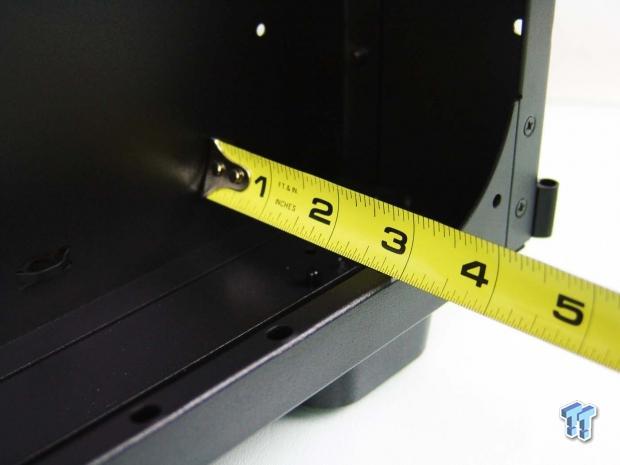
If you think the room here is not deep enough to support water cooling behind the tray, think again. Thermaltake offers three inches of room behind the tray, plus a bit more space in the panel to allow you to pack quite a bit in back here.
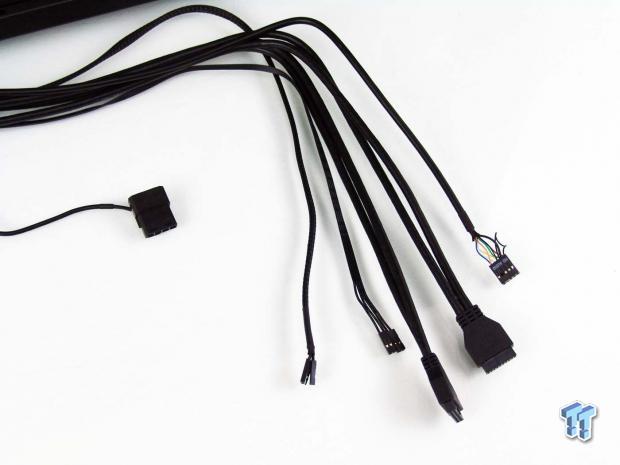
All of the wiring is sleeved in black; even the ends are black, so they blend into any build. The length is the longest we have seen in any chassis, but with a super-tower and a Mini-ITX board, their runs can be lengthy, and this wiring will still be able to be managed and offer a clean finished build.
Hardware
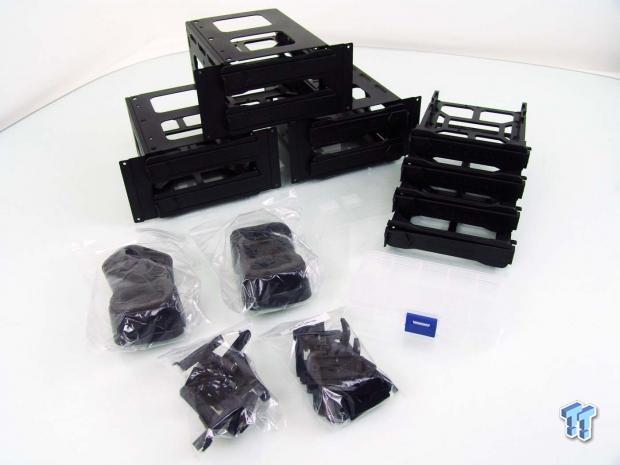
Part of what is found in the hardware box, we have here. There is the trio of HDD cages along with four plastic trays for the back. There are two bags with the plastic feet we chose to use, and bags of the clips that are used to hang the drive trays behind the motherboard tray. Thermaltake also ships a parts sorter box to keep all of the extra screws in that are not used initially in the build.
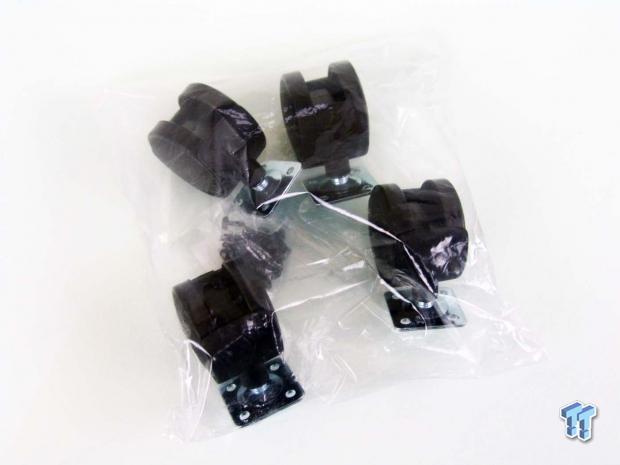
Since this is a beast of a chassis, with a shipping weight of seventy-five pounds, and adding in all of the water cooling gear along with the main components, this chassis may end up as something you will never want to try and lift to move. To help with this, Thermaltake supplies the option to install these four casters so that you can roll it into another room if need be, and save your back from trying to carry it around.
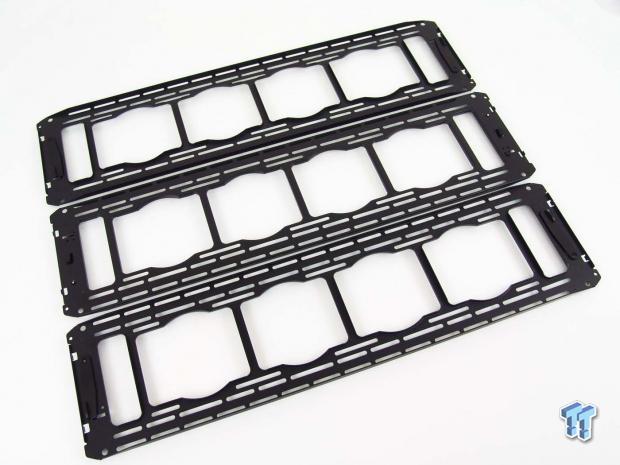
We have spoken about the radiator supports quite a bit up to this point, and these are what we have been talking about. There are three of them, and via a couple of tabs at either end that align with holes in the chassis frame along with a pair of slide locks on each support, they can be installed and removed to allow users to access them or to clean the components that hang from them much easier.
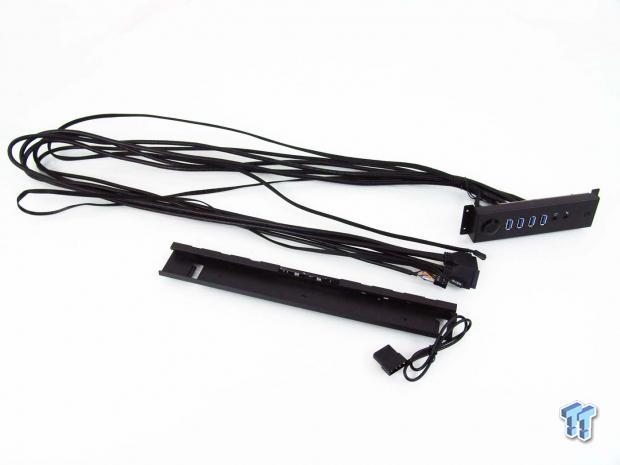
We took this image before the build process so that you could see both the front I/O panel and its wiring, as well as the LED bracket that goes on the front of the chassis. We covered the I/O, but as to the LED setup, a Molex plug powers a strip of LEDs much like what NZXT and BitFenix are offering.
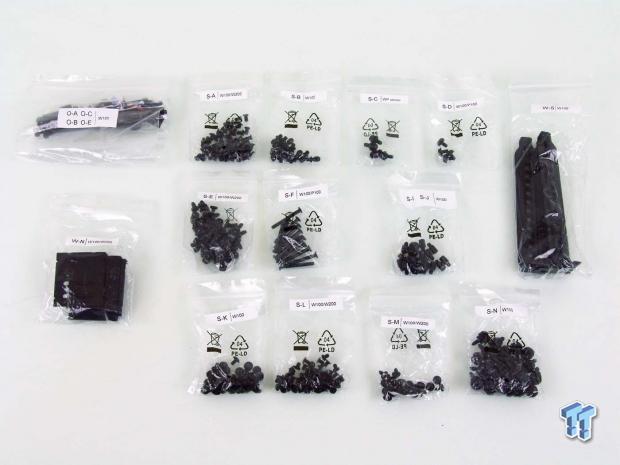
All of the screws, brackets, and additional goodies all come in individual bags. Each of them is also labeled to be sure that as you follow the build instructions, you can be sure you have the proper hardware in hand to mount it.
As for the instructions, we had to follow an online version due to the timing, but you will receive a full book. From our experience, there is nothing left out in the instructions, and it is clearly easy to follow, all you need is some time, patience, and a Phillips screwdriver to get the chassis completed.
Case Build & Finished Product
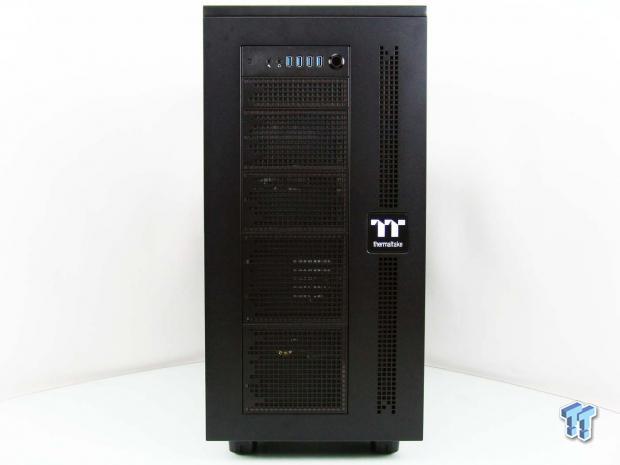
Since we opted not to use optical drives or a bay reservoir, the front of the chassis did not change in our build. We also made mention that the bottom was the only place with dust filtration earlier. We were mistaken as the front offers individual filters for each section of the removable panels in the middle.
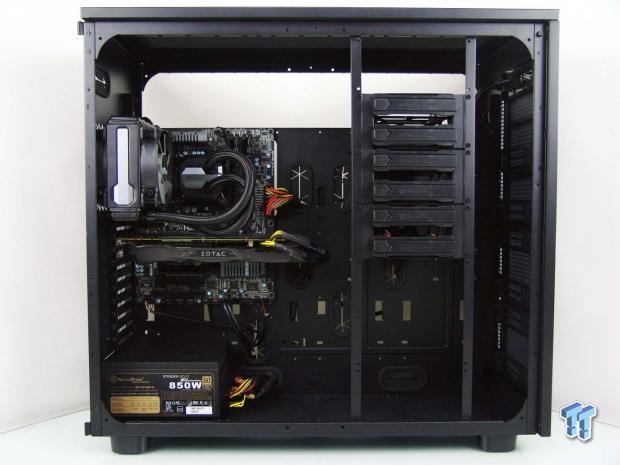
Even opting to use a longer than normal video card and an ATX system to test in the Core W100, it takes it like a champ. We have a ton of leftover room, and even with triple loops installed and all the components needed to go along with it, you will be hard pressed to fill this chassis. If you do have plans of grandeur and do not think everything can be housed here, this is why Thermaltake offers the P100 pedestal.
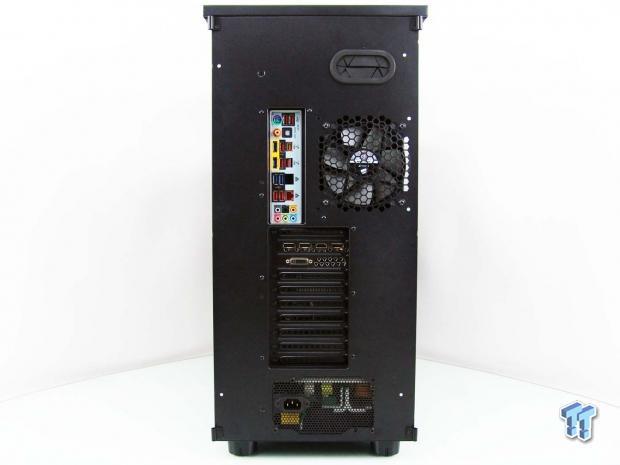
We found no issues in the back of the chassis either. The rear I/O cover snapped right into place, and the video card lined right up as well. As for the PSU, once supported with the rubber spacers, the screws line right up and it is easily mounted.
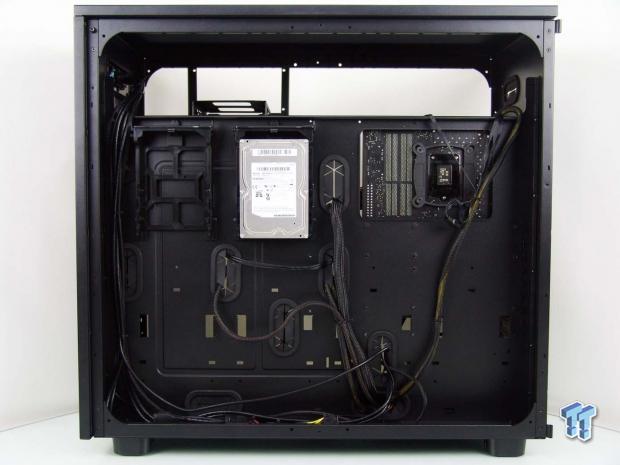
Wire management is easy in a chassis this large. We did find that the 24-pin and 8-pin were stretched to fit this chassis, so we do advise thinking about extension cables, or making sure you buy a PSU with the longest leads possible.
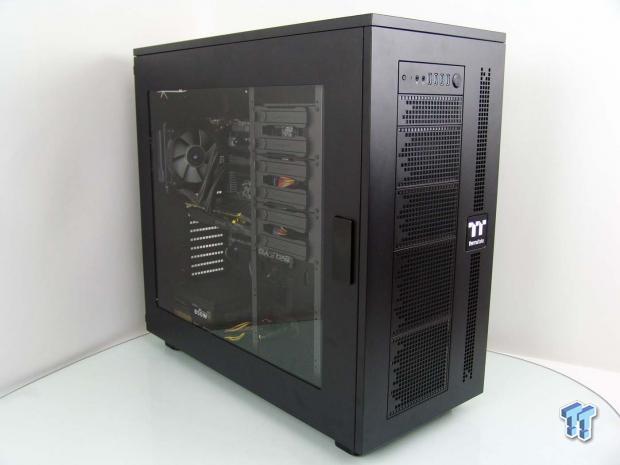
With the Core W100 all back together at this point, we like what we have, even if just using the system and passive air cooling at the moment. Only the PSU, video card, and the AIO are cooling this chassis, and we found that temperatures were pleasant, even without filling the chassis with fans.
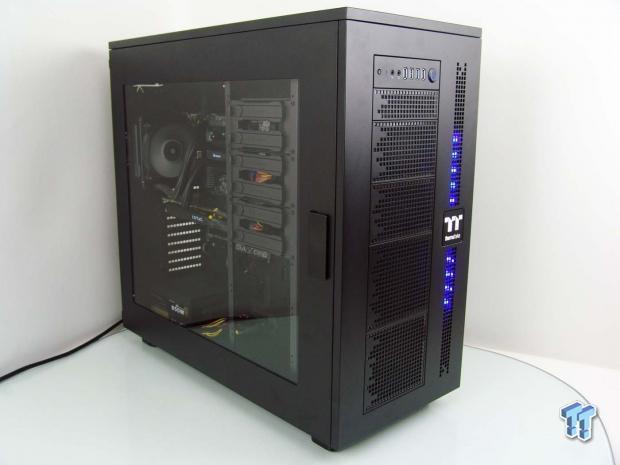
With power now delivered to the system, we like the look of the blue LEDs popping through the mesh around the logo, as well as the thin ring of blue around the power button. As to the noise produced from the chassis, well, there is none. Any noise that comes from the Core W100 is based solely on your choices of components and fans, so you can tune it to your preferred level.
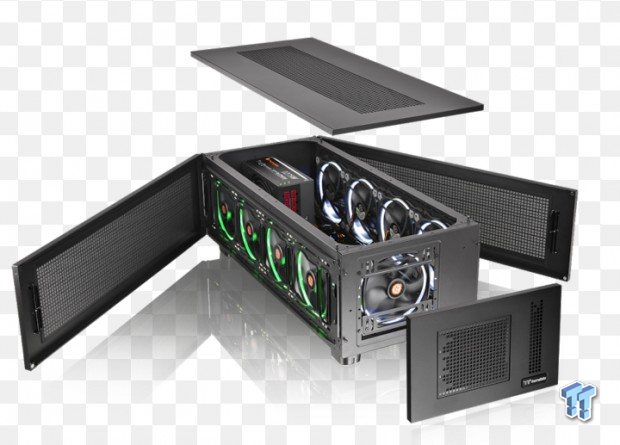
While we were not sent the P100, we made sure to at least include an image to show what you can do with it. It is designed to be opened from the sides, offering plenty of room for additional water cooling support. It even offers a centralized PSU location if you need more power, or just want to move a serious PSU down here to power the entire build.
Final Thoughts
What we are left with is a massive chassis that maximizes options, is modular, and if there isn't enough room in this super-tower for all of your needs, you can opt for the P100 and increase the space. We had a lot of fun in the build process, and it sheds light on what goes into a chassis, and the amount of components and time it takes to assemble them in the factory.
We also like that you get the chassis without fans, as most users who will buy something like this have no plans to keep the stock fans, so why bother providing them and need to raise the price along with it. Even without fans, our thermal results are better than average with the passive flow of air through this chassis, and, of course, there is no droning noise from up to nineteen fans out of the box. The noise level you get in this design is completely up to you.
The components are solid, and once assembled correctly, we would have no issues putting out overweight self on top of it and use it as a stepping stool; it is that strong. We love the idea of modular drive bays that can be oriented two ways, and we are also fond of no traditional ODD bays, just brackets to use if the need arises. Even if you were to load the top, front, bottom, and the back with water cooling, there is still plenty of room for the longest of video cards, as well as leaving full access to the motherboard and all of it components. There is not one thing that we feel Thermaltake should have done differently or that any of it is lacking in any way. You are delivered a beast of a chassis that will and can house anything your heart desires.
If we were to have to pick out one thing that may drive customers away, it would have to be the pricing. As an enthusiast, we feel the pricing is on point and much more affordable than other offerings like those from Caselabs and the like, but nonetheless, the $329.99 pricing is a hard pill to swallow for the masses. As a counterpoint, though, this chassis is not intended to be used by the masses. The Core W100 and the P100 optional pedestal are designed for those who already are aware of the stack of money they dished out for the components it takes to fill this super-tower chassis.
For less than the price of one decent video card, you get this monstrous beast of a chassis that is ready willing and able to take on anything you can think of. With everything considered, we honestly do not see how Thermaltake could have delivered such a design for much less, and to be honest, as we said, when it comes to a chassis with these sort of features and offerings, this is one of, if not the most affordable option on the market today.
Chad's Chassis Test System Specifications
- Motherboard: GIGABYTE GA-Z68X-UD4-B3 (buy from Amazon)
- CPU: Intel Core i7 2600K (buy from Amazon)
- Cooler: Corsair H80i GT (buy from Amazon)
- Memory: G.Skill Ripjaws F3-12800CL6D-4GBXH (buy from Amazon)
- Video Card: Zotac GeForce GTX 970 AMP. Extreme Edition (buy from Amazon)
- Storage: SuperSpeed 128GB (buy from Amazon)
- Power Supply: SilverStone SST-ST85F-G (buy from Amazon)
- OS: Microsoft Windows 7 Ultimate 64-bit (buy from Amazon)

| Performance | 95% |
| Quality including Design and Build | 98% |
| General Features | 100% |
| Bundle and Packaging | 100% |
| Value for Money | 97% |
| Overall | 98% |
The Bottom Line: Thermaltake and its Core W100 takes cases to a whole new level of awesomeness! All the room most will ever need, modularity and a ton of potential, and it even has a matching pedestal option. For what you get in this design, you will be hard pressed to find a better deal in a competing design.
PRICING: You can find products similar to this one for sale below.
 United
States: Find other tech and computer products like this
over at Amazon.com
 United
Kingdom: Find other tech and computer products like this
over at Amazon.co.uk
 Australia:
Find other tech and computer products like this over at Amazon.com.au
 Canada:
Find other tech and computer products like this over at Amazon.ca
 Deutschland:
Finde andere Technik- und Computerprodukte wie dieses auf Amazon.de
What's in Chad's PC?
- CPU: Intel Core i7 13700K
- MOTHERBOARD: ASUS ROG Maximus Z690 Hero Eva
- RAM: TEAM DDR5-7200 32GB
- GPU: ASUS GeForce RTX 3090 Eva
- SSD: addlink m.2 2TB
- OS: Windows 11 Pro
- COOLER: Fractal Lumen S36
- PSU: be quiet! Dark Power Pro 1500W
- KEYBOARD: ASUS ROG Strix Scope TKL Electro Punk
- MOUSE: ASUS ROG Strix Impact Electro Punk
- MONITOR: ASUS ROG Swift OLED PG42UQ
Related Tags

