Introduction, Specifications and Pricing
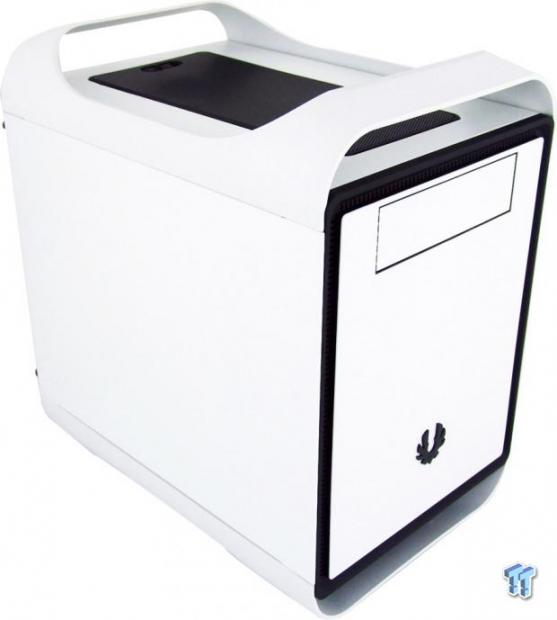
If you are in the know, then you can remember the release of the original Prodigy from BitFenix. The chassis released at the perfect time; the design was revolutionary, and gave users something outside the conventions of what a SFF chassis design typically offered. Of course, after this chassis hit the market, it was also a huge hit for the mod community, as it seemed everyone was buying them. The chassis was so well received, that even after quite some time, BitFenix found it productive for the bottom line to go back and offer this chassis in a plethora of colors to help match various system themes.
Some people in the mod community took things a step further. They were taking the Prodigy and hacking away at the back, removing the motherboard tray, and reconfiguring the entire interior to fit Micro-ATX based systems. They just liked the Prodigy so much that come hell or high water, they were going to make the much larger motherboard fit. But those days are now over. BitFenix has listened to the complaints, seen the mods themselves, and they figured: why not offer what all those people want, directly from the factory, with no modding needed?
This is exactly why we have you here today: to have a look at the way BitFenix answered the call for a reconfigured Prodigy that will fit a Micro-ATX system, right out of the box. Their answer to your call is the Prodigy M. The outside of this design kept all of the things that made the original so successful, but with BitFenix taking control of the redesign, you no longer have to worry about things like removing the motherboard tray and PSU location, then having to invent a motherboard tray. But what about storage, since the motherboard support also took care of that?
Well, in this design, BitFenix has covered all of the angles. With the Prodigy M, there is plenty of room for Micro-ATX based systems, and there is a new way of installing the PSU; plus, there are some other very handy design features that you will have to continue reading to find out about.
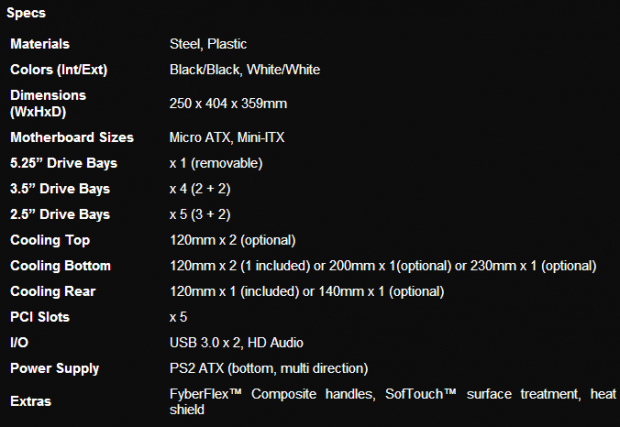
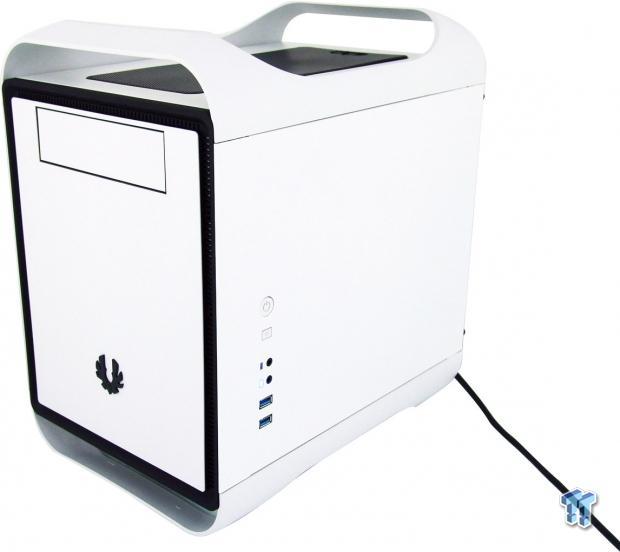
The chassis is still mostly made of steel, with the exception of a plastic front bezel, and FyberFlex composite handles or feet, depending on whether you are speaking of the top or bottom. For now, the Prodigy M is only available in all black trimming, or the white version we received, which has highlights of black trim. The chassis is not all that large considering that we can house Mini-ITX, as well as much larger Micro-ATX motherboards. On the inside of the chassis there is room for a single 5.25" device, and the bay is completely removable as well. There is room for either four 3.5" drives, or up to five 2.5" drives, or some combination of the two. At the back of the chassis there are five expansion slots to fill. On the right side of the chassis, the I/O panel offers a pair of USB 3.0 ports, 3.5mm HD Audio jacks, and of course, two lights, a power button, and a reset button.
Cooling in this smaller chassis is quite varied in its options. The top of the chassis is not shipped with any fans, but there is room for a pair of fans, with or without a radiator. The floor of the chassis does ship with a 120mm fan to exhaust out of the bottom, but this location can also house either a 200mm or 230mm fan as well. The rear offers the second fan in the chassis, and it is another 120mm fan installed as an exhaust. The front does have holes drilled to accept fans, but due to the new PSU orientation and location, this area is off limits for optional fans. The nice thing about the PSU location is that the bracket that holds the PSU in place allows the fan to face the front to draw in cooler air, or you can use it with the fan facing inward, as additional system exhaust.
Since the original Prodigy is still widely available on the market for right near $70 U.S. dollars, anyone with a Mini-ITX motherboard based system is well on their way to a new build. However, for those looking for a vertical orientation of the motherboard, less restrictive PSU area, better storage options, and the ability to fit a Micro-ATX motherboard inside - you are going to want to spring for the Prodigy M. The fact that we are finding the Prodigy M at $99.99 is no surprise to us.
Re-tooling costs money; the time to re-engineer the layout costs money; and the fact that there is no need to run to the hardware store to make gear fit, is all worth that $30 difference in the end. If you are still not sure that the Prodigy M, Micro-ATX chassis is the right case for you, then please continue on, as we are certain you will appreciate the updates found in this redesign, even if you are looking for a Mini-ITX chassis, and were already pondering the original design.
PRICING: You can find the BitFenix Prodigy M for sale below. The prices listed are valid at the time of writing, but can change at any time. Click the link to see the very latest pricing for the best deal.
United States: The BitFenix Prodigy M (White) retails for $99.99 at Amazon, and the BitFenix Prodigy M (Black) retails for $122.99 at Amazon.
Packaging

As with all of BitFenix chassis to hit our labs lately, we see the plain brown cardboard with black printing that saves money on something we typically throw away anyways. We see the large BitFenix logo, the Prodigy M naming, and of course, they also display the web address at the bottom.
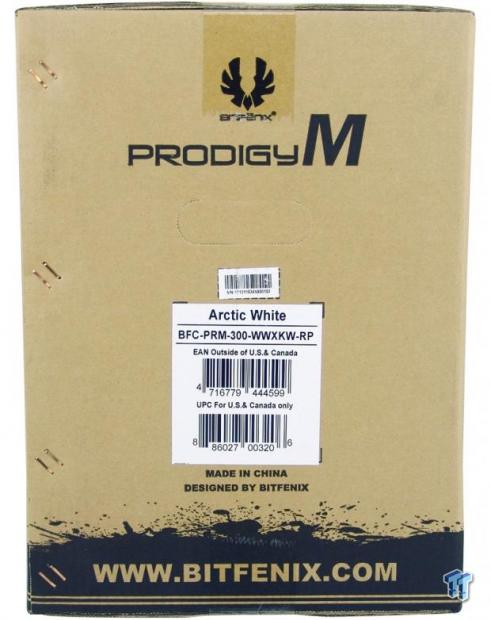
Spinning the box, we are now looking at the right side, where BitFenix has chosen to apply their product sticker. This gives us the naming of the BFC-PRM-300-WWXKW-RP; if it were black, the W's would be replaced with K's.
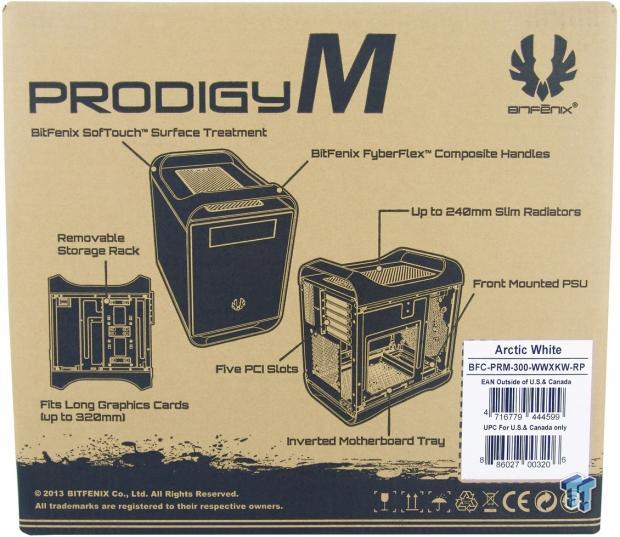
The back offers quite a bit when it comes to what gets printed here. BitFenix offers their potential customers knowledge of what is contained inside with three images of the chassis, opened and closed, along with eight key features positioned around them.
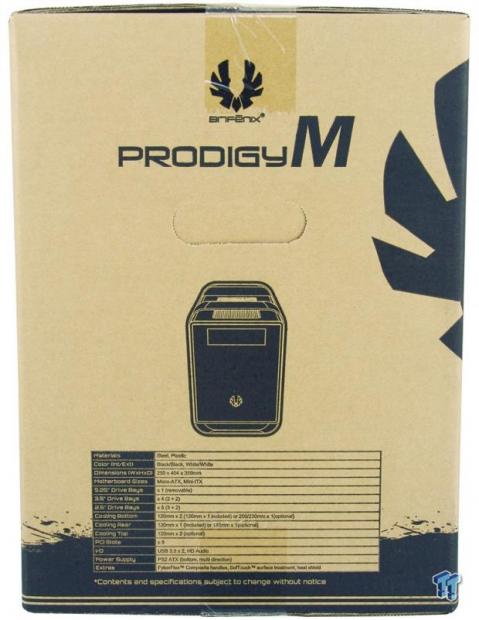
On our last panel for the Prodigy M we find one more rendering of the chassis in the middle, and below that is the specifications chart, and it is nearly identical to what we just went over.
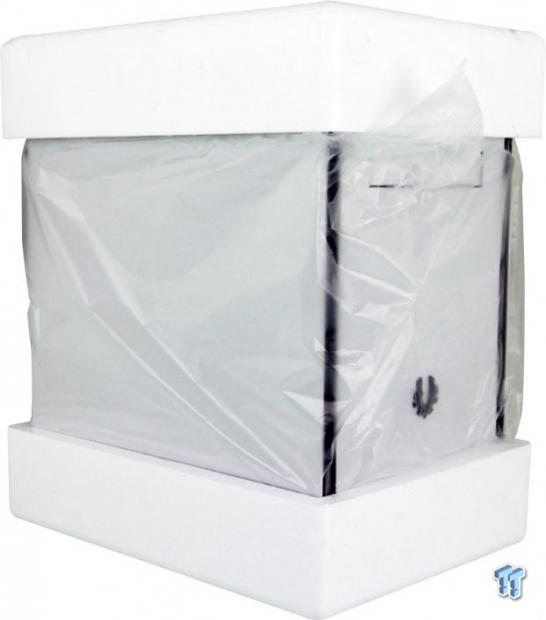
In this instance, the Prodigy M comes packaged with foam on the top and bottom. This is to better protect the FyberFlex handles. Along with the thick Styrofoam used in those, a plastic liner under it allowed our Prodigy M to arrive in perfect condition, without a scratch or blemish to be found.
BitFenix Prodigy M Micro-ATX Chassis

From an aesthetic point of view, nothing about the Prodigy M should shock you; it is essentially the same design as its predecessor, since both cases share dimensions as well. The handles define the shape at the top and bottom, and the Bezel sort of floats in the middle with its black trim, logo, and the single bay cover at the top.
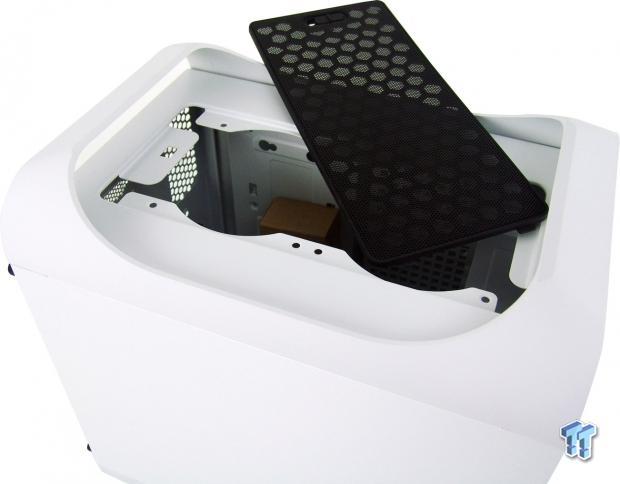
The top of the chassis has a mesh panel that unclips and is completely removable. Under this there is room for two 120mm fans to be installed via holes on both side rails.
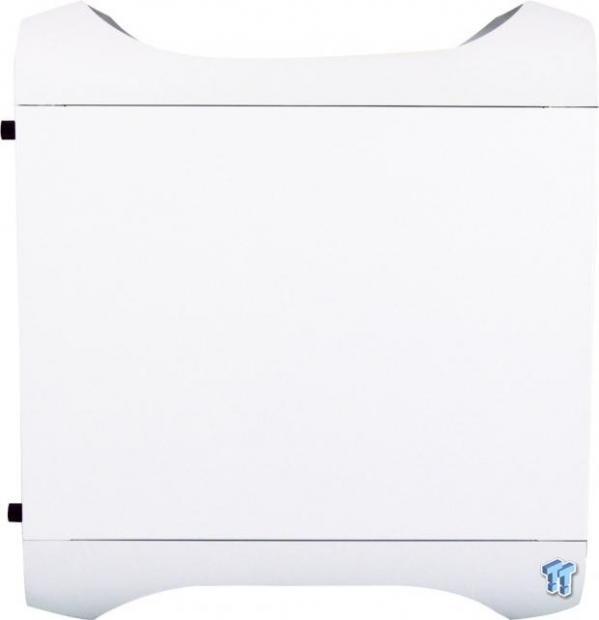
The left side of the chassis is the Plain Jane side of this design. Of course, the curve of the handles and the top and bottom do detract from the basic square design inside, but access to the inside of the chassis is on the other side.
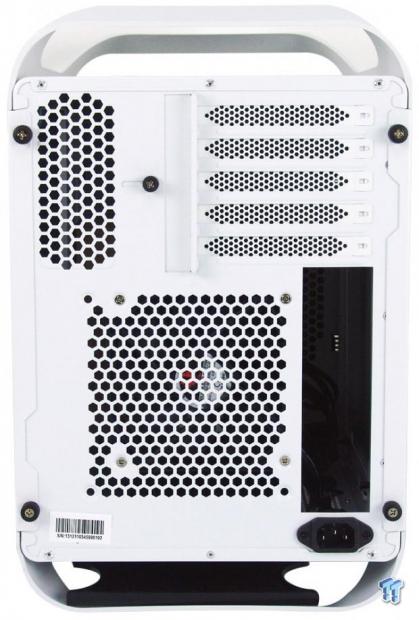
With a glance at the back of the Prodigy M, we can immediately see the motherboard is inverted inside. With five expansion slots at the top to fill, and the rear I/O panel needing to go in, we see a plug this time, rather than access for PSU installation.
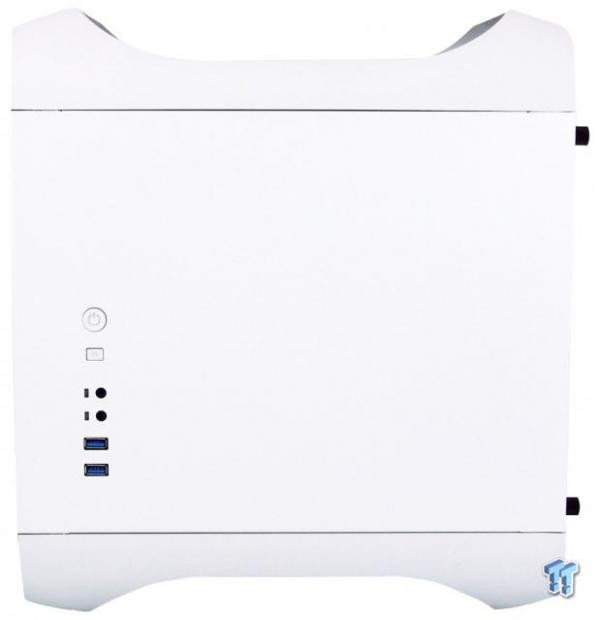
The right side of the chassis is the side of the Prodigy M you will likely see most, as this is the side used to gain access to the inside of the chassis. While the side panel is mostly identical to the other side, this time we do have an I/O panel near the front edge of the chassis.
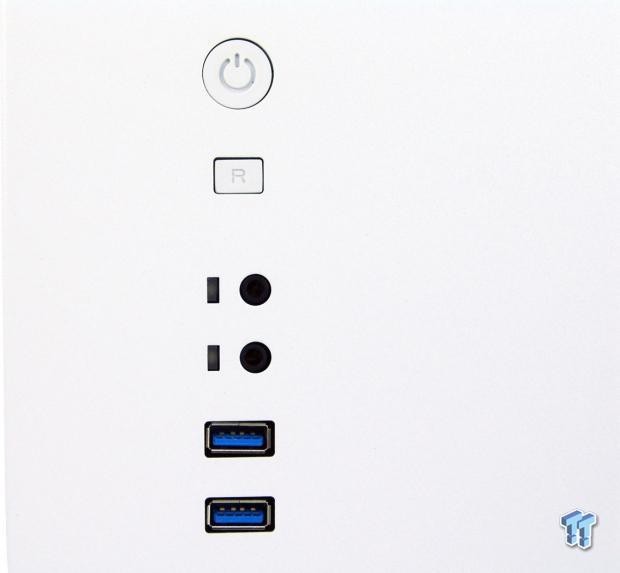
In this I/O panel we find the large power button just above the rectangular reset button. Next is a pair of LEDs on the left, with a pair of HD audio jacks next to them. That leaves the pair of USB 3.0 ports at the bottom as the last of the front panel connectivity.
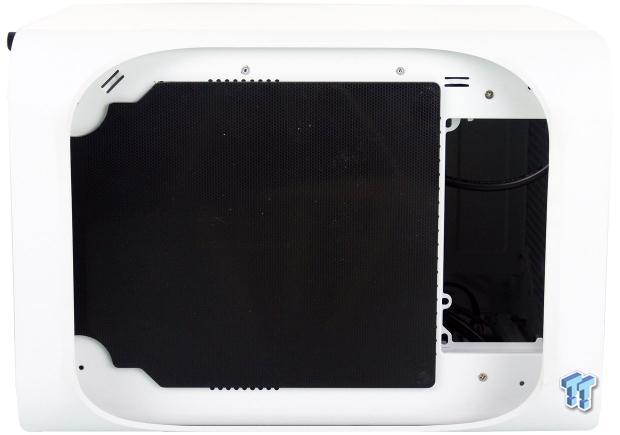
We find that a magnetic plastic panel has been placed under the chassis. The PSU mounting location is exposed to the right, but if you do not care to cool the chassis from the bottom, it can be entirely blocked off with this.
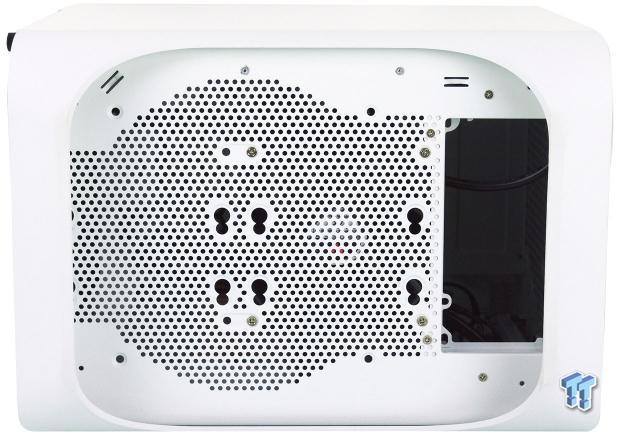
Removing the cover, we see that the bottom of the chassis offers a lot of mesh for air flow. We can also see options for fans and storage incorporated into this design.
Inside the Prodigy M
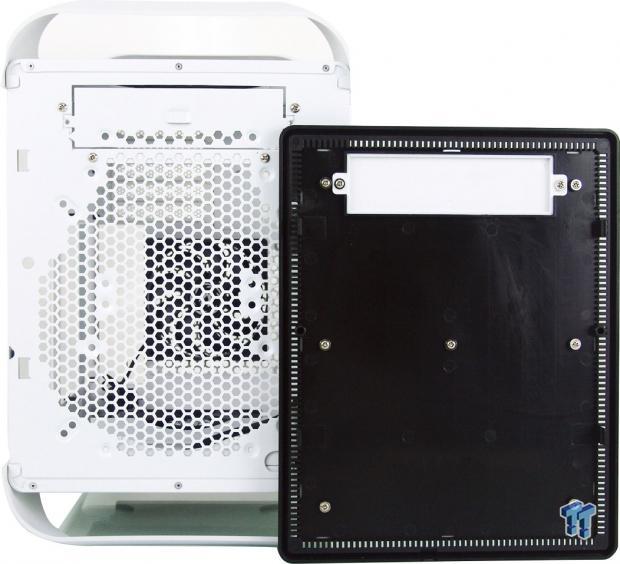
The front bezel is thin, but it is ventilated on all four sides to allow air to be drawn into the large mesh front of the chassis. Currently, the bay cover still needs to be unscrewed for removal, and we can see a break-away panel on the chassis, but that panel is also replaceable if need be.
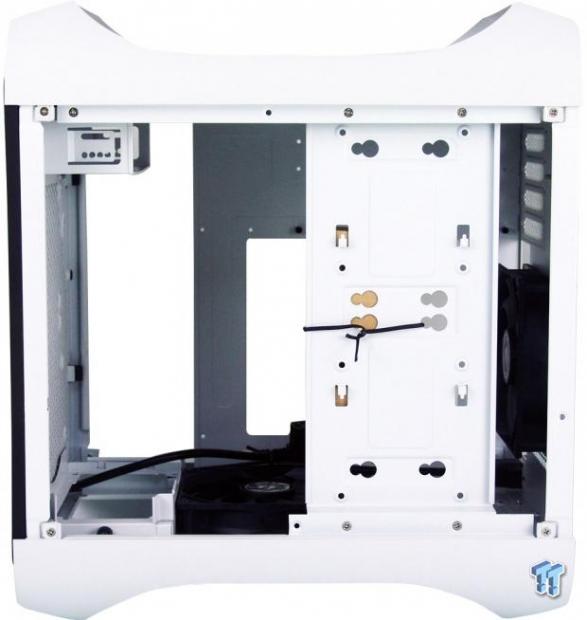
With the black line at left denoting the bezel, that means we are looking into the right side of the Prodigy M. We can see there is a storage rack blocking most of the view, and it will need to be removed for access. We also see that the provided hardware is strapped to the storage rack.
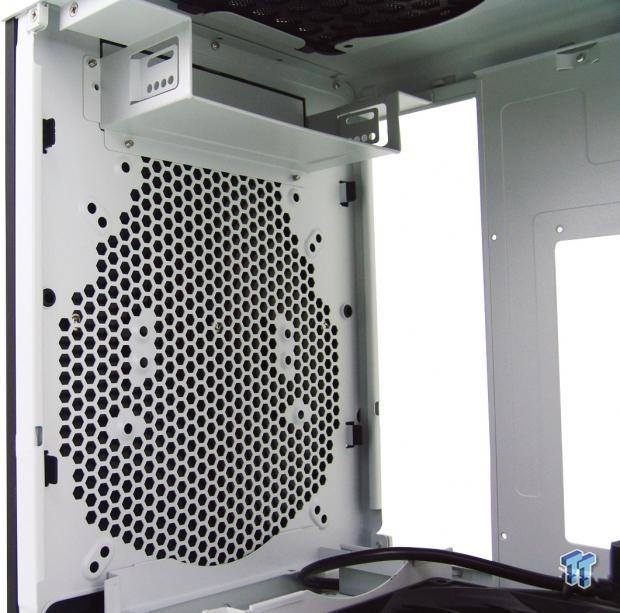
Inside of the front of the chassis, there is a half-bay installed into the top of the case with screws. This can be completely removed for water cooling support. Below it, we again see the mesh that you will have the option of letting the PSU draw air through or not.
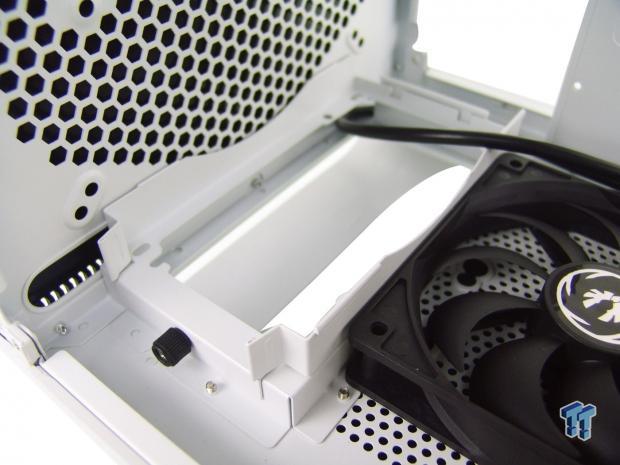
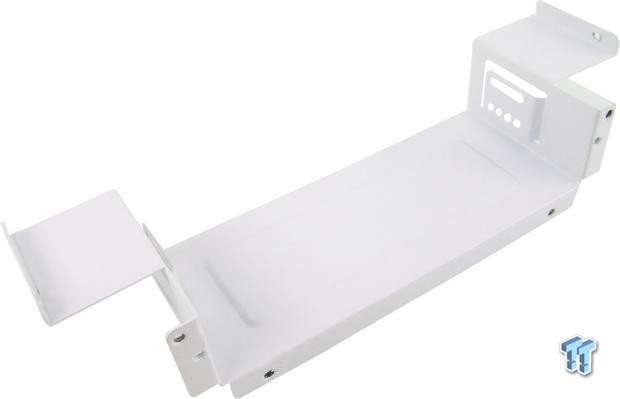
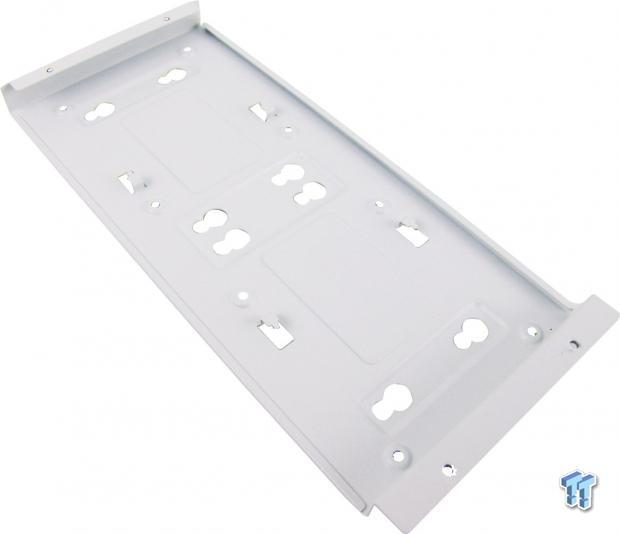
As we continue down the front, and reach the floor of the chassis, we find there is a removable PSU support bracket. The bracket works for both PSU orientations, leaving the choice of where the fan goes up to each user.
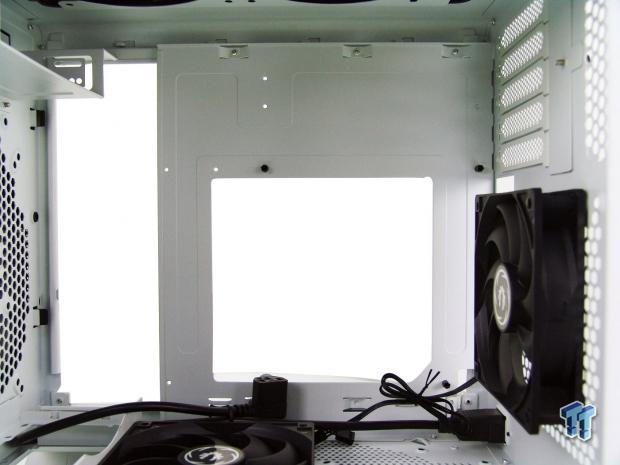
The motherboard tray is drilled for both Mini-ITX, and Micro-ATX; this time vertically. There is room above the tray to help support water cooling, a large hole in the tray for backplate access, and the entire left side is left open for wiring.
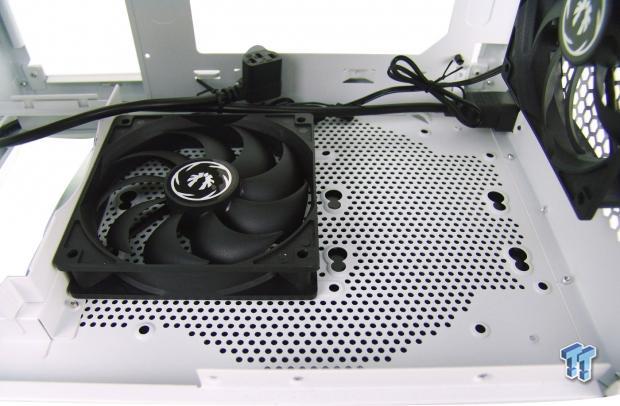
Below the motherboard tray, on the floor, we find one of the two 120mm fans currently set up as an exhaust, as not to draw in the exhaust from the PSU. Next to it, and under the fan, there are keyed holes to allow drives to lock in with supplied grommets and screws.
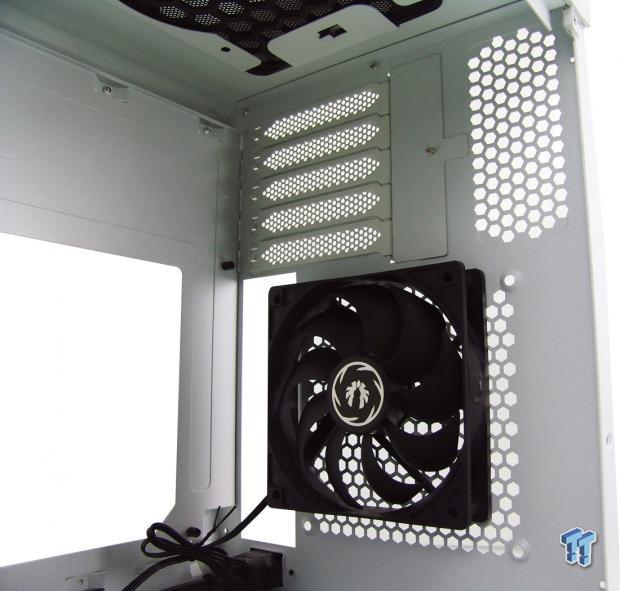
In the back of the Prodigy M, we find the second of two 120mm fans, which both are three-pin powered. Above the fan, we see the expansion slots. We can also see a cover that locks cards and covers into place, with no need for screws, aside from the one that opens and closes the sliding panel.
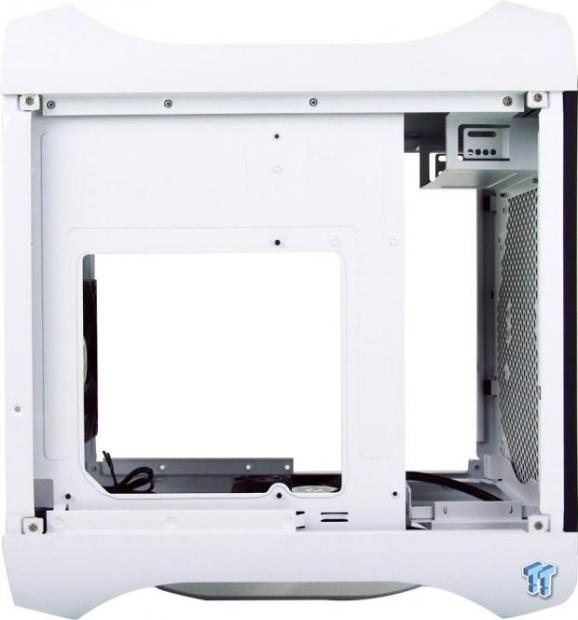
Behind the motherboard tray, there is just enough room for front panel wires, or possibly an eight-pin lead, but not enough to hide much of the system wiring. The real place to hide the wiring is to the right, next to the PSU, where there is a deep recess left after the PSU is in place.
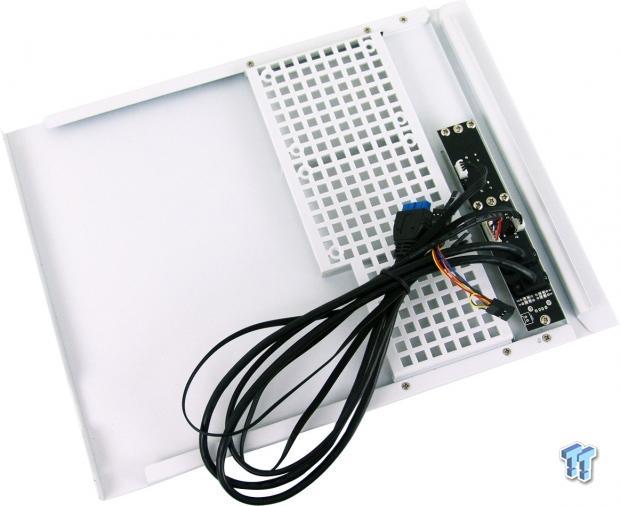
Where we would usually have a shot of the wiring coming out of the chassis, with this design the wires are clipped into the back of the aside panel. Along with all of the black wiring for connectivity, there is also a plastic rack to allow for a pair of 2.5" drives to slide in under, and get screwed into place.
Accessories and Documentation

The little cardboard box of goodies has everything you need to get started with the build. There are standoffs and a socket to tighten them, brackets to allow the steel break-out panel for the 5.25" bay to be replaced, and a handful of grommets to mount drives via the keyed holes found throughout. The bottom row offers ODD drive thumbscrews, a handful of M3 screws, some 6/32 screws, and four hex head screws for the PSU.
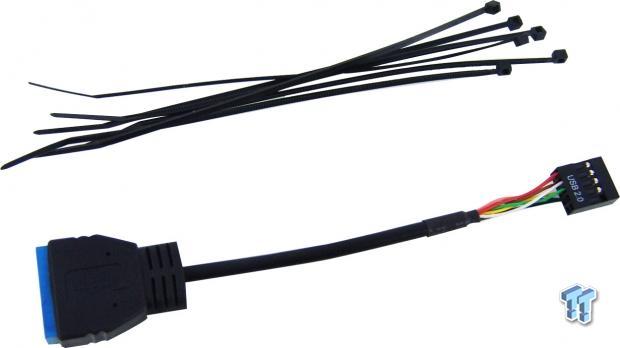
There are only a few places on the floor of the chassis to tend any wiring, but you are supplied with five zip-ties to get wiring under control. We also like that we received a native USB 3.0 to USB 2.0 adapter so that you don't have to have the latest and greatest motherboard to have USB ports at the front of the chassis.
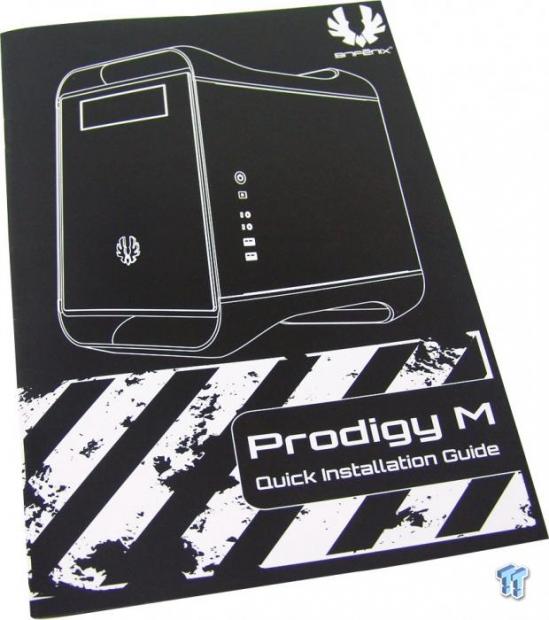
The quick installation guide offers all you will need to get the build started, and work your way right on through to the end. The guide starts with diagrams of how the chassis is laid out, and it shows all of the removable components. It then goes on, step-by-step, with small renderings and concise text to show you how everything is done.
After removing four screws from the face of the bay, accessed under the front bezel, and pulling one more from each side, the 5.25" bay is now out to leave plenty of room for the fans and AIO that we have planned to use in here.
This storage rack, which we had to remove right away, had four screws holding it in place. On this side, two 2.5" drives can be installed via the tabs with pins and screws. This still allows the other side to use grommets, and hang 3.5" drives.
Case Build and Finished Product
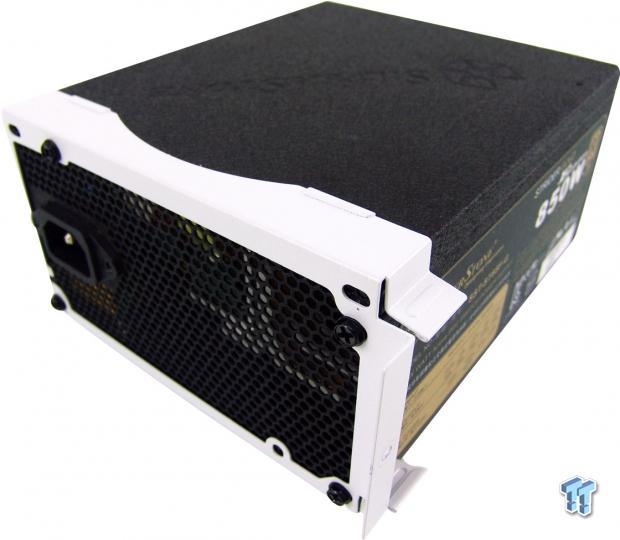
First off, we went ahead and added the PSU bracket to our power supply. It is a tight fit, but with just a bit of force, we got it in the PSU. We soon realized that we had it on so that the fan was pulling from the chassis interior, so we swapped it around later so that we could use the front of the chassis to supply air to the PSU fan instead.
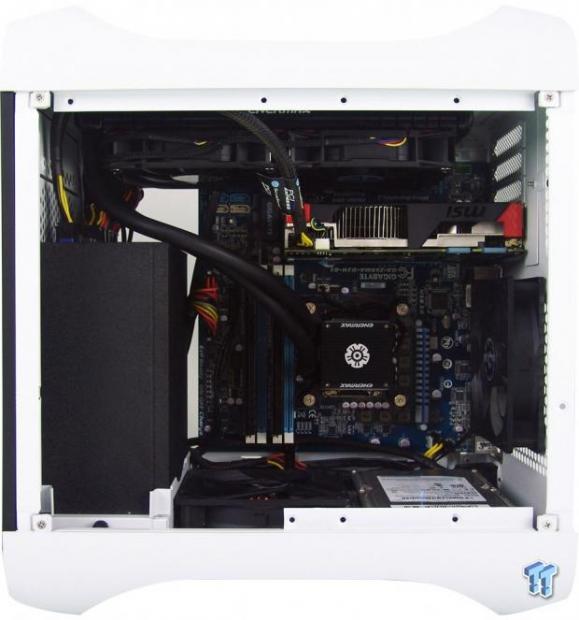
After some serious thought, and trial and error, this is what we came up with. It's not the easiest chassis to get things into with the choice of components we used, but we got everything in cleanly with a bit of patience.
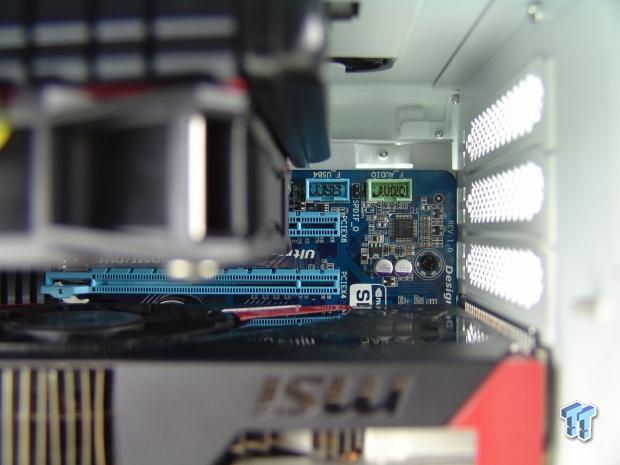
One issue we did find is that you have to remember to plug in the front panel wires way ahead of adding the video cards and or fans/AIOs to the top. We also found that after addressing the wires, they are a tad short, leaving the panel to hang rather than rest on the table.
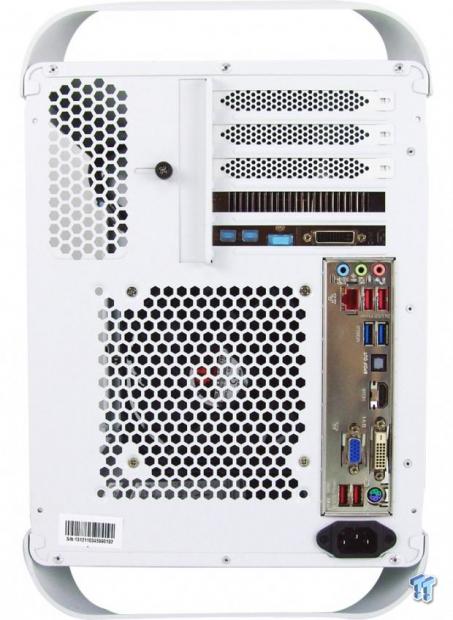
The back of the chassis filled right out without issue. The dust shield went into place without much hassle, and the video card is securely fastened just by the dimples in the adjustable cover plate that is currently holding the card and slot covers in place.
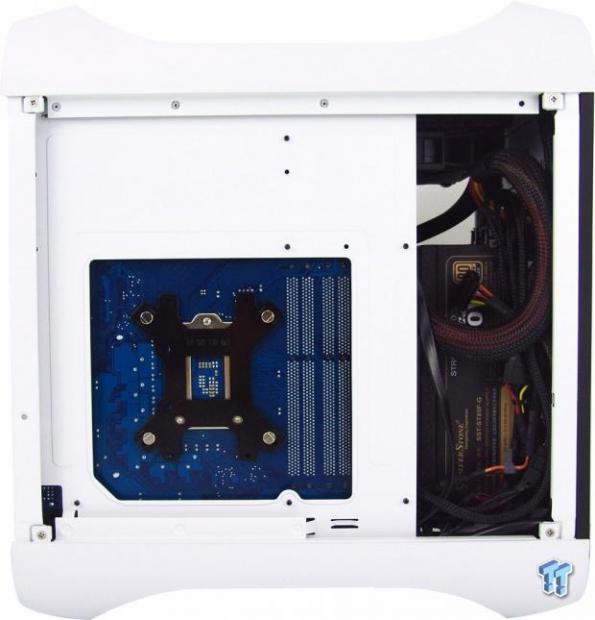
From the left, there is not much to see. However, the access hole is well placed, allowing full access, and we can also see that next to the PSU is a great place to tend extra wiring if you do not have a short cable kit like we used.
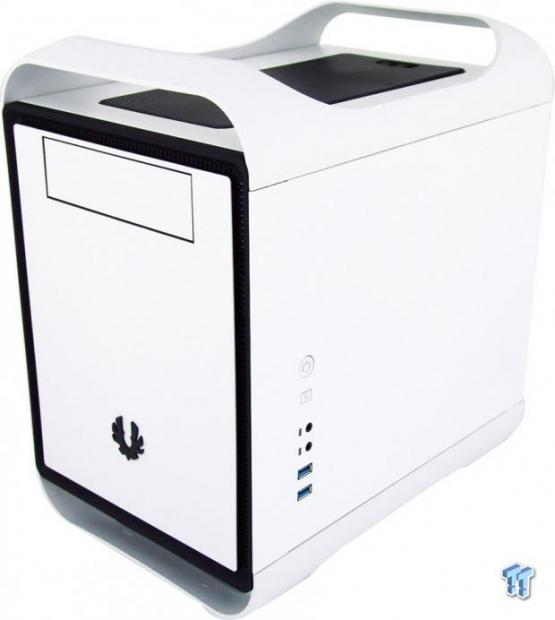
We found no issues getting the panels on; in fact, they slide right into place. With everything all bundled back up, all we have to do now is add some power, and get to the testing.
Powering the Prodigy M, and our system, we missed the flicker of the white glow of the HDD activity LED, but the power LED is at full glow. Of course, our AIO kept the thermals down inside, and the fans are barely audible; the AIO was the loudest thing in this chassis. Without the AIO, and with just stock fans, temperatures inside may suffer if you are just planning on using the stock CPU cooler.
Final Thoughts
On the outside of this chassis, there is nothing to get really excited about. If placed next to the original Prodigy, unless you can get a view of the bottom or back of these cases, you will be hard pressed to tell them apart. But that isn't what sets the Prodigy M apart; what sets it apart has everything to do with the interior. Here, BitFenix took all the messages and images of what the community wanted and had done to the original design, and reworked it into an almost perfect design - all in the same restricted space they had before. Now we not only get a vertically mounted motherboard, but it is also inverted, which many will tell you is the better orientation, thermally speaking.
Then we get more storage options with the new rack and offerings in the floor. One of the biggest improvements in our mind with the Prodigy M is that you are no longer limited on what power supply can be used by the short cage. Now you can have a seriously power hungry system installed, and still have the means to be sure it has ample power as well.
Issues are very limited. Of course, there are those that will complain that the handles are flimsy, and while the FyberFlex sort of specifies flexibility, the amount it has is nothing to be worried about. We have yet to have any break on us. The only other thing we wanted to bring to your attention is the side panel wiring. Here, we don't mind so much that we had do tear things down and reinstall them once we realized the door was still sitting across the room.
Our issue stems from two other things. First, the wiring is a tad short, and will leave you hanging the panel while trying to connect the ends. They did try to correct for this with plugs on the panels PCB. Also, two of the clips are 4-pin, and with no notation, or way to see the connection on the motherboard in our case, we were left guessing and crossing our fingers that we got it right.
Cooling is a concern that may need addressed if you plan to run a serious build in here. There are plenty of locations to make the air flow much better inside, but with the negative pressure design that they offer out of the box, it may not be enough to leave you comfortable with the results. However, we were more than happy when we flipped the fan on the floor and added in the AIO. Of course, someone will say: "What about sucking in the PSU exhaust?" To that, we only say this: With a draw of around 300W from an 850W PSU, we are not even warming things up, let alone delivering any sort of noticeable heat.
All things considered, we do like the redesign, and it will save many potential clients of the original version a ton of time. Ever since the Prodigy was released, I have wanted to use it for a Micro-ATX system I still have here. The issue was that I just did not have the time to get it done properly. With the Prodigy M, we feel that BitFenix offers a chassis that is on the next level when compared to the original, and not only when using a Micro-ATX based system, but even for those wanting to use a Mini-ITX board.
Even if the cost has increased to $99.99 with the newer design, for what you get, and the issues that were solved from the original design, we still feel it is worth every penny. It just takes time, patience, and planning, and you could have one rockin' system in a chassis that you never thought you had the talent to pull off.
PRICING: You can find the BitFenix Prodigy M for sale below. The prices listed are valid at the time of writing, but can change at any time. Click the link to see the very latest pricing for the best deal.
United States: The BitFenix Prodigy M (White) retails for $99.99 at Amazon, and the BitFenix Prodigy M (Black) retails for $122.99 at Amazon.


 United
States: Find other tech and computer products like this
over at
  United
Kingdom: Find other tech and computer products like this
over at
  Australia:
Find other tech and computer products like this over at
  Canada:
Find other tech and computer products like this over at
  Deutschland:
Finde andere Technik- und Computerprodukte wie dieses auf