Introduction
Since the release of the Prodigy, BitFenix has been offering one of the coolest little boxes for any mini-ITX build. With the basic essence of a cube, adding in large logos to the front, covering the entire thing in SofTouch coatings, and of course, offering those one of a kind, curved feet and handles that took that basic cube into the realm of curvy and rounded. Love it or hate it, there is no way to deny the success of this concept, as the Prodigy has been the heart of many modifications and build logs since its release. Of course there were some reported issues with stability with flexible feet, even cracking, or buyers plainly not liking the look of what BitFenix offered at that time.
Building from that success, BitFenix is now offering yet another mini-ITX tower chassis that takes quite a bit of its design and heritage from the Prodigy. With this design, most of that lineage is all hidden inside of this new chassis. As BitFenix does this revisit, they also took great strides to make sure that this new release is a chassis that can stand on its own four feet and potentially even take potential Prodigy buyers into another direction. The coolest thing about this new interpretation is that BitFenix offers styling from the chassis from which its name and lighting scheme.
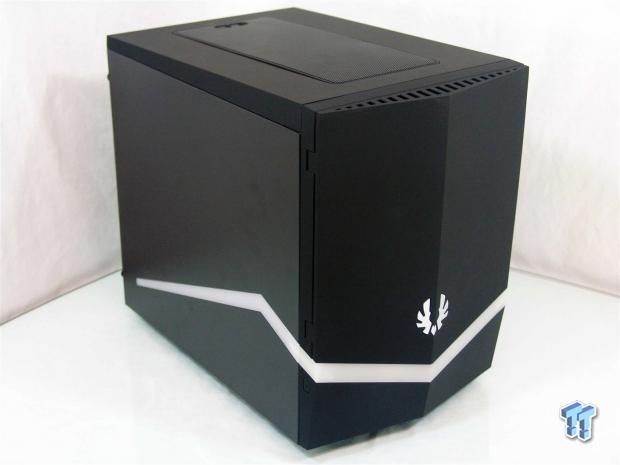
Today we will be looking at the BitFenix Colossus Mini-ITX chassis. In this design, you will find everything you loved about the Prodigy on the inside, but the outside is aggressively styled with a pointed center to the bezel, a raised angled top that makes the front of the Colossus taller in the front than in the rear, oh and likely the feature that will captivate buyers would have to be the new way BitFenix illuminated the front and sides of this chassis to be an addition worthy of what the original Colossus offered.
It will soon be easy to see that BitFenix has been able to do both families of cases in one swoop with this new Colossus Mini-ITX chassis, and I bet you will be hard pressed to not find something about it that appeals to you as well.
Specifications, Availability and Pricing
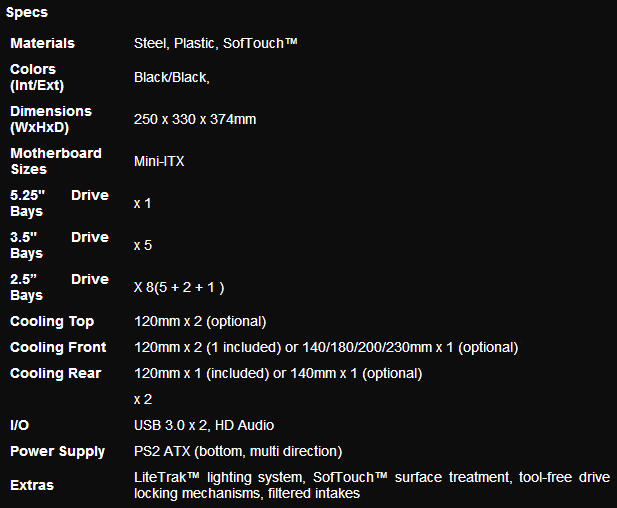
The Colossus Mini-ITX chassis is made mostly of steel painted black throughout. The front of the chassis offers a pointed, plastic, front bezel that has been coated with SofTouch and also offers a large V-shaped light under a BitFenix logo. The sides of the chassis continue the lighting as it angles across both sides. There is even a button provided to swap colors between red, blue, and green lighting. The front I/O is offered on the right panel, and is why the front door swings to the left. Inside of the chassis there is a single, yet removable 5.25" bay at the top of the chassis. Below that is room for many fan options, including 230mm fans, and there is a dual hard drive bay arrangement that is completely removable and modular. The motherboard tray sits above the PSU area, and will only house mini-ITX motherboards. For those looking to add a powerful video card, two expansion slots are provided in the back of the chassis.
Moving back to the chassis cooling, BitFenix ships this chassis with a 120mm in the front, and another in the rear of the chassis to offer some basic airflow. For those looking to add options, the top of this chassis will house a pair of 120mm fans, the rear can be changed out for a 140mm fan, but the front has all sorts of options. There can be two 120mm fans, a single 140mm, 180mm, 200mm, or 230mm fan to blow as much air through the front of the chassis as you need. For those looking to water cool inside of this compact chassis, with the optical drive removed, both AIO's and custom loops can be housed inside. While there is room for a radiator at the top, and one at the front, if trying to run a pair of 240mm radiators, thickness and fan placement may cause conflicts between the two areas.
While the Prodigy is available now for $79.99, just as some perspective, the release price we were told for the new Colossus Mini-ITX being what it is really makes sense, and is even a fair deal. Once you consider that the Prodigy was basically flat, and the handles made of plastic weren't really that huge of a cost to manufacture. Once you look at R&D for lighting schemes that won't melt when left on for days, weeks, even months at a time is just one thing to look at. The front of the chassis is completely new, and we know new tooling does not come cheap.
With those sorts of things in mind, and the fact that the Colossus Mini-ITX will list for $99.99 US dollars makes a whole lot of sense, and is easily worth the investment for what BitFenix is offering this time around. Now there may be an initial price hike with limited locations at first, but wait it out, pricing will soon settle out.
Packaging
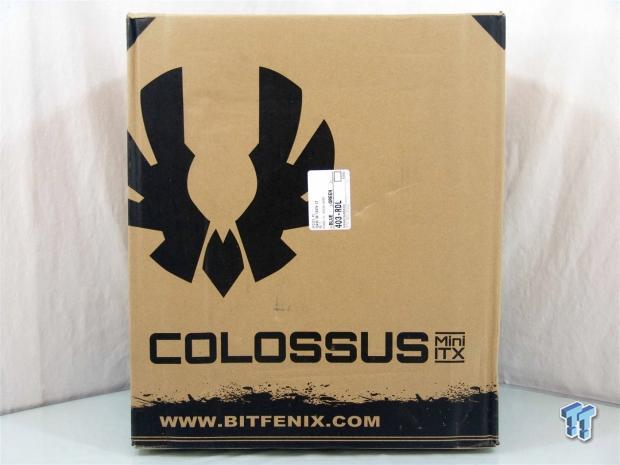
The Colossus Mini-ITX comes in packaging we are very used to from BitFenix. They were one of the first to go with the brown cardboard packaging with black printing of things like the logo, chassis name, and any other bits to highlight things like a web address.
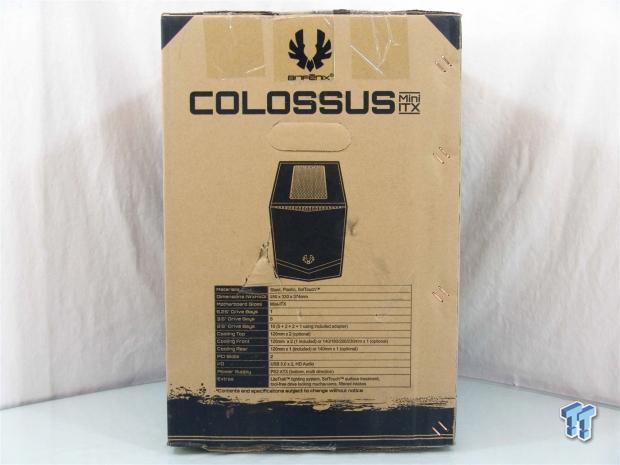
On this side we get the first real concept of the chassis inside via the rendering placed above a similar specifications chart to the one we just discussed.
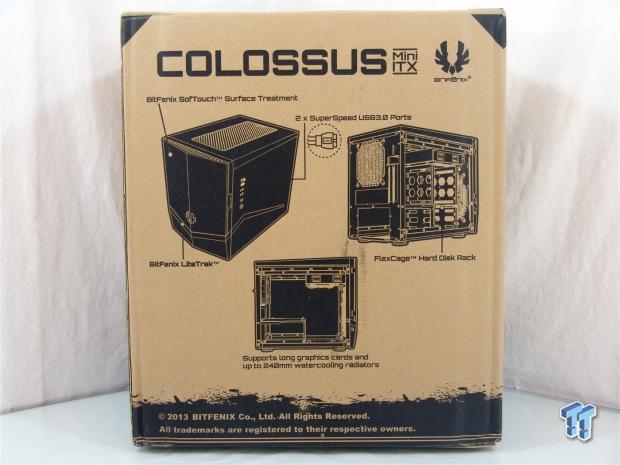
The back delivers the naming first at the top. Below you will find three renderings of the chassis from various angles as text points out five features on or in this design.
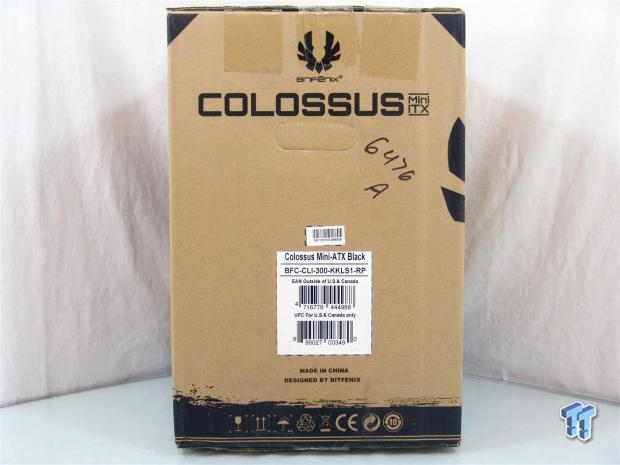
The last panel also offers the name of the chassis, but is used for housing a couple of stickers. The bottom sticker also shows that we have a Colossus Mini-ATX in black, but I can assure you this is a mini-ITX only chassis.
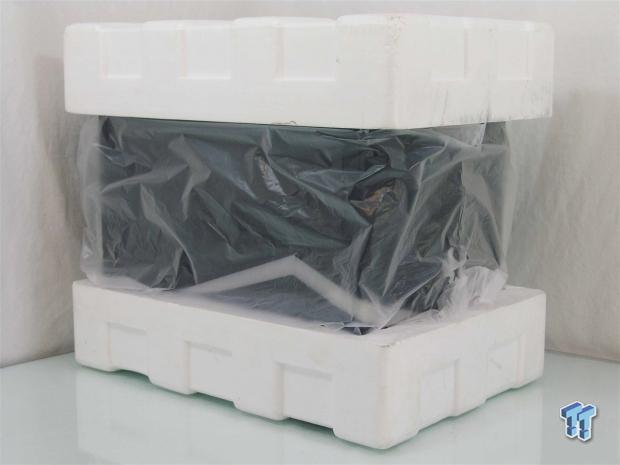
Even though the lower Styrofoam cap was broken, the pair of them did their job diligently as the chassis inside of them and the plastic liner suffered no damage from the trip. We would much rather the packaging took the hit and saved the product, and with this that is exactly what happened.
BitFenix Colossus Mini-ITX Chassis
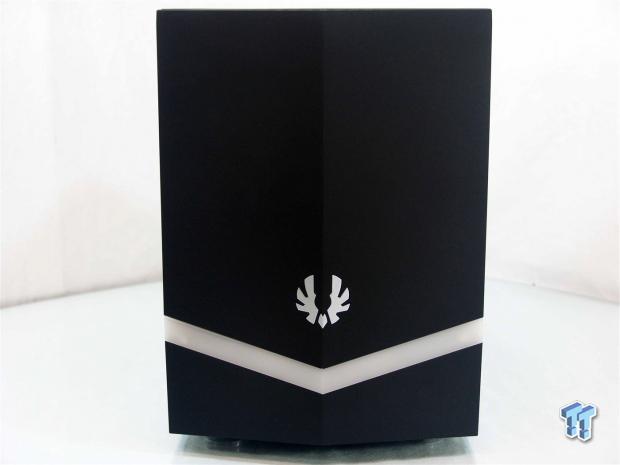
The front of the Colossus Mini-ITX is almost entirely black as the center pint of the bezel is extended to give the front almost the same shape as the white bar of plastic that will soon be illuminated after the build. Just above the light bar is the BitFenix logo as the only branding on the chassis.
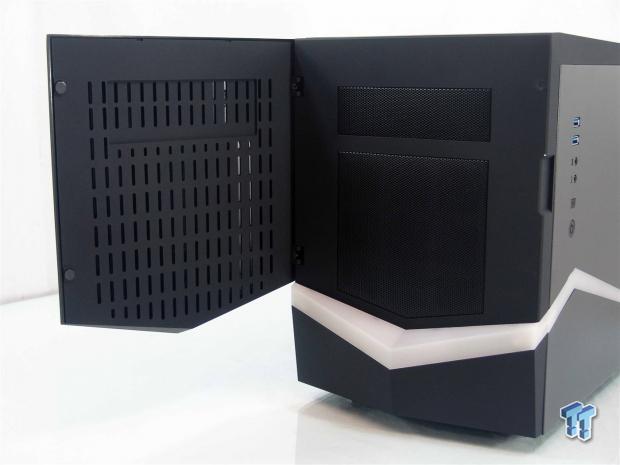
The section above the light bar opens to the left to expose the vented inner door panel that allows air in through the top of the door to flow in through the vents into the main body of the chassis. On the face there is a single, mesh, 5.25" bay cover and a large mesh cover for the intake fan.
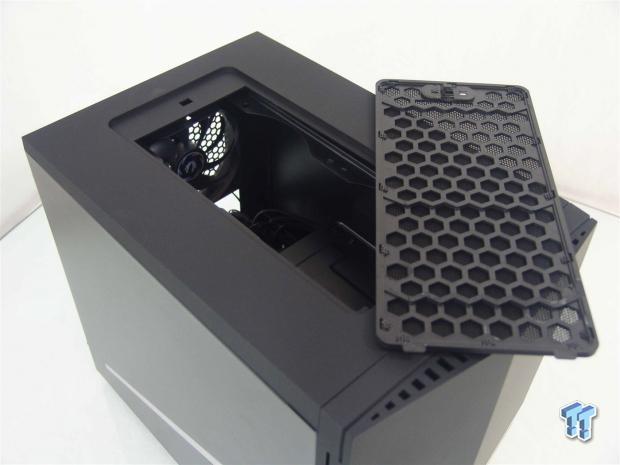
The top of the chassis has a removable mesh insert that allows access to mounting 120mm fans or a radiator into the top of the chassis. This cover also has a lock at the back end to slide-lock the panel back into the roof.
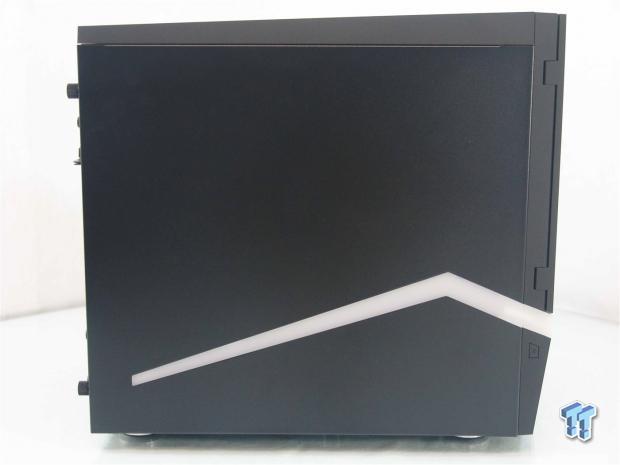
The top of the chassis angles higher at the front, to give it an aggressive stance, while the SofTouch coating is not an exact match to the paint on the panels. I am however more interested in the continuation of the light bar through this panel too.
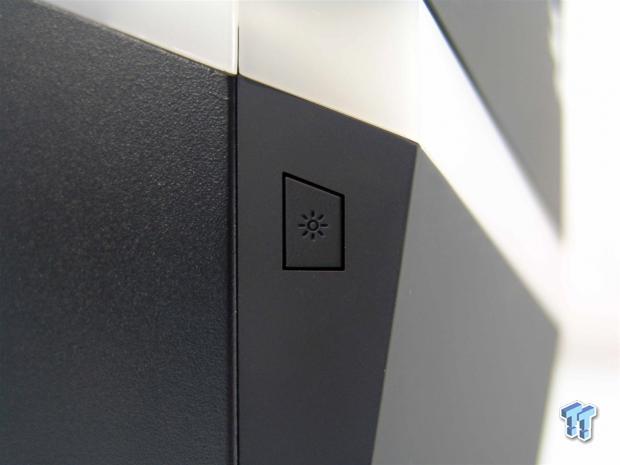
On the side of the front bezel, just below the light bar as it wraps to the side of the case, there is a small lighting button. This is where you can change colors or set the chassis into a breathing mode where the illumination will pulse on and off.
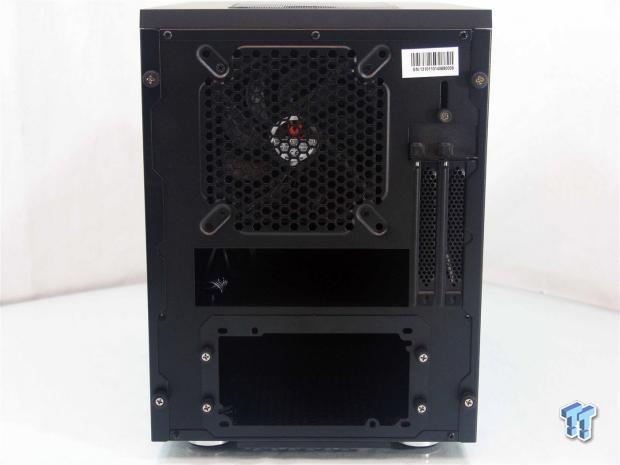
Around the back, the top starts with the 120 or 140mm exhaust fan options. The rear I/O is laid on its side next to a pair of expansion slots, and the PSU installs at the bottom. They do also offer a plate to make mounting the PSU a little easier as well as adding a way to extend it for longer PSUs.
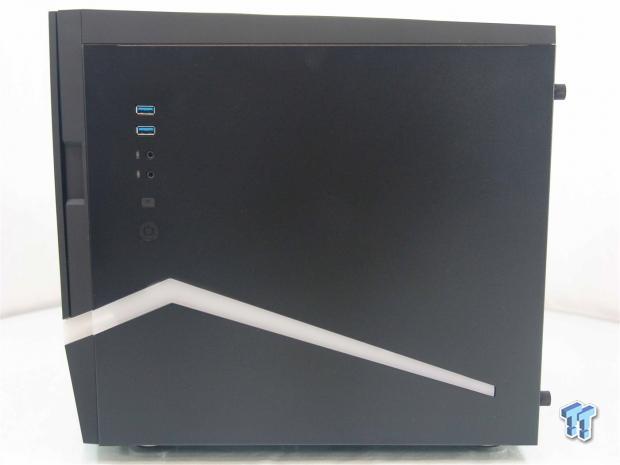
The right side then offers the front I/O panel high on the left side of the panel. The same treatment is given to this side as far as the design and shape of the light bar as it also extends back from the front bezel.
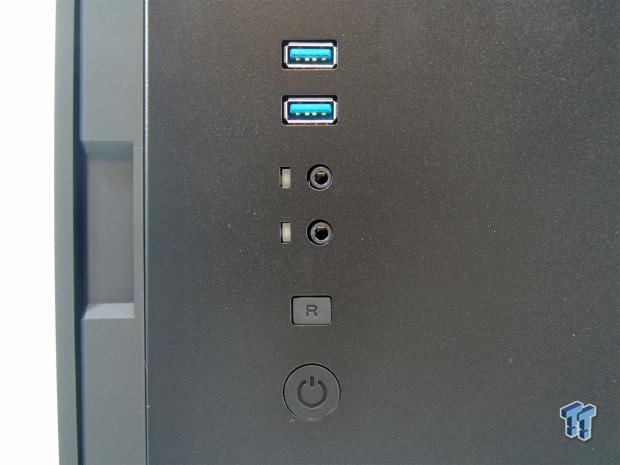
Getting much closer to the I/O panel, we can see it offers a pair of USB 3.0 ports, HD Audio jacks flanked to the left with the HDD activity and power LEDs, and the bottom offers a small reset button just above the larger round power button.
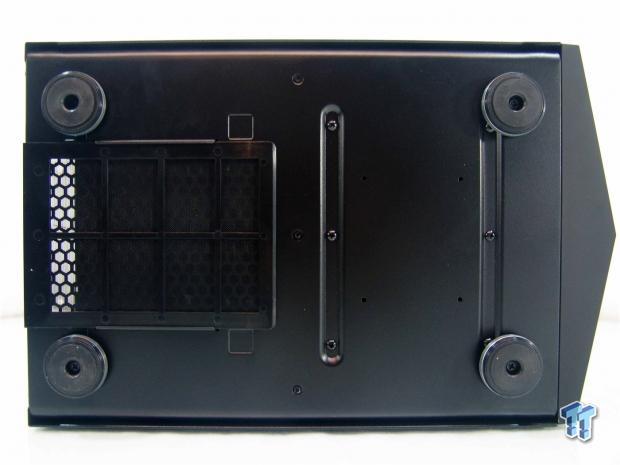
Under the chassis we find four large round feet with rubber pads that give the Colossus sure footing. There is a dust filter under the power supply, and you can also make out screws that are holding in the bottom of the HDD rack.
Inside the Colossus Mini-ITX
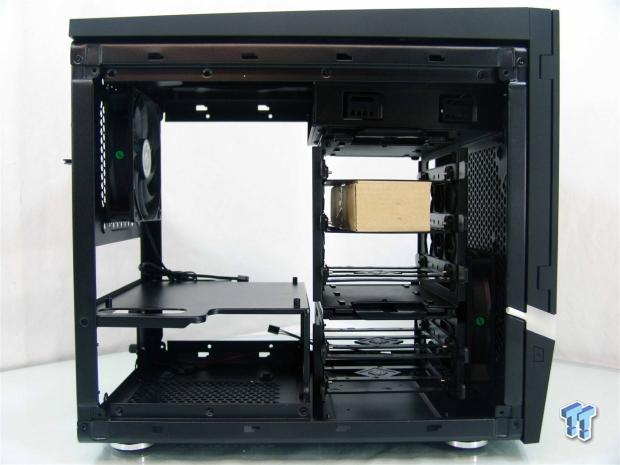
Once both door panels are off the chassis we can see the completely black interior. There is a small box of hardware in the hard drive tray, but the paperwork was shipped outside of the chassis.
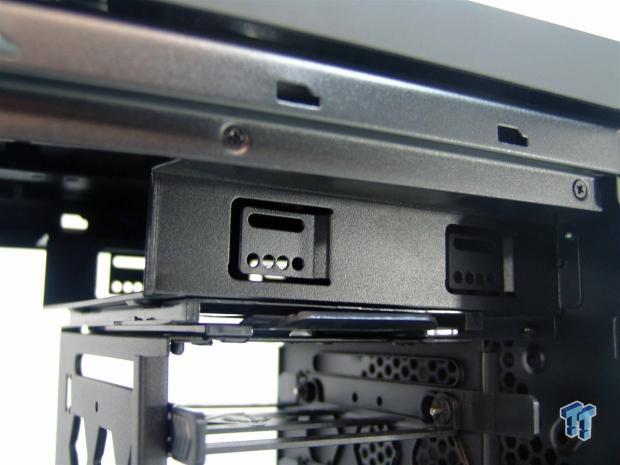
The top of the chassis offers a single 5.25" bay for an optical device or fan controller. It is also screwed into the chassis and can be easily removed to fit more cooling inside.
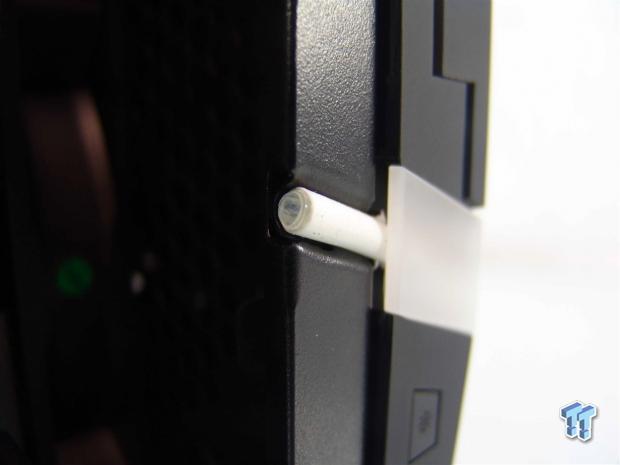
On the right edge, there is this LED at the end of a tube. As the doors slide on, they go over this LED, and this is what illuminates the milky white plastic on the door panels; no wiring to deal with.
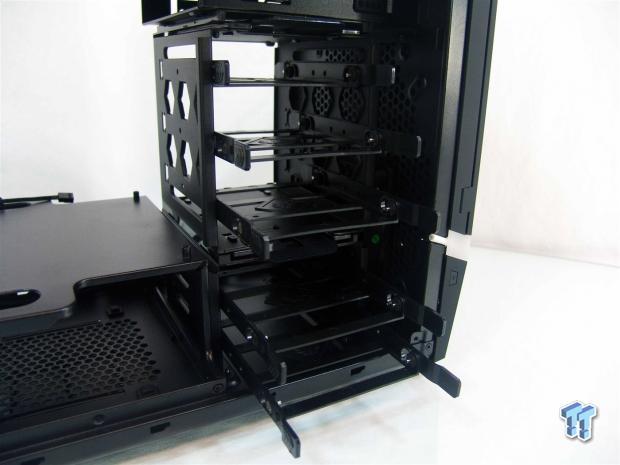
There are two sections to the HDD rack. The top part offers three trays for both 2.5" and 3.5" drives. Grasping two tabs this is easily removable. As for the lower section, there are two drive trays, but to remove this section, you need to pull six screws from the bottom of the chassis.
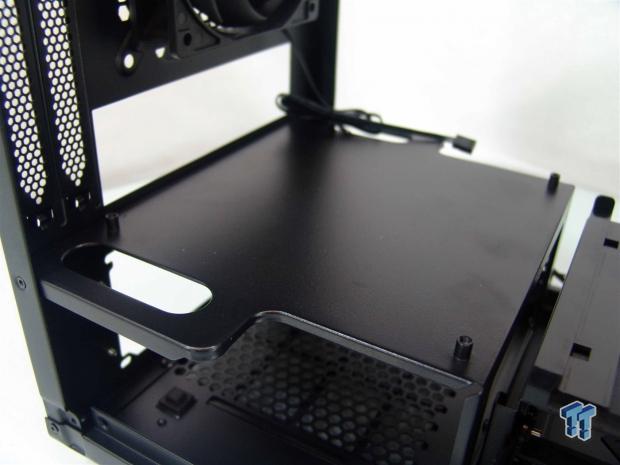
The motherboard tray has formed edges for structural support, bit both side of the tray also have wiring holes to cleanly pass wiring to the Mini-ITX motherboard that will soon be installed.
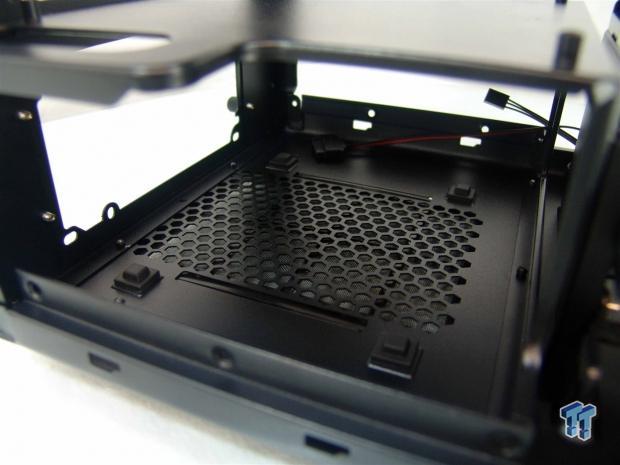
Under the tray is where the PSU will slide it. BitFenix did not add any length here, so some PSUs will have issue in length or possible the connections if it is modular. When you do slide the PSU in, it will rest on four pads, both for support as well as isolating vibrations.
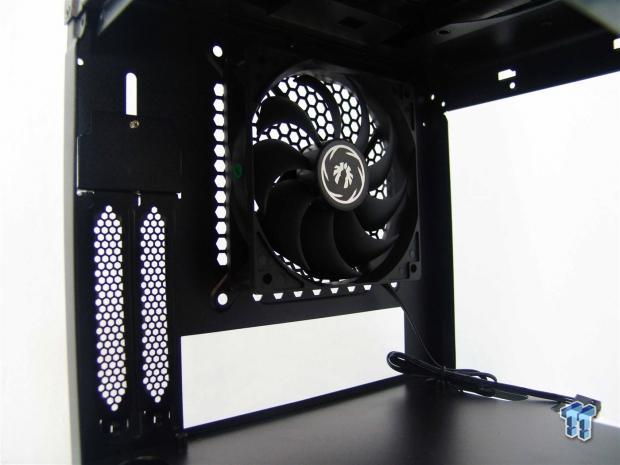
The back of the chassis has the same 120mm fan with a 3-pin connection as is found in the front of the Colossus Mini-ITX.
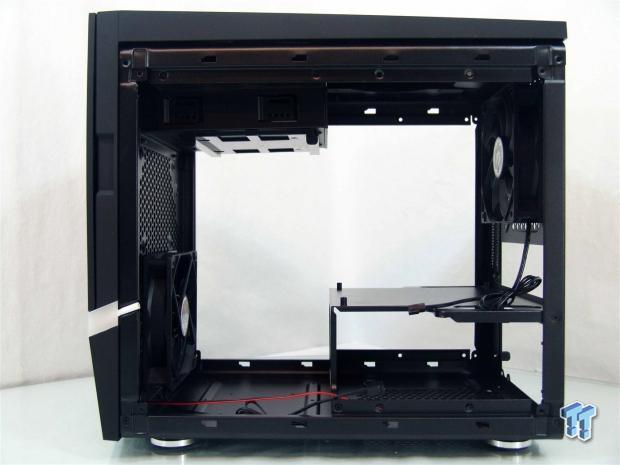
After getting some of the stuff out of the way for what we have planned, we spun the chassis around to look at it from this side. There are a couple of front panel wires to tend to, but remember, the I/O is mostly contained on the side, and will get wired last in the build process; something to remember.
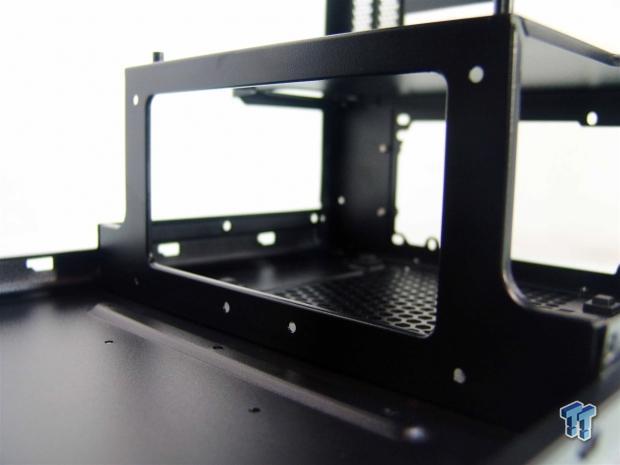
Removing the main stack of drive trays will allow for room for a pair of 2.5" drives to mount in front of the power supply, and there are also four extra holes in the floor to mount one where the rack used to stand.
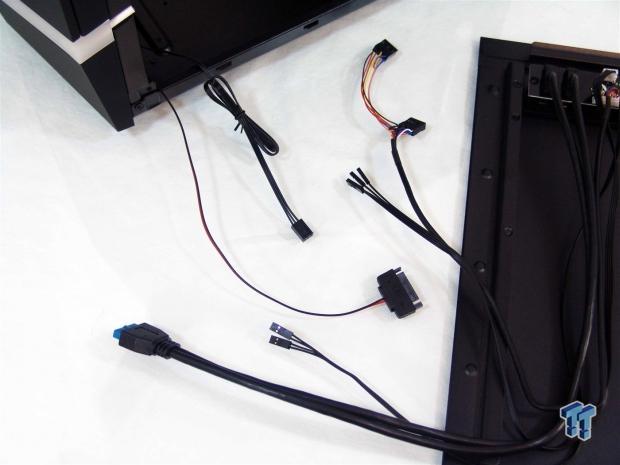
Connecting the wiring is pretty easy since there isn't a whole lot of planning involved early. The USB 3.0, lighting and switch wiring, and the audio connections all come from the side panel. Just the SATA power for the lights and a couple of 3-pin fan leads are all to tend to inside of the chassis.
Accessories and Documentation
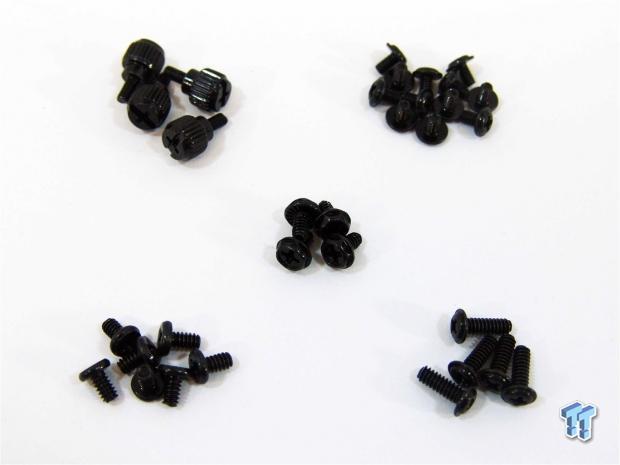
Inside of the hardware box, you are given a full assortment of screws to get any build installed. There are thumbscrews for the optical bay and motherboard screws to the left. In the middle are the power supply screws, leaving the 2.5" drive screws at the top, and 3.5" drive screws at the bottom.
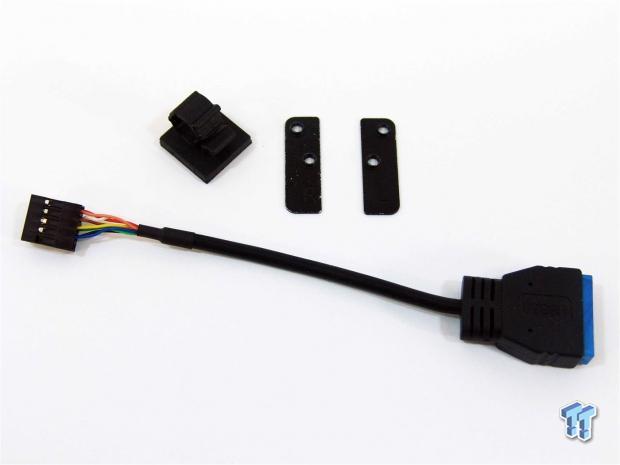
Also included as part of the hardware kit is what we have here. There is a USB 3.0 to USB 2.0 for those with no native USB 3.0 on the board, there is also a wire management clip with adhesive on the back. What I find strange is that I would almost swear those are hinge plates, but I see no way to reverse the door swing on this chassis.
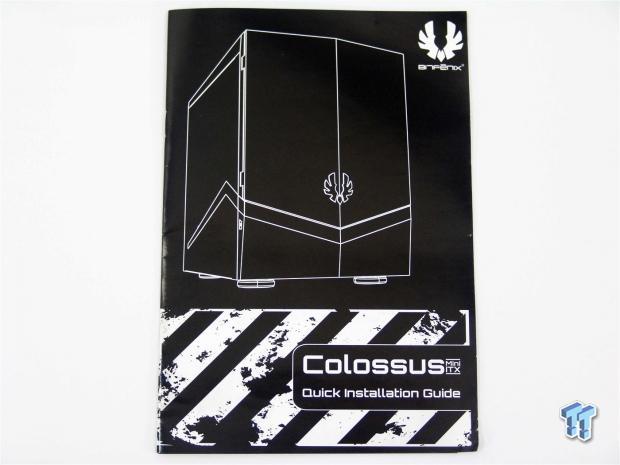
The manual is done all in black and white on a shiny paper. It offers an outline of the chassis and while it says this is a quick installation guide, there is a full set of instructions inside.
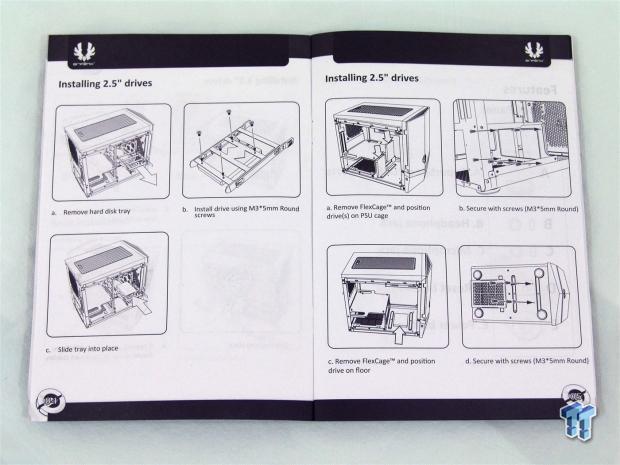
After a parts list and some information on how to remove the panels, BitFenix goes full out ot show how to install everything, and even go as far as to show the screw locations for those intending to remove parts like we do.
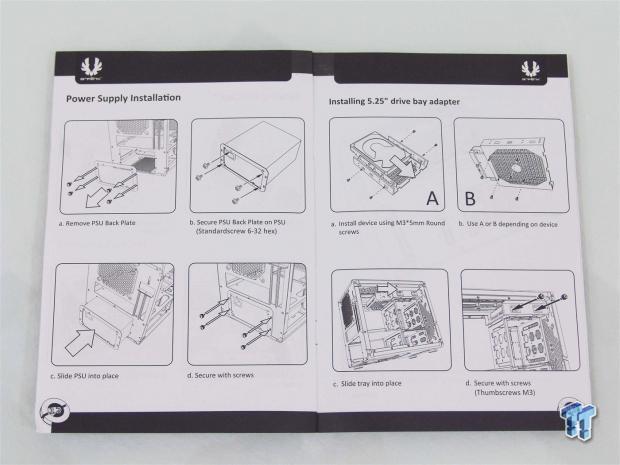
This just further confirms what I was saying. Usually in a guide, we get limited information, but BitFenix goes all out to deliver renderings and text for every step of the build and leave nothing to chance when looking through this full on manual.
The Build and Finished Product
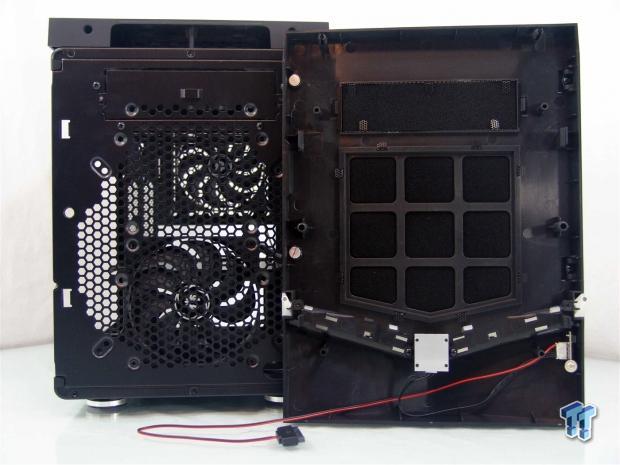
Four tabs hold the bezel to the frame, and once removed it is easy to see the foam in the bay as well as the larger inlet in the middle acting as dust filters. It is also much easier to grasp the amount of fan options for the intake to this chassis.
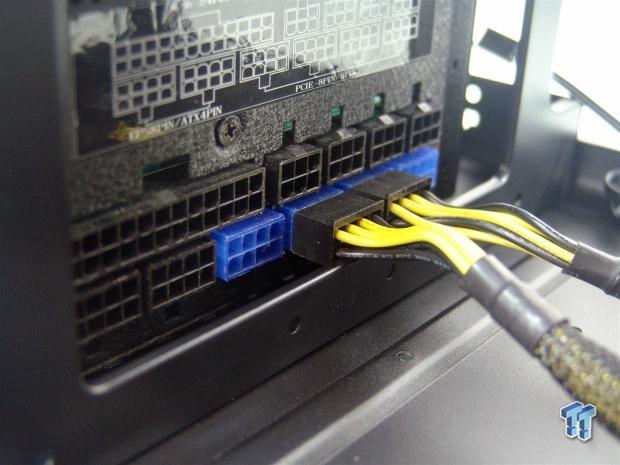
In total length the SilverStone PSU was a fit, but once we slid it in, we realized that the modular connections ran into the lower steel frame. Time to find "old trusty".
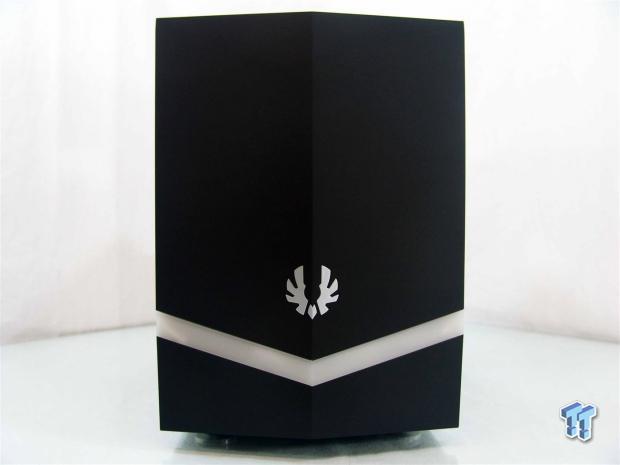
Once everything is installed, the front of the chassis makes no change at all. If we were to look behind the door, nothing changed again since we did not opt for an optical drive at the top, so we left the plate in place.
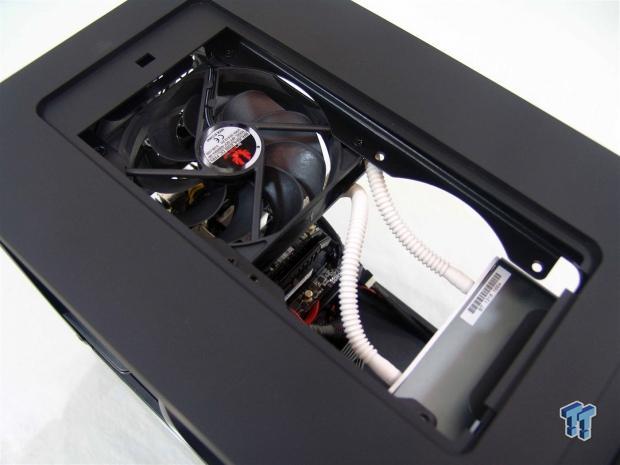
We did remove the front fan to allow for an AIO to go into the front, but we just added to to the top of the chassis to slightly improve the exhausting of the chassis over leaving it in the box.
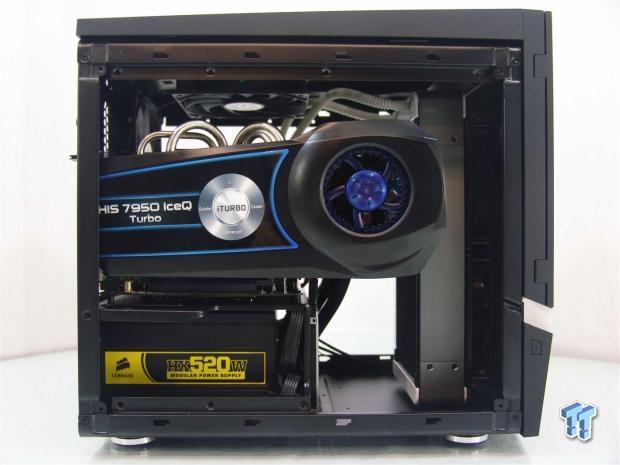
With "old trusty" in at the bottom and the HD7950 installed, there is very little view of anything inside of the chassis, and remember, this panel will be facing away from you most times.
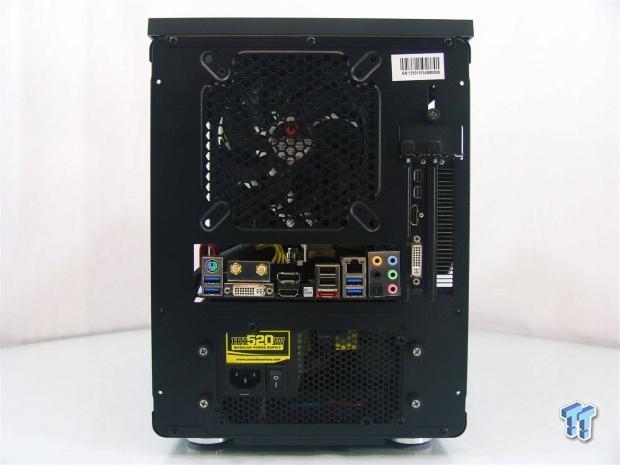
Without a dust shield for the rear I/O for this motherboard, we did test fit one, and there were not fitment issues. The PSU goes in easily, and with the screws for the slots and its cover on the outside, it makes accessing them so much easier than if they were inside.
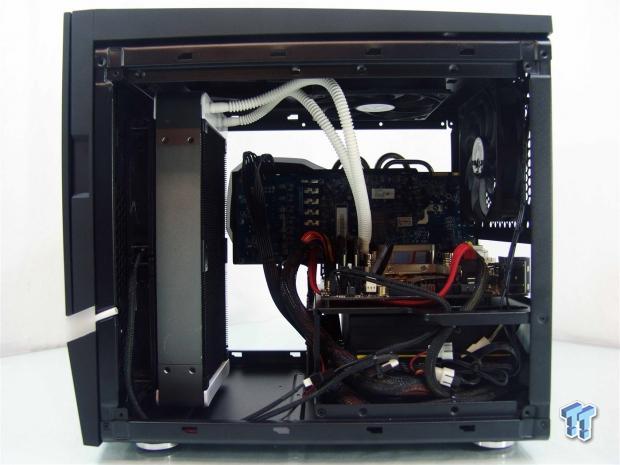
Looking inside form the right side of the Colossus Mini-ITX, now we can tell what is going on. Wiring is meant to be stowed next to the power supply, and doing so does leave the rest of the chassis clutter free for much better airflow inside of the chassis than if we had wires all over.
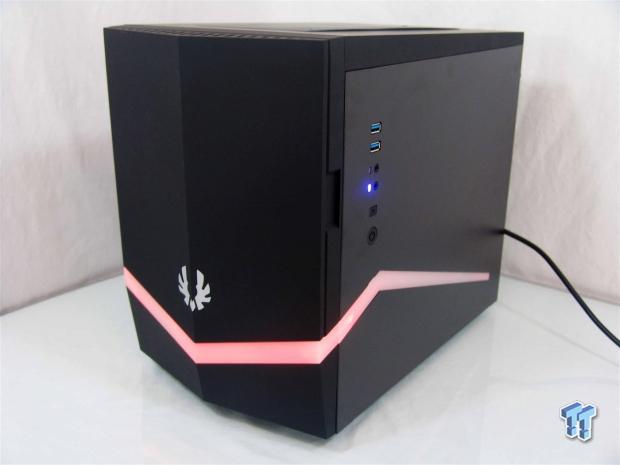
Powering up the Colossus Mini-ITX delivers roughly 33dB of noise, but with the Tundra inside, we have a much louder system running. The first thing to do is to hit that light button to see what happens, and here we see the LEDs are in the red selection as the front and side of the chassis are now glowing.
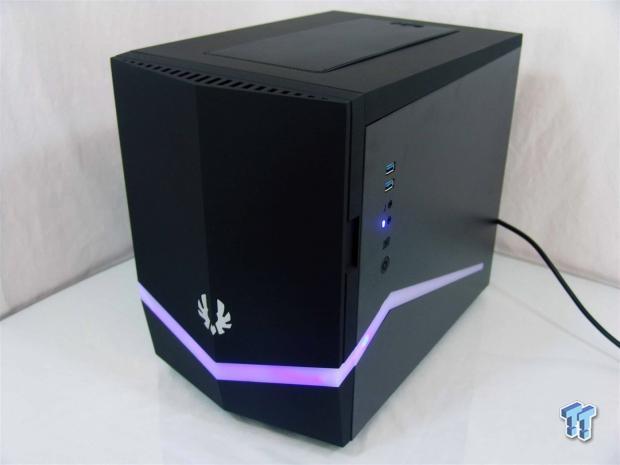
Pushing the light button again will deliver the blue lighting mode that again illuminates the sides as well as the front section.
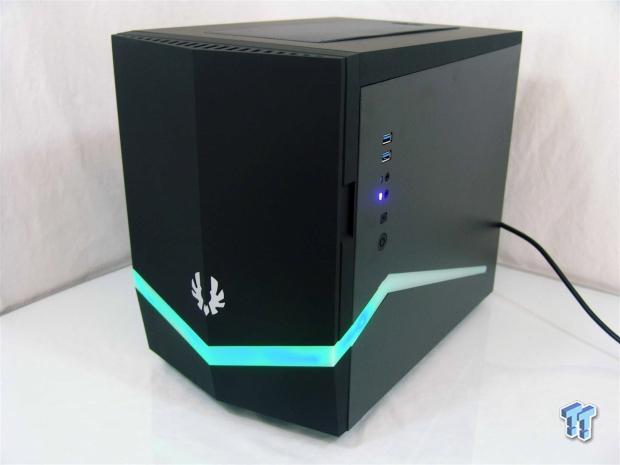
The least option outside of the fourth push that activates a breathing mode is obviously the green LED lighting we see here.
Final Thoughts
Now I vividly remember back to the original Colossus and how much I liked that someone was thinking outside of the box for chassis illumination. Of course there are strings of LEDs or SMDs, but the way it has been done then as well as now with the use of a milky white plastic to carry the intensity of a few bulbs into bright strips of various colored accents was something that sold me on the Colossus then, and with the redesign, and wireless design they have implemented this time around, they sold me on it again. On the flip side I was also a big fan of the Prodigy, and while there are some haters, BitFenix showed they again were coming up with ideas that were outside the realm of normality. While this is essentially the same guts as the original prodigy, we took full advantage of what was offered this time rather than air cooling the system, and was pleasantly surprised with the structural integrity of the chassis with more than half of the structural assemblies removed as well as finding everything ready and willing to take on the parts we chose almost randomly off the shelf.
Temperatures for our system of course were great. Considering we went to an AIO in the front with some very powerful fans, as well as having a pair of 120mm fans to exhaust out the back as well as at the top, all the components stayed chilly, well all but one. The card did suffer a bit, but that is because of this specific 2+ slot cooler the HIS offers. With a normal 2 slot cooler, there is near 5mm of room between it and the panel to allow for a steady flow of cool air to most cards.
Its left handed nature is somewhat different than most designs, it stay current in the feature set, and with a whole new, much more aggressive styling, people who thought the Prodigy was too subtle now have an option to fit your wants and desires. I don't think that if they had another two or three tries at this design they could come up with a more cohesive mixing of what we remember from both the Colossus and Prodigy designs.
While pricing may be slightly inflated for early adopters, and you may have to come up with an extra $10 to $20 to do so when the Colossus Mini-ITX hits shelves. Once the field levels out and more e-tailers get stock of this chassis, the $99.99 pricing is well worth the investment in my opinion. Think about it, we took almost everything not riveted down out of the chassis, we took a fat radiator AIO and strapped it in the front with no issues, and we even got a relatively clean build done with the limited options for wire management.
Then once we close things off and power it up, the Colossus Mini-ITX chassis gets even better as you get to customize the very cool lighting scheme offered around three sides of this chassis. I for one am a fan of what BitFenix delivered in the Colossus Mini-ITX chassis and hope that they stick with the logic that you don't have to follow the crowd to make a good chassis, doing things outside of the realm of normality is the real meal ticket in today's market.


 United
States: Find other tech and computer products like this
over at
  United
Kingdom: Find other tech and computer products like this
over at
  Australia:
Find other tech and computer products like this over at
  Canada:
Find other tech and computer products like this over at
  Deutschland:
Finde andere Technik- und Computerprodukte wie dieses auf