Introduction
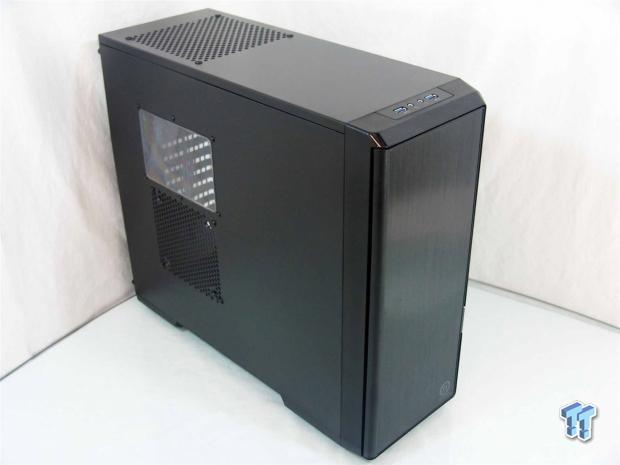
While there are a ton of huge chassis designs that will offer you every feature under the sun, as well as digging as deep as those companies possibly can while offering such cases, there is a huge market looking for something on the complete opposite end of the spectrum. There are quite a few users out there looking to find chassis designs made more for the beginner with a bit of room for upgrades, or just want to be able to keep a full ATX system housed in as small of a chassis as physically possible. This is the angle that Thermaltake has taken in their latest addition to the Urban Series.
We have already seen the original design of the Urban series with the S71 we looked at back in July, and we found that design to be sleek, rounded, and had plenty of features to sway any buyer. On the basic level, this latest addition definitely takes on a similar aesthetic appeal that we found earlier in the Urban series, but the interior has been completely reworked with a completely different design this time around. The idea here is speed of the build and simplicity of design to make a compact yet affordable option to obtain, yet still get the externals that made the S71 a success.
This time around as we look at the Urban T21, keep an eye out for the internal changes, as well as a couple of external things that makes this chassis stand on its own four feet within the Urban series. While there is almost a nostalgic feeling to this interior design, Thermaltake took the steps needed to keep the build as tool-free as possible, making this new Urban T21 on of the fastest builds we have done, was super simple to make it all happen, and while compact, Thermaltake gives everything needed for users to appreciate this design.
If I have yet to gain or at least pique your interest, once you see more, you may very well be on board as well.
Specifications, Availability and Pricing
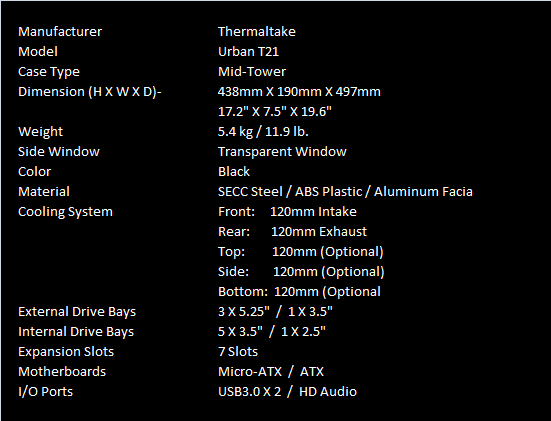
Externally, the Urban T21 has a few textures and materials going on in this design. The front bezel is plastic and has a doubled front door that will open to allow access to the trio of 5.25" bays, a single 3.5" bay, and access to remove the dust filter for the intake. Adding a bit of class, the front facing panel of the door has been trimmed with a full brushed aluminum panel applied to it. The top and right side of the bezel are polished plastic and both contain bits of the front I/O panel. As for the rest of the chassis, both inside and outside are painted with black textured paint, and even the wiring is sleeved in black. The left side panel offers room for a 120mm fan and also has a small window to offer a view of the CPU cooler.
Internally, you have the option in the HDD rack to store five 3.5" drives, all with tool-free clips, similar to what is used to secure the three 5.25" drives. The top of the chassis will allow for a 120mm optional fan and has a dust filter added under the mesh design cut into the steel. The motherboard tray offers room for an ATX or Micro-ATX motherboard, and offers very little as far as wire management is concerned.
The floor of the chassis houses the PSU, and there is also a spot in front of it for another optional 120mm fan, yet both the PSU and this fan spot are backed with a dust filter that covers both. The back of the chassis offers seven expansion slots, and for some form of water cooling support, there are holes that will allow half inch tubing to pass through for external water cooling options.
At the time of writing, there are only pre-listings outside of the various eBay listings. This is because the Urban T21 has yet to release. By the time you are seeing this, listings should pop up with available stock at all of your favorite e-tailers that already carry the massive lineup of Thermaltake products. We were able to ascertain that the MSRP has been set on this chassis at $69.99, so when shopping, look for pricing as close to this as possible for the best deal.
Considering the cost effectiveness of this design, we are not expecting miracles here, but it is time to see what the Urban T21 from Thermaltake has to offer for the price.
Packaging
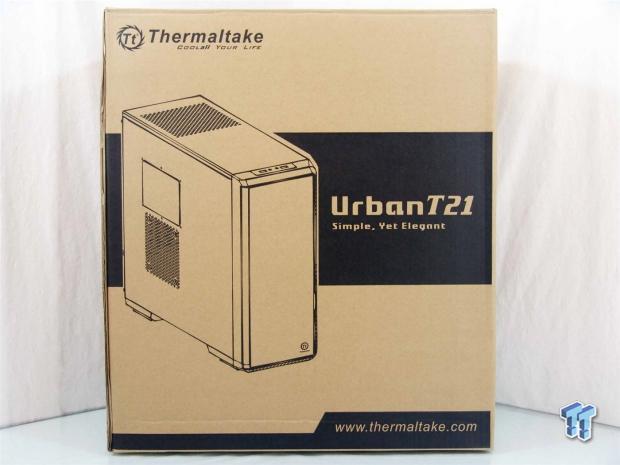
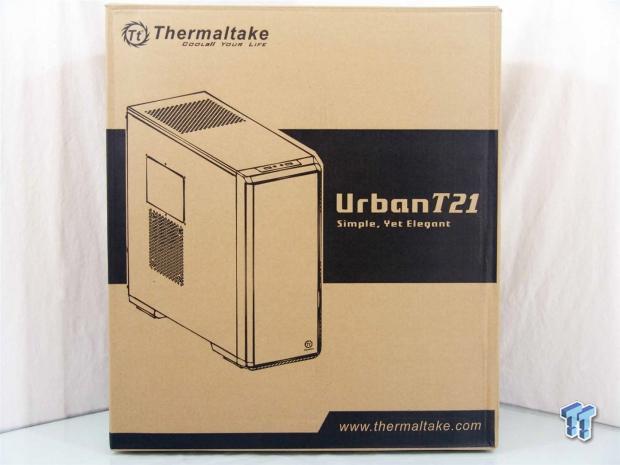
Packaging is kept simple with the use of plain cardboard and black silk screening to display information. This panel is topped with the Thermaltake name and logo, has a large rendering of the Urban T21 in the center, and it carries the tag line "simple, yet elegant".
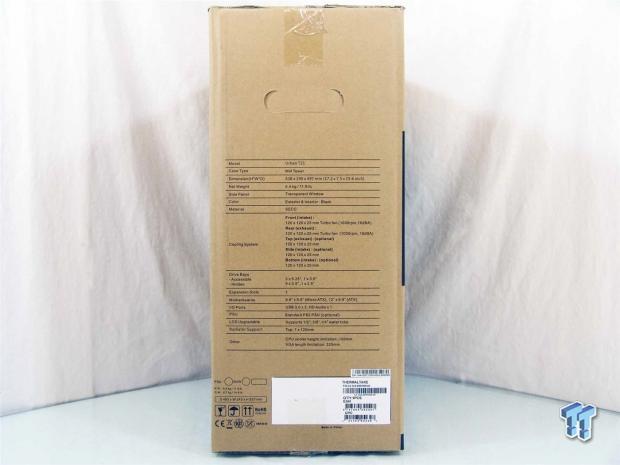
On this thinner panel, Thermaltake displays a large list of specifications about the Urban T21. At the bottom, there are check boxes for power supplies with codes next to it for shipping and tracking purposes.
The back is an exact duplicate of the opposing panel on the packaging. If more information is desired, you can always visit the site provided while at the point of purchase as well.
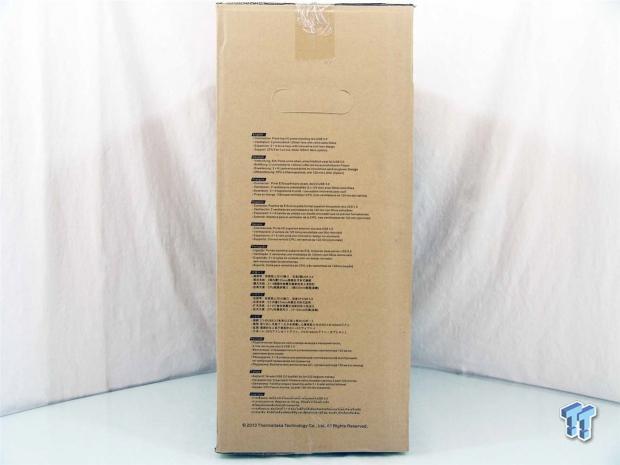
In 12 various languages, covering the massive Thermaltake market, there is a list of four features. The first is the front I/O connectivity including USB 3.0, the fact it includes two 120mm fans, the innovative drive bay tool-less design, and that this chassis has a CPU access hole.
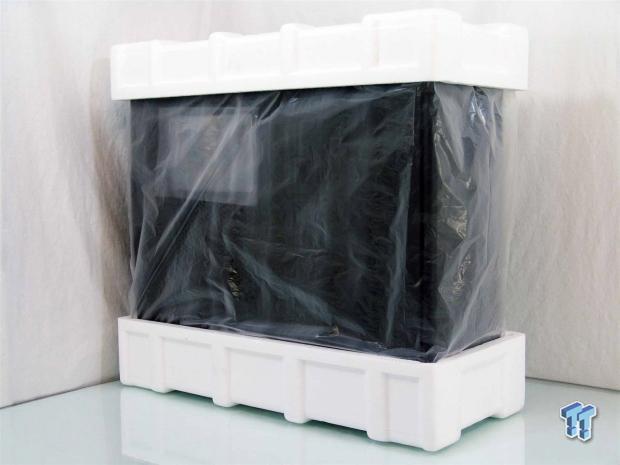
To protect the chassis inside of the box, Thermaltake uses thick Styrofoam caps on the top and bottom, a thin plastic liner, and clingy plastic applied to both sides of the small window. While the chassis weight being light usually bodes better for cases than heavy ones, but this packaging was more than sufficient, and the Urban T21 arrived in perfect condition.
Thermaltake Urban T21 Mid-Tower Chassis
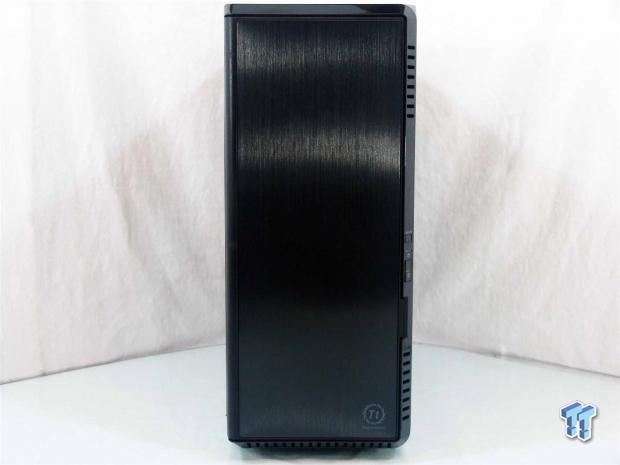
The front of the Urban T21 has the top, right side, and the bottom angled away from the brushed aluminum center section, and these sides are polished and shiny. In the bottom right corner of the door, there is the Thermaltake name and logo as the only markings on this design.
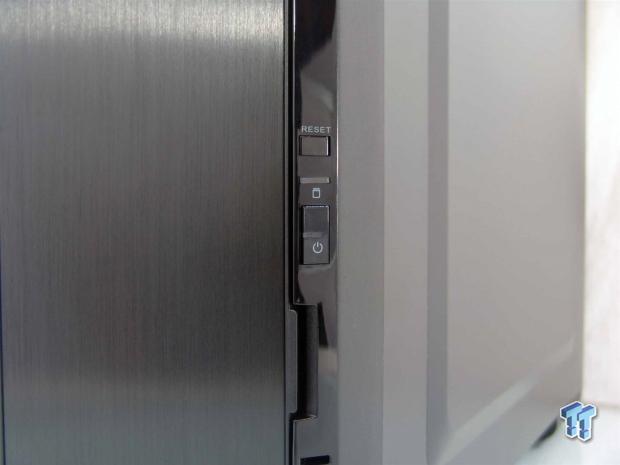
A little past halfway down the right edge of the bezel is where the power and reset buttons, along with the power and drive activity LEDs are placed. Just below them, there is a cutaway section to allow a grip to open the door panel.
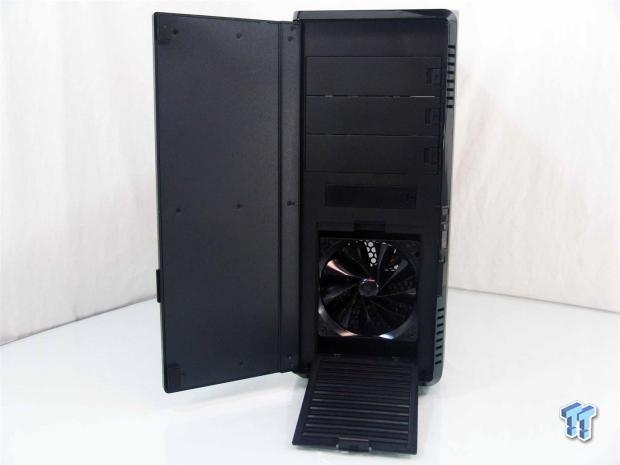
The door is dual layer to keep noise down, and the fan gets air through the slots in the bezel. There are three 5.25" bay covers, a 3.5" bay cover, and the front dust filter that are all removable from this side of the bezel, with no real need to remove it for the build.
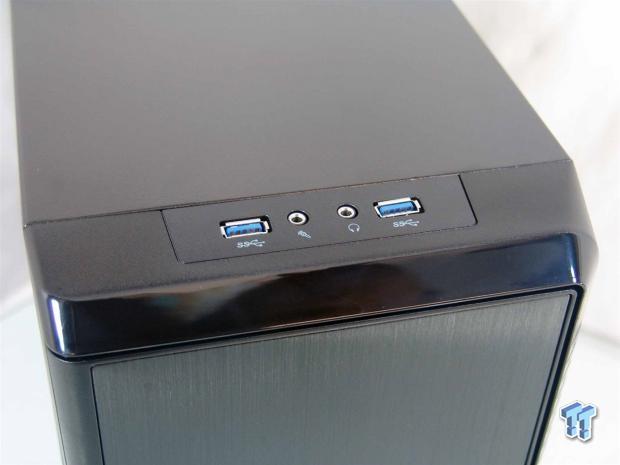
The top edge of the front bezel offers a place for users to plug in USB devices via the pair of provided USB 3.0 ports. To connect a microphone or headphones to this chassis, use the pair of 3.5mm HD Audio connections.
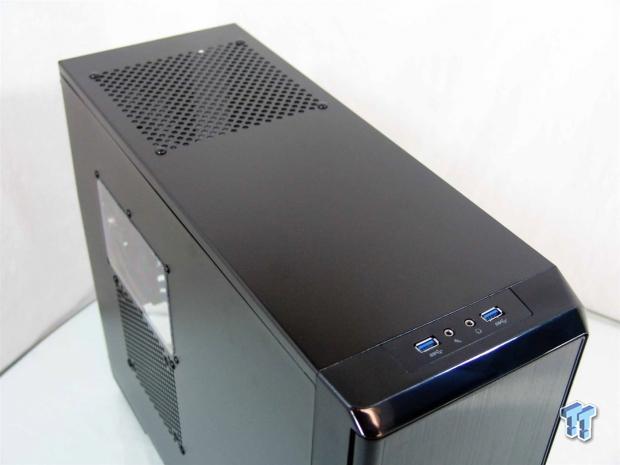
The roof of the chassis is plain steel most of the way back. At the back edge of the case there is room to install an optional 120mm fan. The plastic clips in the corners are holding in a plastic dust filter.
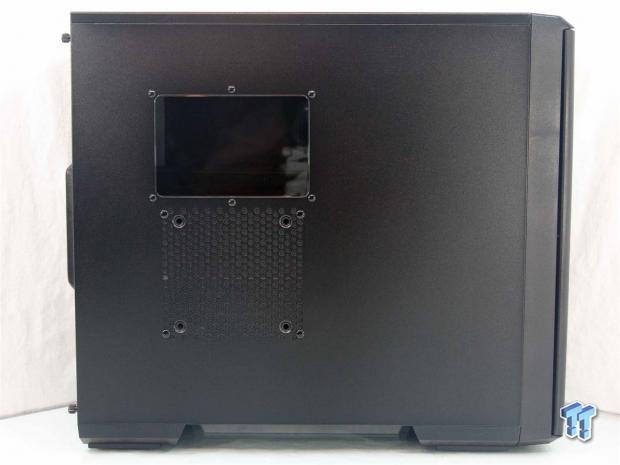
The left side of the T21 offers room for another optional 120mm fan to aid in cooling video cards just below a very small window. The rest of the panel is flat, and the only design features here are seen at the feet as they extend in from the edges and angle up to the floor of this case.
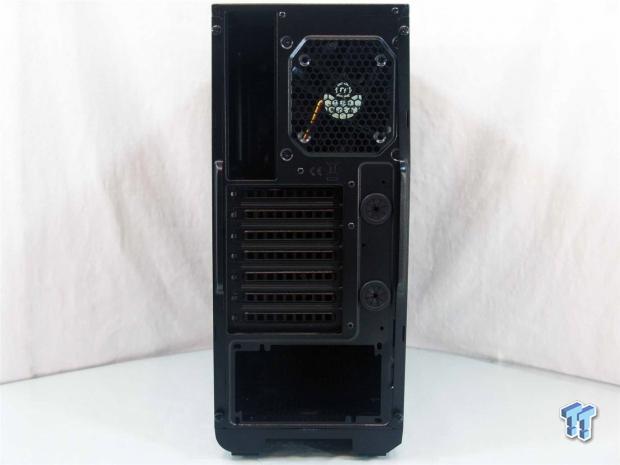
Around the back, there is an area for the rear dust shield next to the second 120mm fan installed in this chassis. There are seven expansion slots and two holes for water cooling tubing below. At the bottom of the chassis is where the PSU will be mounted.
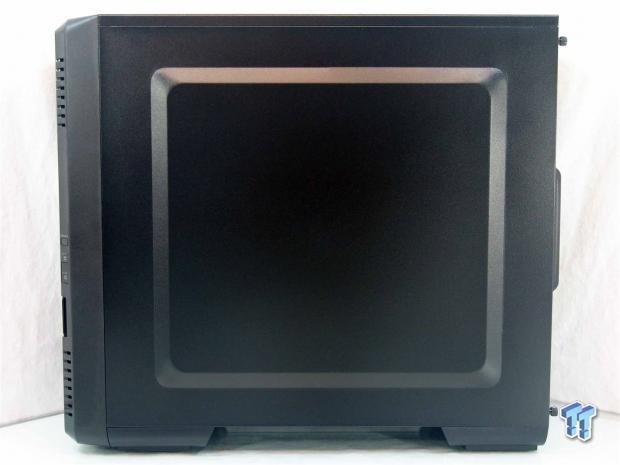
The right side of the chassis offers a large bumped out door panel that is usually indicative of more room for wire management. However, with this design, it will become very obvious that is not the reason for this, it is simply aesthetic.
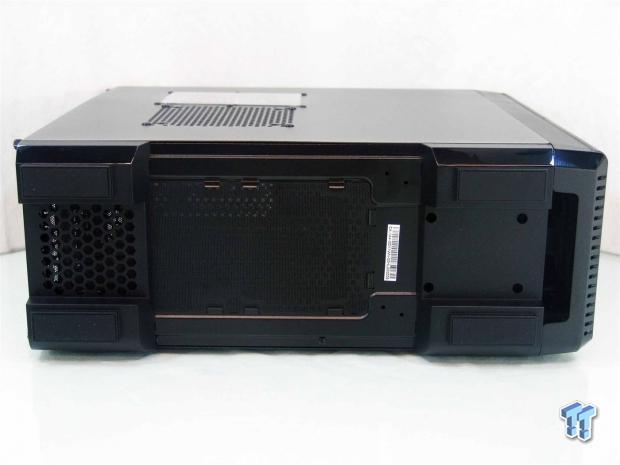
Under the chassis, there are four large plastic feet with large rubber pads on them to give the T21 great footing on any surface. There is also a large dust filter that needs unclipped and slid forward to clean the intake for the PSU and the optional fan position here.
Inside the Urban T21
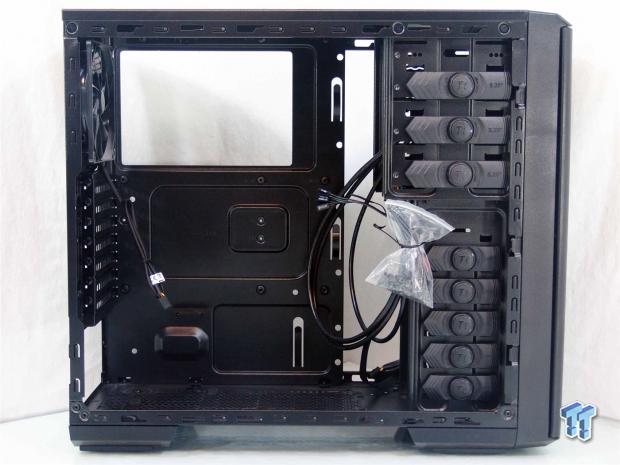
After removal of the panels, we can now get a glance inside of this chassis. The wiring is looped and then tied up to the HDD rack at the same place the hardware bag is attached to keep it in place, while in transit.
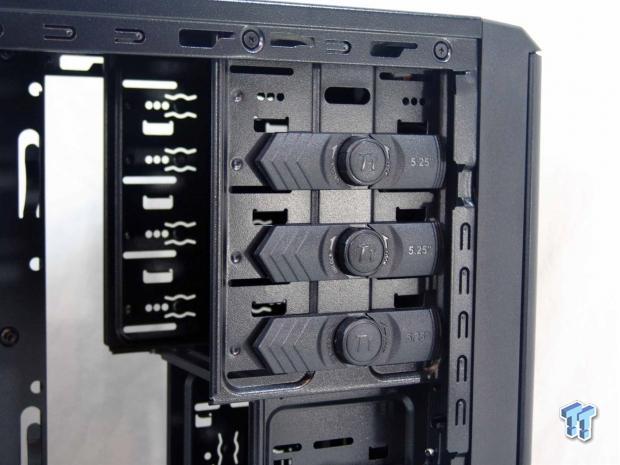
The 5.25" bays use these tool-free clips on this side of the bays and they can be backed up by screws on the other side. To operate these clips, twist the Tt logo to the right to unlock and remove, then to lock them in, align the pins, set the center in, and then twist the lock back to the left.
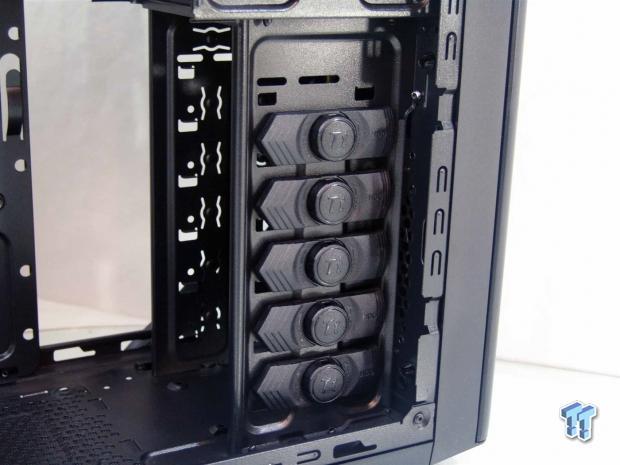
The hard drive rack is sort of old school in its design. It does offer five 3.5" bays with similar clips to what are used on the optical bays. The top bay has no clip, but will allow a 2.5" drive to be screwed into place there.
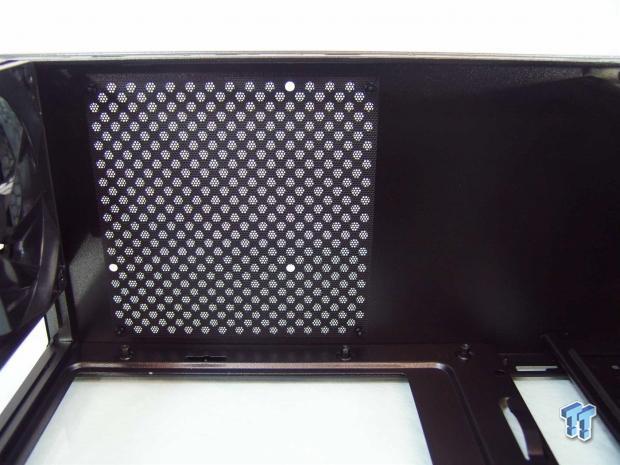
The top of the chassis offers a dust filter under the steel mesh that is much larger than the area of the four holes for the 120mm fan. A larger fan may be able to be installed in this area, but there are no other holes provided to mount them simply.
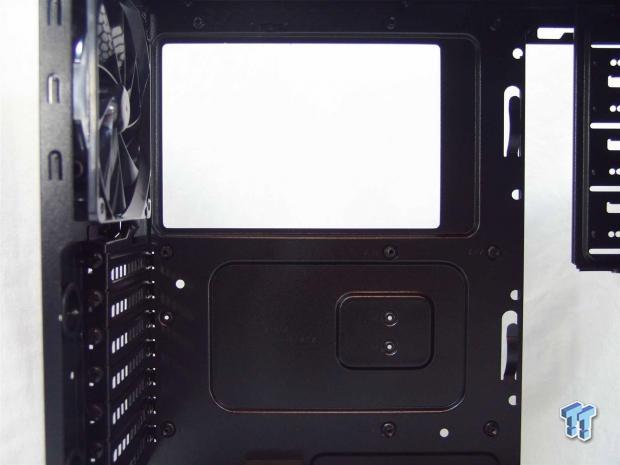
The motherboard tray will allow for an ATX or a Micro-ATX motherboard and offers a large cooler access hole. The standoffs are shifted very close to the top, and the wire management consists of the two clips on the right edge of the tray.
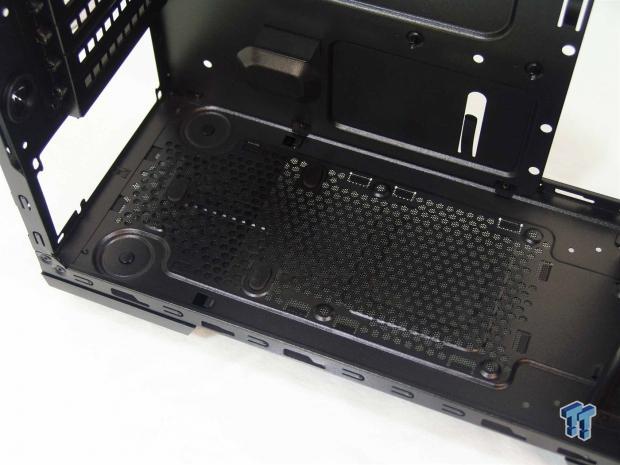
The floor of the chassis offers three rubber pads for the PSU to set upon and be isolated from the chassis. If the PSU wiring will allow for it, there is also room for a 120mm fan to be placed here.
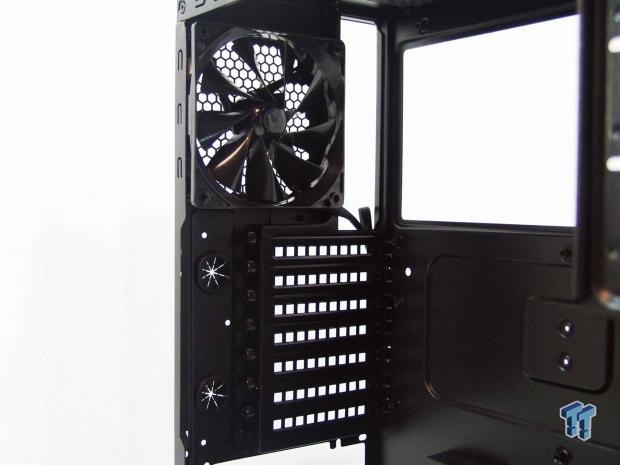
Inside of the rear of the chassis there is the second 120mm fan that exhausts this chassis, and neither this or the intake fan at the front are LED lit, they are simply powered with a 3-pin connection and move air. The expansion slot covers are ventilated, and use thumbscrews to secure cards once these are removed.
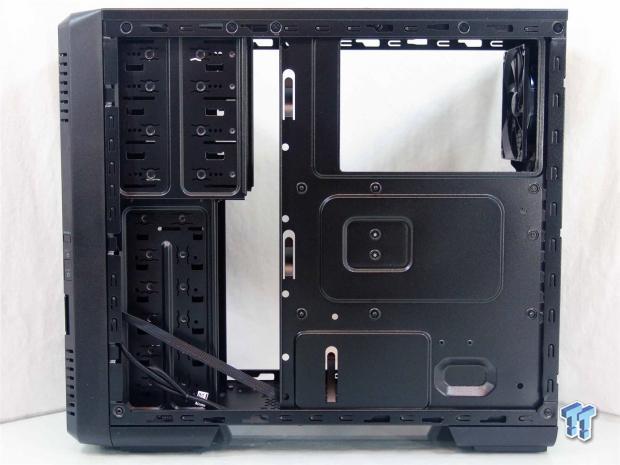
Behind the motherboard tray there is maybe 5mm of space at best, so not much more than possibly some fan wiring will fit there. To the left, next to the HDD rack, there is plenty of room to store wiring or make runs to the various components.
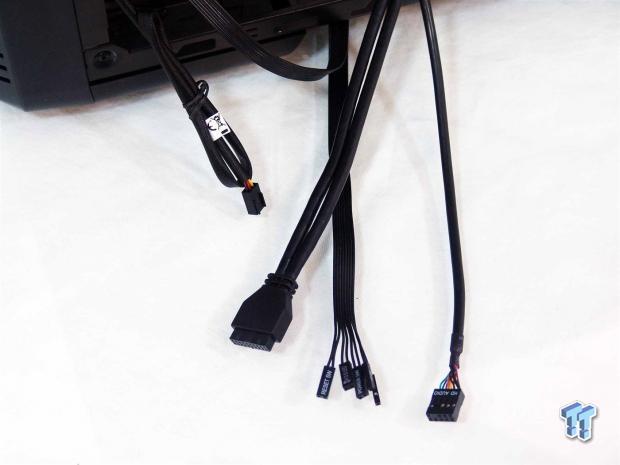
The chassis wiring, even the fan wiring, is all sleeved black to match the chassis, and since everything is run on the front of the tray, the fact that the native USB 3.0, the HD Audio, and the front panel wires will disappear into the black chassis.
Accessories and Documentation
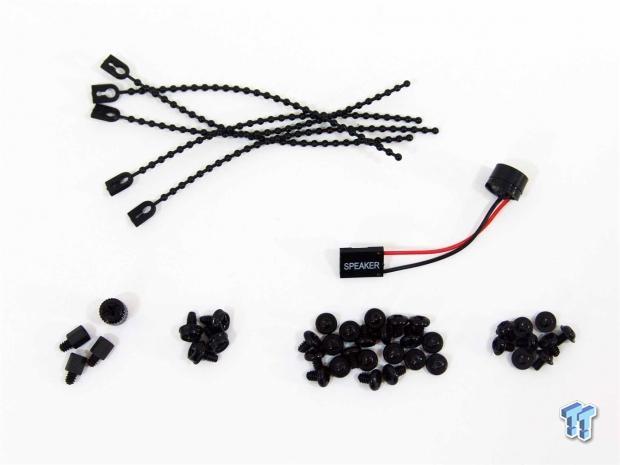
The small plastic bag tied to the HDD rack contains what is shown here. At the top are five adjustable tie straps for taming the wiring inside of this chassis, and they also include a motherboard post speaker. The row at the bottom consists of spare standoffs and a socket to secure them, the PSU screws, the motherboard and HDD screws, and the ODD and 2.5" drive screws finish things off.
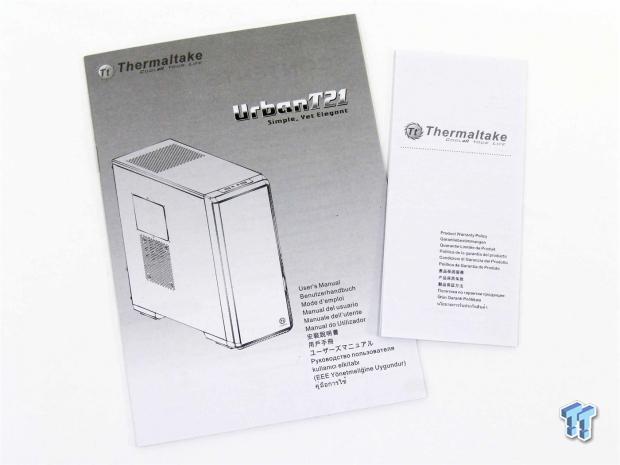
Under the foam at the top of the chassis is where the paperwork is shipped. In a bag there is the user manual and warranty information about the one year of coverage offered from Thermaltake.

Inside of the manual there are the contents to skim to where you may be stuck, and to the right is a specifications list along with a parts list.
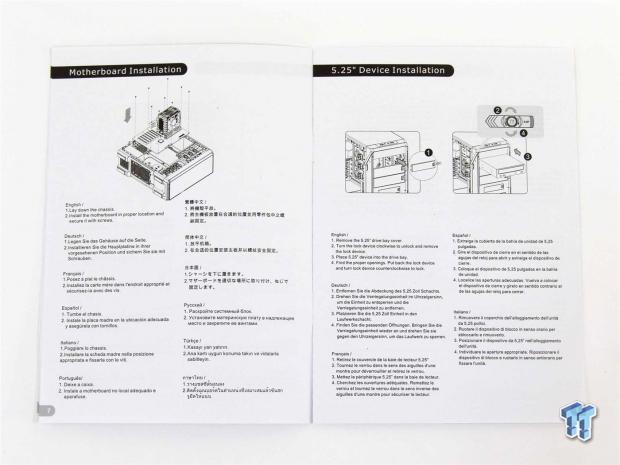
Moving further into the manual, this is the kind of instructions offered. Every page has its own step with an image or two at the top showing what to do. If you need additional help to understand what is being shown, there are basic instructions offered in many languages below the images.
The Build and Finished Product
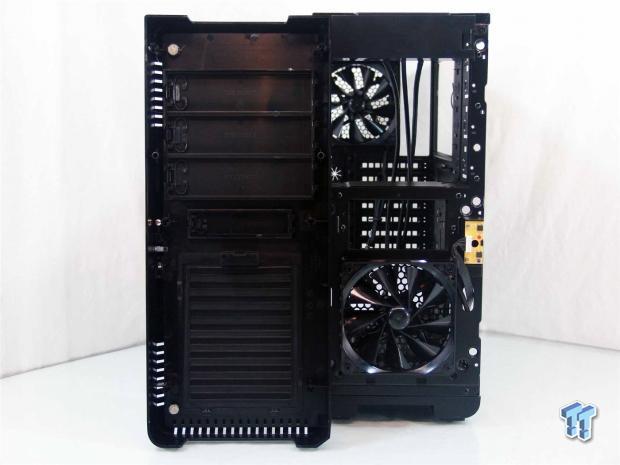
Even though the removal of the bezel isn't needed for the build, it is nice to see that the wiring and switches are mounted to the chassis and not to the bezel.
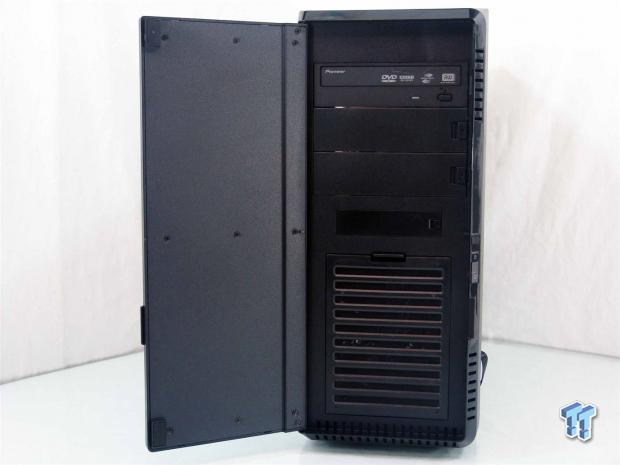
Removing the bay cover, then sliding in the drive and installing the tool-free clip, the DVD drive is very secure and not going anywhere, even if you have to travel. For those that are paranoid, there are holes on the right side for screws to make sure these devices don't move.
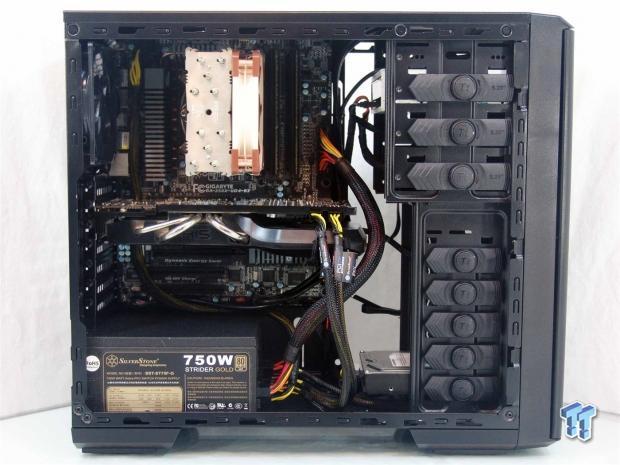
It is easy to see how compact this chassis is once the ATX motherboard and HD 7950 are inside of it. Surprisingly enough, there were no issues getting things to fit, although we did have to go to a smaller CPU cooler this time. As for the wiring, we expected better, but with a tiny window, none of this is visible.
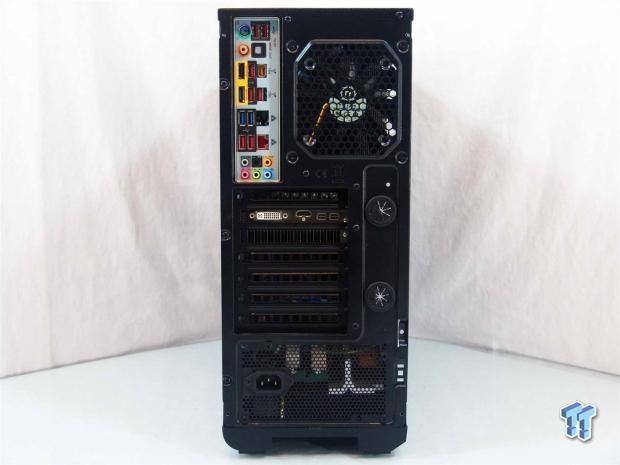
No surprises in the back of the chassis either. The I/O plate snapped right in, the card was easy to align and secure, and the PSU lines right up and is easily screwed into place permanently.
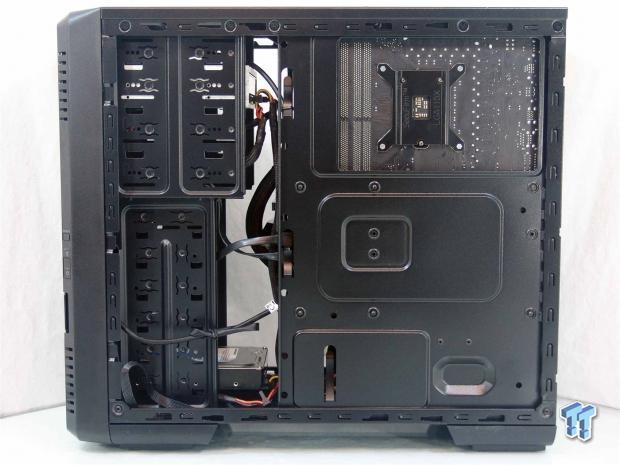
To be honest, there was very little done on this side of the chassis as far as connectivity is concerned. We used a modular PSU with a short cable kit which helped tremendously with the build's tidiness, but if needed, there is room next to the HDD rack to create a rat's nest to hide wires.
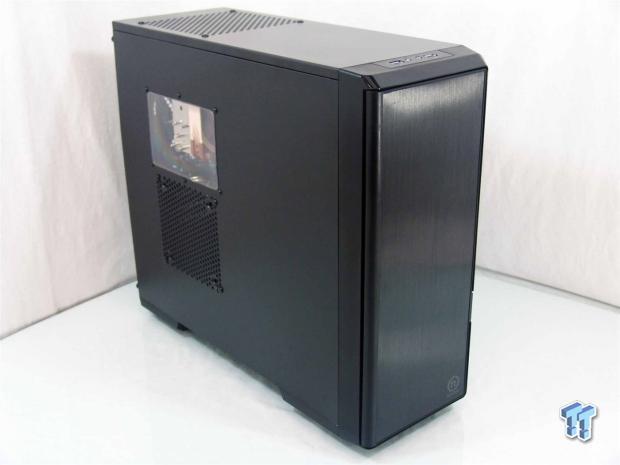
With the panels back on and components ready to run for the testing phase, we glance back at the T21. There is just a bit of the CPU cooler visible through the window, and we did not add a side fan, even though there was still room even with the side heat pipes on this specific video card.
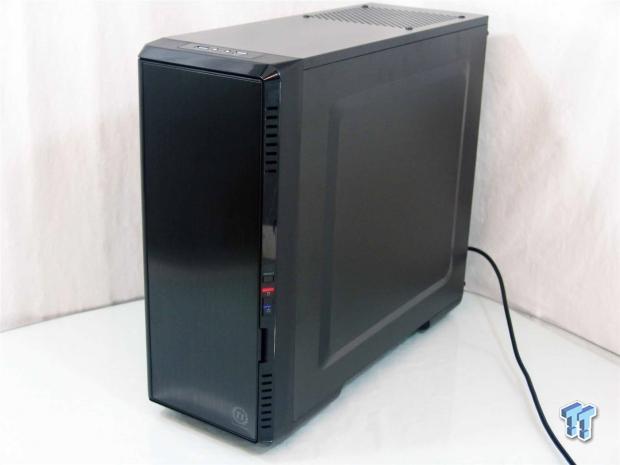
When power is added to the Urban T21, the right side of the chassis is where the LED lighting is, so in most cases this will be showing into a wall. But the bright blue LED for power and the red LED for HDD activity will definitely glow against the wall and be easily seen.
Final Thoughts
There are a lot of plusses that the Thermaltake Urban T221 offers. The front of the chassis is sleek looking, and the aluminum panel does add a touch of elegance. Outwardly, while compact, this chassis could go anywhere from the office, to a LAN, even to the living room in an HTPC environment - the subtle classy look will blend in anywhere. While the interior may be a bit on the old school side of its layout, there is something to say for that. Wiring is kept simple, there are tool-free clips, essentially you need a screwdriver for the motherboard, the video card, and the PSU, the rest of the build is pretty much plug-and-play. For those in the market for a case you could do a build in blindly, this is it, and with the smaller side window and optional fan locations, you can cool this chassis to your heart's content, and see only just a hint of what is inside, leaving a bit of intrigue to the design when friends come over and see this system.
There are some downsides to this design, though, too. If you have issues knowing cabling is just making it to connection points, and will be obvious as soon as you open the door that there is little to no options to maintain the cables in a chassis, you may want to keep on looking. Also the thickness of the steel is a bit lacking, and the panels flex easily, as does the chassis once the panels are off. On the flip side of this, once the PSU and motherboard were installed, along with the video card, the case does get much more rigid using these components to strengthen the overall structural integrity.
There are a bunch of locations for fans, but other that a single radiator AIO, you would be hard pressed to install much along the lines of a custom loop. This is why they offer the holes and grommets, as the majority of a loop would have to be external.
The build process was simple and speedy, everything works, the wiring is long enough to get where they need to be, with the tool-free clips and limited time with a screwdriver in our hand, we found this basic design to do exactly what it needs to without much more to offer. As appealing as the exterior is, an extra fan, and an aluminum fascia does not warrant the $69.99 MSRP in my opinion.
There are plenty of $40 to $70 offerings on the market that offer much richer feature sets, are just as easy to build inside of, and some are even as aesthetically pleasing, just in their own ways. If you happen to catch this chassis on sale, by all means consider it, but for the asking price, I just think there is money better spent on other offerings already flooding a lower priced segment of the mid-tower case market.


 United
States: Find other tech and computer products like this
over at
  United
Kingdom: Find other tech and computer products like this
over at
  Australia:
Find other tech and computer products like this over at
  Canada:
Find other tech and computer products like this over at
  Deutschland:
Finde andere Technik- und Computerprodukte wie dieses auf