Introduction
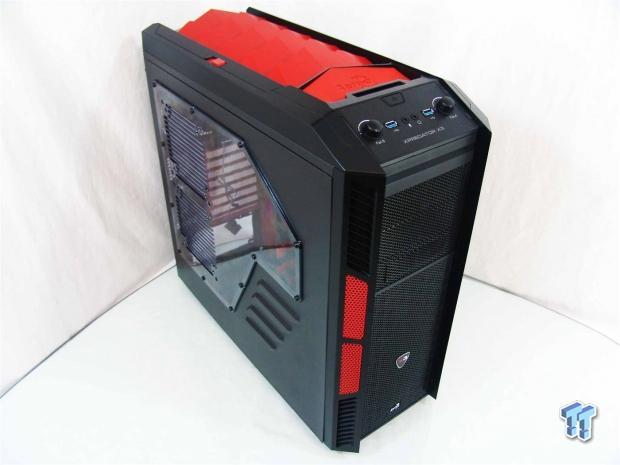
This is my first time ever reviewing a chassis from Aerocool. If you count the review I did of the Rosewill Thor chassis, then technically I have seen one of their chassis designs previous to this. Since both the Thor and the Xpredator X1 used the same OEM to build their cases, aside from the left side panel on both cases, they were spot-on identical. The funny thing is, that when I reviewed that chassis, it was one of two cases that when powered, went up in a puff of magic smoke, you know that kind you can't get back in, and leaves things dysfunctional. Not that that has any bearing on what Aerocool produces; it is just what stood out to me when I reread that review to see what has changed.
Looking at what the Xpredator X1 offered, for that time, it was a good mix of a basic case design on the interior, and I would go as far as to say somewhat dated, even for that time. What sold me on the chassis design was the aesthetics that were very original then, as well as the louvered top. Some things I look back at now and dislike about that bay drive system that was so 2005, the rainbow of wires that are coming from the front I/O panel, and with what is offered now, there was little to no water cooling support. They covered things like wire management and space behind the motherboard tray, because I was nowhere near as good wiring cases then as I am today, and I don't recall any sort of panel fit issues.
The Xpredator X3 Devil Red Edition chassis we are looking at from Aerocool today is a take off on the original X1. While many things both internally, and externally have been changed, most of the aesthetics that sold buyers on the X1, will be very easy for those user to appreciate. Even for those who were completely unaware of Aerocool or their cases will have a hard time passing this chassis by when considering aesthetics and features.
In this review I plan to cover those factors, but I also will be looking for overall strength in the build, airflow, noise levels, and just how well the build comes together. If the Intro image of the Xpredator X3 has you intrigued, continue reading to see just how well this Devil Red Edition stacks up against other cases.
Specifications, Availability and Pricing


Since the outside looks so much like the Xpredator X1 / Thor, I say we look past the aesthetics and dive right into what the charts have to offer. They start with the fact that this full-tower chassis is 527mm tall, is 223mm wide, and is 533mm from front to back, and weighs in at 8.66Kg or 20.7" tall, 8.7" wide, and 20.9" in total depth, and weighing in at a little over 19 pounds. It then progresses to the fact that the frame is made of steel and uses 0.6mm and 0.7mm thick steel. Inside the chassis you have the choice of housing an ITX, Micro-ATX or ATX motherboard behind the drive bays. In which you will have access to three 5.25" bays through the front of the chassis, and one of them has a 3.5" adapter tray in it.
You also are given accommodations for up to eight storage devices in slide-out trays - you can also install 2.5" drives in these trays with the use of screws. Speaking of 2.5" drives, Aerocool has included a dock for one just behind the front I/O panel. The chassis also includes room for up to eight slots worth of expansion cards, as long as they are 310mm or shorter. Speaking of limitations, I am quite surprised to see that this chassis allows for 186mm tall CPU coolers inside of the not quite 9" wide frame.
Under the image of the red bladed, red LED, 200mm fan image, you will find all of the specs for the intake fan that sits in the front of this chassis. This fan will run at a speed of 700 RPM while delivering 53.4 CFM of airflow. With a rating of 0.49 mmH2O of static pressure, along with the lower CFM rating, the fan will be quiet, but is it enough to get much air past the drive bays? Under the image of the black bladed, 120mm exhaust fan that is placed in the rear of the chassis you are getting more RPM with the 1200 RPM rating. This fan is also rated to deliver 50.4 CFM and 0.85 mmH2O of pressure. Both fans aren't specified to be all that great, but this is where the ventilation in the sides of the bezel and the adjustable louvers on the top hopefully come into play and keep temperatures at a respectable level. There is an added bonus here, in that this chassis also comes with two fan controllers. Each is capable of 12.5W of fans over three connections.
I had no issues trying to locate this chassis either. A quick Google search turned up five or six places that I could have easily grabbed this from. Pricing does vary with the listings as well. On the low-end, at TigerDirect, you are going to find the best current pricing of $105.99 for the chassis, with another $9.89 for shipping. Other places start at this pricing for the case and have yet to include shipping charges, and one listing has the chassis priced at $129.99 with $19.95 listed for fees. I can tell you, it doesn't take a genius to realize where to spend your money, and the price is good for a full-tower with this sort of a feature set.
I say we get right down to it and see just what the Xpredator X3 from Aerocool is all about, and if this is, or is not, the perfect case for you.
Packaging
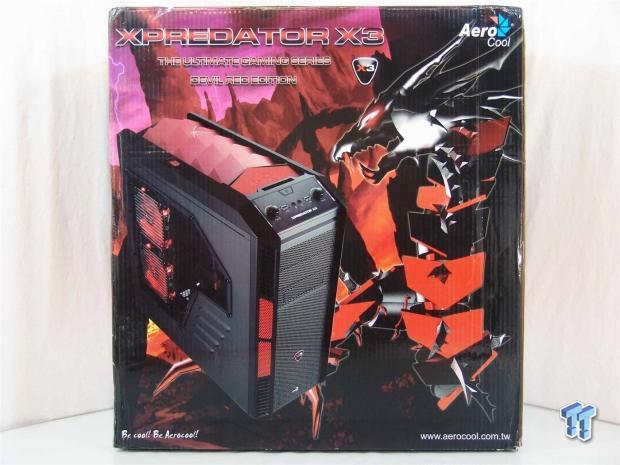
The background is a scene from inside a volcanic crater with a large dragon looking critter on the right side. This allows Aerocool room for the Xpredator X3 naming along with the case series and the fact that this is the Devil Red Edition. As you can see, the louvers on the top of this chassis are mimicked in the plates along the dragon's chest and abdomen.
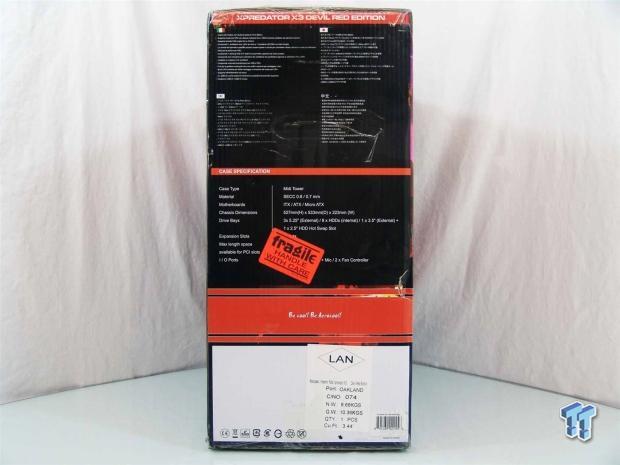
The top of this panel starts with the full name of the chassis above a list of features in four languages listed before you run into the specifications list.

The next large panel offers us the same scene under the chassis, series, and edition names of the chassis. Instead of one large image of the chassis, here you have a look inside, dead at the front of it, and again, the left side with the door panel in place with optional fans installed.

The last of the outside of the packaging offers that same list of features that were found on the other side. Just that this time it is repeated in eight languages this time, and English is included. Aerocool cover things like the construction, CPU cooler clearance, card clearance, included fans, the louvers, dust filter, fan controller - the works.
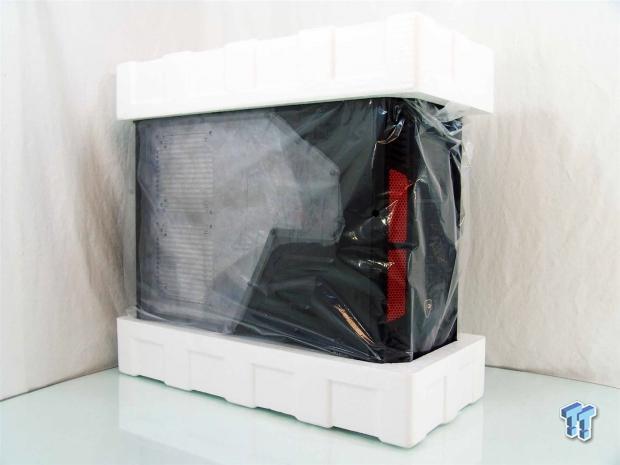
After removing the cardboard from the rest of the packaging, you can see Aerocool used Styrofoam end caps and a plastic liner just like most other manufacturers. They also add extra step to cover both the inside and the outside of the window to protect everything against unintentional damages in transit. This method worked very well to pack the chassis, as my sample arrived in terrific condition.
Aerocool Xpredator X3 Devil Red Edition Full-Tower Chassis

The bezel on the X3 is very similar to what was offered on the X1, and stays very true to its roots. Down the middle, the bezel is all steel mesh, with three 5.25" bay covers at the top. The side of the bezel protrude quite a bit, but on the angled sides, you have vents and red mesh panels to allow air to flow past the side of the bays behind it.

As the front angles back to meet the top of the chassis, Aerocool has placed a large front I/O panel backed with a black aluminum cover piece. In this panel you have strips of LEDs on both sides that surround the I/O panel. On it you have a fan control knob on either side, USB 3.0 on both sides of the 3.5mm audio jacks, and the power button. Just behind the panel you see the 2.5" dock included as well.
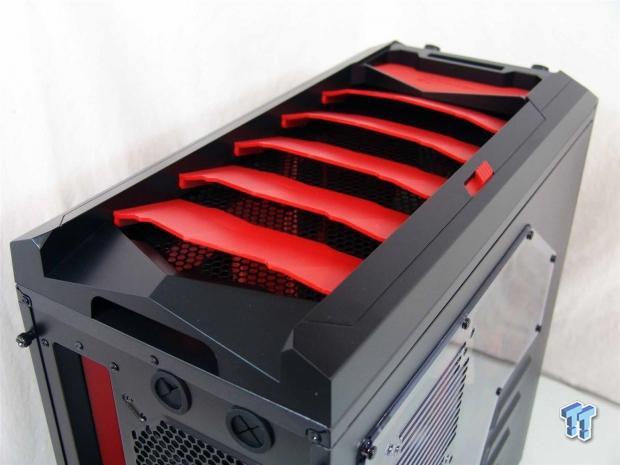
The top of the chassis ships with the slide lever on the edge of the top slid back and the vents are closed. I slid the lever forward to open the louvers to show that with it opened, there is plenty of space for airflow to escape naturally due to convection.

The left side of the chassis does remind me a lot of the styling of the original concept, but the window has been changed, and the louvers have been moved and resized. You also notice right away that part of what makes this the Devil Red Edition is the red interior of the chassis, not just the external trim.

Behind the X3 you can see the top is easy to remove with just a tug in the cut-out. You then have a total of four water cooling holes, above and below the rear exhaust fan. You are also given ventilated slot covers that are painted red to match the theme.

The right side panel of this chassis is flat, textured, and black. Let's hope there is plenty of room behind the motherboard tray, or this panel may be rough getting it back in place.

Underneath of the Xpredator X3 you will find two large feet in the front with rubber rings to keep the chassis in place. There is a large dust filter for the power supply and optional fan placement location, and is why the feet in the rear of the chassis are so small, to allow the filter to slide out the back of the chassis.
Inside the Xpredator X3 Devil Red Edition
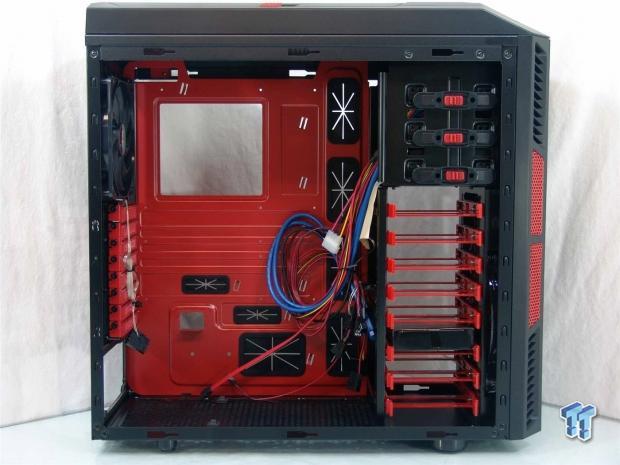
Inside of the chassis, I have to say that the red tool-free accents and the red motherboard tray do look nice. What gets me is the rainbow assortment of wires, though. As for the hardware, you can locate it in the drive bays, and the paperwork is shipped outside of the chassis.

At the top of the chassis, in the front, you have these three 5.25" bays with tool-free locks on them. They are on both sides, push in and slide forward to lock, and are some of the sloppiest devices I have ever used. The nice thing about it is that you can always use screws for a secure drive mount.

Below the ODD rack are eight plastic trays that slide out this side to accept storage drives. For 3.5" drives, you simply force the tray around the drive and slide it back in. For 2.5" drives, you will need screws, and then slide it back in the rack as well.

Inside of the top of the chassis, under those adjustable louvers, it looks to me like you could install a pair of 120mm fans, a pair of 140mm fans, and even has the option to allow larger 180mm or 200mm fan as well.

The motherboard tray offers, outside of it being red, the CPU access hole, seven places to tie wiring, and offers seven wire management holes with grommets in place, and two holes along the top for the 8-pin and fan wiring.
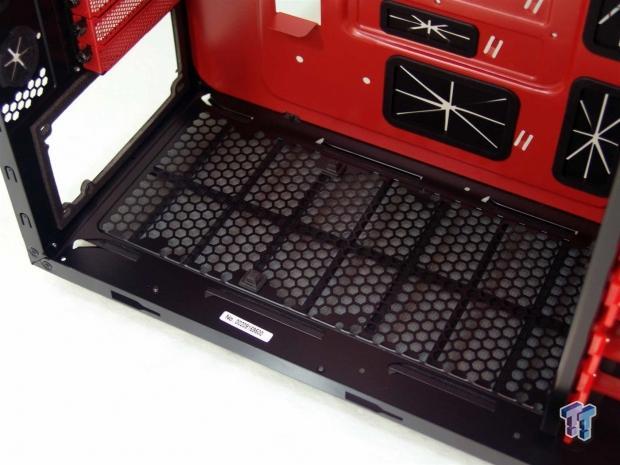
The floor of the chassis has a very long area of ventilation backed with the dust filter for just the power supply. This will allow for a convective flow upwards in the chassis, but with a few zip ties, I can see a fan as an option here, even without actual mounting holes. They also included a gasket for the PSU, which is a bit of a surprise.

Looking at the back of the chassis, now from the inside, you can easily see the 120mm exhaust fan that is black and has no LEDs to better blend in with the design. As for the eight red expansion card covers, they and your cards are held in with thumbscrews.

Behind the motherboard tray you have a 20mm offset from the inside of the panel to what you see here. This will allow for quite a bit of wiring, but don't get super excited; you have to keep it minimal since the panel is flat.

In that rainbow assortment of colored wires, you have a lot to contend with. There are multiple Molex connectors that need power from the fan controller, front fan, and the HDD dock. You also have the six fan leads from the fan controller, a SATA cable, Native USB 3.0, and HD or AC'97 Audio.
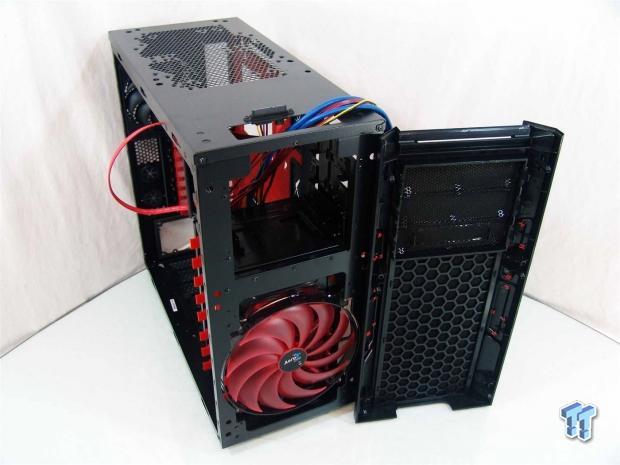
Removing the panels is pretty easy at this point, but the top panel has the I/O wiring attached to it, so if you want to add fans, do it prior to managing all of that wiring. As for the front of the chassis, it offers a 200mm fan, but will take a pair of 120mm fans as well. The bezel does need to come off to move the tabs and remove the bay covers.
Accessories and Documentation
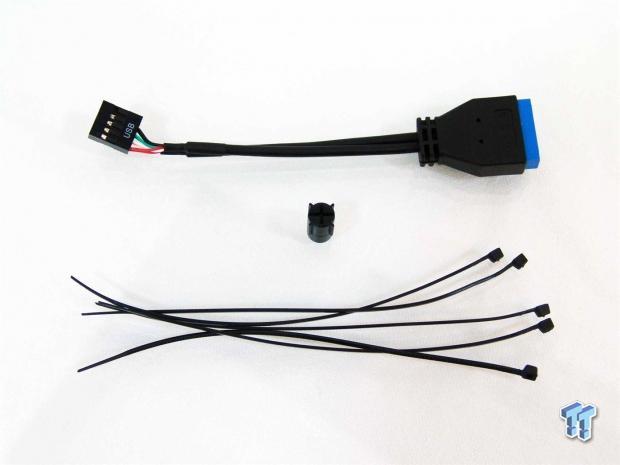
Part of the hardware kit includes the Native USB 3.0 to USB 2.0 for those wanting this chassis, but do not have Native USB 3.0 support on your motherboard. You also receive a plastic stand-off socket, and five zip ties to help keep the wiring under control.

I like how all of the screws are packaged so that you don't have to rummage through a handful of screws and verify with a parts list if you have the right screw in hand. With each type of screw coming in clearly labeled bags, it makes the build process a little bit easier.

You also are shipped the Xpredator X3's User's Manual. I found mine sitting on top of the case, under the Styrofoam and inside of the plastic liner. You can also see at the bottom that this one manual covers all 11 languages that User's Manual was translated into on the bottom.

Opening the manual you are greeted with a safety message before you find the parts list on the right side. They show you everything from the fans, to the slide out drive trays, and it includes a list of all of the smaller hardware as well.

Moving on, Aerocool offers some step by step instruction as to how to install the optical drives, storage drives, and how to install the stand-offs with the use of the plastic "turn-cap" as they call it.

They also show you how to remove the dust filter under the chassis, adjust the ventilation louvers at the top. On the last page of the English section you are given a wiring diagram for the fan controllers, as well as pointing out where to put the USB 3.0 connection and the audio pass-through.

As I said earlier, with a 3.5" drive, you just force the plastic tray onto the drive. With 2.5" drive installation, you must use the provided screws, but you also must remove one of the pins to allow the smaller drive to ride the side rail flush.
The Build and Finished Product
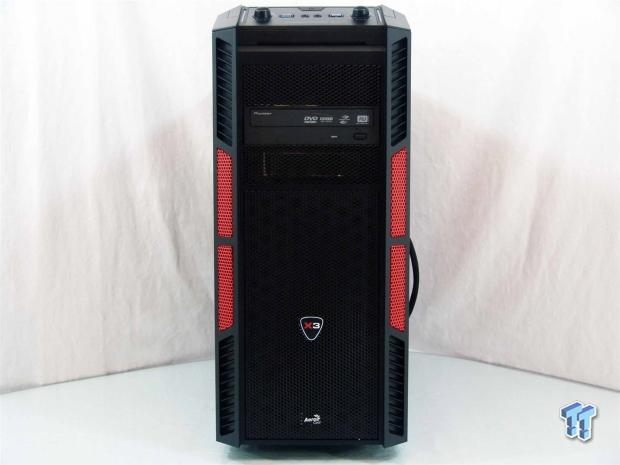
Besides the fact that I strongly urge you to screw in the optical bay drives or devices rather than using the almost worthless tool-free clips, the drive does sit flush and looks okay when added to the build.

Inside of the chassis, I had a lot of trouble getting the motherboard screw in above the CPU cooler, and that leads me to the fact that there isn't a lot of room internally at the top for much more than fans. As for the rest of the space, it is pretty tight, but I was able to get the components in with relative ease.

The rear of the X3 all comes together as planned. The PSU is a bit tough with the gasket thickness, but it is feasible. The GPU went in, but I did have to flex the chassis back to allow the screws to line up. The rear I/O dust shield snaps right in as well. Also I am glad for the external tubing holes; otherwise you really have no easy answers inside. To water cool, the radiator will have to hang outside.

Since the room here is somewhat limited, I tired to be sure to tie up tight anything I did run back here. Even with just the 8-pin lead, a Molex lead, and a SATA lead along with the front I/O wiring, I had some issues getting the panel back on. It was one of those which you have to lay down and use your forearms to close it as you flex it over even this simple wiring.

Completely reassembled and ready for testing, I do like the view through the window, and the fact that the chassis looks much the same as it did when we started, sans the internal view.

Powering up the Xpredator X3, it is virtually silent with the system I have inside, and there is a bit of LED lighting to discuss. The front 100mm fan is LED lit, but you have to search for it when viewing the front of the chassis, it isn't very obvious. The front I/O panel also illuminates both sides in a red glow of LED light to designate the system being powered. When the SSD was accessed, there is a flash of white LED light that comes up from the bottom of those strips.
Final Thoughts
Starting at the beginning of this review, when I tried to take the chassis out of the bag, and the sharp corners on the front bezel tried stabbing me in the palm, it sort of widened my eyes to be on the lookout for anything odd with this chassis. That being said, for most of the early steps, I really did like the aesthetics of the chassis - the splashes of red to make this the Devil Red Edition. But it wasn't very long before I started to see things that just shouldn't happen in a chassis offered in 2013 - we are well past the days of flimsy boxes with little thought and effort.
As I got to the inside, I saw the rainbow of wiring from the front I/O, and the fact that it is attached to a panel and not the case makes things later down the line a real pain in the you know where. The last thing that took it over the top for me is that everywhere it speaks of this sturdy construction and the thickness of the steel, yet when I tried putting the left side back on the case, I had it sitting wrong to access the thumbscrews. At this point I picked up the chassis and watched the door panel shift out of place some 15 degrees, and it eventually made the side panel fall off completely.
There are some good points about the Xpredator X3; it isn't all doom and gloom. The looks and aggressive styling is something I think a lot of potential buyers will like, and having the fan controllers and the 2.5" HDD dock are steps in the right direction, for sure. Offering the chassis in the Devil Red Edition as well as the White Edition will sell to more users than just the plain black version would like when the X1 was shipped. Internally there is enough room to get an ATX motherboard and a few cards in there as well, but for the water coolers out there, you are going to be hard pressed to do things on the inside with this design. You know, the more I think about this chassis, maybe it is a bit more doom and gloom than I had thought when I started this page. It seems even when I find a good point to bring up, there is always a bad one to combat it on the pro's versus con's list.
Even when it came down to the pricing, I really thought to myself, wow that seems pretty reasonable for what this chassis is said to offer. I know I am a bit spoiled when it comes to chassis design in what I have seen, but the Aerocool Xpredator X3, even if near $115, really isn't worth the money. Low CFM fans providing little airflow depending more on convective properties to keep things cool may be great for your ears, but not good on your components. Adding fans to this design is a must, and with that in mind, why not just step it up a bit initially and buy one of the other many better solutions on the market today?
Sorry Aerocool, but at best this chassis needs some work just to meet your claims on the box, let alone live up to what I see day to day.



 United
States: Find other tech and computer products like this
over at
  United
Kingdom: Find other tech and computer products like this
over at
  Australia:
Find other tech and computer products like this over at
  Canada:
Find other tech and computer products like this over at
  Deutschland:
Finde andere Technik- und Computerprodukte wie dieses auf