Introduction
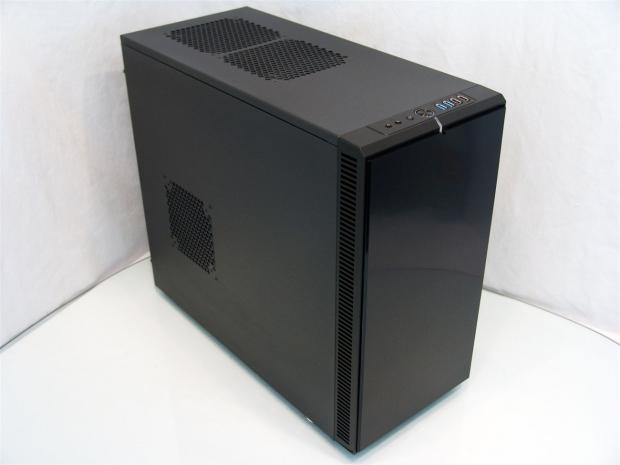
The Define series from Fractal Design is one that used to consist of the single version of the Define Mini along with four versions of the Define R3 that was a huge success for them. From what I can gather, the plan was to keep what makes the R3 such a success, but add things that R3 buyers suggested may need improving or just random suggestions that also made it into this newest chassis that Fractal Design is just releasing as I type this.
I have seen both the Define Mini and the Define R3 where the concept was to deliver good airflow within the chassis while keeping all of the noises in there as well. To do this Fractal Design uses a combination of dense open celled foam behind the bezel while the side panels use a blend of cloth and fibers blended to absorb sounds that other panels allow to pass right through. One feature I really liked was the ability to add fans in the top and sides of these chassis. Beyond that, for those that don't want an extra ventilated build, the ModuVent panels can be used to plug the sound leaks. That along with hard drive trays, black interiors with all black wiring, the accents of white on the trays fans and expansion slots, I mean the list goes on and on for the feature set.
I am really glad to say that all of the features that I liked in the previous Define series chassis are not thrown away or lost in any way in the redesign. With our latest submission of the Define R4 in the Black Pearl attire, you get everything I mentioned with lots of new options and features to, in all honesty, make the Define R3 almost obsolete.
With what I am about to show you, it will be easy to see why I say that. Given the choice from what I have already seen from taking the images and doing the build, there is no reason why if you were looking to them for a chassis you could possibly choose the R3 over the much improved and tricked out Define R4.
Specifications, Availability and Pricing

The exterior of the Define R4 keeps the same textured black steel exterior that the Define series is known for on the steel components of the chassis. The front bezel is made from ABS plastic and offers a door with a brushed look to it, easy access to the components behind it and it also holds the front I/O on the top edge. This panel offers HD Audio 3.5mm jacks, a reset button, a power button surrounded with a backlit ring, two USB 3.0 ports and a pair for USB 2.0 connectivity.
Aside from all of the textured steel and the stylish front bezel, the feet of the Define R4 pop with the look of natural brushed aluminum to add a bit of elegance to an otherwise black, plastic, plain foot. The rear of the Define R4 offers ventilation at the top through some honeycomb mesh above the rear I/O and 140mm fan. Below this you will find eight white expansion slot covers in the slots and a large hole with a padded ring around it for the PSU installation.
Internally there is a lot going on in the Define R4. In the front let's start with the fan rack assembly. Fractal Design includes one 140mm Silent Series R2 fan, but leaves room for another to be added. This fan rack uses a clip in, clip out securing method to allow ease of use without any rattle and this front area has a dust filter to cover both fans. Just behind this is a pair of 5.25" bays and a hard drive rack that has many ways to be used. There are eight total bays broken up into a group of five at the top and three at the bottom. The top five can be rotated ninety degrees or removed all together. As for the bottom three, well they aren't stuck in place either and with the removal of six screws it will also come right out of the R4. That means a ton of room for a radiator and water cooling gear. The top of the chassis has two ModuVent panels covering the pair of holes and I am told a slim radiator will also fit here with fans.
Moving down, you run into the motherboard tray that offers room for ATX, Micro-ATX and Mini-ATX motherboards. Along with easy to read placements for the risers, this tray offers five wire management holes with grommets and the large CPU cooler access hole. On the back side of it you have six wire tie places, 26mm of workspace and room for a pair of SSD's. I almost forgot all about the fan controller. On the left side of all of the bays, looking in from behind the motherboard tray, you will find three leads to power fans that have a switch that allows for settings of 5V, 7V or 12V to the connected fans.
With what I have described fresh in your mind, I know you are thinking with every addition to the chassis design, there must be dollar signs going off in someone's head right? Well with the Define R4 that simply isn't the situation. As of this moment the chassis is just releasing, so finding one outside of those privileged few that received them as I did, is near impossible. Give it a bit of time though, as I am sure this chassis will be filling shelves soon. The really good part about this wait for stock to arrive is that you don't have to spend that time scrounging up a bunch of money to get one.
The MSRP of the Define R4 is set at only $109 and from what I can already see, this chassis is worth every penny of that pricing and can contend with many offerings in the $150-200 range without even breaking a sweat.
Packaging

Gone is the fancy packaging we had with the R3. The plain cardboard with black screened images and text is a great way to keep the money in the chassis offerings and not into something we are going to store in the basement or closet anyways.

This panel shows that the Define R4 comes in three versions. There is Black Pearl, Titanium and White with the red sticker on the -BL version or the Black Pearl you are about to see. At the bottom there is a drawing of the inside of the R4 as it is shipped to you, before any HDD conversions.

Even though they are using basic materials and monochrome printing, that doesn't mean the information is low quality. Quite the opposite on the back panel as Fractal Design shows off almost all of the features with an exploded view of the Define R4.

The last panel offers you the same Product Specifications and Cooling System charts I had on the last page. Between these lists and the look at the chassis on the back panel, there is little information that was missed about the Define R4 for their customers who will buy this off the shelf.

First off I have to say that I was pleased to see that my chassis was actually double boxed for transit to my door. The doubled cardboard along with the Styrofoam end caps and the plastic liner seen here allowed this Define R4 Black Pearl to arrive in perfect condition. There is also a plastic lining applied to the front panel and a piece of bubble wrap between the front door and the pop-out panels inside to make sure nothing came loose on its way to me.
Fractal Design R4 Black Pearl Mid-Tower Chassis
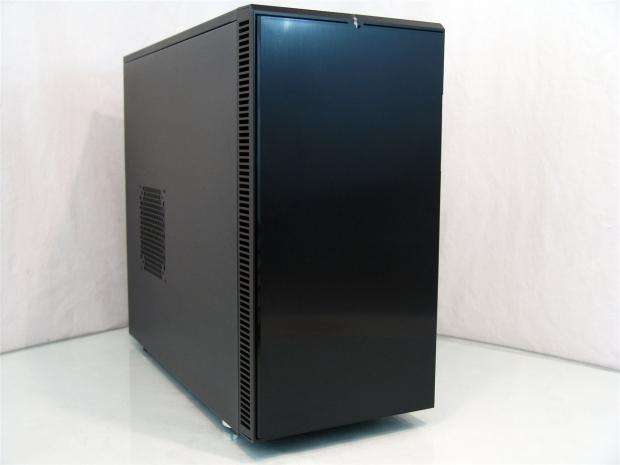
Looking at the front of the Define R4 you can definitely see the influence of the R3 design on the outside. The very front of the chassis has a brushed, yet shiny appearance to the door with venting down the side to allow the intake fans some place to grab clean air from.
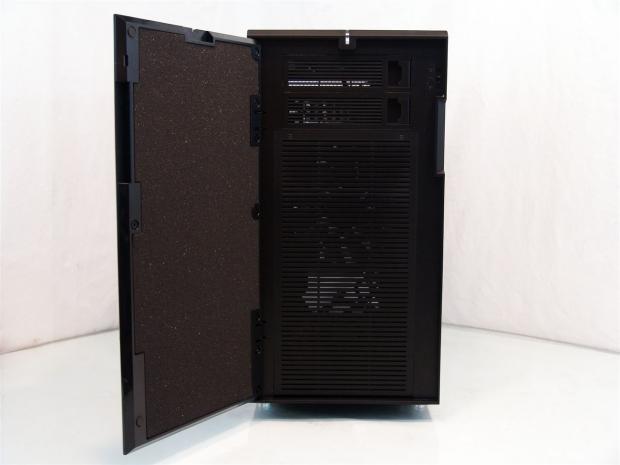
The door is held to the chassis with a magnetic catch. The inside of the door has rubber pads to keep the door from slamming and the bulk of the inside of the door has foam applied for sound deadening. The face of the chassis offers two removable 5.25" bay covers and the slotted screen for the fans are easily removable from here.

Moving much closer to the top right corner of the inside of the front bezel you run into the three way fan switch. Here you have the option to use 5V, 7V or 12V to supply to the fans. On the back there are three leads with 3-pin fan headers to power the fans and a 4-pin Molex connection to power the controller.

The front I/O panel at the top of the bezel contains the HD Audio 3.5mm jacks for both headphones and a microphone. It also has a reset button in the I/O unlike the R3 and the large power button with a blue LED backlit ring around it. On the right you have a pair of both USB 3.0 and USB 2.0 connections.
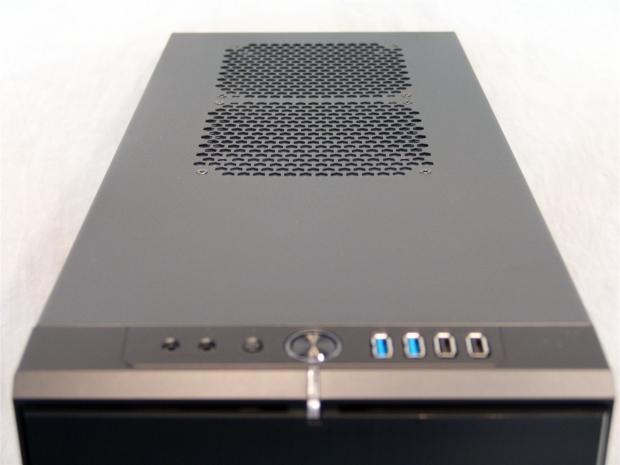
Looking down the top of the chassis, you see there is a break from the I/O panel to allow for the 5.25" bays, but then you are given the option to add a pair of 120mm or 140mm fans here. If you don't wish to add fans, just leave the ModuVent panels screwed in place to dampen any noise that would otherwise leak out of the large holes.
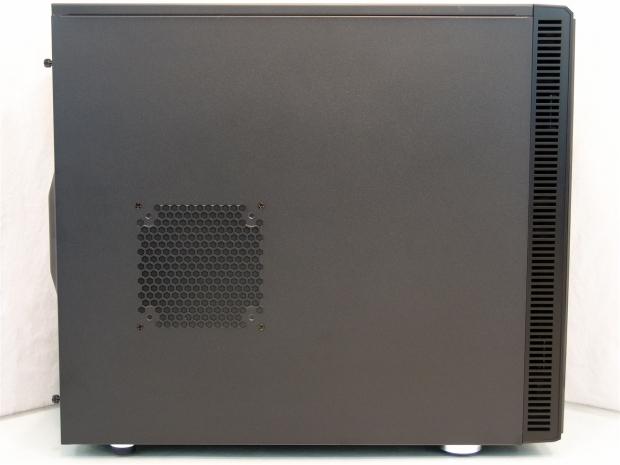
The left side of the chassis uses a full steel panel that has a textured paint finish applied to it. Just a bit lower than center of the left side of this panel also has a ModuVent panel installed where you can also put either a 120mm or 140mm fan.
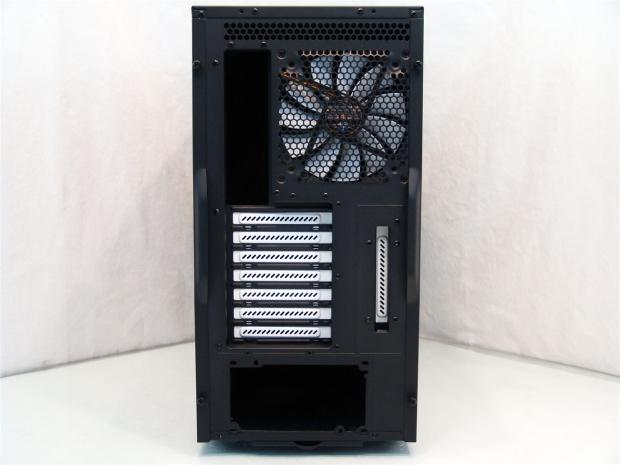
Behind the chassis you see the entire top is ventilated to allow passive cooling of any trapped heat if top fans are not used. On the left is the rear I/O next to the 140mm exhaust fan. Below is a 7+1 arrangement of the eight expansion slots leaving the area at the bottom for the power supply.
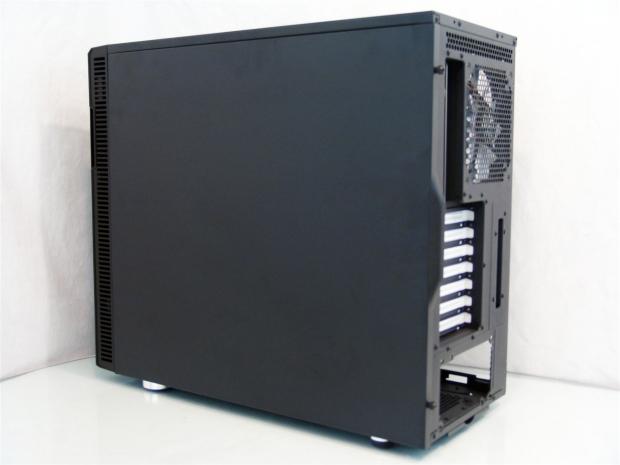
The right side of the chassis is very plain with only an expanse of the textured paint on the steel panel. There is a hand hold at the rear of both doors, but I focused at the front to show the ventilation on this side of the bezel.

Under the chassis you can see that the feet in the back are smaller than the pair at the front to allow the passage of the long dust filter that covers the PSU and an optional 140mm fan hole in front of the PSU. Also notice there are four screws at the right under the drive cages, these will be removed soon enough.
Inside the Fractal Design R4 Black Pearl

When you remove both side panels you will find that the inside of both have the sound proofing installed from edge to edge inside of the frame of the chassis. On this, the left side panel, there is the ModuVent panel that is at least twice as thick as the deadening material applied to the panel.

Our first look inside the Define R4 is reminiscent of other Fractal Design cases with the white trim in the hard drive bays, expansion slots and the blades of the fans. The wiring is secured by passing in and out of the grommets, while the hardware box takes a ride in the third hard drive slot from the bottom.
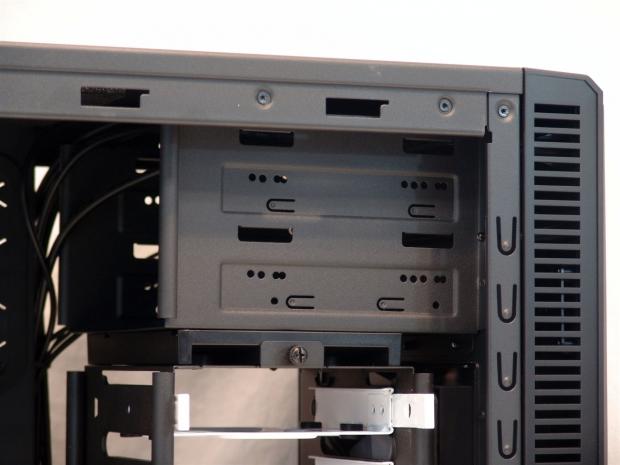
At the top of the chassis, near the front, the pair of 5.25" drive bays reside that use thumbscrews for drive or device mounting. The front I/O wiring has plenty of room to easily pass over the top of both bays.

Here is where things get interesting. There are eight 3.5" bays that will allow for both 3.5" hard drives and 2.5" drives as well. The cage is split into two components that allow them to be reconfigured.
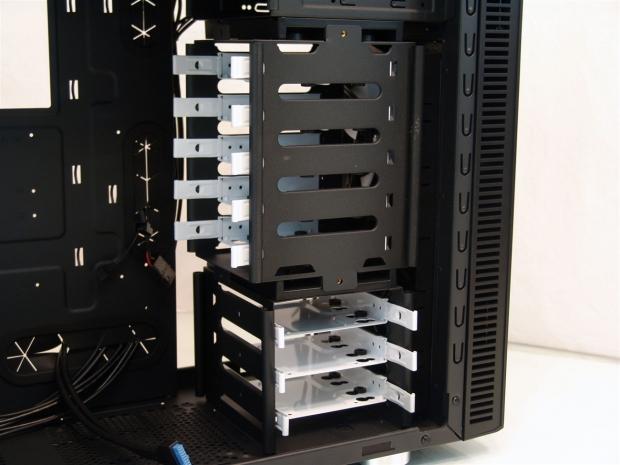
One way is to simply remove the pair of thumbscrews holding the top five drives in place, slide out the cage and rotate it ninety degrees if you wish, then at this point you would replace the thumbscrews.
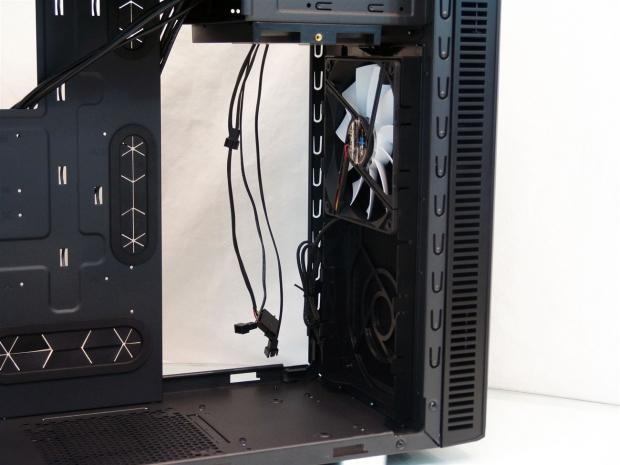
Or if you want, since the top five bays are already lose, take that section out. Then remove the four screws under the case and a pain behind the front bezel, the bottom three drives pull out as well. Water cooling anyone? Also notice the clip style fan mounting for the front of this chassis. You could essentially clip a dual 140mm radiator in here with the fans attached.
Inside the Fractal Design R4 Black Pearl Continued

Under the roof of the R4 there is a pair of the ModuVent panels installed to block noises from passing through, but as I mentioned these will easily remove and allow for a pair of fans or a pair of fans and a slim radiator.

The motherboard tray is also black like the rest of the interior and offers plenty of wire management options. There are the five oval holes with grommets and six tie points to use. At the top is a large CPU cooler access hole and under it you can see the markings around all of the riser holes marked A for ATX and M for the others.

Inside the rear of the chassis you can now see the other 140mm Silent Series R2 fan that matches the one installed in the front of the chassis. Both of these eleven blade fans are silent even at 12V and are suspended on a hydraulic bearing. As for the 7+1 slot covers, they are all held in with thumbscrews.

Behind the motherboard tray, the distance in the R4 has been raised to 26mm of clearance for any and all wiring you want to run back here. Off to the left you can also see the fan leads and the Molex connection for the fan controller.
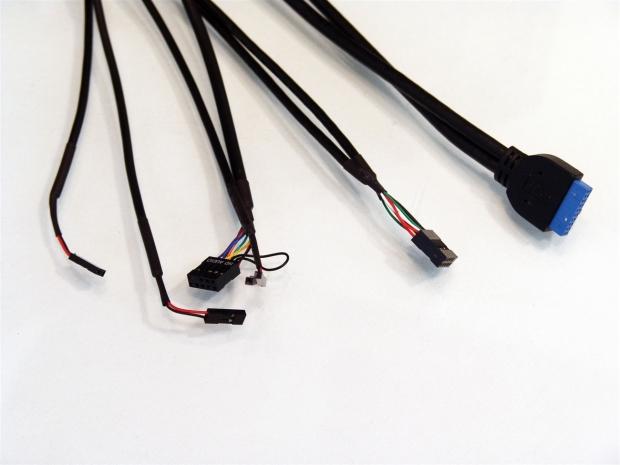
As far as the wiring is concerned, you get a power, reset and power LED connections for the F-Panel pins on the motherboard. Then you also get the HD Audio, USB 2.0 and the native USB 3.0 connections.
Accessories and Documentation

The hardware box that was seen last in the hard drive bays has been removed. You can see they went with the fancy, shiny application to the packaging and the model number of the kit has an R4 in it so it must have what we need to continue with the build in the Define R4.

If you flip the hardware box over you will find the included parts list to check against what comes inside of this box.

Laying out the hardware as the back of the box describes you have the four PSU screws starting the list with the motherboard standoffs, motherboard screws and SSD mounting screws lined up at the top. Across the bottom you have the ODD thumbscrews, the rubber washers and cable ties in the middle with the anti-vibration screws for the 3.5" drives on the right.

What you will find inside the user's manual is pretty basic as far as the text goes. It does explain a bit about the chassis and discuss the warranty terms and such in many languages, about three pages for each one. What is handier is the two page fold out in the back that shows a completely exploded view of the Define R4 and all of its components.
As for the red insert on the right, this tells you to contact the manufacturer for any defects or issues to directly contact Fractal Design and not the reseller.
The Build and Finished Product
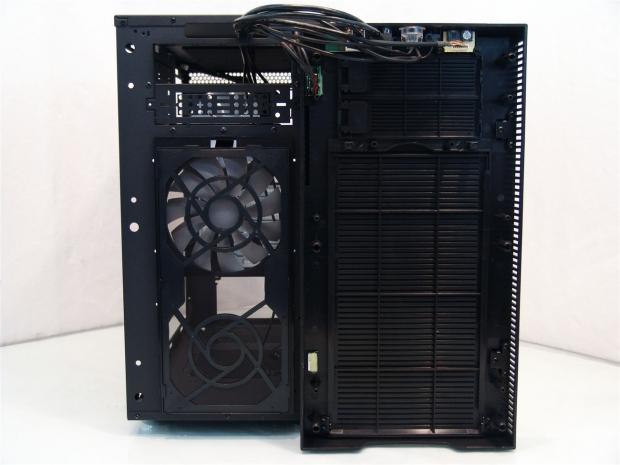
Don't get confused that this panel needs removed to be able to install the optical drives because the access is given from the front for that. Here I just wanted to show that all of the wiring is attached to the front bezel and give you a good look at the dust filter on the front of the steel part of the chassis.
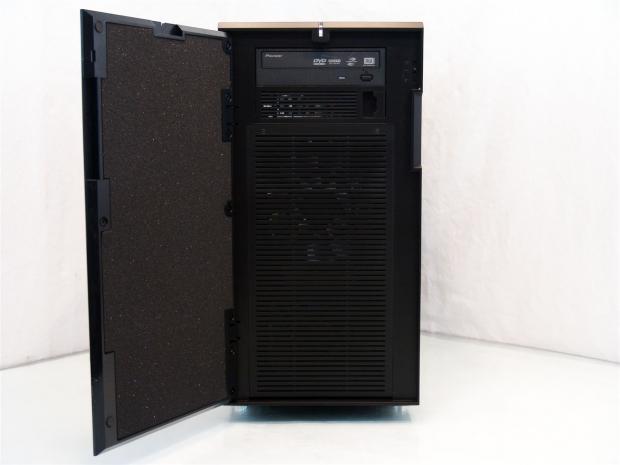
With the front bezel and door back on the chassis, I removed the top 5.25" bay cover by releasing the latch on the right side of it and slid the DVD drive into the chassis. To secure it you will need to use at least one thumbscrew to keep it from sliding around.
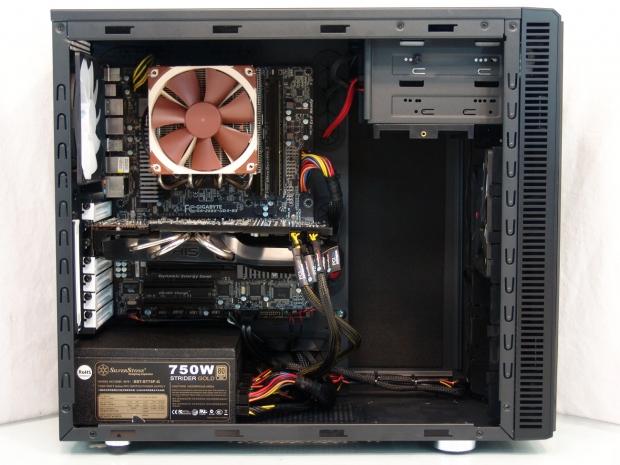
Once everything was installed I snapped this image. Even with the drive bays in place the HD 7950 would have fit without any issues, but since my build system has an SSD, I didn't need a single one of the hard drive bays to get the build completed.

In the back the Define R4 fills out as any chassis would. The rear I/O dust shield fits well and the card aligns well. I also like the isolation padding provided for the PSU installation to keep it from making any noises against the chassis.
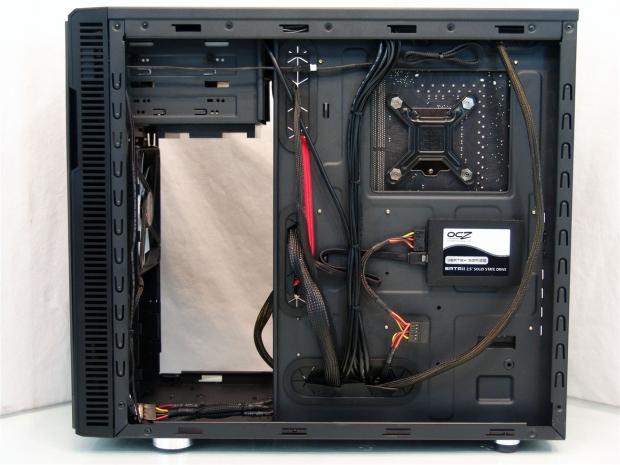
All of the wiring tidies up very nice and makes for a very clean build without any real effort involved. I really like the hideaway SSD mounting in the motherboard tray. This allows me to not need the HDD bays and I can get them right out of the way. Mind you, you do need to install the SSD prior to the motherboard to have access to the mounting holes.
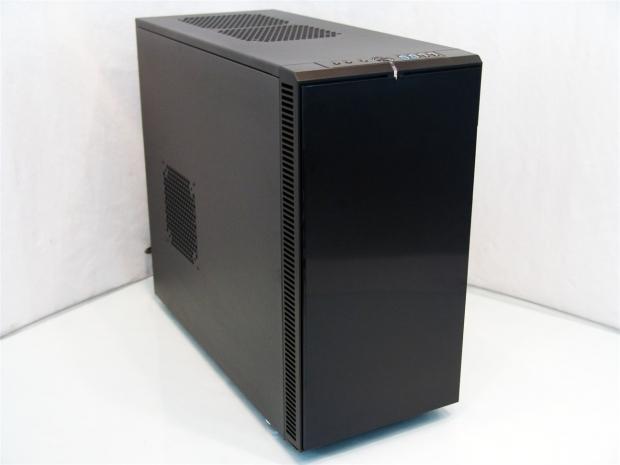
When the chassis is reassembled and ready for the testing phase, there isn't anything that changes externally except for the back of the chassis. I can really appreciate a chassis that keeps its looks in any situation.

Once the chassis is powered you get the light glow of the ring around the power button. Since there wasn't an HDD activity LED connection, the light under the power button that illuminates will also be on all the time the Define R4 has power.
Final Thoughts
The Fractal Define R4; what's not to like, really. On the most basic level, the Define R4 is sleek, sexy and is an elegant looking addition to any environment, even in the living room, next to the TV. On top of that there is the fact that this chassis is based with the idea to virtually eliminate all noises associated with a chassis. There is the sound deadening material in the front, both sides and even the fan holes are covered with the ModuVent panels to keep all sounds at bay if you don't chose to fill those three holes with fans. I mean even though it is a simple controller, even fan control for the perfect level of noises for your needs can be used on up to three fans inside the chassis, provided they use 3-pin power connections. I haven't even discussed the removable cages and the extra room added to the right side of the case for easier wire management, nor is I get to the dust filters and the ease of access to both of them. Seriously at every turn in this chassis there is something you can take note of.
During build, reassembly and testing phase I got a real grasp for the solidity and forethought that went into redesigning the R3 to a much better offering with the Define R4. There was a structural stability in this chassis that I haven't seen in a while. Even with all of the hard drive bays out, the panels off and full of the weight of the components, this chassis doesn't flex at all and I tried to do exactly that, all to no avail. I also noticed that things like the threads for all the screws were tight and made you feel that once something was mounted, it was very secure with no slop at all in the holes. Even as far as replacing the panels, the holes align great, but you may want the help of a screwdriver for all the thumbscrews in the chassis.
Moving into the testing I found there is an ample amount of airflow with the bays removed and only using the pair of 140mm Silent Series R2 fans that came with the Define R4. If you demand better than average cooling in your chassis, there are seven total locations for fans to be installed; Fractal covers just two of those, so there is tons of room for cooling improvement, but at the gains of noise levels. As the chassis is shipped, even testing the fan controller at 12V, there isn't any noise audible from the Define R4 until I got within just a few inches of the chassis and even then I had to be near the rear of the chassis.
I know this is slightly teasing you since the current availability is nil anywhere I looked, but there just isn't anything that makes me shake my head in disappointment with what the Define R4 delivers or in the packaging or hardware included with it. If I really had to nit-pick this chassis to find any faults, I could see users wanting a native USB 3.0 to the nine-pin USB 2.0 adapter. While most new boards have native USB 3.0 on them, this is a chassis you will even want to use to re-house older builds and there I could see a real use for this to be included.
Although with an MSRP as low as $109 I can forgive this little omission in the kit. For what Fractal Design is asking of the Define R4 and the fact that sales and competition may bring that pricing down a bit more, this chassis is definitely worth investing into. For a chassis that is completely silent as shipped, has a ton of options and a full feature set I am please and honored to deliver the Fractal Design R4 Black Pearl our highest award.



 United
States: Find other tech and computer products like this
over at
  United
Kingdom: Find other tech and computer products like this
over at
  Australia:
Find other tech and computer products like this over at
  Canada:
Find other tech and computer products like this over at
  Deutschland:
Finde andere Technik- und Computerprodukte wie dieses auf