Introduction

For what seems like the better part of last year, I was working emails, Cameron was working emails, even Chris Ramseyer sent one over thinking he had the magic fingers to write the appropriate e-mail to address our desire in seeing for ourselves what all the hype was surrounding the Fractal Design chassis concepts and implementation.
To my dismay most of our e-mails went unanswered, all but one. At that point I was supposed to be looking at the flagship chassis, but as luck would have it NCIX.com beggared up that deal and I never received the chassis.
As I was making a meeting with Lian Li on the CES show floor, I happened to show up a few minutes early. While JP from Lian Li was talking to someone I stood and waited my turn, but as I did I was also scouting the floor for my next meeting and I happened to see the Fractal Design booth. After I finished up with JP, I walked over to the Fractal booth and was greeted by a representative who I caught looking at my press badge to see who I was. So offhandedly I asked him, am I on some sort of blacklist I don't know about? I know it was a bit tongue and cheek to say that to them, but it set the mood for a great conversation and what must have been a twenty minute tour around their both looking at what I had missed along with a sick looking BF3 case mod.
As I was leaving to make the next meeting, which I was serious late for at this time, I was given a card and told to contact them for anything I wanted to look at. While my original request some time ago was to obtain the Define XL, since then my views have changed a bit on what I wanted to look at. In the discussions I asked for simply and affordable chassis that you guys are proud to stand behind and if that goes well, I still want to see that Define XL. For now, Fractal has fulfilled everything they had said would happen in Vegas. Today we are looking at the mid-tower, Define R3 USB3.0 in Black Pearl from Fractal Design.
I am glad we have finally broken the ice so that I may see for myself and bring to you what has been making Fractal Design almost a household name, over just the past year.
Specifications, Availability and Pricing

The outside of the Define R3 is a sleek and simple looking concept driven toward silence over LEDs and gaudy looks. The front is hidden by a foam backed front door that has ventilation down both sides of the bezel behind it to redirect the noise the 120mm fan here makes. Behind the door is access to two 5.25" bay covers and two dust cover doors that one of which houses a fan, the other does not from the factory. The left side of the chassis offers the option to remove a couple of sound proof pads to install optional fans in the door of extra cooling is needed and the same is said for the top of the chassis, as it has a pair of fan holes covered out of the box, too. The exterior is completely black in the Black Pearl edition with the door having a brushed appearance put into the plastic.
The interior of the Define R3 is black as well. Well, most of it. The pair of 5.25" drive bays requires the use of screws to mount devices and the bottom bay has a 3.5" floppy drive tray in it in case you are an old school BIOS flash kind of person. Below those you find eight 3.5" bays that also accept 2.5" drives and the trays here are white to contrast against all of the black and are mounted perpendicular to the motherboard.
The motherboard tray will house Mini-ITX, Micro-ATX and ATX motherboards and has sufficient wire management abilities. Inside the back of the chassis you will find things like a white bladed fan, four water cooling holes, seven white expansion slot covers and the padded spot for the PSU at the bottom. Speaking of the bottom, this case can hold an additional 120mm fan in the floor as long as your PSU is less than 160mm in length. I think that pretty much covers the basics on the Define R3, all except for the materials used on both panels and the extra fan holes to deaden noise leaving the user with a silent gaming experience.
Even after a year, locating the Fractal Design cases is somewhat limited. I know they have been as close as Canada for most of the time I was hunting them down, or trying to rather. I guess I wasn't the only one finding it tough to get my hands on these cases; it seems e-tailers are too. The overseas market is also a lot easier to locate these cases. As I look via Google shopping I am finding only two locations other than e-bay currently. The cheapest of the pair of listings is the one I found at Newegg.com for $109.99 and $14.99 in shipping costs. For a little more than $120 dollars and a trip to Newegg.com you can have this sleek and well thought out case all to yourself.
The Packaging

On a shiny black panel with a grey top the Fractal Design and their snowflake logo top the panel with the Define R3 name. The lower section shows the chassis in Titanium Grey color with windows to see the Black Pearl and Silver Arrow versions. Down the right of the case image is a list of specifications and features you should know about.

The right side of the box is just simply black! This saves some money not having to create the artwork and might also be done to create an air of mystery about the contents.

There goes that theory! As you can see the back panel of the packaging opens up the chassis and lets you see it all in plain sight. Along with the listed specs and features there are three bubbles showing off the HDD tray capabilities, the top fans with ModuVent and the front I/O.

This side is also very sparse in information. Here you can only see what version of the three you have inside the box; in this instance we have the Black Pearl coloration.

To protect the Define R3, Fractal Design used an opaque liner to keep the small scratches off the chassis with thick Styrofoam end caps to support this relative lightweight of a case to me in perfect condition.
Fractal Design Define R3 USB 3.0 Black Pearl Mid-Tower Chassis

The front of the Define R3 is flat as can be from top to bottom and the entire door you are looking at is foam backed for sound reduction and all the ventilation has been moved around to the sides of the bezel.
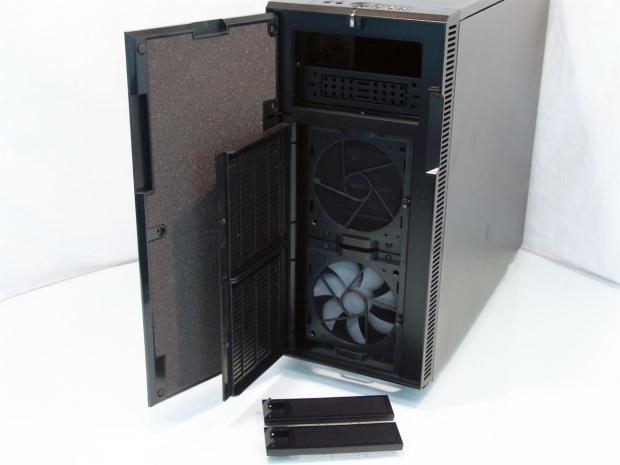
Opening the front door allows a view of the foam backing it as well as giving us access to the removable ODD bay covers and the pair of panels that open to expose the dust filters and 120mm fan that is installed there now. For those wondering, the door latches to the chassis via a pair of magnets.
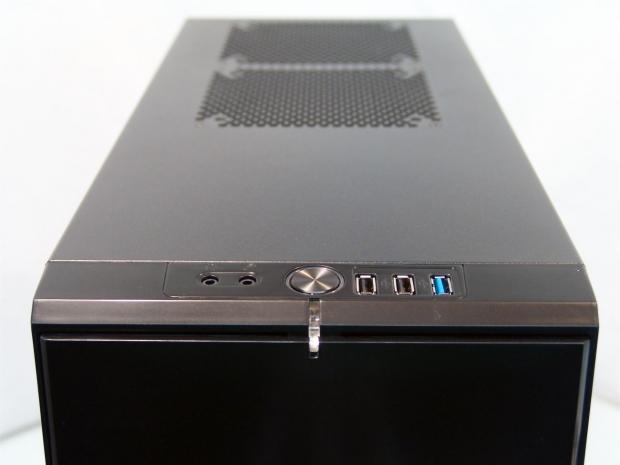
Covering both the front I/O and the top of the chassis in one image, I focused on the I/O panel with the audio jacks, power button and USB 2.0 and USB 3.0 connections. Just under the power button is a blue LED that displays the system power; there is no indicator for the HDD activity. Behind the I/O is a pair of holes for 120mm fans, but are currently blocked with soundproofing as part of the ModuVent system.

On the left side of the R3 we see the ventilation to allow intake into the chassis is running down the entire length of the bezel. This redirects any noise away from the user. The side panel offers room for a 120mm or a 140mm fan to be installed if you remove the sound dampening material.

The back offers the first indication I see of the white on black theme of the Fractal cases. Next to the rear I/O and under a pair of water cooling pass-through holes there is the white blades of the 120mm exhaust fan. As you move down you also see the seven white expansion slot covers and the pair of tubing holes nest to them as well.
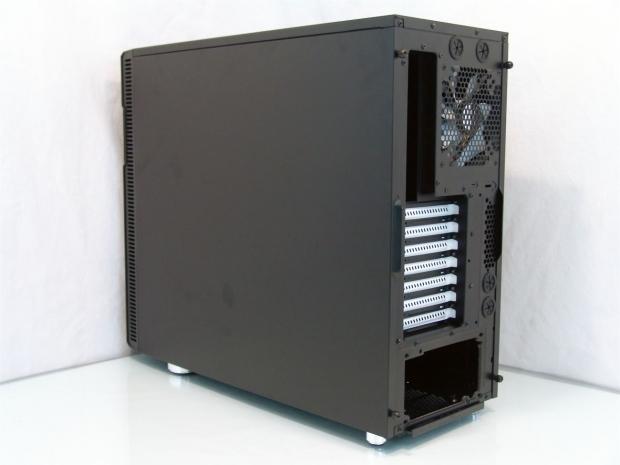
The right side of the case is plain and is just an expanse of textured black paint on the steel panel with a tab at the back to help remove these panels, just like the one found on the other side.
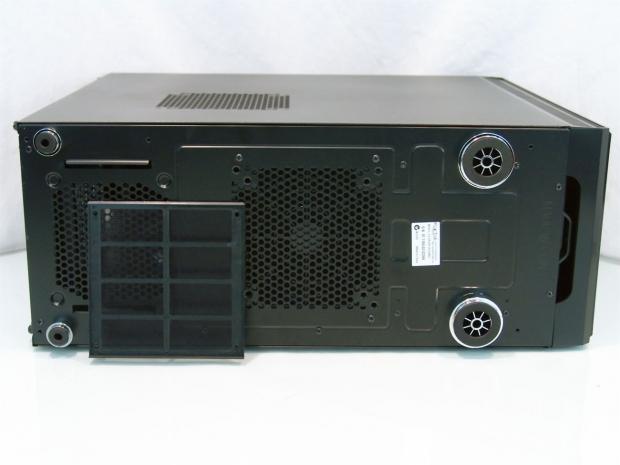
Under the chassis we can see there is a dust filter for underneath of the PSU and an area in front that can directly mount a 120mm or 140mm fan to the floor, but has a snap in tray already there for 120mm fans inside. The chassis is elevated and supported with the four, large in front, small in the rear, chromed feet with rubber pads.
Inside the Define R3 Black Pearl
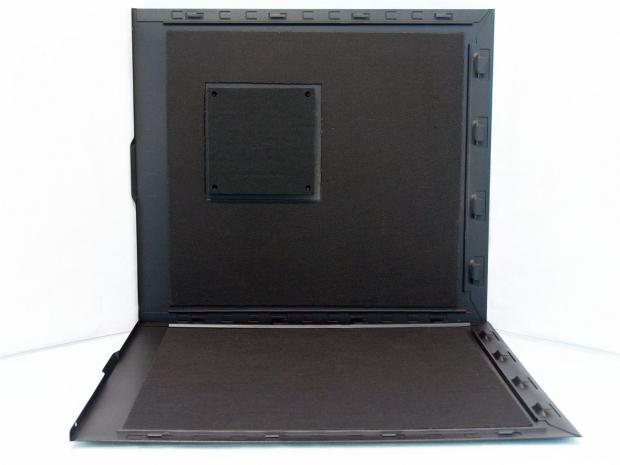
Removing the panels you can see where most of the soundproofing goes into the chassis. Both of the panels on the inside get the full coverage treatment. The panel standing is the left side panel with the soundproofing cover still in place.
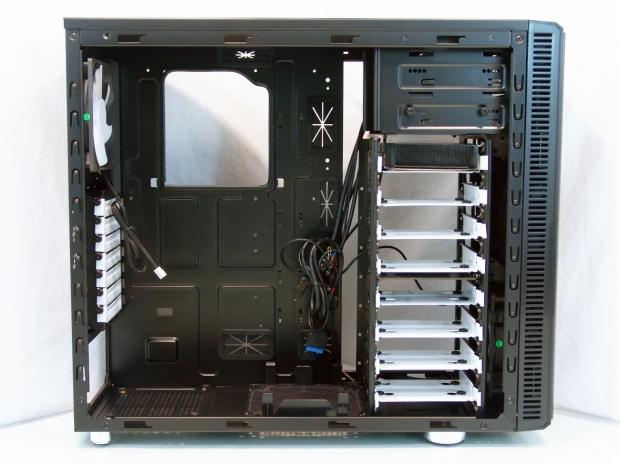
The first look into the chassis shows that the wiring has been routed and bundled up as not to fly around during transit. You will also find the hardware box in the top white tray for the HDD bays.
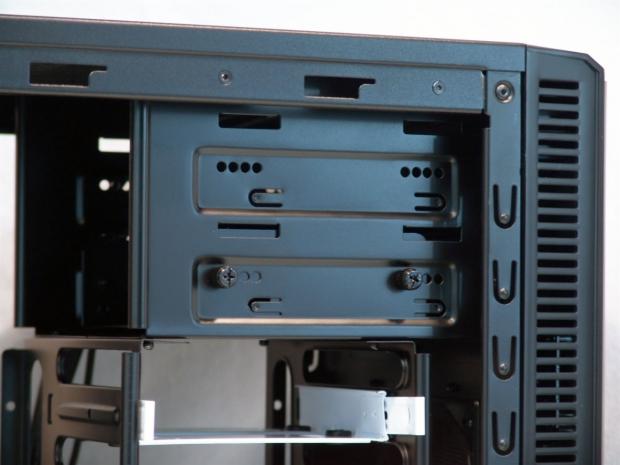
Getting closer so we can get into more detail, the top of the chassis supports two 5.25" bays. The bottom bay has a floppy drive conversion tray installed currently, but loosening a couple of screws gets that right out of the way.

The hard drive bays are designed to offer little resistance with the wide openings on the sides leading to the larger wire management holes near the back. Each of the eight whit trays use one set of screws to mount to the bottom of a 3.5" drive through the rubber grommets. For 2.5" drives you get different hardware to mount to the floor of the trays without grommets as there aren't vibrations in an SSD.

Looking up at the top of the chassis you can see two more of the ModuVent system. Just like in the door panel, these soundproofing panels can be removed to add fans for better cooling, but also giving up some of the silence the Define R3 is made for.
Inside the Define R3 Black Pearl Continued

The motherboard tray offers a large CPU access hole with rubber trim over the rolled steel edge. There are six random sized wire management holes and eight tie points. The whole right side of the tray is also open to give you even more options for routing cables.

The floor of the Define R3 has room for a shorter PSU, around 150 to 160mm long, will allow the use of a 120mm fan in front of it. If the PSU is any longer, it and the cables can impede on a fans placement of operation.

Inside the back of the R3 we again see the bold contrast of the white fan and expansion slot covers. We can also see that the expansion slots use thumbscrew to secure any and all cards in here. Lastly you can also see the PSU gasket to keep vibrations here to a minimum.

Behind the motherboard tray there is right around 20mm of space, but as you move passed it to the left side, there are plenty of holes in the back of the hard drive assembly and the top to bottom gap will allow you to get wires anywhere you want to in principle.

As for the wires you need to connect to make the front I/O and case functional, here you have them. There is the USB 2.0 connector and the HD and AC'97 Audio on the left. In the middle are the power, reset and power LED connections. That just leaves the native USB 3.0 on the right.
Accessories and Documentation

The black box I found in the hard drive bays has the hardware names and quantity next to each of the images right on the top of the box. To complete the checklist, there are also some zip ties and a fan controller, although I don't see any Velcro.

The fan controller comes in its own bag, but I opened it up to show its contents. You get the twist style knob on the back of the case once the controller is mounted in an expansion slot. Then you just connect the power lead to the PSU via a 4-pin Molex connection and then have the ability to control up to three fans.
[img]27[img]You also receive a 5.25" to 3.5" adapter cover for the lower 5.25" bays and the floppy drive tray installed there to get access to the drive behind the door of the R3. You also get a set of eight zip ties to contain your wiring inside this chassis.

Just like the top of the box showed, there is in fact all of the hardware as far as the screws and risers are concerned. The images will help you with any confusion as to which goes where.

The Define R3 user manual is more of a guide really. While they do take you through a step by step set of assembly instructions, there isn't any other help really provided with the text if you were to run into an issue.

The one part of the manual I did find handy was the fold out page and the image of the chassis in an exploded view with eleven of the components labeled for easier identification during the instructional guide reading.
The Build and Finished Product

See, even I can learn! I opened the front of the chassis before I did any internal wiring, good thing too. As you can see both the front I/O connectivity as well as the fan wiring needs to be loose to get the bezel off and out of your way for drive or additional fan installations.
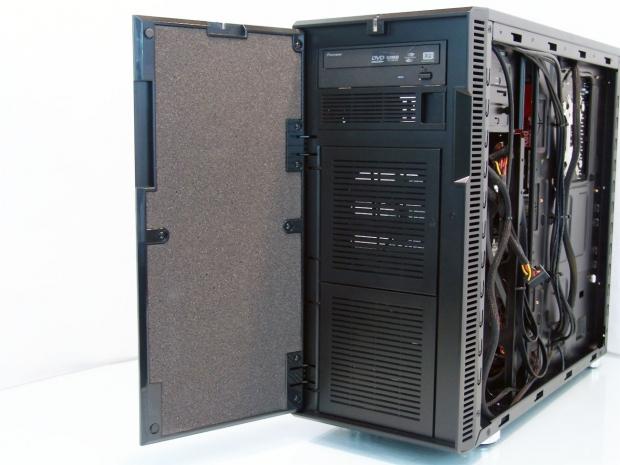
With the drive in place, a few screws added and the bezel back on the case, we are ready to close up the door and have a look around the rest of the build.
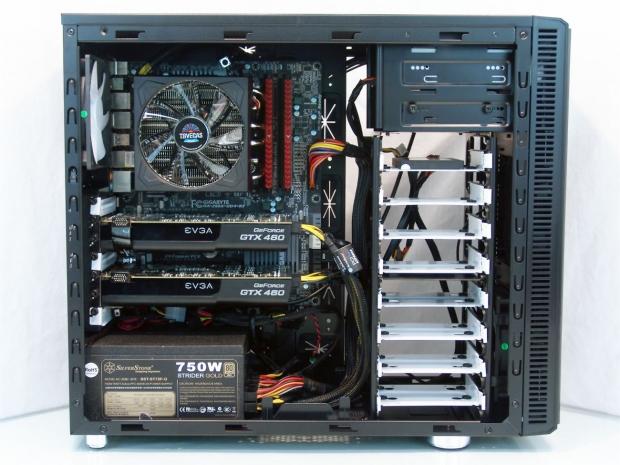
Inside room is at a premium. While there are ample management options for the build, I found it more convenient to wire some things internally. Since there isn't a window on this chassis, no one but us will know! For those with longer GPUs that power on the end of the card, you may have an issue.
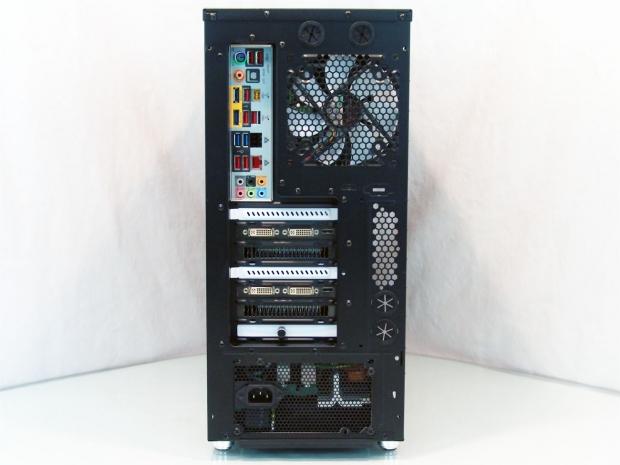
Our last look behind the Define R3 shows that it took all of the hardware I threw at it and still has a cool white stripe pattern playing against the GTX 460s. It's really a shame, this side is almost good enough to show it off as well and too bad most people will not give this a second look.
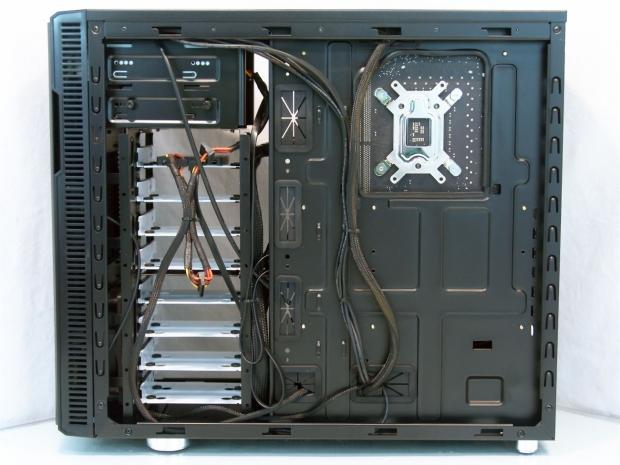
I did manage to fit the 8-pin EPS through the hole at the top and wire it behind the board along with all of the front I/O wiring except the audio cable. In fact it was so short it almost didn't make the connection cleanly.

All packed up and ready for testing is how we now see the Define R3 Black Pearl, just waiting for me to add the cord and power things up.

Once the Define R3 gets powered up I had to really pay attention at first. I saw the blue LED light up, followed by the beep of the motherboard speaker, but then nothing! I was sure something was wrong, but alas it was just that this case is just that silent in operation as it ships. Both fans offer good flow and they were able to deliver good results and not be heard until I was within a foot of the chassis.
Final Thoughts
The Define R3 USB3.0 Black Pearl from Fractal Design won me over in the end. There are only two things I can even think of that this design lacks - about two inches more HD Audio cable and a docking station or removable hard drive area. This may make some buyers pass over this more elegant solution.
The goal here was to produce a sleek looking chassis that offers the user the most silent gaming experience possible, yet still allowing you to easily customize the air flow in this chassis from every angle, literally! Even with the things that may sell other cases, for those who want silence now and may want to force induct the case later, this solution is exactly what you want.
At no time during the build or removal of any of the components did I find any weak spots or flaws in the workmanship. Fractal Design delivers a really sturdy chassis! While I did find some of the wire management holes to be a bit off for my slightly longer PSU, I was able to manage a very clean resulting build with some wiring up front and some behind the tray. As I mentioned though, with a full panel door, it can be thrown together with bubble gum and duct tape, nobody will ever know until you go out of your way to show them. It doesn't matter if you are the first time builder looking for a bit of understated appeal outside and some classic black and white on the inside, or even a seasoned builder, the Define R3 still holds up well against the competition today and this is the better part of a year old already!
I wish things would have worked out better earlier in the TweakTown and Fractal Design friendship, but either way we are building one now. I for one do see what all the hype was about, finally and I am eager to get a look at what their flagship chassis has in store as I missed that as well. Really for $110 you are going to be hard pressed to find a chassis that is this quiet, doesn't blind you with useless LEDs and looks this good sitting in any room for that money. As I said, the cheapest I can find this chassis as I received it from Fractal Design is over at Newegg.com for $109.99 and I've got to say that is a great price for the case I just looked at.
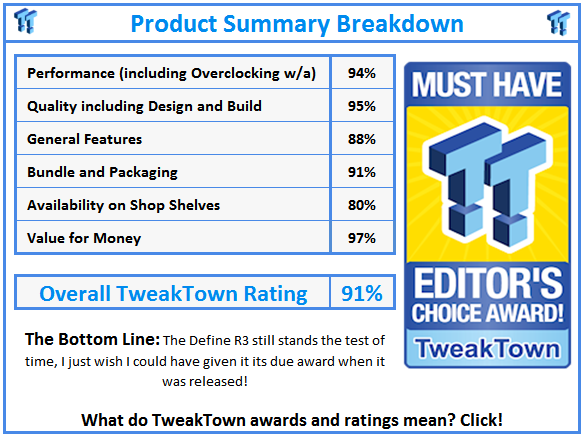
For those of you like me who missed this chassis on its release, for an aging entry, Fractal Design proves they are onto something good with their designs if I am still recommending this over the Phantom 410, Xigmatek Midgard II and even the Viper! The Define R3 is just that nice!


 United
States: Find other tech and computer products like this
over at
  United
Kingdom: Find other tech and computer products like this
over at
  Australia:
Find other tech and computer products like this over at
  Canada:
Find other tech and computer products like this over at
  Deutschland:
Finde andere Technik- und Computerprodukte wie dieses auf